前言
前面3篇博文实现了http服务器的框架、http报文处理以及动态页面和静态页面的GET请求。本文基于 http服务器实现(三)增加了对post请求的处理 。同时对浏览器到服务器之间的交互机制进行总结。
涉及到的内容有:
- 什么是post请求
- post请求实现
- 浏览器和服务器如何交互
- 关于源码的说明
一、什么是post请求
GET一般用于获取/查询网站资源信息,而POST一般用于更新资源信息。我们平常遇到的登录界面,输入用户名和密码之后点击确认,提交FORM(表单),一般是用POST请求。这里用具体的例子,通过抓包来理解这一过程,看完就知道post请求是什么回事了。例子如下:
//login.html
<body>
<form name="form_1" action="/cgi-bin/post.cgi" method="post">
<table align="center">
        <tr><td align="center" colspan="2"></td></tr>
        <tr>
             <td align="right">username</td>
             <td><input type="text" name="Username"></td>
        </tr>
        <tr>
             <td align="right">password</td>
             <td><input type="password" name="Password"></td>
        </tr>
        <tr>
             <td><input type="submit" value="login"></td>
             <td><input type="reset" value="cancel"></td>
        </tr>
</table>
</form>
</body>
这是一个html文件,在浏览器中显示如下:
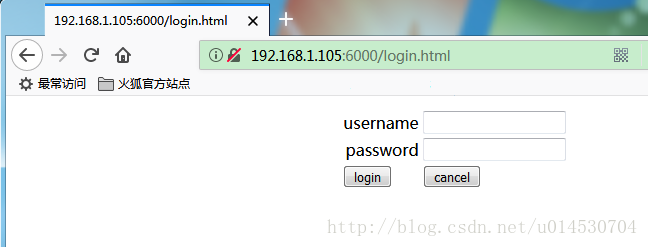
输入账号和密码然后点击login按钮,会发生什么呢?眼见为实,打开抓包工具,来试一波!抓到了浏览器POST请求的报文
POST /cgi-bin/post.cgi HTTP/1.1
Host: 192.168.1.105:6000
User-Agent: Mozilla/5.0 (Windows NT 6.1; WOW64; rv:57.0) Gecko/20100101 Firefox/57.0
Accept: text/html,application/xhtml+xml,application/xml;q=0.9,*/*;q=0.8
Accept-Language: zh-CN,zh;q=0.8,zh-TW;q=0.7,zh-HK;q=0.5,en-US;q=0.3,en;q=0.2
Accept-Encoding: gzip, deflate
Referer: http://192.168.1.105:6000/login.html
Content-Type: application/x-www-form-urlencoded
Content-Length: 33
Connection: keep-alive
Upgrade-Insecure-Requests: 1

Username=xiaoming&Password=123456细心一点,就发现了POST请求的内容在消息体,因为请求头和消息体中间有一行空行嘛。消息体是提交时输入的账号和密码。报文的第一行表示这是一个POST请求,向服务器请求的文件是/cgi-bin/post.cgi。我们把上面的html文件请求的方法修改为get,即method="get",再抓包实验一波。
GET /cgi-bin/post.cgi?Username=xiaohong&Password=654321 HTTP/1.1
Host: 192.168.1.105:6000
User-Agent: Mozilla/5.0 (Windows NT 6.1; WOW64; rv:57.0) Gecko/20100101 Firefox/57.0
Accept: text/html,application/xhtml+xml,application/xml;q=0.9,*/*;q=0.8
Accept-Language: zh-CN,zh;q=0.8,zh-TW;q=0.7,zh-HK;q=0.5,en-US;q=0.3,en;q=0.2
Accept-Encoding: gzip, deflate
Referer: http://192.168.1.105:6000/login.html
Connection: keep-alive
Upgrade-Insecure-Requests: 1
发现点什么了没?
可以看出,GET请求的内容都附加在了请求行的URL后面,请求body数据为空。这些数据将全部暴露在浏览器的URL方框,此时用户名和密码全部泄漏出去。即使关闭了页面,别人也能通过浏览记录等方式获取到我们的账户和密码,一不小心就泄漏出去了,这明显不安全。而POST请求就能规避这种情况。当然,GET请求和POST请求,不同的点还挺多,比如传输数据大小等,这里就不细说了。前面分析到POST请求是有数据实体的,在接下来的程序中将读取并解析这部分数据,然后根据解析出来的结果来执行决定程序流程。
来看看服务器的CGI程序是怎么处理上述POST请求的。
//post.c
#include <stdio.h>
#include <stdlib.h>
int main(void){
        int len;
        char *lenstr,poststr[256];
        char user[32],pwd[32];
        printf("Content-Type:text/html\n\n");
        printf("<HTML>\n");
        printf("<HEAD>\n<TITLE >post Method</TITLE>\n</HEAD>\n");
        printf("<BODY>\n");
        printf("<div style=\"font-size:12px\">\n");
        lenstr=getenv("CONTENT_LENGTH");
        if(NULL == lenstr)
                printf("<DIV STYLE=\"COLOR:RED\">Error: CONTENT_LENGTH not set!</DIV>\n");
        else{
                len=atoi(lenstr);
                fgets(poststr,len+1,stdin);
                if(sscanf(poststr,"Username=%[^&]&Password=%s",user,pwd)!=2){
                        printf("<DIV STYLE=\"COLOR:RED\">Error: parse username and password error!</DIV>\n");
                }
                else{
                        if(!strcasecmp(user, "admin") && !strcasecmp(pwd, "123456"))
                            printf("<DIV STYLE=\"COLOR:GREEN; font-size:15px;font-weight:bold\">username=%s,password=%s</DIV>\n",user,pwd);
                        else
                            printf("<DIV STYLE=\"COLOR:RED\">username or password error!</DIV>\n");
                }
        }

        printf("</div>\n");
        printf("</BODY>\n");
        printf("</HTML>\n");
        fflush(stdout);
        return 0;
}上面是一个C语言程序,我们需要把它编译成可执行程序才能被服务器调用。程序主要的目的是输出一段html格式的数据,这段数据将会被服务器发送给浏览器显示出来。程序先是获取CONTENT_LENGTH环境变量的值len,然后调用fgets函数从标准输入读取len个字节的数据,接着调用sscanf函数把账户和密码解析出来。Http在数据发送完后,并不会发送相应的数据传输完毕提示信息,所以Http服务器需要提供环境变量CONTENET_LENGTH。在接下来的代码中必须实现这一点。因为我们知道程序从标准输入读进来的是Username=XXX&Password=XXX这种格式,所以用了sscanf(poststr,"Username=%[^&]&Password=%s",user,pwd)把账户信息放到了user数组,把密码放到了pwd数组。%[^&] ^是取反的意思,%[^&] 表示以& 符号结束标志的字符串。最后我们根据账户和密码是否正确,来显示一段文本信息给浏览器。
二、post请求实现
在前面 http服务器实现(三),讲到了GET静态请求和动态CGI请求。这里增加了一条分支,专门来处理post请求。如下代码:
int process_header_end(char *buff)
{
    int is_static,post_data_fd;
    struct stat sbuf;
    char buf[MAXLINE], uri[MAXLINE], version[MAXLINE];
    char filename[MAXLINE], cgiargs[MAXLINE];
    //既不是GET请求也不是POST请求
    if (method != M_GET && method != M_POST) {
        perror("does not implement this method");
        //此处发送501响应
        return;
    }
    is_static = parse_uri(request_uri, filename, cgiargs);
    if (stat(filename, &sbuf) < 0) {
        perror("couldn't find this file");
        return;
    }
    //处理post请求
    if (method == M_POST) {
        serve_post(buff, filename, cgiargs);
        return(0);
    }
......//get请求 略,参考上一篇的代码
}
在process_header_end函数里面,我增加了serve_post函数,用来处理post请求,真正干活的是这个函数。代码如下:
void serve_post(char *post_buff, char *filename, char *cgiargs)
{
    printf("this is serve_post\n");

    int pipes[2] ,post_data_fd ,reda_num;
    char buf[MAXLINE], *emptylist[] = { NULL };
    printf("1\n");

    // Return first part of HTTP response
    sprintf(buf, "HTTP/1.1 200 OK\r\n");
    if (rio_writen(fd, buf, strlen(buf)) != strlen(buf))
        linux_error("rio_writen");

    sprintf(buf, "Server: Tiny Web Server\r\n");
    if (rio_writen(fd, buf, strlen(buf)) != strlen(buf))
        linux_error("rio_writen");

    char template[] = "post-temp.XXXXXX";
    post_data_fd = mkstemp(template);//创建临时文件,用于存放post请求的body数据
    if (post_data_fd == -1) {
        linux_error("mkstemp");
    }
    int len = atoi(content_length);//从头部解析出的post请求数据长度
    if(len <= 0)
        linux_error("content_length");
    char len_buf[32] = {0};
    sprintf(len_buf, "CONTENT_LENGTH=%d",len);
    putenv(len_buf);//设置环境变量,方便cgi程序获取
    printf("content_length len = %d\n",len);
    //把post请求数据写入boa-temp.XXXXXX临时文件
    if (rio_writen(post_data_fd, post_buff, len) != len)
        linux_error("rio_writen");

    if (pipe(pipes) == -1) {//创建管道
        linux_error("pipe");
    }
    int pid = fork();
    if (pid == 0)// child
    {
        //把子进程的标准输出重定向到写管道,也就是CGI向终端输出的数据会写进管道,然后父进程读取管道的数据,最后最发送给客户端。
        if (dup2(pipes[1], STDOUT_FILENO) == -1) {
            close(pipes[1]);
            linux_error("dup2");
        }
        close(pipes[1]);//此时,pipes[1]和STDOUT_FILENO同时指向同一个地方,pipes[1]没用就关掉。

        lseek(post_data_fd, SEEK_SET, 0);
        dup2(post_data_fd, STDIN_FILENO);//将标准输入重定向到post_data_fd,也就是说post_data_fd指向的文件内容会作为标准输入
        close(post_data_fd);

        if (execve(filename, emptylist, environ) < 0)
            linux_error("Execve error");
    }
    else if (pid < 0)  //fork错误
    {
        close(pipes[0]);
        close(pipes[1]);
        linux_error("fork");
    }
    else //父进程
    {
        //读pipes[0] 管道的内容到buff中,这里可能还要对读取的cgi进行解析,然后发送给远端fd,明天调试
        close(post_data_fd);
        post_data_fd = 0;
        close(pipes[1]);
        while ((reda_num = rio_readn(pipes[0], buf, 1024) )> 0) //从读管道读取cgi脚本的终端打印到buf中
        {
            if (rio_writen(fd, buf, reda_num) != reda_num)
                linux_error("rio_writen");
        }
    }

}
以上代码注释已经很详细了,这里讲下整体情况。程序先是发送了响应头部分信息,然后用mkstemp函数创建一个临时文件,这个文件用于存放post请求的body数据,也就是账户和密码相关字符串。接着调用putenv函数把CONTENT_LENGTH环境变量设置上,这是为了方便CGI程序解析字符串。往下调用pipe创建管道,fork出子进程。在子进程里面,把标准输出重定向到写管道,也就是CGI向终端输出的数据会写进管道。把标准输入重定向到临时文件,也就是说临时文件的内容会作为标准输入。最后利用execve函数调用CGI程序替换掉整个子进程。而父通过读管道读取CGI输出的数据,发送给浏览器。
三、浏览器和服务器如何交互
接下来,以一个完整的实践例子来展示POST请求这一过程。
打开火狐浏览器,打开抓包软件。在服务器目录下创建login.html文件,这是上文讲到的例子。接着在cgi目录下,创建post.c文件,也是上文讲到的例子,但是这里还需要把它编译成post.cgi可执行文件。搭建完之后执行服务器程序,如下所示:
ubuntu@ubuntu:~/project/web-server$ ls
cgi-bin   web-server4.c  login.html
home.html  web-server4
ubuntu@ubuntu:~/project/web-server/cgi-bin$ ls
post.c  post.cgi
ubuntu@ubuntu:~/project/web-server$ ./web-server4
Socket id = 3
Bind success!
Listening....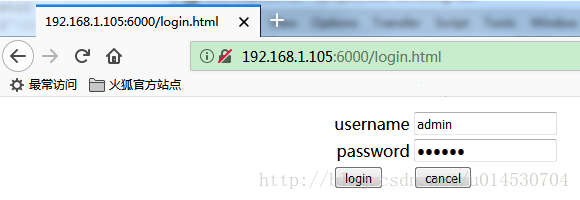
before select接着在浏览器输入网址:http://192.168.1.105:6000/login.html
在显示出来的界面中,username输入admin,password输入123456,打开抓包软件转包,然后再点击login。
我们抓到的的POST请求报文(保留了几个用到的):
POST /cgi-bin/post.cgi HTTP/1.1
Content-Length: 30

Username=admin&Password=123456此时,服务器接收到请求,解析上述这些字段并存放在了变量中。通过/cgi-bin/post.cgi路径找到了响应的CGI脚本,并将Content-Length和Username=admin&Password=123456信息通过标准输入传进CGI程序执行。CGI程序解析出用户名和密码之后,用原定的账号和密码跟浏览器传输过来的账号和密码做比较,根据信息是否一致向标准输出输出html数据。服务器最后将这些数据原样发送给浏览器。浏览器接收到数据之后就显示出来。这是服务器的响应报文:
HTTP/1.1 200 OK
Server: Tiny Web Server

<HTML>
<HEAD>
<TITLE >post Method</TITLE>
</HEAD>
<BODY>
<div style="font-size:12px">
<DIV STYLE="COLOR:GREEN; font-size:15px;font-weight:bold">username=admin,password=123456</DIV>
</div>
</BODY>
</HTML>显示在了浏览器是这模样:
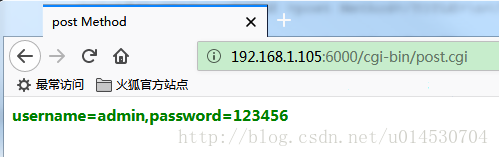
上述过程基本诠释了:浏览器请求—>服务器响应请求—>浏览器显示页面
四、关于源码
源码,我这里就不全部贴出了,占地方。根据 http服务器实现(三)贴出的源码,再结合本文给的源码很快就可以调试出来的。