想必大家在初次接触多线程或多进程时一定会感觉这是多么的神奇!一个程序居然可以“同时”执行好多工作,此时你一定有一探其究竟的想法吧?可是无奈,这些都是内核中十分复杂的代码。对于初入计算机大门的我们,去看那些东西,的确有些困难。但是不用灰心,本篇博文我将为大家介绍一个由我自己实现的简单线程,代码也就100多行,程序还很简陋,但是我感觉这有助于我们对进程或线程的理解
1.设计思路
要实现线程,那么就先得有个简单的设计思路,具体有如下几步
.实现能够保存当前上下文的功能函数,并实现能够将当前程序运行切向某个函数的功能函数。如果自己要做到这点,一定会很麻烦,也不简
单,好在ucontext.h头文件中为我们提供了该类功能函数的API
.如何进行线程调度?我采用了传统的时间片轮训,设置一个定时器,当定时器触发时,将会触发信号处
理函数(即调度函数)
我想能够实现上述俩点,那么实现线程这项工作剩下的也都是些细枝末叶了
2.前期知识准备
要完成1中的第一点,我们只需要学习一下ucontext.h为我们提供的几个API接口的使用即可
具体如下
1.获取当前运行程序上下文的API
int getcontext(ucontext_t *ucp);
//失败返回-1
ucontext_t结构体定义如下
 typedef struct ucontext {
               struct ucontext *uc_link;
               sigset_t         uc_sigmask;
               stack_t          uc_stack;
               mcontext_t       uc_mcontext;
               ...
           } ucontext_t;
该接口可获取当前程序上下文并将其保存到ucp中
2.将当前程序切换到某个上下文处的API
int setcontext(const ucontext_t *ucp);该API会将当前程序所运行的地方切换至ucp指向的上下文处
具体实例如下
#include <stdio.h>
#include <ucontext.h>
#include <unistd.h>

int main(int argc, char *argv[]) {
  ucontext_t context;

  //获取当前程序上下文
  getcontext(&context);
  puts("Hello world");
  sleep(1);
  //将程序切换至context指向的上下文处
  setcontext(&context);
  return 0;
}
该程序执行结果如下
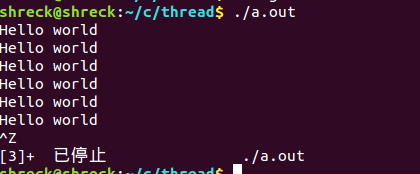
你可能会惊讶的发现这杂么成了一个无线循环了!其实只要你理解了上面介绍的俩个API这一点都不奇怪
上述代码中我们先用getcontext获取其所在位置的程序上下文,之后程序往下执行,当执行到setcontext时,我们上面以介绍过他的功能,其会将当前执行程序的位置挪到我们之前保存下来的程序上下文context的内容,所以执行完此条语句后程序又会回到getcontext所在的语句处,也因此这段代码成了一个无限循环了
3.swapcontext
int swapcontext(ucontext_t *oucp, const ucontext_t *ucp);该接口融合了上述介绍的1,2俩个接口的功能
我们可以将其功能理解为
首先执行getcontext(oucp);
然后执行setcontext(ucp);
4.将当前上下文入口改为某个函数入口的API
void makecontext(ucontext_t *ucp, void (*func)(), int argc, ...);将API会将当前上下文ucp入口切换为func函数的额入口,及如果我们执行了setcontext(ucp)后,程序会去执行func函数
具体实例如下
#include <stdio.h>
#include <ucontext.h>
#include <unistd.h>
void fun(void)
{
printf("hello,world\n");
}
int main(int argc, char *argv[]) {
ucontext_t context;
char stack[1024];
getcontext(&context);
context.uc_stack.ss_sp = stack;
context.uc_stack.ss_size = 1024;
makecontext(&context,fun,0);
setcontext(&context);
return 0;
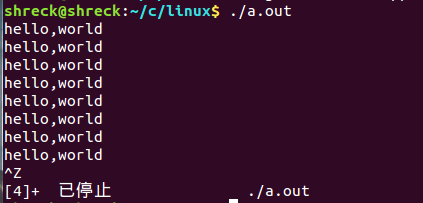
}程序执行结果为

5.定时信号的使用
关于定时信号的使用非常简单,我就不做太多介绍了
具体实例如下
   #include <stdio.h>
   #include <unistd.h>
  #include <signal.h>
  #include <sys/time.h>
  #include <functional>

  void print(int n)
  {
      printf("%s\n","hello,world");
  }

  int main(void)
  {
      int res = 0;
      struct itimerval tick;

      signal(SIGALRM,print);

      tick.it_value.tv_sec = 0;   //定时延时时间
      tick.it_value.tv_usec = 1;  //延时之后每多少长时间触发一次定时事件

      tick.it_interval.tv_sec = 0;
      tick.it_interval.tv_usec = 100000;

      res = setitimer(ITIMER_REAL,&tick,NULL);
      if(res)
      {
          printf("set timer failed!!!\n");
      }


      while(1)
      {
          pause();
      }


      return 0;
  }
执行结果如下
3.开始实现自己的线程
我用C++11来开发这个小程序
线程类的头文件定义如下
 #pragma once

#include <functional>
#include <ucontext.h>
#include <map>
#include <memory>
#include <assert.h>
#include <stdio.h>

namespace mythread
{
    class Mythread
    {
        public:
            Mythread(int stackSize = 10240);
            ~Mythread();
            void start(void);   //开始运行线程类对象

            template <typename threadCallback,typename ...Args>
            void newThread(threadCallback cb,Args ...args)  //创建新线程
            {
                std::unique_ptr<ucontext_t> threadContext(new ucontext_t);

                assert(getcontext(threadContext.get()) != -1);  //获取当前上下文

                //设置当前上下文信息
                threadContext->uc_stack.ss_sp = new char[stackSize_];
                threadContext->uc_stack.ss_size = stackSize_;
                threadContext->uc_link = 0;
                threadContext->uc_flags = 0;
                assert(threadContext->uc_stack.ss_sp != NULL);

                //将参数cb切换为当前上下文的入口函数
                makecontext(threadContext.get(),cb,sizeof...(args),args...);
                //将当前上下文插入map之中
                threadMap_.insert(std::pair<int,std::unique_ptr<ucontext_t>>(makeThreadId(),std::move(threadContext)));
            }

            void destroyThread(int id);  //销毁某个线程

        private:
            static void threadSchedule(int n); //线程调度函数
            int makeThreadId(void);     //生成一个线程id
            static std::map<int,std::unique_ptr<ucontext_t>> threadMap_;  //保存线程id及其对应的线程上下文内容
            static int current_;                       //保存当前线程id
            int stackSize_;             //每个线程的栈空间的大小
            int maxThreadNumber_;               //最大可创建线程数
    };
}
该类的设计具体为
.用一个map类的静态变量threadMap_来保存每个我们通过newThread接口创建的线程的线程id以及对应的线程运行的上下文
.current_用来保存我们当前所执行的线程的线程id
.makeThreadId函数用来生成一个线程id给我们新创建的线程使用
.threadSchedule用来调度各个线程的执行
.newThread接口是可以供外部调用的接口,用来创建一个线程
.start接口用来启动定时器,以及通过定时信号来调用上述调度线程的threadSchedule函数
该类的具体实现如下
#include <ucontext.h>
#include <signal.h>
#include "coroutine.h"
#include <assert.h>
#include <sys/time.h>
#include <signal.h>
#include <functional>
#include <memory>
#include <stdio.h>

using namespace mythread;

std::map<int,std::unique_ptr<ucontext_t>> Mythread::threadMap_;
int Mythread::current_ = 1;


Mythread::Mythread(int stackSize)
    :stackSize_(stackSize)
{

}

Mythread::~Mythread()
{
    for(auto &t : threadMap_)
    {
        free(t.second->uc_stack.ss_sp);
    }
    threadMap_.clear(); //将map中的内容清空
}

void Mythread::start(void)
{
    std::unique_ptr<ucontext_t> mainContextPtr(new ucontext_t);
    threadMap_.insert(std::pair<int,std::unique_ptr<ucontext_t>>(1,std::move(mainContextPtr)));//将主线程加入到map中

    signal(SIGALRM,threadSchedule);

    struct itimerval tick;
    tick.it_value.tv_sec = 0;   //无定时器延时
    tick.it_value.tv_usec = 1;

    tick.it_interval.tv_sec = 0;
    tick.it_interval.tv_usec = 1000;   //每10毫秒切一次线程
    setitimer(ITIMER_REAL,&tick,NULL);
}


void Mythread::destroyThread(int id)
{
    free(threadMap_[id]->uc_stack.ss_sp);    //释放线程栈空间
    threadMap_.erase(id);   //将map中的线程上下文删除
}

int Mythread::makeThreadId(void)
{
    if((--threadMap_.end())->first != threadMap_.size())    //说明map中有未利用的id
    {
        int i = 1;
        for(auto it = threadMap_.begin(); it != threadMap_.end(); i++,it++)
        {
            if(i != it->first)
            {
                printf("return  = %d\n",i);
                return i;
            }
        }
    }
    else
    {
        return threadMap_.size() + 1;
    }

    return 0;
}

void Mythread::threadSchedule(int n)
{
    if(threadMap_.size() > 1)
    {
        int lastId = current_;  //保存当前id
        if(current_ != (--threadMap_.end())->first)//当前线程不是map中的最后一个
        {
            auto it = threadMap_.find(current_);
            current_ = (++it)->first;
        }
        else
        {
            current_ = threadMap_.begin()->first;   //从map的起点开始
        }

        swapcontext(threadMap_[lastId].get(),threadMap_[current_].get());   //切换线程
    }
}
测试代码如下
#include <iostream>
#include <vector>
#include <string>
#include "coroutine.h"
#include <unistd.h>

void func(void)
{
    while(true)
    {
        printf("hello\n");
    }
}

int main(int argc,char **argv)
{
  mythread::Mythread t;
  t.start();
  t.newThread(func);
  printf("hehe\n");

  while(1)
  {
    printf("world\n");
  }
  return 0;
}
如上述代码我们调用newThread接口创建一个线程去执行func函数,该函数循环打印hello,而主线程循环打印world
我们把定时器频率调为10微妙
运行部分结果如下 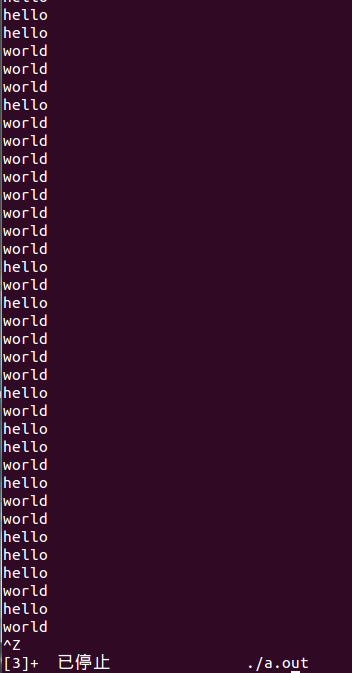
可以看出hello与world在无规律的交替打印
4.重点思路解析
我的设计其实很简单,就是用一个map来保存线程id和对应的线程上下文,每当我们创建新的线程(即调用makecontext之后),就将对应的线程id和上下文存入map。然后就是线程调度了,我的调度算法也很简单,就是给每个线程具体的时间片,然后轮流执行
5.总结
之所以会写这个小玩意,是昨天突然看到了ucontext.h中的API,一时手痒就自己实现一下,其中有好多不足之处,之后也会不断改进,并扩充,有兴趣的可以一起搞