使用eclipse软件的php配置。http://blog.csdn.net/u011432354/article/details/46559749
1.netbeans软件安装
一路默认安装就可以。
2.wamp软件安装
参考本人之前写的eclipse+php配置,网上也有好多这个教程。
一、netbeans运行php
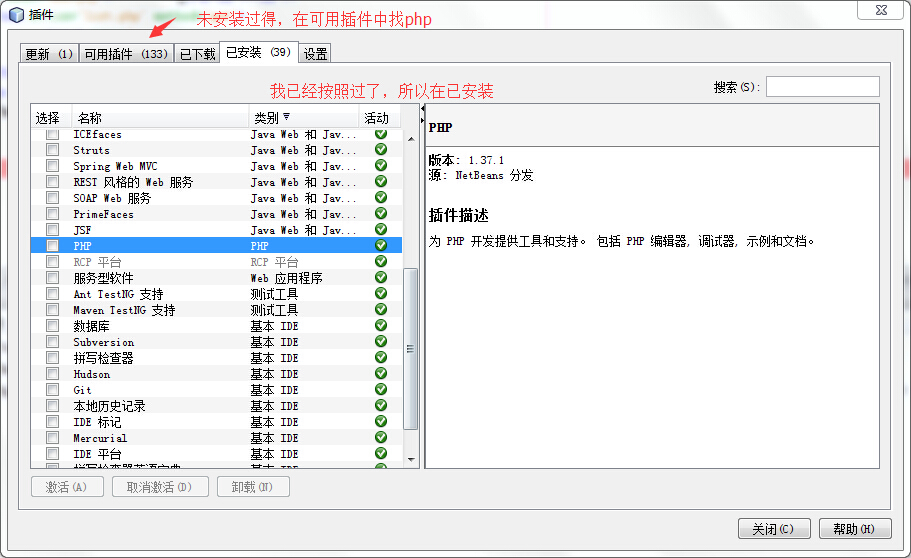
安装好的netbeans,工具–> 插件
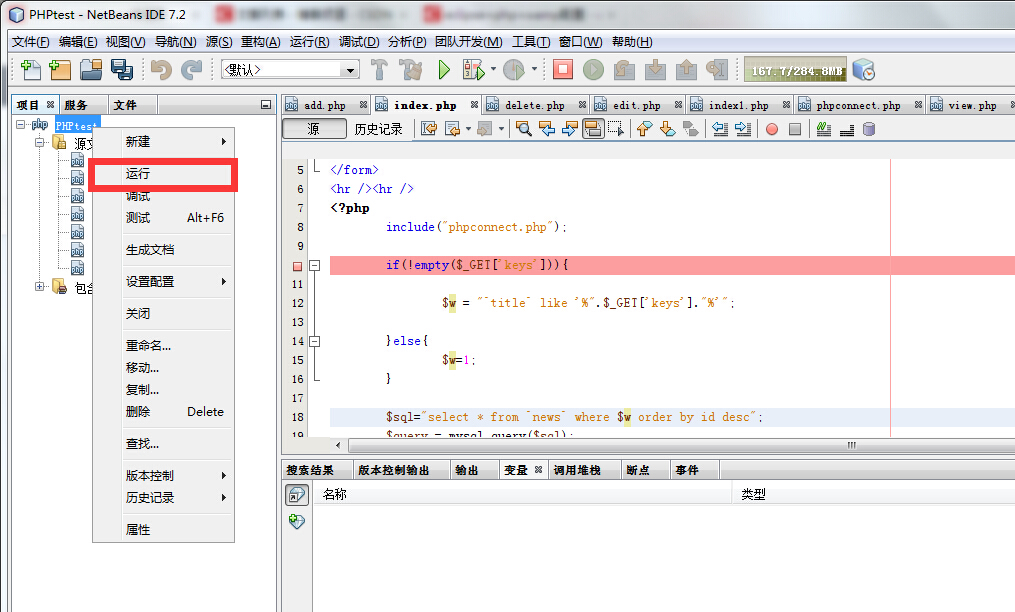
安装好以后,新建php项目。注意php项目路径必须是wamp中的www。
直接在php项目,右键点运行就可以了。
个人感觉netbeans,使用比eclipse简单多了。但是市场上大部分使用的是eclipse。
二、php项目调试(使用XDebug)
作为优秀程序员,代码调试需要占到80%的工作量。
如果你安装wamp的时候,没有经行过任何改动。将php.in中最后面的代码替换成:
从XDEBUG Extension 这一行开始替换
; XDEBUG Extension

zend_extension = "c:/wamp/bin/php/php5.5.12/zend_ext/php_xdebug-2.2.5-5.5-vc11-x86_64.dll"
;
[xdebug]
xdebug.profiler_enable = on
xdebug.auto_trace = on
xdebug.collect_params = on
xdebug.collect_return = on
xdebug.show_exception_trace = on
xdebug.remote_autostart = on
xdebug.remote_enable = on
xdebug.collect_vars = on
xdebug.profiler_enable_trigger = off
xdebug.profiler_output_name = cachegrind.out.%t.%p
xdebug.profiler_output_dir = "c:/wamp/tmp"
xdebug.show_local_vars=0
打开phpinfo()页面
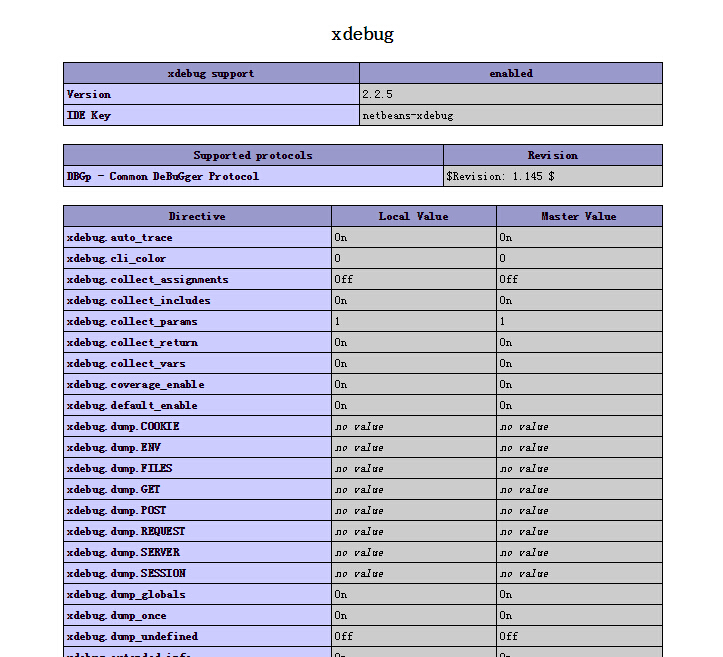
可以看到xdebug内容。
这个时候,在netbeans中加入断点调试就可以了。
个人感觉,netbeans比eclipse真的简单多了