系统环境:
[root@kvm-admin ~]# cat /etc/redhat-release
CentOS Linux release 7.3.1611 (Core)
关闭防火墙、selinux
[root@kvm-admin ~]# systemctl stop firewalld.service
[root@kvm-admin ~]# setenforce  0
一、安装部署WebVirtMgr
需要有repo源,centos7默认没有wget:yum install wget
wget -O /etc/yum.repos.d/epel.repo http://mirrors.aliyun.com/repo/epel-7.repo
1、安装依赖包
[root@localhost ~]# yum -y install git python-pip libvirt-python libxml2-python python-websockify supervisor nginx
[root@localhost ~]# yum -y install gcc python-devel
[root@localhost ~]# pip install numpy
Collecting numpy
  Downloading https://files.pythonhosted.org/packages/6a/a9/c01a2d5f7b045f508c8cefef3b079fe8c413d05498ca0ae877cffa230564/numpy-1.14.5-cp27-cp27mu-manylinux1_x86_64.whl (12.1MB)
    100% |████████████████████████████████| 12.1MB 26kB/s
Installing collected packages: numpy
Successfully installed numpy-1.14.5
You are using pip version 8.1.2, however version 18.0 is available.
You should consider upgrading via the 'pip install --upgrade pip' command.
2、安装python需求并设置Django环境
[root@localhost ~]# cd /server/tools/
[root@localhost tools]# git clone git://github.com/retspen/webvirtmgr.git
Cloning into 'webvirtmgr'...
remote: Counting objects: 5730, done.
remote: Compressing objects: 100% (6/6), done.
remote: Total 5730 (delta 1), reused 0 (delta 0), pack-reused 5724
Receiving objects: 100% (5730/5730), 3.01 MiB | 341.00 KiB/s, done.
Resolving deltas: 100% (3686/3686), done.
[root@localhost tools]# cd webvirtmgr/
[root@localhost webvirtmgr]# pip install -r requirements.txt
Collecting django==1.5.5 (from -r requirements.txt (line 1))
  Downloading https://files.pythonhosted.org/packages/38/49/93511c5d3367b6b21fc2995a0e53399721afc15e4cd6eb57be879ae13ad4/Django-1.5.5.tar.gz (8.1MB)
    100% |████████████████████████████████| 8.1MB 42kB/s
Collecting gunicorn==19.5.0 (from -r requirements.txt (line 2))
  Downloading https://files.pythonhosted.org/packages/f9/4e/f4076a1a57fc1e75edc0828db365cfa9005f9f6b4a51b489ae39a91eb4be/gunicorn-19.5.0-py2.py3-none-any.whl (113kB)
    100% |████████████████████████████████| 122kB 58kB/s
Collecting lockfile>=0.9 (from -r requirements.txt (line 5))
  Downloading https://files.pythonhosted.org/packages/c8/22/9460e311f340cb62d26a38c419b1381b8593b0bb6b5d1f056938b086d362/lockfile-0.12.2-py2.py3-none-any.whl
Installing collected packages: django, gunicorn, lockfile
  Running setup.py install for django ... done
Successfully installed django-1.5.5 gunicorn-19.5.0 lockfile-0.12.2
You are using pip version 8.1.2, however version 18.0 is available.
You should consider upgrading via the 'pip install --upgrade pip' command.
2.1 输入用户信息:登录外部页面的管理用户
[root@localhost webvirtmgr]# ./manage.py syncdb
WARNING:root:No local_settings file found.
Creating tables ...
Creating table auth_permission
Creating table auth_group_permissions
Creating table auth_group
Creating table auth_user_groups
Creating table auth_user_user_permissions
Creating table auth_user
Creating table django_content_type
Creating table django_session
Creating table django_site
Creating table servers_compute
Creating table instance_instance
Creating table create_flavor

You just installed Django's auth system, which means you don't have any superusers defined.
Would you like to create one now? (yes/no): yes
Username (leave blank to use 'root'): admin
Email address: test@163.com
Password: 123456
Password (again): 123456
Superuser created successfully.
Installing custom SQL ...
Installing indexes ...
Installed 6 object(s) from 1 fixture(s)
扫描二维码关注公众号,回复:
2327236 查看本文章


2.2 生成配置文件
[root@localhost webvirtmgr]# ./manage.py collectstatic
WARNING:root:No local_settings file found.

You have requested to collect static files at the destination
location as specified in your settings.

This will overwrite existing files!
Are you sure you want to do this?

Type 'yes' to continue, or 'no' to cancel: yes
2.3 也可以添加其他管理用户
[root@localhost webvirtmgr]# ./manage.py createsuperuser
WARNING:root:No local_settings file found.
Username (leave blank to use 'root'): root
Email address: test@163.com
Password: 123456
Password (again): 123456
Superuser created successfully.
3、配置nginx
[root@localhost webvirtmgr]# cd ..
[root@localhost tools]# mkdir /var/www
[root@localhost tools]# mv webvirtmgr /var/www/
3.1 在/etc/nginx/conf.d目录下添加webvirtmgr.conf文件:
[root@localhost conf.d]# cd /etc/nginx/conf.d/
[root@localhost conf.d]# vim webvirtmgr.conf
server {
    listen 80 default_server;

    server_name $hostname;
    #access_log /var/log/nginx/webvirtmgr_access_log;

    location /static/ {
        root /var/www/webvirtmgr/webvirtmgr; # or /srv instead of /var
        expires max;
    }

    location / {
        proxy_pass http://127.0.0.1:8000;
        proxy_set_header X-Real-IP $remote_addr;
        proxy_set_header X-Forwarded-for $proxy_add_x_forwarded_for;
        proxy_set_header Host $host:$server_port;
        proxy_set_header X-Forwarded-Proto $scheme;
        proxy_connect_timeout 600;
        proxy_read_timeout 600;
        proxy_send_timeout 600;
        client_max_body_size 1024M; # Set higher depending on your needs
    }
}
3.2 编辑/etc/nginx/ngix.conf,注释server部分
vim /etc/nginx/nginx.conf
#    server {
#        listen       80 default_server;
#        server_name  localhost;
#        root         /usr/share/nginx/html;
#
#        #charset koi8-r;
#
#        #access_log  /var/log/nginx/host.access.log  main;
#
#        # Load configuration files for the default server block.
#        include /etc/nginx/default.d/*.conf;
#
#        location / {
#        }
#
#        # redirect server error pages to the static page /40x.html
#        #
#        error_page  404              /404.html;
#        location = /40x.html {
#        }
#
#        # redirect server error pages to the static page /50x.html
#        #
#        error_page   500 502 503 504  /50x.html;
#        location = /50x.html {
#        }
#    }
3.3 修改属主属组,重启nginx
[root@localhost conf.d]# chown -R nginx:nginx /var/www/webvirtmgr
[root@localhost conf.d]# service nginx restart
4、创建/etc/supervisord.d/webvirtmgr.ini包含以下内容的文件:
[root@localhost conf.d]# vim /etc/supervisord.d/webvirtmgr.ini
[program:webvirtmgr]
command=/usr/bin/python /var/www/webvirtmgr/manage.py run_gunicorn -c /var/www/webvirtmgr/conf/gunicorn.conf.py
directory=/var/www/webvirtmgr
autostart=true
autorestart=true
logfile=/var/log/supervisor/webvirtmgr.log
log_stderr=true
user=nginx

[program:webvirtmgr-console]
command=/usr/bin/python /var/www/webvirtmgr/console/webvirtmgr-console
directory=/var/www/webvirtmgr
autostart=true
autorestart=true
stdout_logfile=/var/log/supervisor/webvirtmgr-console.log
redirect_stderr=true
user=nginx
5、重新启动supervisor守护程序
[root@localhost conf.d]# service supervisord stop
[root@localhost conf.d]# service supervisord start
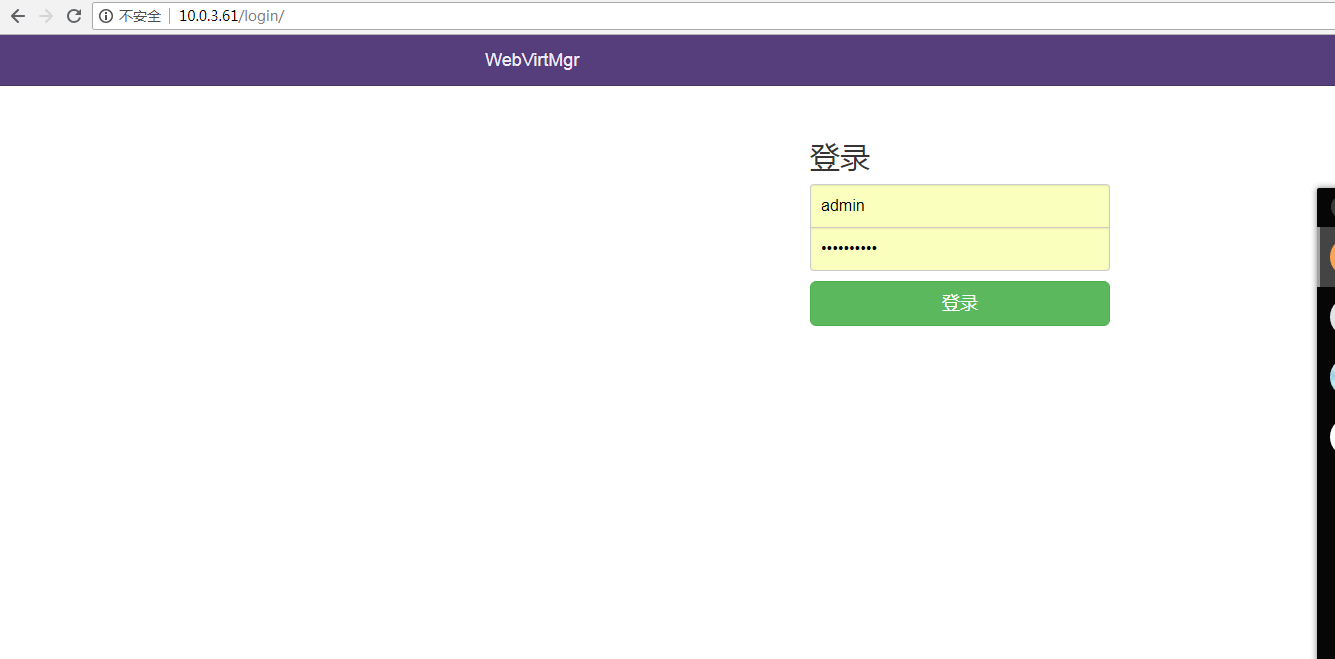
6、输入本机IP网页访问,用户名和密码是上面2.2设置的用户和密码。

二、配置KVM宿主机,下载并执行脚本:libvirt-bootstrap.sh,如果虚拟机比较多,该脚本执行时间会比较长
[root@localhost ~]# curl http://retspen.github.io/libvirt-bootstrap.sh | sudo sh
三、配置SSH连接
ssh和tcp设置一种即可,其实就是设置无密码登录,要注意的是从webvirtmgr的什么用户到宿主机的什么用户的无密码登录,比如我用nginx用户跑的django webvirtmgr,而宿主机是root跑的virsh,所以需要设置nginx到root的无密码登录。而git官网推荐的是用nginx用户跑django webvirtmgr,webvirtmgr用户跑的virsh,所以设置的是nginx用户到宿主机webvirtmgr用户的无密码登录。
创建SSH私钥和ssh配置选项(在安装了WebVirtMgr的系统上):
[root@localhost conf.d]# sudo su - nginx -s /bin/bash
-bash-4.2$ ssh-keygen
Generating public/private rsa key pair.
Enter file in which to save the key (/var/lib/nginx/.ssh/id_rsa):
Created directory '/var/lib/nginx/.ssh'.
Enter passphrase (empty for no passphrase):
Enter same passphrase again:
Your identification has been saved in /var/lib/nginx/.ssh/id_rsa.
Your public key has been saved in /var/lib/nginx/.ssh/id_rsa.pub.
The key fingerprint is:
51:4d:c9:0b:24:99:10:45:9a:c5:6b:70:4c:85:e4:3b [email protected]
The key's randomart image is:
+--[ RSA 2048]----+
|      oXB*++..   |
|      .=Bo. +    |
|      ooo. . .   |
|        oo  .    |
|       .E        |
|         .       |
|                 |
|                 |
|                 |
+-----------------+-bash-4.2$ touch ~/.ssh/config && echo -e "StrictHostKeyChecking=no\nUserKnownHostsFile=/dev/null" >> ~/.ssh/config
-bash-4.2$ chmod 0600 ~/.ssh/config
-bash-4.2$ cat .ssh/id_rsa.pub
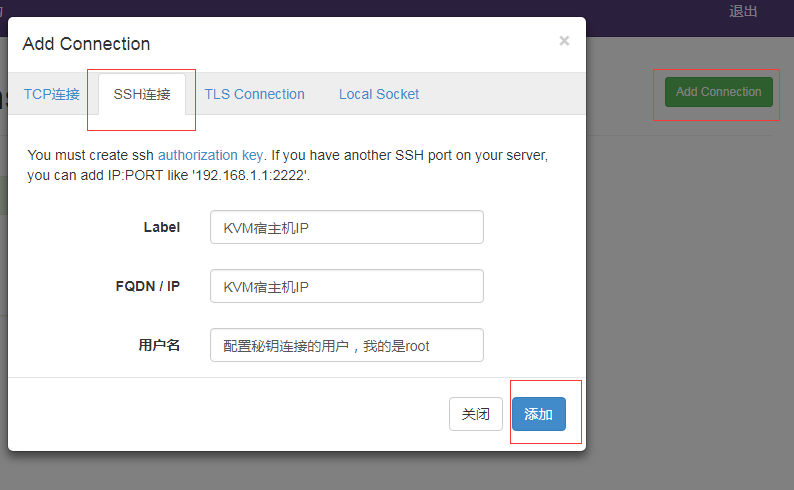
KVM宿主机,将nginx用户公钥加到/root/.ssh/authorized_keys文件中。ssh秘钥连接成功后再网页添加KVM宿主机。

参考地址:https://github.com/retspen/webvirtmgr/wiki/Install-WebVirtMgr