一、CIFS
1.CIFS系统:Internet文件共享系统,也称服务器信;适用于MicrosoftWindows服务器和客户端的标准文件和打印机的共享系统息块(SMB)。
2.Samba服务:用于将linux文件系统作为CIFS/SMB网络文件进行共享,并将linux打印机作为CIFS/SMB打印机进行共享。
二.Samba安装
一.实验环境:在server(server)服务端:172.25.254.216
在desktop(client)客户端:172.25.254.166
二.安装
在server(server)服务端
[root@server ~]# yum install samba samba-client samba-common -y ## Samba-common -Samba的支持文件 samba-client -客户端应用程序 Samba -服务器应用程序
[root@server ~]# systemctl start smb
[root@server ~]# systemctl enable smb.service
[root@server ~]# systemctl stop firewalld
[root@server ~]# systemctl disable firewalld
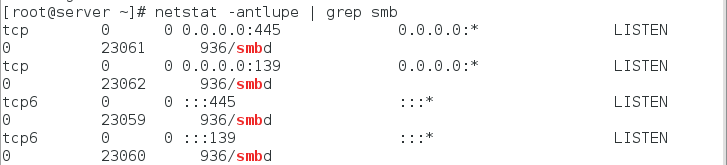
[root@server ~]# netstat -antlupe | grep smb ##查看samba端口信息
在desktop(client)客户端
[root@client ~]# yum install samba-client -y
三.Samba用户管理
<1>添加与删除用户
在server(server)服务端
[root@server ~]# smbpasswd -a student ##添加smb用户,smb用户必须是本地用户

[root@server ~]# pdbedit -L ##查看smb用户信息

[root@server ~]# pdbedit -x student ##删除smb用户
[root@server ~]# setsebool -P samba_enable_home_dirs on ##在SElinux开启的情况下,修改sebool值,打开访问,在selinux中设定smb用户可以访问自己的家目录。
在desktop(client)客户端测试
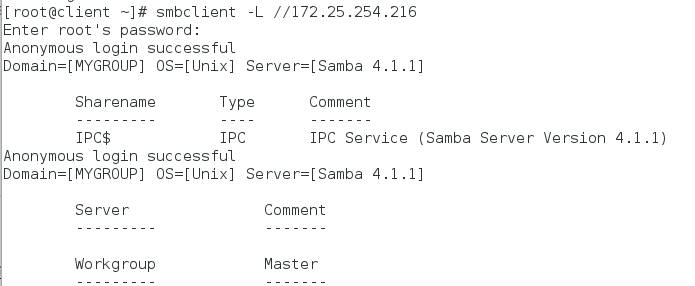
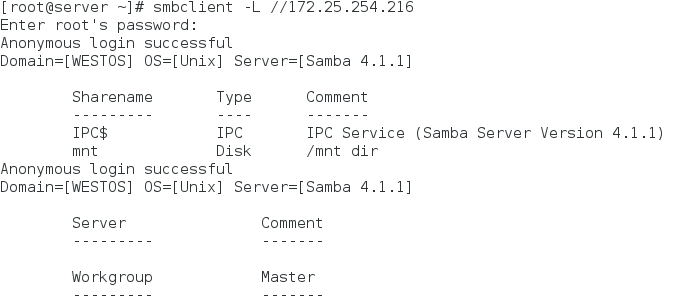
[root@client ~]# smbclient -L //172.25.254.216 ##匿名用户登陆 -L显示
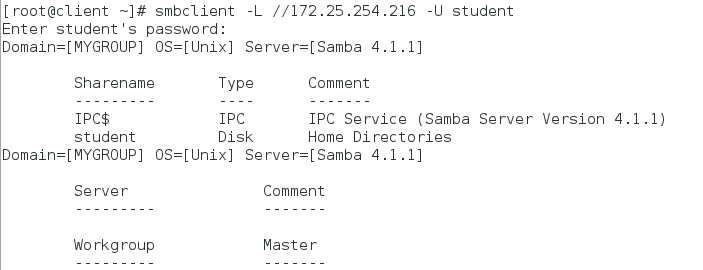
[root@client ~]# smbclient -L //172.25.254.216 -U student ##输入密码可以看到系统共享家目录信息 -U用户
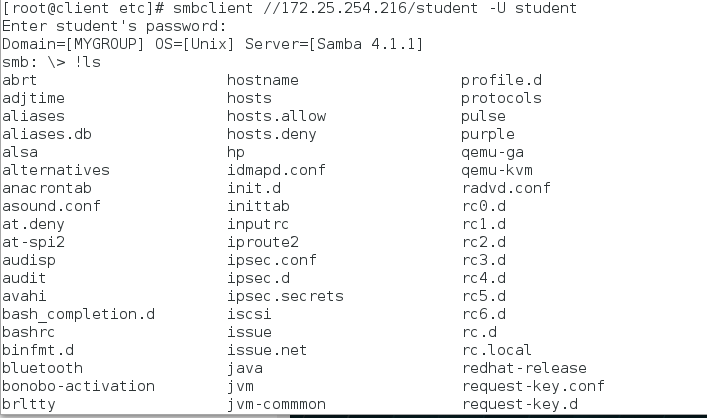
[root@client ~]# smbclient //172.25.254.216/student -U student ## 进入到家目录里,若以student登陆无法显示共享内容,主要是因为Selinux的开启无法正常访问。

<2>临时挂载
在desktop(client)
[root@client ~]# cd /etc/
[root@client etc]# smbclient //172.25.254.216/student -U student
smb: \> put passwd ##只能上传所在目录的文件,其它目录的无法上传。无法建立文件。

在server(server)
查看是否由passwd

为了方便使用,将其挂载到本机目录下,即可以使用所有操作命令。
在desktop(client)
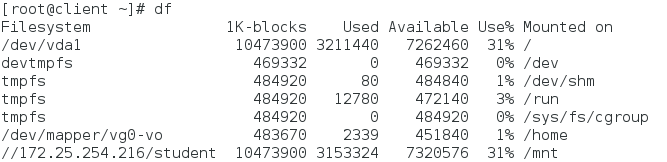
[root@client ~]# mount //172.25.254.216/student /mnt/ -o username=student,password=westos ##临时挂载
[root@client ~]# df

[root@client mnt]# touch file{1..10}
在server(server)

<3>永久挂载
在desktop(client)
方法一:##此方法有缺点是如果配置文件内容修改错误会影响开机启动
[root@client mnt]# cd
[root@client ~]# umount /mnt/
[root@client ~]# vim /etc/fstab

[root@client ~]# mount -a
[root@client ~]# df
方法二:
[root@client ~]# vim /etc/rc.d/rc.local
mount -o username=student,password=westos //172.25.254.216/student /mnt ##写入此命令

[root@client ~]# chmod +x /etc/rc.d/rc.local
[root@client ~]# reboot
[root@client ~]# df

<4>修改工作组名称
在server(server)
[root@server student]# vim /etc/samba/smb.conf##编辑配置文件

[root@server student]# systemctl restart smb.service
在desktop(client)
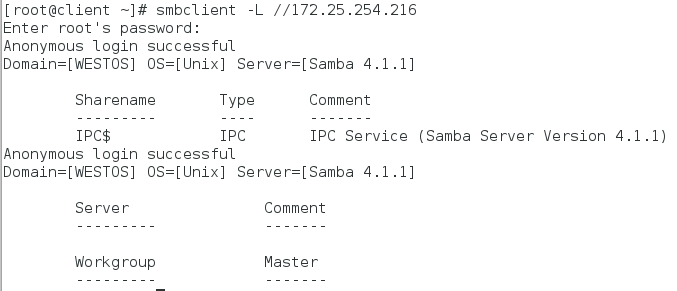
[root@client ~]# smbclient -L //172.25.254.216
<5>访问权限设定
黑名单:
在server(server)
[root@server student]# vim /etc/samba/smb.conf##编辑配置文件
hosts deny = 172.25.254.116##不允许访问id

[root@server student]# systemctl restart smb.service
在desktop(client)测试

白名单:
在server(server)
[root@server student]# vim /etc/samba/smb.conf##编辑配置文件
hosts allow = 172.25.254.216
<6>自定义文件共享目录
第一种情况:这个目录是用户自己建立的
在server(server)
[root@server ~]# mkdir /westos
[root@server ~]# semanage fcontext -a -t samba_share_t '/westos(/.*)?'##更改安全上下文
[root@server ~]# semanage fcontext -l | grep /westos
[root@server ~]# restorecon -FvvR /westos/ ##刷新
[root@server ~]# vim /etc/samba/smb.conf

[root@server ~]# systemctl restart smb.service
[root@server ~]# cd /westos/
[root@server westos]# touch file
在desktop(client)测试
[root@client ~]# smbclient -L //172.25.254.216
第二种情况:当目录是系统目录时例如/mnt
在server(server)
[root@server westos]# vim /etc/samba/smb.conf

[root@server westos]# systemctl restart smb.service
[root@server westos]# cd
[root@server ~]# touch /mnt/file{1..5}
[root@server ~]# ls /mnt/
file1 file2 file3 file4 file5
[root@server ~]# setsebool -P samba_export_all_ro on ##打开只读共享权限
在desktop(client)测试
[root@client ~]# smbclient //172.25.254.216/mnt -U student

四.用户权限的设定
<1>可浏览权限
在server(server)服务端
[root@server ~]# vim /etc/samba/smb.conf
browseable= no ##隐藏目录信息

在desktop(client)客户端
[root@client ~]# smbclient -L //172.25.254.216

<2>可写权限
在server
[root@server ~]# vim /etc/samba/smb.conf
writable = yes ##所有用户均可写

[root@server ~]# systemctl restart smb.service
[root@server ~]# chmod 777 /westos/
[root@server ~]# ll -d /westos/
drwxrwxrwx. 2 root root 17 Jun 2 01:52 /westos/
在desktop测试
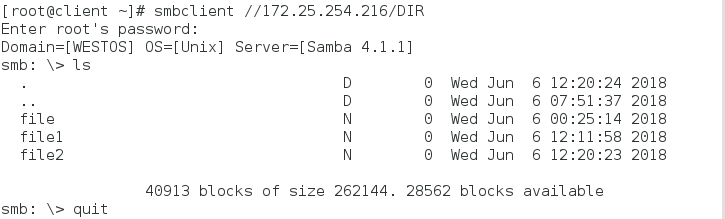
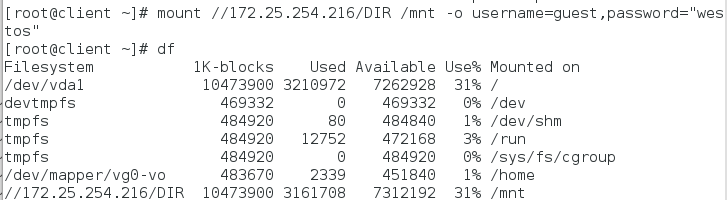
[root@client ~]# mount //172.25.254.216/DIR /mnt -o username=westos,password=westos
[root@client ~]# touch /mnt/file
[root@client ~]# ll /mnt

<3>只对某个用户可写
在server
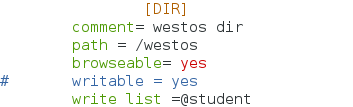
[root@server ~]# vim /etc/samba/smb.conf
write list = student ##可写用户

[root@server ~]# systemctl restart smb.service
在desktop
[root@client ~]# mount //172.25.254.216/DIR /mnt -o username=westos,password=westos
[root@client ~]# touch /mnt/file1
touch: cannot touch ‘/mnt/file1’: Permission denied##westos用户无法建立文件
[root@client ~]# umount /mnt/
[root@client ~]# mount //172.25.254.216/DIR /mnt -o username=student,password=westos
[root@client ~]# touch /mnt/file1##student用户可以建立文件
<4>组成员可写
在server
[root@server ~]# vim /etc/samba/smb.conf
write list = @student##可写用户组
[root@server ~]# id westos
uid=1001(westos) gid=1001(westos) groups=1001(westos)
[root@server ~]# usermod -G student westos##将westos加入student
[root@server ~]# id westos
uid=1001(westos) gid=1001(westos) groups=1001(westos),1000(student)
在desktop
[root@client ~]# umount /mnt/
[root@client ~]# mount //172.25.254.216/DIR /mnt -o username=westos,password=westos##因为westos用户属于student组的用户
[root@client ~]# touch /mnt/file2
[root@client ~]# ls /mnt/
file file1 file2
<5>目录的超级用户
在server
[root@server ~]# vim /etc/samba/smb.conf
admin users= westos##共享的超级用户指定

[root@server ~]# systemctl restart smb.service
在desktop
[root@client ~]# cd /mnt
[root@client mnt]# ll
total 0
-rw-r--r-- 1 1001 1001 0 Jun 2 02:50 file
-rw-r--r-- 1 student student 0 Jun 2 02:55 file1
[root@client mnt]# touch file5
[root@client mnt]# ll
total 0
-rw-r--r-- 1 1001 1001 0 Jun 2 02:50 file
-rw-r--r-- 1 student student 0 Jun 2 02:55 file1
-rw-r--r-- 1 root 1001 0 Jun 2 03:06 file5
五.多用户挂载
在客户端desktop
[root@client ~]# umount /mnt/
[root@client ~]# yum install cifs-utils -y
[root@client ~]# vim /root/smbpass##创建访问时所需密码
username=westos
passwd=redhat
[root@client ~]# mount -o credentials=/root smbpass,sec=ntlmssp,multiuser //172.25.254.216/DIR /mnt##多用户挂载
[root@client ~]# cd /mnt/
[root@client mnt]# useradd test
[root@client mnt]# su - test
[test@client ~]$ cifscreds add -u westos 172.25.254.216
Password: ##若密码输入错误
[test@client ~]$ ls
[test@client ~]$ ls /mnt
ls: cannot access /mnt: Permission denied##没有做smb的认证所以无法访问smb共享
[test@client ~]$ cifscreds add -u westos 172.25.254.216
You already have stashed credentials for 172.25.254.216 (172.25.254.216)
If you want to update them use:
cifscreds update
[test@client ~]$ cifscreds clearall##清除之前的缓存
[test@client ~]$ cifscreds add -u westos 172.25.254.216##认证后可以访问
Password:
[test@client ~]$ ls /mnt/
file file1 file4
[test@client ~]$ touch /mnt/file5
[test@client ~]$ ll /mnt/
total 0
-rw-r--r-- 1 test test 0 Jun 2 02:50 file
-rw-r--r-- 1 student student 0 Jun 2 02:55 file1
-rw-r--r-- 1 root test 0 Jun 2 03:06 file4
-rw-r--r-- 1 root test 0 Jun 2 03:35 file5
六.匿名用户访问
在server服务端
[root@server ~]# vim /etc/samba/smb.conf
security = user
passdb backend = tdbsam
map to guest = bad user##客户匿名访问

guest ok = yes##匿名用户访问

[root@server ~]# systemctl restart smb.service
在desktop