对于音视频的播放在之前的文章中我就有了解到音频播放这篇文章介绍了使用Android高级别点的API来对音频渲染播放处理,视频的播放使用高级别的API没有写文章来处理。这篇文章将要了解到偏向于稍微底层API的方式来对音视频渲染播放处理,使用OpenSL ES处理音频,使用OpenGL ES处理视频。这篇文章我们可以了得到。
- Android平台OpenSL ES的搭建使用
- 使用OpenSL ES播放音频
- Android平台OpenGL ES的搭建使用
- 使用OpenGL ES播放渲染视频
OpenSL ES在Android中使用
简介
OpenSL ES全称Open Sound Library for Embedded Systems,嵌入式音频加速标准。它为嵌入式移动多媒体设备上的本地应用程序提供了标准化、高性能、低响应时间的音频功能实现方法,还实现了软硬件音频性能的跨平台。
我们在使用它开发Android应用的时候可以直接使用C/C++开发基于OpenSL ES音频的应用。为什么可以这样用呢?Android NDK对它有支持,我们可以在目录/NDK_ROOT/platforms/android-xx/arch-xx/urs/lib/libOpenSLES.so看到这个库的文件
引入OpenSL ES
刚开始要我们知道如何引入使用OpenSL ES来播放音频,想必肯定是懵逼的,一般我会选中一个好的示例代码来先看一下,看Android的NDK sample发现了有它的使用Android NDK Sample其中的例子native-audio就是我们想要的答案,我首先就吧它跑了一遍看看效果。
看了官方的使用OpenSL ES播放音频的demo,我把它的播放和暂停功能抽出来了,了解一下引入OpenSL ES的大体流程和简单了解一下它的API。使用的是CmakeLists.txt文件来引入NDK的配置。
引入OpenSL ES代码
先列出完整的项目目录截图:
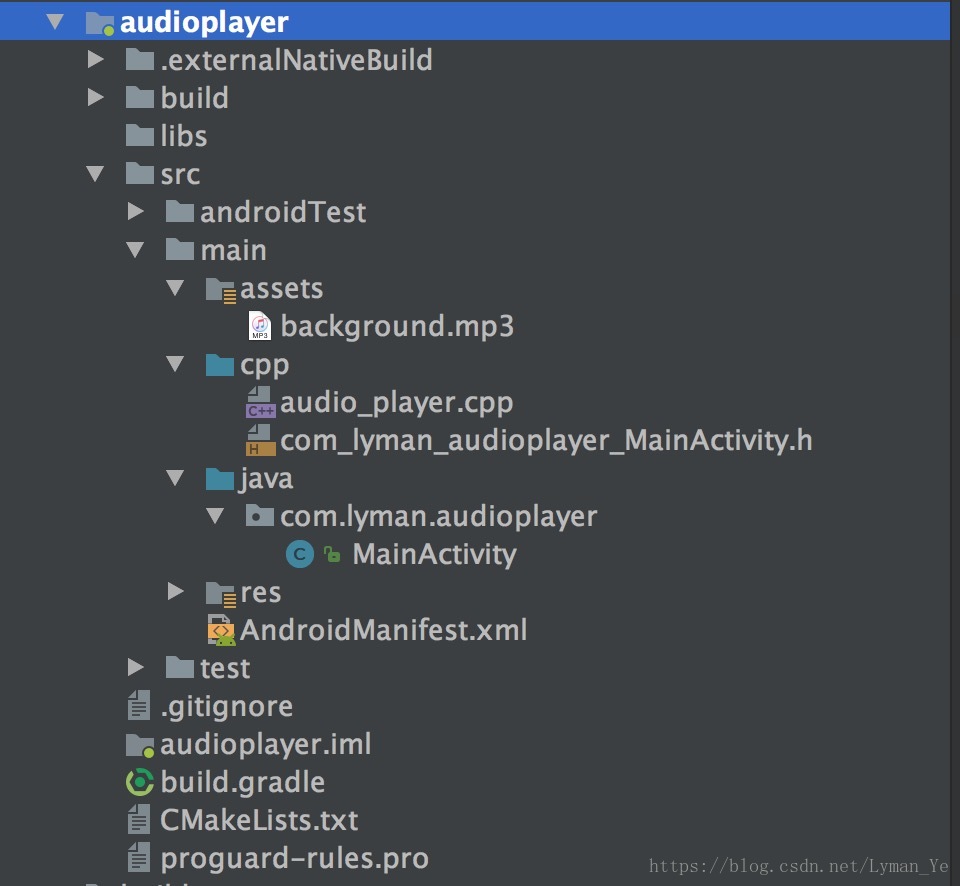
CMakeLists.txt的配置这里就不累赘了,后面会有完整的Demo列出,只贴出和OpenSL ES 相关的配置。
在CMakeLists.txt 中配置链接:
target_link_libraries(
                      audio_player
                      #native-audio-jni
                      android
                      log
                      OpenSLES
                      )
在audio_player中引入头文件:
// for native audio
#include <SLES/OpenSLES.h>
#include <SLES/OpenSLES_Android.h>
其中上层的native接口声明 然后引入so库,以及配置生成我们的c++代码生成so库的过程不再累赘。直接看到调用native API来播放音频的代码
实现音频播放
这里主要了解创建播放的流程。
初始化音频系统
// create the engine and output mix objects
void Java_com_lyman_audioplayer_MainActivity_createEngine(JNIEnv* env, jclass clazz)
{
    SLresult result;

    // create engine
    result = slCreateEngine(&engineObject, 0, NULL, 0, NULL, NULL);
    assert(SL_RESULT_SUCCESS == result);
    (void)result;

    // realize the engine
    result = (*engineObject)->Realize(engineObject, SL_BOOLEAN_FALSE);
    assert(SL_RESULT_SUCCESS == result);
    (void)result;

    // get the engine interface, which is needed in order to create other objects
    result = (*engineObject)->GetInterface(engineObject, SL_IID_ENGINE, &engineEngine);
    assert(SL_RESULT_SUCCESS == result);
    (void)result;

    // create output mix, with environmental reverb specified as a non-required interface
    const SLInterfaceID ids[1] = {SL_IID_ENVIRONMENTALREVERB};
    const SLboolean req[1] = {SL_BOOLEAN_FALSE};
    result = (*engineEngine)->CreateOutputMix(engineEngine, &outputMixObject, 1, ids, req);
    assert(SL_RESULT_SUCCESS == result);
    (void)result;

    // realize the output mix
    result = (*outputMixObject)->Realize(outputMixObject, SL_BOOLEAN_FALSE);
    assert(SL_RESULT_SUCCESS == result);
    (void)result;

    // get the environmental reverb interface
    // this could fail if the environmental reverb effect is not available,
    // either because the feature is not present, excessive CPU load, or
    // the required MODIFY_AUDIO_SETTINGS permission was not requested and granted
    result = (*outputMixObject)->GetInterface(outputMixObject, SL_IID_ENVIRONMENTALREVERB,
                                              &outputMixEnvironmentalReverb);
    if (SL_RESULT_SUCCESS == result) {
        result = (*outputMixEnvironmentalReverb)->SetEnvironmentalReverbProperties(
                outputMixEnvironmentalReverb, &reverbSettings);
        (void)result;
    }
    // ignore unsuccessful result codes for environmental reverb, as it is optional for this example

}
创建音频播放器缓冲区
// create buffer queue audio player
void Java_com_lyman_audioplayer_MainActivity_createBufferQueueAudioPlayer(JNIEnv* env,
                                                                           jclass clazz, jint sampleRate, jint bufSize)
{
    SLresult result;
    if (sampleRate >= 0 && bufSize >= 0 ) {
        bqPlayerSampleRate = sampleRate * 1000;
        /*
         * device native buffer size is another factor to minimize audio latency, not used in this
         * sample: we only play one giant buffer here
         */
        bqPlayerBufSize = bufSize;
    }

    // configure audio source
    SLDataLocator_AndroidSimpleBufferQueue loc_bufq = {SL_DATALOCATOR_ANDROIDSIMPLEBUFFERQUEUE, 2};
    SLDataFormat_PCM format_pcm = {SL_DATAFORMAT_PCM, 1, SL_SAMPLINGRATE_8,
                                   SL_PCMSAMPLEFORMAT_FIXED_16, SL_PCMSAMPLEFORMAT_FIXED_16,
                                   SL_SPEAKER_FRONT_CENTER, SL_BYTEORDER_LITTLEENDIAN};
    /*
     * Enable Fast Audio when possible:  once we set the same rate to be the native, fast audio path
     * will be triggered
     */
    if(bqPlayerSampleRate) {
        format_pcm.samplesPerSec = bqPlayerSampleRate;       //sample rate in mili second
    }
    SLDataSource audioSrc = {&loc_bufq, &format_pcm};

    // configure audio sink
    SLDataLocator_OutputMix loc_outmix = {SL_DATALOCATOR_OUTPUTMIX, outputMixObject};
    SLDataSink audioSnk = {&loc_outmix, NULL};

    /*
     * create audio player:
     *     fast audio does not support when SL_IID_EFFECTSEND is required, skip it
     *     for fast audio case
     */
    const SLInterfaceID ids[3] = {SL_IID_BUFFERQUEUE, SL_IID_VOLUME, SL_IID_EFFECTSEND,
            /*SL_IID_MUTESOLO,*/};
    const SLboolean req[3] = {SL_BOOLEAN_TRUE, SL_BOOLEAN_TRUE, SL_BOOLEAN_TRUE,
            /*SL_BOOLEAN_TRUE,*/ };

    result = (*engineEngine)->CreateAudioPlayer(engineEngine, &bqPlayerObject, &audioSrc, &audioSnk,
                                                bqPlayerSampleRate? 2 : 3, ids, req);
    assert(SL_RESULT_SUCCESS == result);
    (void)result;

    // realize the player
    result = (*bqPlayerObject)->Realize(bqPlayerObject, SL_BOOLEAN_FALSE);
    assert(SL_RESULT_SUCCESS == result);
    (void)result;

    // get the play interface
    result = (*bqPlayerObject)->GetInterface(bqPlayerObject, SL_IID_PLAY, &bqPlayerPlay);
    assert(SL_RESULT_SUCCESS == result);
    (void)result;

    // get the buffer queue interface
    result = (*bqPlayerObject)->GetInterface(bqPlayerObject, SL_IID_BUFFERQUEUE,
                                             &bqPlayerBufferQueue);
    assert(SL_RESULT_SUCCESS == result);
    (void)result;

    // register callback on the buffer queue
    result = (*bqPlayerBufferQueue)->RegisterCallback(bqPlayerBufferQueue, bqPlayerCallback, NULL);
    assert(SL_RESULT_SUCCESS == result);
    (void)result;

    // get the effect send interface
    bqPlayerEffectSend = NULL;
    if( 0 == bqPlayerSampleRate) {
        result = (*bqPlayerObject)->GetInterface(bqPlayerObject, SL_IID_EFFECTSEND,
                                                 &bqPlayerEffectSend);
        assert(SL_RESULT_SUCCESS == result);
        (void)result;
    }

#if 0   // mute/solo is not supported for sources that are known to be mono, as this is
    // get the mute/solo interface
    result = (*bqPlayerObject)->GetInterface(bqPlayerObject, SL_IID_MUTESOLO, &bqPlayerMuteSolo);
    assert(SL_RESULT_SUCCESS == result);
    (void)result;
#endif

    // get the volume interface
    result = (*bqPlayerObject)->GetInterface(bqPlayerObject, SL_IID_VOLUME, &bqPlayerVolume);
    assert(SL_RESULT_SUCCESS == result);
    (void)result;

    // set the player's state to playing
    result = (*bqPlayerPlay)->SetPlayState(bqPlayerPlay, SL_PLAYSTATE_PLAYING);
    assert(SL_RESULT_SUCCESS == result);
    (void)result;
}
播放Asset下面的文件
// create asset audio player
jboolean Java_com_lyman_audioplayer_MainActivity_createAssetAudioPlayer(JNIEnv* env, jclass clazz,
                                                                         jobject assetManager, jstring filename)
{
    SLresult result;

    // convert Java string to UTF-8

    const char *utf8 = env->GetStringUTFChars(filename, false);
    assert(NULL != utf8);

    // use asset manager to open asset by filename
    AAssetManager* mgr = AAssetManager_fromJava(env, assetManager);
    assert(NULL != mgr);
    AAsset* asset = AAssetManager_open(mgr, utf8, AASSET_MODE_UNKNOWN);

    // release the Java string and UTF-8
    //(*env)->ReleaseStringUTFChars(env, filename, utf8);
    env->ReleaseStringUTFChars(filename,utf8);

    // the asset might not be found
    if (NULL == asset) {
        return JNI_FALSE;
    }

    // open asset as file descriptor
    off_t start, length;
    int fd = AAsset_openFileDescriptor(asset, &start, &length);
    assert(0 <= fd);
    AAsset_close(asset);

    // configure audio source
    SLDataLocator_AndroidFD loc_fd = {SL_DATALOCATOR_ANDROIDFD, fd, start, length};
    SLDataFormat_MIME format_mime = {SL_DATAFORMAT_MIME, NULL, SL_CONTAINERTYPE_UNSPECIFIED};
    SLDataSource audioSrc = {&loc_fd, &format_mime};

    // configure audio sink
    SLDataLocator_OutputMix loc_outmix = {SL_DATALOCATOR_OUTPUTMIX, outputMixObject};
    SLDataSink audioSnk = {&loc_outmix, NULL};

    // create audio player
    const SLInterfaceID ids[3] = {SL_IID_SEEK, SL_IID_MUTESOLO, SL_IID_VOLUME};
    const SLboolean req[3] = {SL_BOOLEAN_TRUE, SL_BOOLEAN_TRUE, SL_BOOLEAN_TRUE};
    result = (*engineEngine)->CreateAudioPlayer(engineEngine, &fdPlayerObject, &audioSrc, &audioSnk,
                                                3, ids, req);
    assert(SL_RESULT_SUCCESS == result);
    (void)result;

    // realize the player
    result = (*fdPlayerObject)->Realize(fdPlayerObject, SL_BOOLEAN_FALSE);
    assert(SL_RESULT_SUCCESS == result);
    (void)result;

    // get the play interface
    result = (*fdPlayerObject)->GetInterface(fdPlayerObject, SL_IID_PLAY, &fdPlayerPlay);
    assert(SL_RESULT_SUCCESS == result);
    (void)result;

    // get the seek interface
    result = (*fdPlayerObject)->GetInterface(fdPlayerObject, SL_IID_SEEK, &fdPlayerSeek);
    assert(SL_RESULT_SUCCESS == result);
    (void)result;

    // get the mute/solo interface
    result = (*fdPlayerObject)->GetInterface(fdPlayerObject, SL_IID_MUTESOLO, &fdPlayerMuteSolo);
    assert(SL_RESULT_SUCCESS == result);
    (void)result;

    // get the volume interface
    result = (*fdPlayerObject)->GetInterface(fdPlayerObject, SL_IID_VOLUME, &fdPlayerVolume);
    assert(SL_RESULT_SUCCESS == result);
    (void)result;

    // enable whole file looping
    result = (*fdPlayerSeek)->SetLoop(fdPlayerSeek, SL_BOOLEAN_TRUE, 0, SL_TIME_UNKNOWN);
    assert(SL_RESULT_SUCCESS == result);
    (void)result;

    return JNI_TRUE;
}
OK代码就是Copy官方Sample来的。
该功能的完整代码问文末的audioplayer工程。
OpenGL ES在Android中使用
简介
OpenGL ES之前有写一篇介绍的文章,并且实现了一些Demo程序,可以参考这篇文章看看。
Android实现OpenGL ES渲染播放图片
在Android平台使用OpenGL ES,第一种方式是直接使用GLSurfaceView,通过这种方式使用OpenGL比较简单,不用搭建OpenGL ES的上下文环境,以及创建OpenGL ES的显示设备。我之前的OpenGL ES的demo程序就是使用这种方式,但是这种方式的缺点是不够灵活,很多真正的OpenGL ES的核心用法例如共享上下文达到多线程共享操作一份纹理都不能直接用。
以后的Demo的上下文环境都是直接基于C++使用EGL来搭建的。下面的Demo程序参考自《音视频开发进阶指南》书籍的Demo。通过重新集成修改阅读这个Demo,还是可以学到很多东西的。
首先看看项目的文件结构
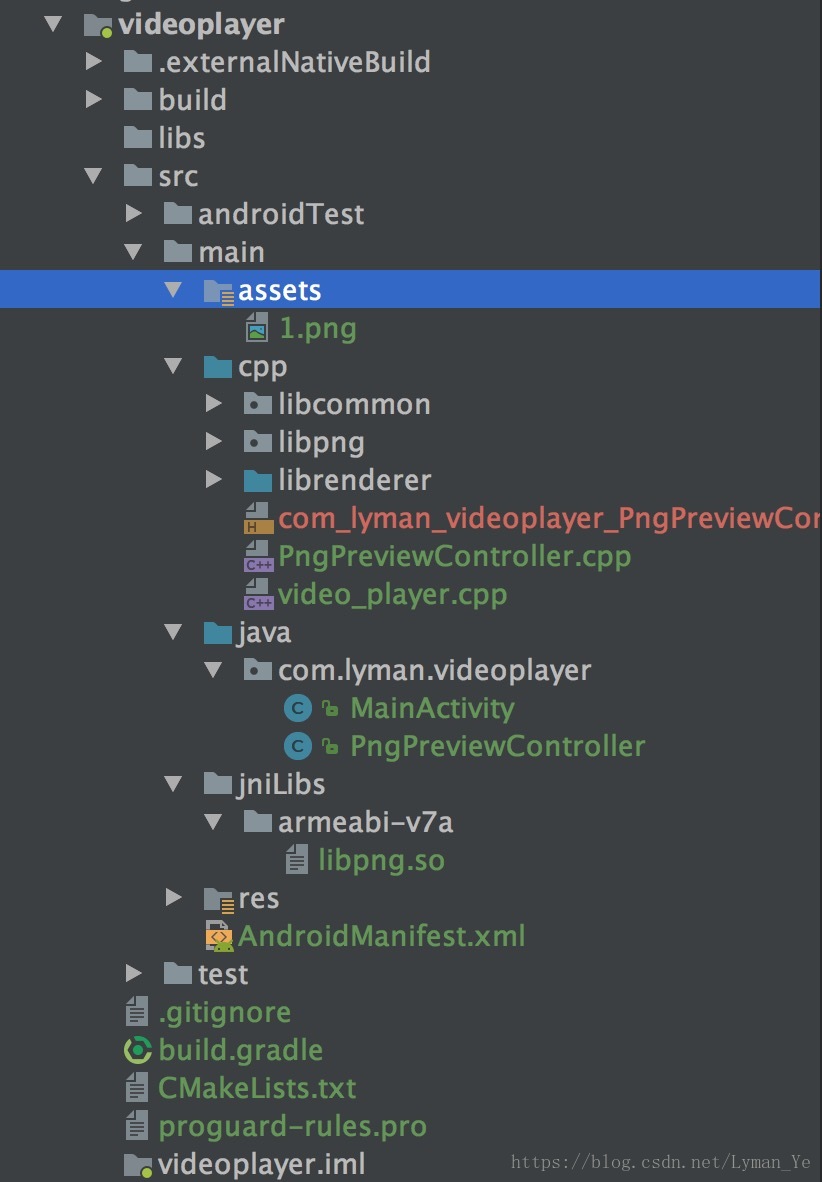
这篇文章主要记录重新构建项目的过程,其中的源码分析得花更多时间去阅读Demo源码才能真正的理解。
引入OpenGL ES以及EGL
关于EGL这个概念的理解一下:
因为OpenGL ES不负责窗口管理以及上下文管理,该指责由各个平台或设备自己完成。为了在OpenGL 的输出与设备屏幕直接建立一个桥梁,Khronos创建了EGL的API用来实现Android平台设备的链接。EGL承担了为OpenGL提供上下文环境以及窗口管理的指责。
- 在CMakeLists.txt中链接两个库
#如果当前系统版本过低设置拒绝编译
if (${ANDROID_PLATFORM_LEVEL} LESS 11)
  message(FATAL_ERROR "OpenGL 2 is not supported before API level 11 (currently using ${ANDROID_PLATFORM_LEVEL}).")
  return()
elseif (${ANDROID_PLATFORM_LEVEL} LESS 18)
  add_definitions("-DDYNAMIC_ES3")
  set(OPENGL_LIB GLESv2)
else ()
  set(OPENGL_LIB GLESv3)
endif (${ANDROID_PLATFORM_LEVEL} LESS 11)

MESSAGE(STATUS “opengl lib = ${OPENGL_LIB}”)

add_library( # Sets the name of the library.
             renderer

             # Sets the library as a shared library.
             SHARED

             # Provides a relative path to your source file(s).
             src/main/cpp/librenderer/egl_core.cpp
             src/main/cpp/librenderer/rgba_frame.cpp
             src/main/cpp/librenderer/pic_preview_texture.cpp
             src/main/cpp/librenderer/pic_preview_render.cpp
             src/main/cpp/librenderer/pic_preview_controller.cpp
             src/main/cpp/librenderer/image.c
             src/main/cpp/librenderer/png_decoder.cpp
             src/main/cpp/PngPreviewController.cpp
             )

# Include libraries needed for renderer lib
target_link_libraries(
                      renderer
                      png
                      ${log-lib}
                      ${OPENGL_LIB}
                      android
                      EGL)
上面的librenderer.so是我们实现功能的一个so文件,下面再说它的相应信息。
- 在代码中引入头文件
#include <EGL/egl.h>
#include <EGL/eglext.h>
#include <KHR/khrplatform.h>
#include <GLES3/gl3.h>
#include <GLES3/gl3ext.h>
由于上面使用了libpng库来处理png图片,我们得编译集成这个库到项目里面
ndk编译libpng
- libpng官网下载source code源码
- libpng依赖了zlib库下载zlib源码
- 在ndk根目录新建jni文件夹、把下载的libpng和zlib源码下面的内容拷贝到jni下
- lpng1634/script的pnglibconf.h.prebuilt文件复制到jni目录下,重命名pnglibconf.h
- 在jni下面新建Android.mk、内容如下:
LOCAL_PATH :=$(call my-dir)
include $(CLEAR_VARS)
LOCAL_MODULE :=png
LOCAL_SRC_FILES :=\
adler32.c \
compress.c \
crc32.c \
deflate.c \
example.c \
gzclose.c \
gzlib.c \
gzread.c \
gzwrite.c \
infback.c \
inffast.c \
inflate.c \
inftrees.c \
png.c \
pngerror.c \
pngget.c \
pngmem.c \
pngpread.c \
pngread.c \
pngrio.c \
pngrtran.c \
pngrutil.c \
pngset.c \
pngtest.c \
pngtrans.c \
pngwio.c \
pngwrite.c \
pngwtran.c \
pngwutil.c \
trees.c \
uncompr.c \
zutil.c
include $(BUILD_SHARED_LIBRARY)- 在jni目录下新建Application.mk、内容如下:
APP_ABI := armeabi-v7a
APP_STL := gnustl_static
APP_CPPFLAGS := -std=gnu++11 -fexceptions -D__STDC_LIMIT_MACROS
NDK_TOOLCHAIN_VERSION = 4.9
APP_PLATFORM := android-14- 终端进入jni目录执行命令:
ndk-build NDK_PROJECT_PATH=. NDK_APPLICATION_MK=Application.mk APP_BUILD_SCRIPT=Android.mk这样在jni下面会生成一个libs目录下面可以找到我们需要的libpng.so了
拷贝libpng.so到我们得项目里面,然后在CMakeLists.txt文件里面配置该库:
#加载第三方libpng库作为动态库引用
add_library(
          #libxxx.so的名称xxx
          png
          #SHARED 为引入动态库so,STATIC 为引入静态库.a
          SHARED
          IMPORTED
          )

include_directories(
                    #${CMAKE_SOURCE_DIR}/src/main/cpp/librenderer
                    ${CMAKE_SOURCE_DIR}/src/main/cpp/libpng
                    )

SET(
    third_path
    ${CMAKE_SOURCE_DIR}/src/main/jniLibs/${ANDROID_ABI}/libpng.so
    )

MESSAGE(STATUS “src  third so path= ${third_path}”)

#设置要连接的so的相对路径,${ANDROID_ABI}表示so文件的ABI类型的路径,这一步引入了动态加入编译的so
set_target_properties(
                        png
                        PROPERTIES IMPORTED_LOCATION
                        ${third_path}
                     )
引入实现功能代码
实现渲染图片得代码主要放在cpp/librenderer目录下面,对上层提供接口得C++文件问PngPreviewController.cpp,应用层声明接口以及进行调用得操作步骤不再多说了。其中在librenderer里面还实现了对引入png库的图片编码的功能主要由四个文件image.h、image.c、png_decoder.h、png_decoder.c这四个文件来实现。
该功能的完整代码问文末的videoplayer工程。
项目完整代码
参考链接:
书籍源码https://github.com/zhanxiaokai/Android-OpenGLRenderer
OpenGL 引入示例https://github.com/LymanYe/OpenGLDemo