转自:https://alexanderzeitler.com/articles/resizing-a-vmware-workstation-partition-using-gparted/
If the boot sequence is to fast, you can add this line to your VMs .vmx file:
bios.bootDelay = "2000"
This will delay the boot sequence for 2000 ms and show the options.
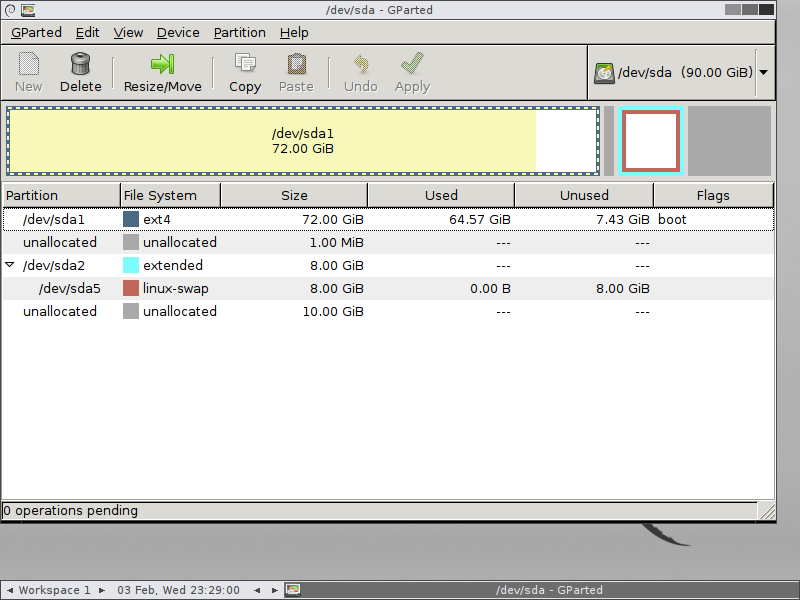
If you're running Ubuntu in your VM, it is likely that there might be a swap partition (/dev/sda5 here) between the main partition and the aforementioned created, unallocated new space and your partitions might look like this:
What we want to achieve now, is to merge the 10 GB unallocated space at the end of the list to the /dev/sda1 partition.
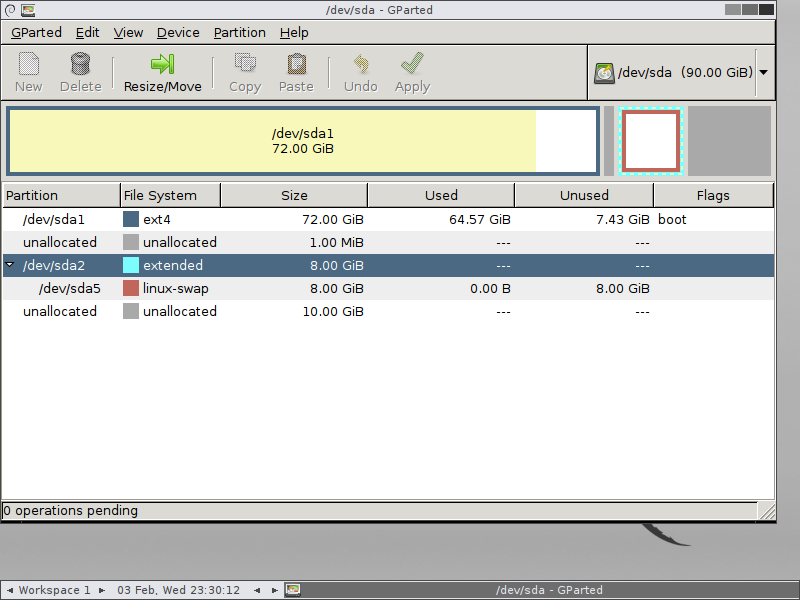
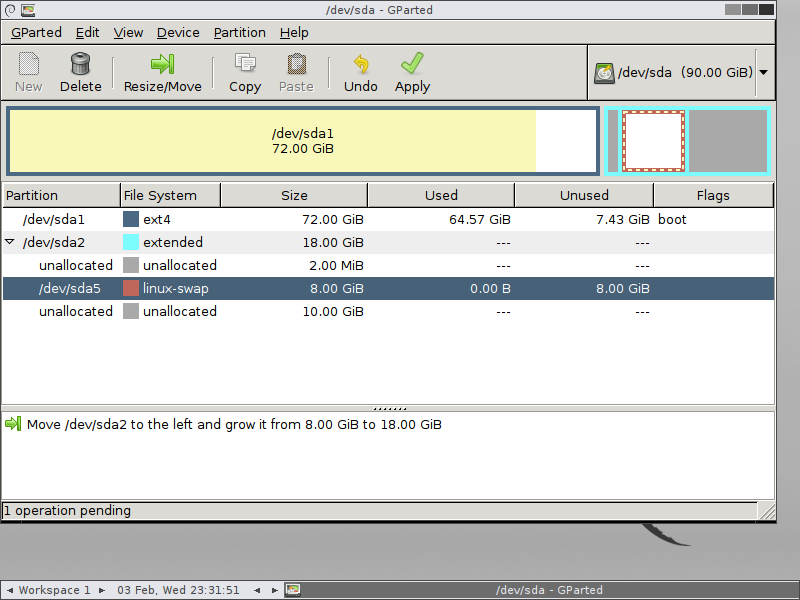
First, we'll select /dev/sda2 (NOT /dev/sda5!):
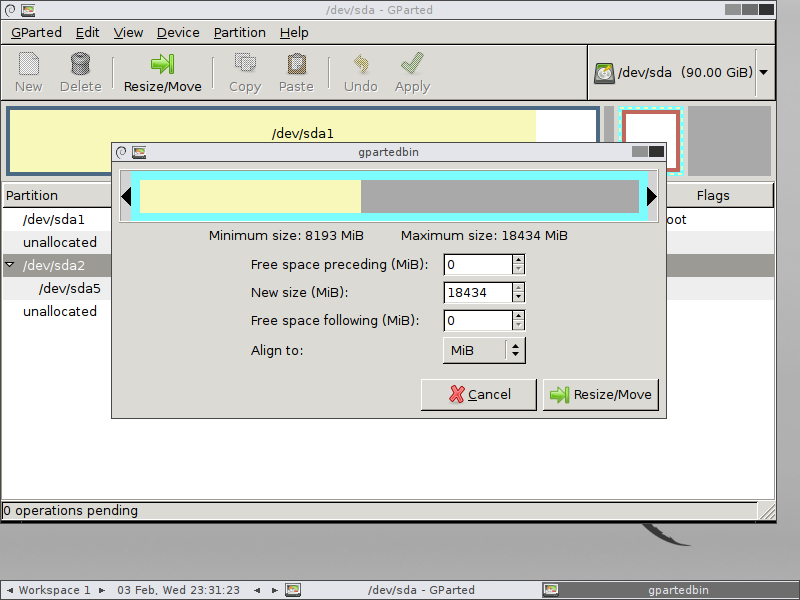
Then, we click "Resize/Move":
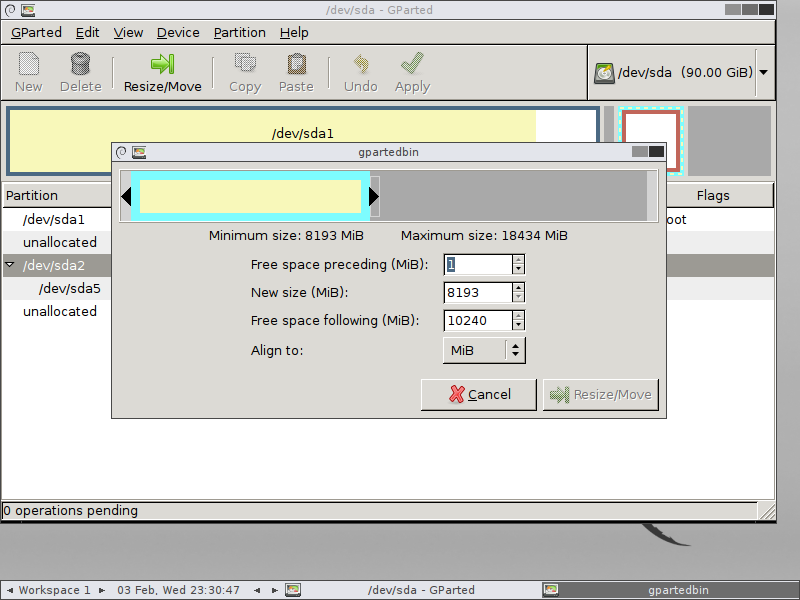
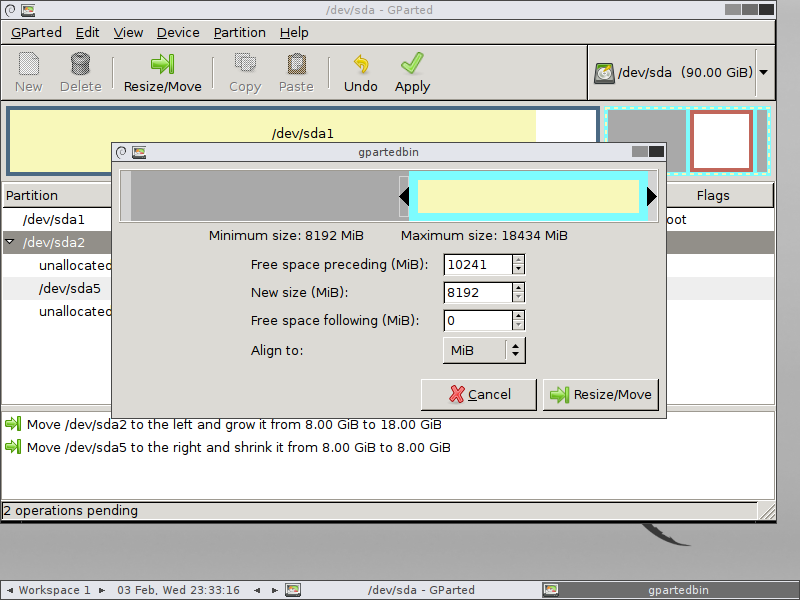
Next, we increase the size of /dev/sda2 to use all available space:
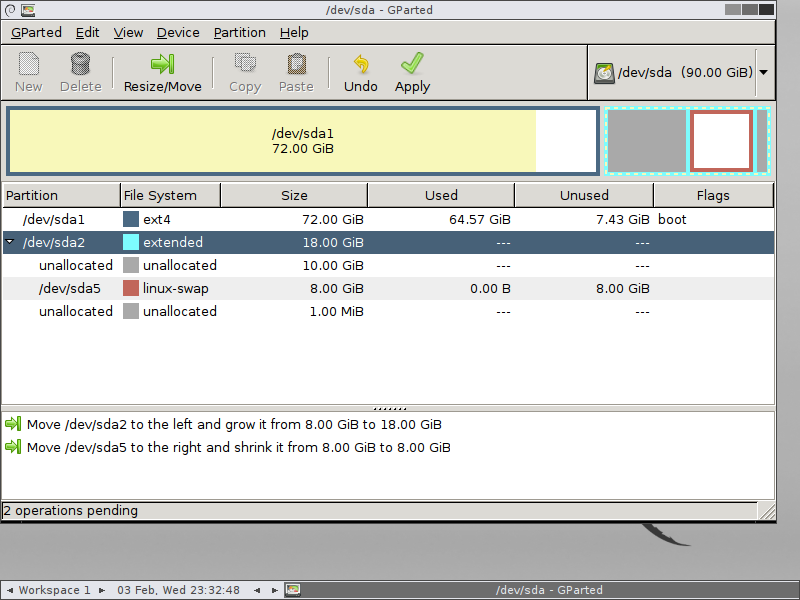
Now we select /dev/sda5 and click Resize/Move again:
In this step, we move /dev/sda5 inside /dev/sda2 to right end: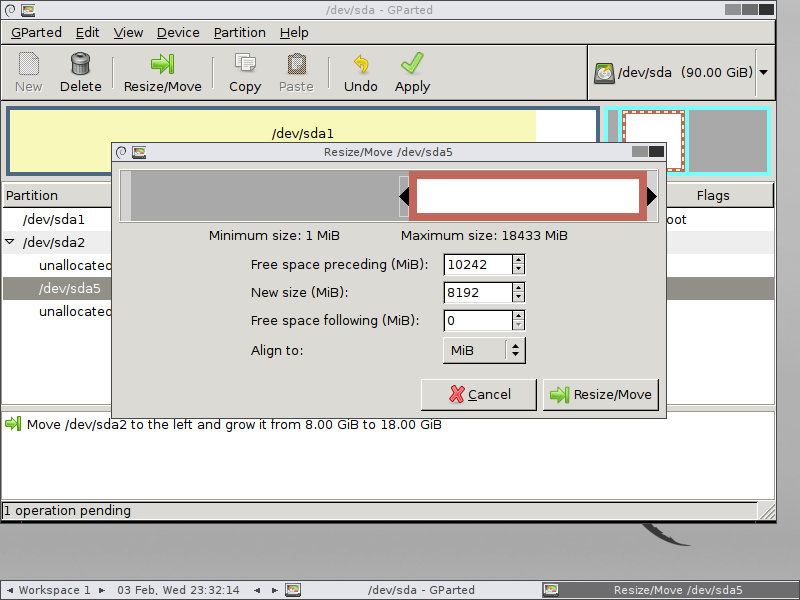
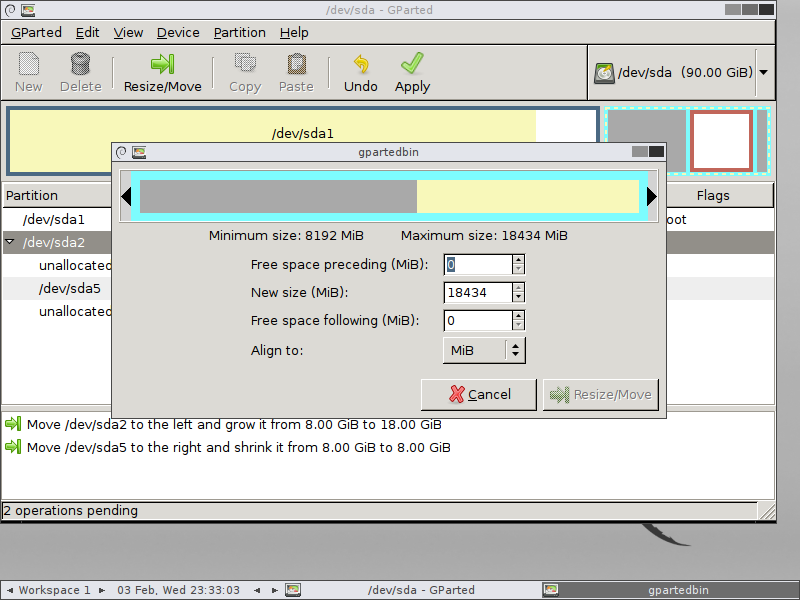
Then again, we select /dev/sda2:
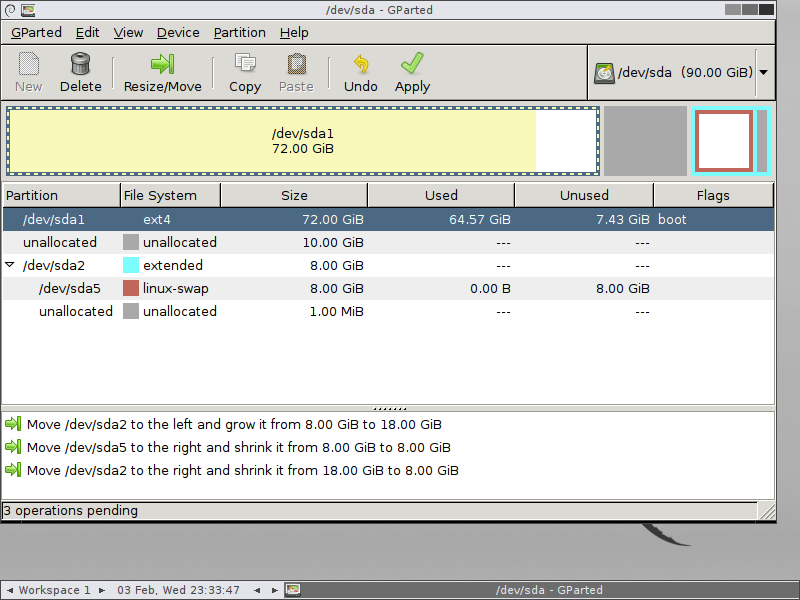
After clicking Resize/Move now we shrink /dev/sda2 to the size of /dev/sda5 by moving the left arrow to the right until it is blocked:
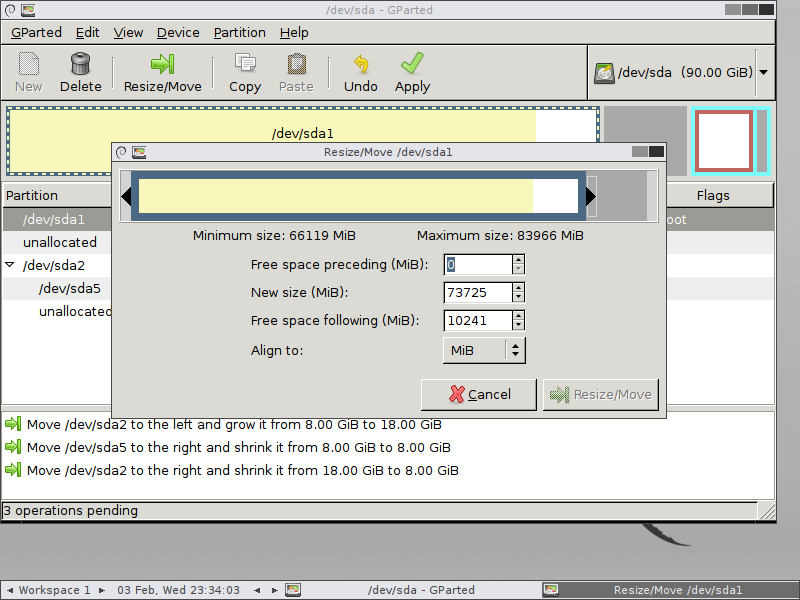
Now we select /dev/sda1 again:
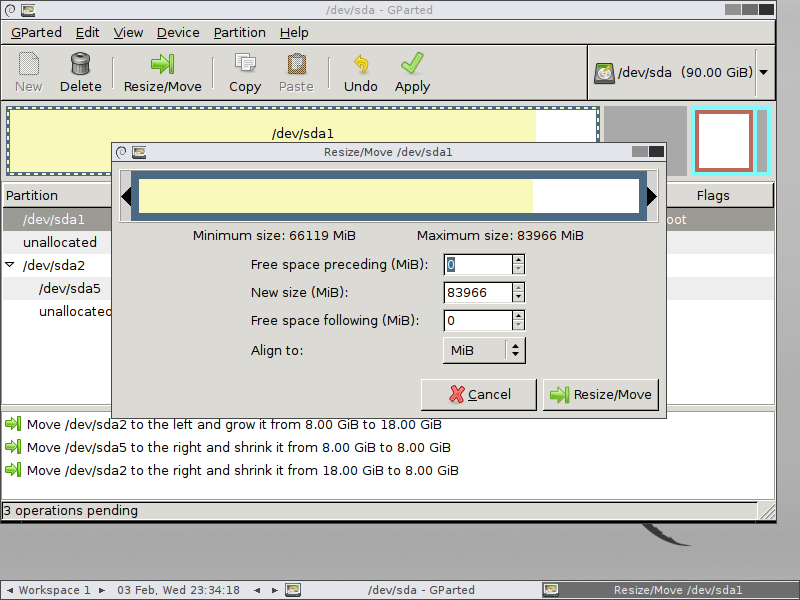
After clicking "Resize/Move" again, we finally can expand /dev/sda1 to the right:
The final step is hitting the "Apply" button, confirm everything, cross fingers and wait for the operations to succeed.
As GParted already tells you in almost every step: Be careful with what you're doing and create a backup before you're trying to modify your partitions!
If the boot sequence is to fast, you can add this line to your VMs .vmx file:
bios.bootDelay = "2000"
This will delay the boot sequence for 2000 ms and show the options.
If you're running Ubuntu in your VM, it is likely that there might be a swap partition (/dev/sda5 here) between the main partition and the aforementioned created, unallocated new space and your partitions might look like this:
What we want to achieve now, is to merge the 10 GB unallocated space at the end of the list to the /dev/sda1 partition.
First, we'll select /dev/sda2 (NOT /dev/sda5!):
Then, we click "Resize/Move":
Next, we increase the size of /dev/sda2 to use all available space:
Now we select /dev/sda5 and click Resize/Move again:
In this step, we move /dev/sda5 inside /dev/sda2 to right end:
Then again, we select /dev/sda2:
After clicking Resize/Move now we shrink /dev/sda2 to the size of /dev/sda5 by moving the left arrow to the right until it is blocked:
Now we select /dev/sda1 again:
After clicking "Resize/Move" again, we finally can expand /dev/sda1 to the right:
The final step is hitting the "Apply" button, confirm everything, cross fingers and wait for the operations to succeed.
As GParted already tells you in almost every step: Be careful with what you're doing and create a backup before you're trying to modify your partitions!