本章主要内容:
1.如何构建Spring Boot项目
2.如何实现RESTful API 接口
3.如何实现多环境的Spring Boot应用配置
4.深入理解Spring Boot配置的启动机制
框架简介
Spring Boot 通过设计大量的自动化配置等方式来简化Spring原有样板化的配置,使开发者可以快速的构建应用,除了解决配置问题,还通过一系列的Starter POMs的定义,整合各项功能时,通过类似模板化的Starter模板定义来引用,使得依赖管理工作变的简单。
Spring Boot构建的工程只需要将Spring Boot应用打成jar包,并通过java -jar 命令运行就能启动一个标准化的web应用。不用打包成war包部署到tomcat下运行。
快速入门
环境准备:
java 7 以及以上版本
Spring framework
maven
构建maven项目
访问官方地址快速构建项目,地址 : http://start.spring.io/
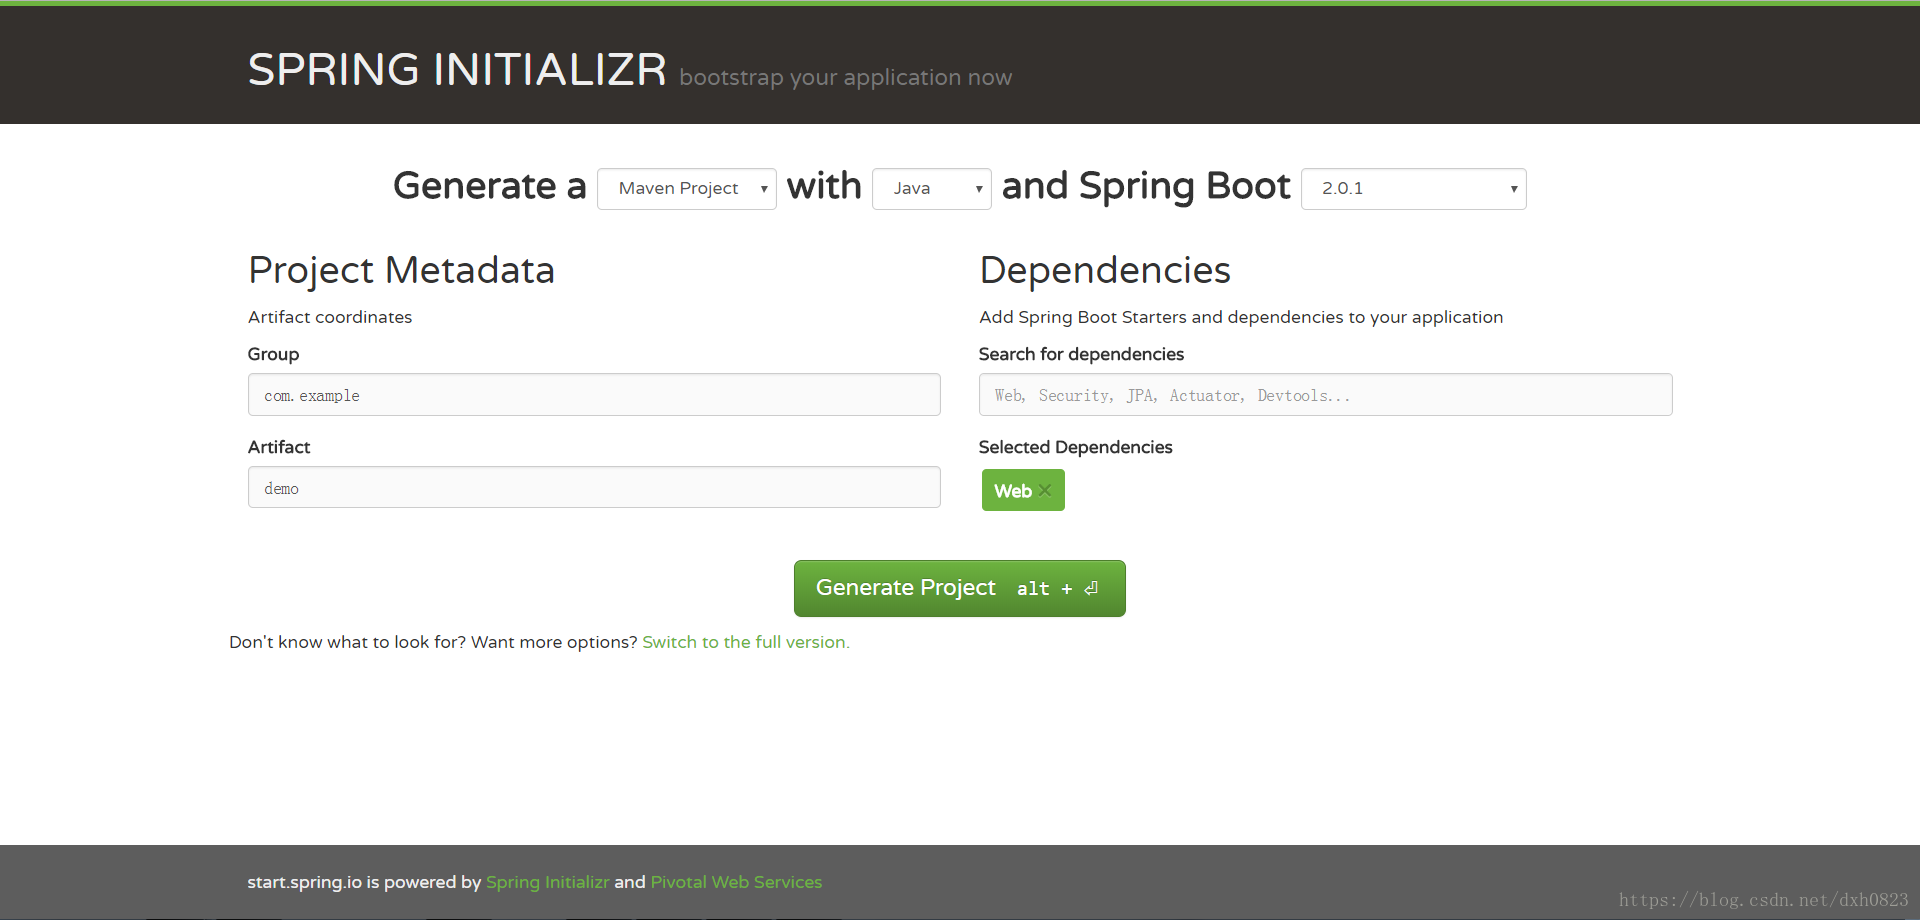
点击Generate Project下载zip包,并解压,导入开发工具中。
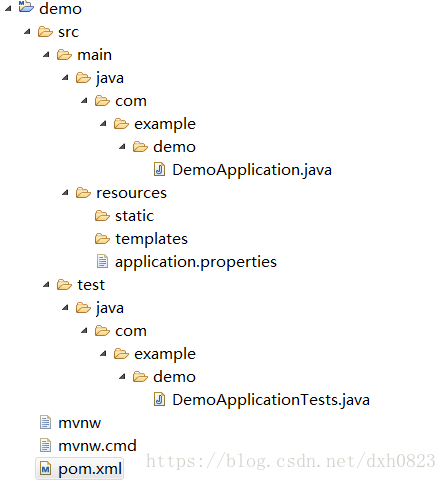
工程结构解析:
src/main/java 主程序的入口:DemoApplication,可以直接运行该类启动Spring Boot应用。
src/main/resources:配置目录,该目录用于存放应用的一些配置信息,比如静态资源、配置文件等
src/test/ :单元测试目录
Maven配置分析:
<?xml version="1.0" encoding="UTF-8"?>
<project xmlns="http://maven.apache.org/POM/4.0.0" xmlns:xsi="http://www.w3.org/2001/XMLSchema-instance"
	xsi:schemaLocation="http://maven.apache.org/POM/4.0.0 http://maven.apache.org/xsd/maven-4.0.0.xsd">
	<modelVersion>4.0.0</modelVersion>

	<groupId>com.example</groupId>
	<artifactId>demo</artifactId>
	<version>0.0.1-SNAPSHOT</version>
	<!-- 默认将应用打包成jar.默认的web依赖会包含嵌入式的tomcat -->
	<packaging>jar</packaging>

	<name>demo</name>
	<description>Demo project for Spring Boot</description>

	<!-- 父项目定义了Spring Boot版本的基础依赖以及一些默认配置内容,比如application.properties的位置等 -->
	<parent>
		<groupId>org.springframework.boot</groupId>
		<artifactId>spring-boot-starter-parent</artifactId>
		<version>2.0.1.RELEASE</version>
		<relativePath/> <!-- lookup parent from repository -->
	</parent>

	<properties>
		<project.build.sourceEncoding>UTF-8</project.build.sourceEncoding>
		<project.reporting.outputEncoding>UTF-8</project.reporting.outputEncoding>
		<java.version>1.8</java.version>
	</properties>

	<dependencies>
		<!-- 全栈web开发模块,包含嵌入式的tomcat,spring MVC -->
		<dependency>
			<groupId>org.springframework.boot</groupId>
			<artifactId>spring-boot-starter-web</artifactId>
		</dependency>
		<!-- 通用的测试模块,包含Junit、Hamcrest、Mockito -->
		<dependency>
			<groupId>org.springframework.boot</groupId>
			<artifactId>spring-boot-starter-test</artifactId>
			<scope>test</scope>
		</dependency>
	</dependencies>

	<build>
		<!-- 插件,可以帮助方便的启停服务 -->
		<plugins>
			<plugin>
				<groupId>org.springframework.boot</groupId>
				<artifactId>spring-boot-maven-plugin</artifactId>
			</plugin>
		</plugins>
	</build>


</project>
实现RESTful API
package com.example.demo.controller;

import org.springframework.web.bind.annotation.RequestMapping;
import org.springframework.web.bind.annotation.RestController;

@RestController
public class HelloController {

	@RequestMapping("/hello")
	public String index(){
		return "Hello World !";
	}

}
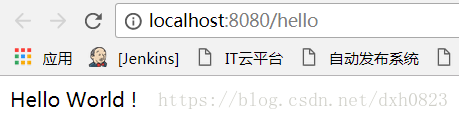
启动应用并访问 http://localhost:8080/hello 我们可以看到返回了预期结果
启动Spring Boot 应用的三种方式:
1.直接通过运行main函数的类来启动
2.使用maven 命令: mvn spring-boot:run
3.在服务器上部署运行时,先使用mvn install 将应用打包成jar 包,再通过java -jar ***.jar包来启动应用
编写单元测试
package com.example.demo;

import static org.hamcrest.Matchers.equalTo;
import static org.springframework.test.web.servlet.result.MockMvcResultMatchers.content;
import static org.springframework.test.web.servlet.result.MockMvcResultMatchers.status;

import org.junit.Before;
import org.junit.Test;
import org.junit.runner.RunWith;
import org.springframework.boot.test.context.SpringBootTest;
import org.springframework.http.MediaType;
import org.springframework.test.context.junit4.SpringRunner;
import org.springframework.test.web.servlet.MockMvc;
import org.springframework.test.web.servlet.request.MockMvcRequestBuilders;
import org.springframework.test.web.servlet.setup.MockMvcBuilders;

import com.example.demo.controller.HelloController;

@RunWith(SpringRunner.class)
@SpringBootTest
public class DemoApplicationTests {

	private MockMvc mvc;

	@Before
	public void setUp(){
		mvc = MockMvcBuilders.standaloneSetup(new HelloController()).build();
	}

	@Test
	public void hello() throws Exception {
		mvc.perform(MockMvcRequestBuilders.get("/hello").accept(MediaType.APPLICATION_JSON))
		.andExpect(status().isOk())
		.andExpect(content().string(equalTo("Hello World !")));
	}

}
配置详解
spring Boot默认的配置文件路劲:src/main/resources/application.properties,关于spring Boot应用的配置内容都可以集中在该文件中,比如容器端口号,应用名等、数据源、日志级别
server.port=8888
spring.application.name=hello
springBoot的配置文件除了可以使用properties文件,还可以使用YMAL。
除了可以配置各个Starter模板中预定义的配置属性,还可以自定义属性,也可以在各个参数之间直接通过PlaceHolder的方式来引用。
book.name=SpringCloudInAction
book.author=zhaiyongchao
book.desc=${book.author} is writing <<${book.name}>>
package com.example.demo.model;

import org.springframework.beans.factory.annotation.Value;
import org.springframework.stereotype.Component;

@Component
public class Book {

	@Value("${book.name}")
	private String name;

	@Value("${book.author}")
	private String author;

	@Value("${book.desc}")
	private String desc;

	/**
	 * @return the name
	 */
	public String getName() {
		return name;
	}

	/**
	 * @param name the name to set
	 */
	public void setName(String name) {
		this.name = name;
	}

	/**
	 * @return the author
	 */
	public String getAuthor() {
		return author;
	}

	/**
	 * @param author the author to set
	 */
	public void setAuthor(String author) {
		this.author = author;
	}

	/**
	 * @return the desc
	 */
	public String getDesc() {
		return desc;
	}

	/**
	 * @param desc the desc to set
	 */
	public void setDesc(String desc) {
		this.desc = desc;
	}

}
测试类:
package com.example.demo.model;

import org.junit.Test;
import org.junit.runner.RunWith;
import org.springframework.beans.factory.annotation.Autowired;
import org.springframework.boot.test.context.SpringBootTest;
import org.springframework.test.context.junit4.SpringRunner;

@RunWith(SpringRunner.class)
@SpringBootTest
public class BookTest {

	@Autowired
	private Book book;

	@Test
	public void test(){
		String name = book.getName();
		String author = book.getAuthor();
		String desc = book.getDesc();
		System.out.println(name);
		System.out.println(author);
		System.out.println(desc);
	}

}
测试结果:
SpringCloudInAction
zhaiyongchao
zhaiyongchao is writing <<SpringCloudInAction>>
使用随机数
可以通过${random} 配置来产生随机的int值,long值或者String字符串。
#随机字符串
com.example.demo.blog.value=${random.value}
#随机int
com.example.demo.blog.number=${random.int}
#随机long
com.example.demo.blog.bignumber=${random.long}
#10以内的随机数
com.example.demo.blog.test1=${random.int(10)}
#10-20的随机数
com.example.demo.blog.test2=${random.int[10,20]}
package com.example.demo.model;

import org.junit.Test;
import org.junit.runner.RunWith;
import org.springframework.beans.factory.annotation.Autowired;
import org.springframework.boot.test.context.SpringBootTest;
import org.springframework.test.context.junit4.SpringRunner;

@RunWith(SpringRunner.class)
@SpringBootTest
public class BlogTest {

	@Autowired
	private Blog blog;

	@Test
	public void test(){
		System.out.println(blog.getName());
		System.out.println(blog.getCount());
		System.out.println(blog.getTotolCount());
		System.out.println(blog.getTest1());
		System.out.println(blog.getTest2());
	}

}
package com.example.demo.model;

import org.springframework.beans.factory.annotation.Value;
import org.springframework.stereotype.Component;

@Component
public class Blog {

	@Value("${com.example.demo.blog.value}")
	private String name;
	@Value("${com.example.demo.blog.number}")
	private int count ;
	@Value("${com.example.demo.blog.bignumber}")
	private long totolCount;
	@Value("${com.example.demo.blog.test1}")
	private int test1;
	@Value("${com.example.demo.blog.test2}")
	private int test2;

	/**
	 * @return the name
	 */
	public String getName() {
		return name;
	}

	/**
	 * @param name the name to set
	 */
	public void setName(String name) {
		this.name = name;
	}

	/**
	 * @return the count
	 */
	public int getCount() {
		return count;
	}

	/**
	 * @param count the count to set
	 */
	public void setCount(int count) {
		this.count = count;
	}

	/**
	 * @return the totolCount
	 */
	public long getTotolCount() {
		return totolCount;
	}

	/**
	 * @param totolCount the totolCount to set
	 */
	public void setTotolCount(long totolCount) {
		this.totolCount = totolCount;
	}

	/**
	 * @return the test1
	 */
	public int getTest1() {
		return test1;
	}

	/**
	 * @param test1 the test1 to set
	 */
	public void setTest1(int test1) {
		this.test1 = test1;
	}

	/**
	 * @return the test2
	 */
	public int getTest2() {
		return test2;
	}

	/**
	 * @param test2 the test2 to set
	 */
	public void setTest2(int test2) {
		this.test2 = test2;
	}


}
package com.example.demo.model;

import org.junit.Test;
import org.junit.runner.RunWith;
import org.springframework.beans.factory.annotation.Autowired;
import org.springframework.boot.test.context.SpringBootTest;
import org.springframework.test.context.junit4.SpringRunner;

@RunWith(SpringRunner.class)
@SpringBootTest
public class BlogTest {

	@Autowired
	private Blog blog;

	@Test
	public void test(){
		System.out.println(blog.getName());
		System.out.println(blog.getCount());
		System.out.println(blog.getTotolCount());
		System.out.println(blog.getTest1());
		System.out.println(blog.getTest2());
	}

}
测试结果:
6c1bed71d6302dd92b05ea042f664e00
1494119158
7481639510420907711
4
13
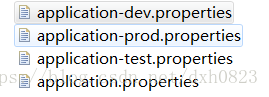
多环境配置
多环境配置的文件名需要满足application-{profile}.properties的格式,其中{profile}对应的环境标识,通过在
application.properties中配置属性spring.profiles.active来选择加载相应的配置文件。
spring.profiles.active=dev
application-dev.properties文件内容:
server.port=8080
则服务启动用的8080端口。
加载顺序
1.在命令行中传入的参数
2.spring_application_json中的属性。spring_application_json是以JSON格式配置在系统环境变量中的内容。
3.java:comp/env中的JNDI属性
4.Java的系统属性,可以通过System.getProperties()获得的内容
5.操作系统的环境变量
6.通过random.*配置的随机属性
7.位于当前应用jar包之外,针对不同${profile}环境的配置文件内容,例如application-{profile}.properties或者YMAL配置内容。
8.位于当前应用jar包之内,针对不同${profile}环境的配置文件内容,例如application-{profile}.properties或者YMAL配置内容。
9.位于当前jar包之外的applicaiton.properties和YMAL配置内容
10.位于当前jar包之内的applicaiton.properties和YMAL配置内容
11.在@Configuration注解修饰的类中,通过@PropertySource注解定义的属性。
12.应用默认属性,使用SpringApplication.setDefaultProperties定义的内容