文件环境:CentOS7 + redis4.0.6
先去官网下载redis:https://redis.io/,然后上传到你的虚拟机,我上传到了/mysoft
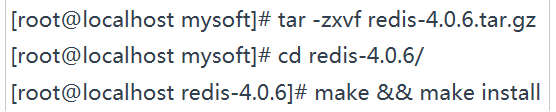
先解压-》然后进入主目录-》安装
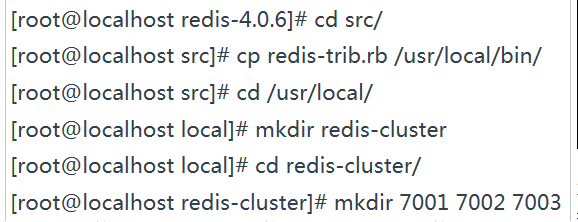
安装完,进入src目录,将 文件复制到
文件复制到 目录
目录
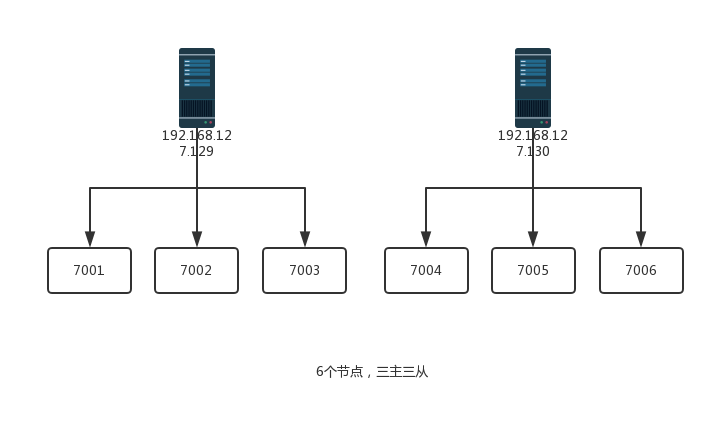
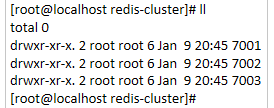
进入 目录,在这里我们建立一个redis集群文件夹,以及用来存放节点配置文件的三个文件夹7001,7002,7003。
将redis主目录里面的配置文件拷贝到这三个文件夹

vim 7001/redis.conf
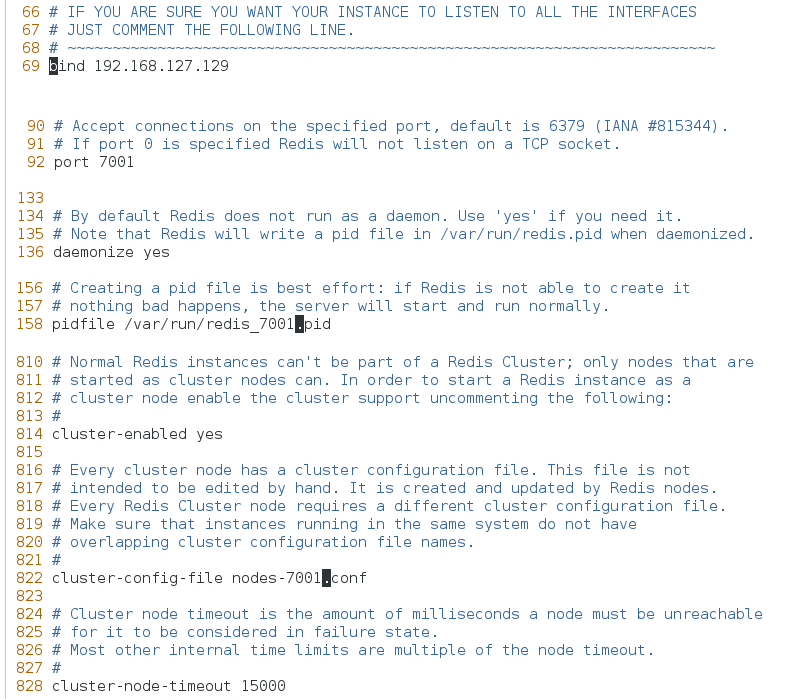
注意:如果不把bind的127.0.0.1改成网络ip,之后进行的工作会报错,如下,can't connect ...

对于上面的步骤,两台机器各安装一个redis,六个配置文件都要改,注意ip和端口。
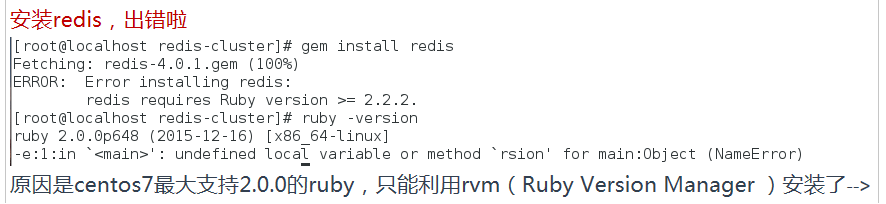
接下来我们的目标是 ,可是这个需要ruby环境(一台机器安装即可)。更需要2.2.2以上版本,然而centos7只能yum2.0.0,所以为了不让大家采坑,我们跳过网络上的教程,如下
 ,如果大家不信,我给你们看这种方式安装的问题
打开rvm官网:http://rvm.io/
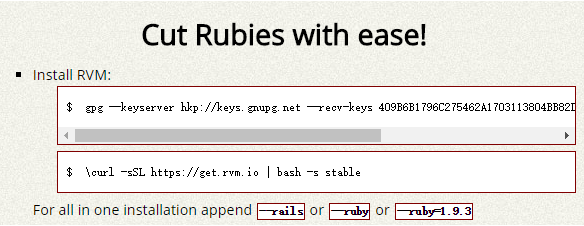
复制上面两段话到虚拟机

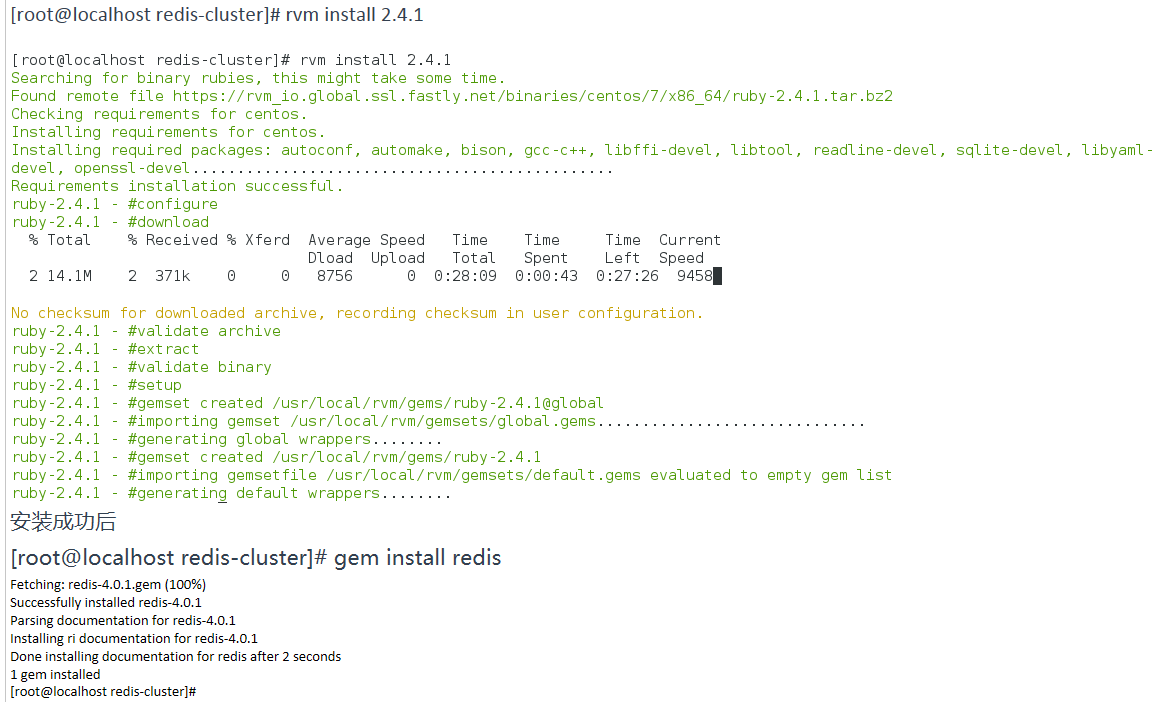
安装完之后

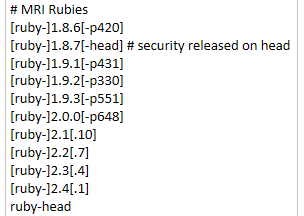
可以看到最高2.4.1(与官网不太一致哦注意,此时官网已经公布2.5.0)
下面安装
开启防火墙端口

[root@localhost redis-cluster]# firewall-cmd --zone=public --add-port=7001/tcp --permanent
success
[root@localhost redis-cluster]# firewall-cmd --zone=public --add-port=7002/tcp --permanent
success
[root@localhost redis-cluster]# firewall-cmd --zone=public --add-port=7003/tcp --permanent
success
[root@localhost redis-cluster]# systemctl restart firewalld
[root@localhost redis-cluster]# firewall-cmd --zone=public --add-port=7004/tcp --permanent
success
[root@localhost redis-cluster]# firewall-cmd --zone=public --add-port=7005/tcp --permanent
success
[root@localhost redis-cluster]# firewall-cmd --zone=public --add-port=7006/tcp --permanent
success
[root@localhost redis-cluster]# systemctl restart firewalld
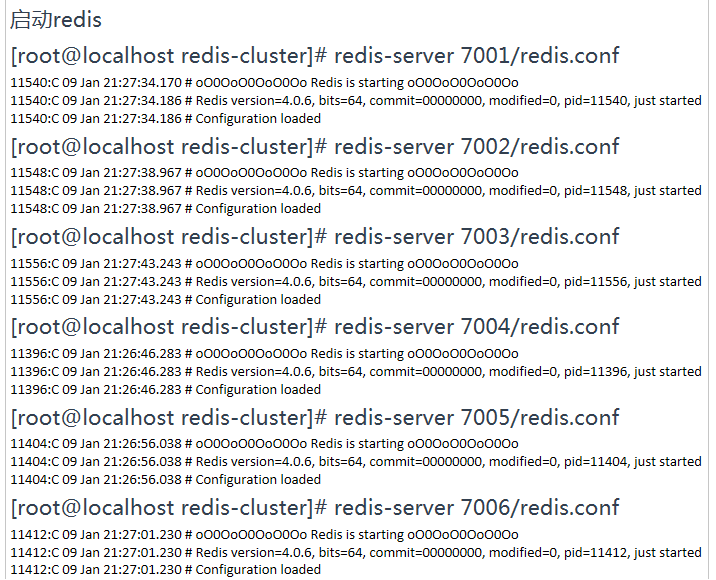
netstat -tunlp | grep redis
利用上面的命令查看启动情况
最后执行集群操作(安装ruby就是为了安装redis gem,而redis gem 是为了能运行redis-trib.rb)
[root@localhost redis-cluster]# redis-trib.rb create --replicas 1 192.168.127.129:7001 192.168.127.129:7002 192.168.127.129:7003 192.168.127.130:7004 192.168.127.130:7005 192.168.127.130:7006
>>> Creating cluster
>>> Performing hash slots allocation on 6 nodes...
Using 3 masters:
192.168.127.129:7001
192.168.127.130:7004
192.168.127.129:7002
Adding replica 192.168.127.130:7005 to 192.168.127.129:7001
Adding replica 192.168.127.129:7003 to 192.168.127.130:7004
Adding replica 192.168.127.130:7006 to 192.168.127.129:7002
M: 0383b1fbe71d8f4349a094711896632f5c54b40c 192.168.127.129:7001
   slots:0-5460 (5461 slots) master
M: 3811c6a22253dfc65d251d9408eb98d67e1452dd 192.168.127.129:7002
   slots:10923-16383 (5461 slots) master
S: cd061c004d5e369674959ac904c8388f81ae9d9b 192.168.127.129:7003
   replicates 822306088f036ee5e27fbe53420e2160f06408ea
M: 822306088f036ee5e27fbe53420e2160f06408ea 192.168.127.130:7004
   slots:5461-10922 (5462 slots) master
S: 7580e123ca9eff829540e5e7cd34afcbab5b2b64 192.168.127.130:7005
   replicates 0383b1fbe71d8f4349a094711896632f5c54b40c
S: 7914649b247bd38dacf8adb5d16460d02b02fb05 192.168.127.130:7006
   replicates 3811c6a22253dfc65d251d9408eb98d67e1452dd
Can I set the above configuration? (type 'yes' to accept): yes
>>> Nodes configuration updated
>>> Assign a different config epoch to each node
>>> Sending CLUSTER MEET messages to join the cluster
Waiting for the cluster to join.......
>>> Performing Cluster Check (using node 192.168.127.129:7001)
M: 0383b1fbe71d8f4349a094711896632f5c54b40c 192.168.127.129:7001
   slots:0-5460 (5461 slots) master
   1 additional replica(s)
S: cd061c004d5e369674959ac904c8388f81ae9d9b 192.168.127.129:7003
   slots: (0 slots) slave
   replicates 822306088f036ee5e27fbe53420e2160f06408ea
S: 7914649b247bd38dacf8adb5d16460d02b02fb05 192.168.127.130:7006
   slots: (0 slots) slave
   replicates 3811c6a22253dfc65d251d9408eb98d67e1452dd
M: 3811c6a22253dfc65d251d9408eb98d67e1452dd 192.168.127.129:7002
   slots:10923-16383 (5461 slots) master
   1 additional replica(s)
M: 822306088f036ee5e27fbe53420e2160f06408ea 192.168.127.130:7004
   slots:5461-10922 (5462 slots) master
   1 additional replica(s)
S: 7580e123ca9eff829540e5e7cd34afcbab5b2b64 192.168.127.130:7005
   slots: (0 slots) slave
   replicates 0383b1fbe71d8f4349a094711896632f5c54b40c
[OK] All nodes agree about slots configuration.
>>> Check for open slots...
>>> Check slots coverage...
[OK] All 16384 slots covered.


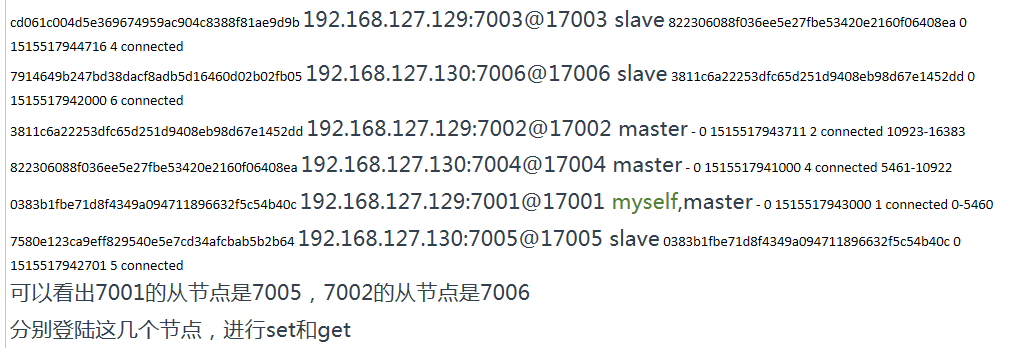
192.168.127.129:7001> cluster nodes
查看集群状态
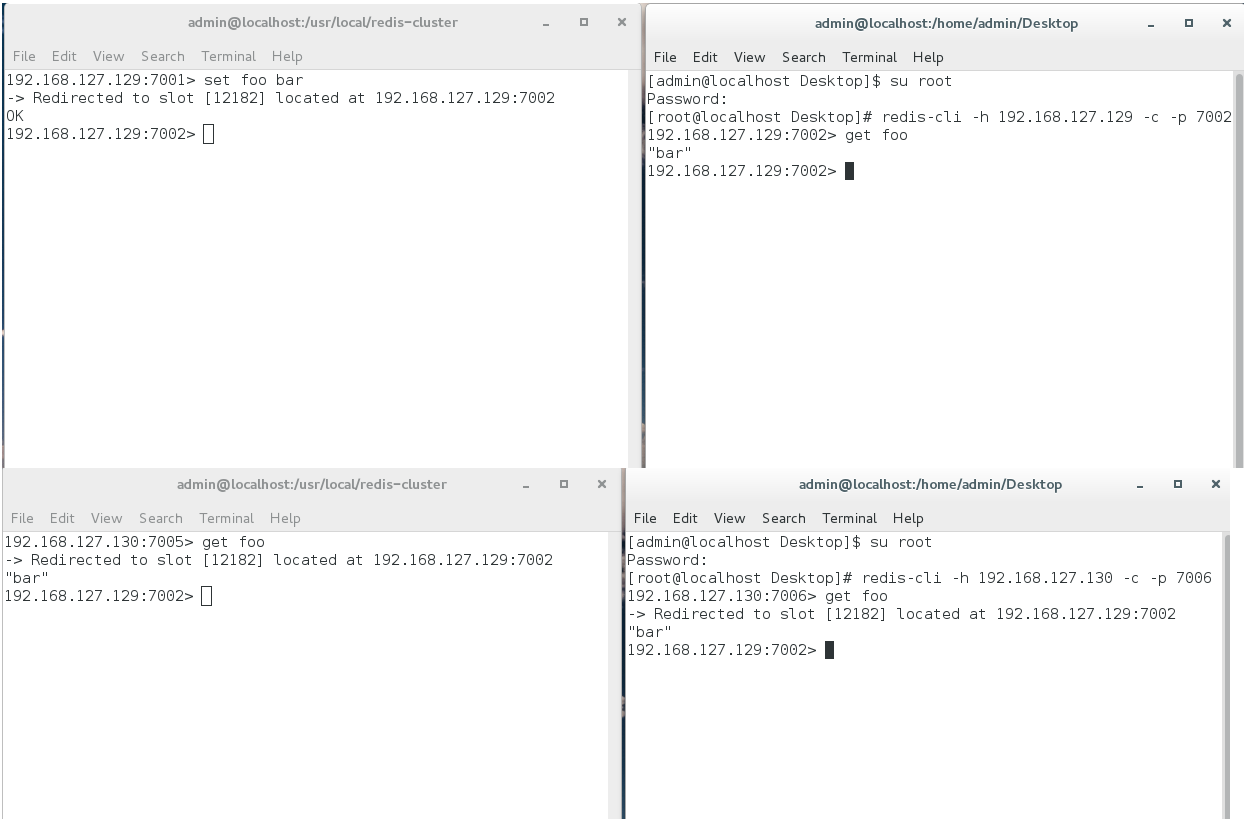
不难发现,集群中一个主节点set了一个值,其它主节点能获取到,从节点也能获取到。
到此,集群搭建完毕