还不知道spring配置的先去看这个,不然很多配置不理解
1、导包,需要在之前6个包的基础上再导入一个aop包
路径如下
spring-framework-4.2.4.RELEASE\libs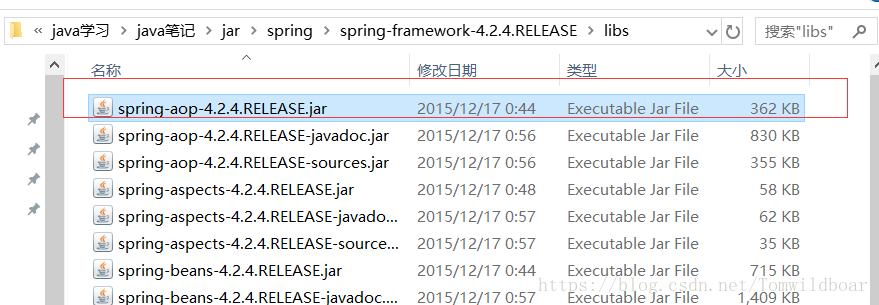
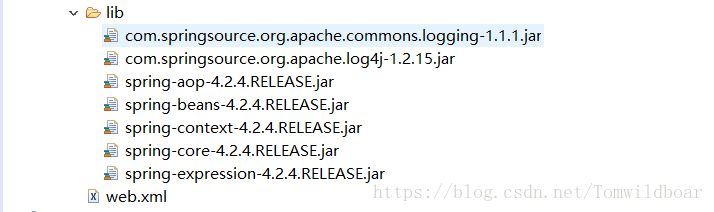
lib目录有以下包
2、导入约束,这个约束是基于入门配置的第二个约束,如果不知道第一个约束怎么导入,去看上面的链接
window->Preference
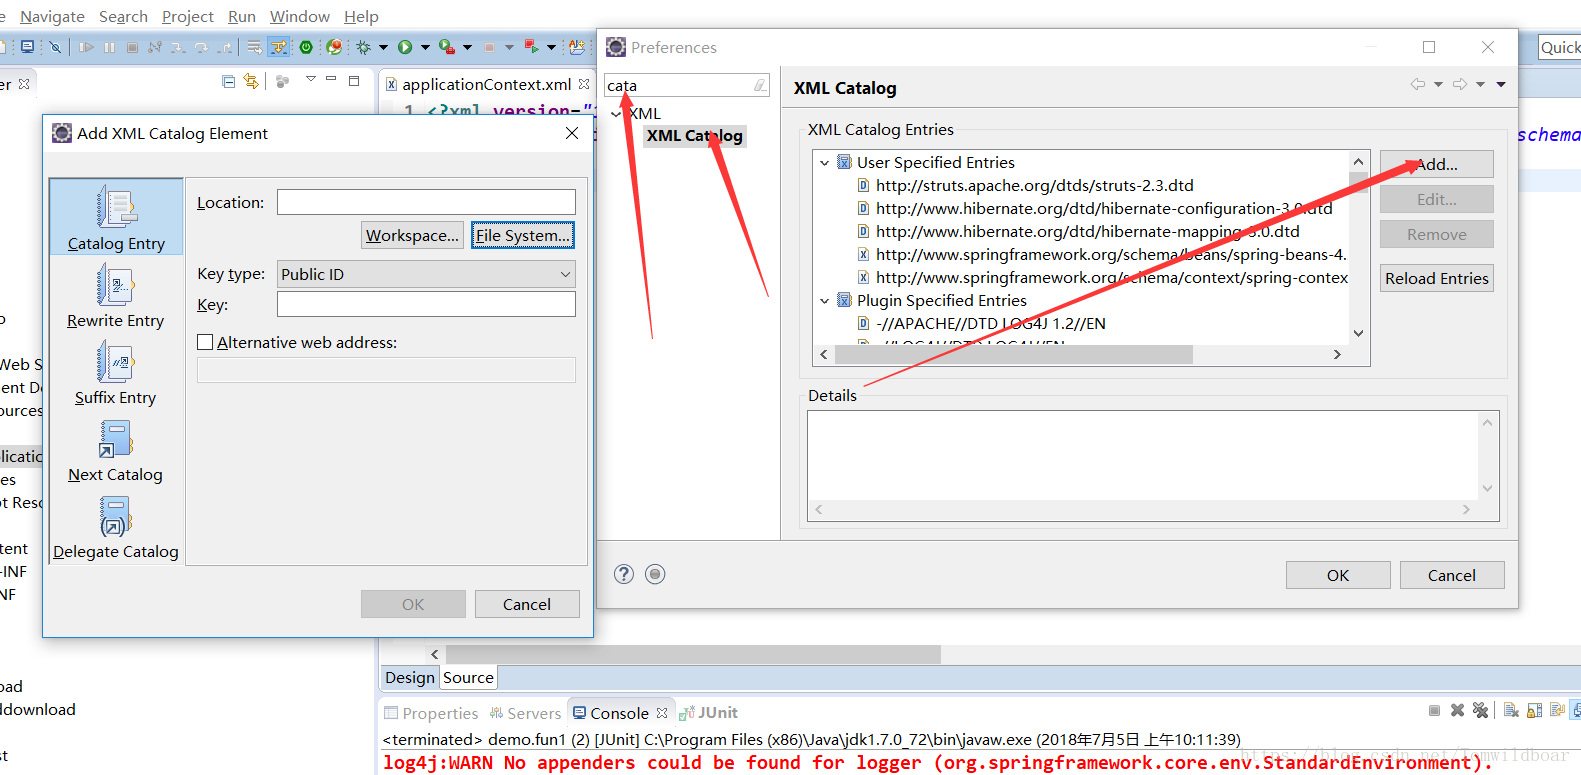

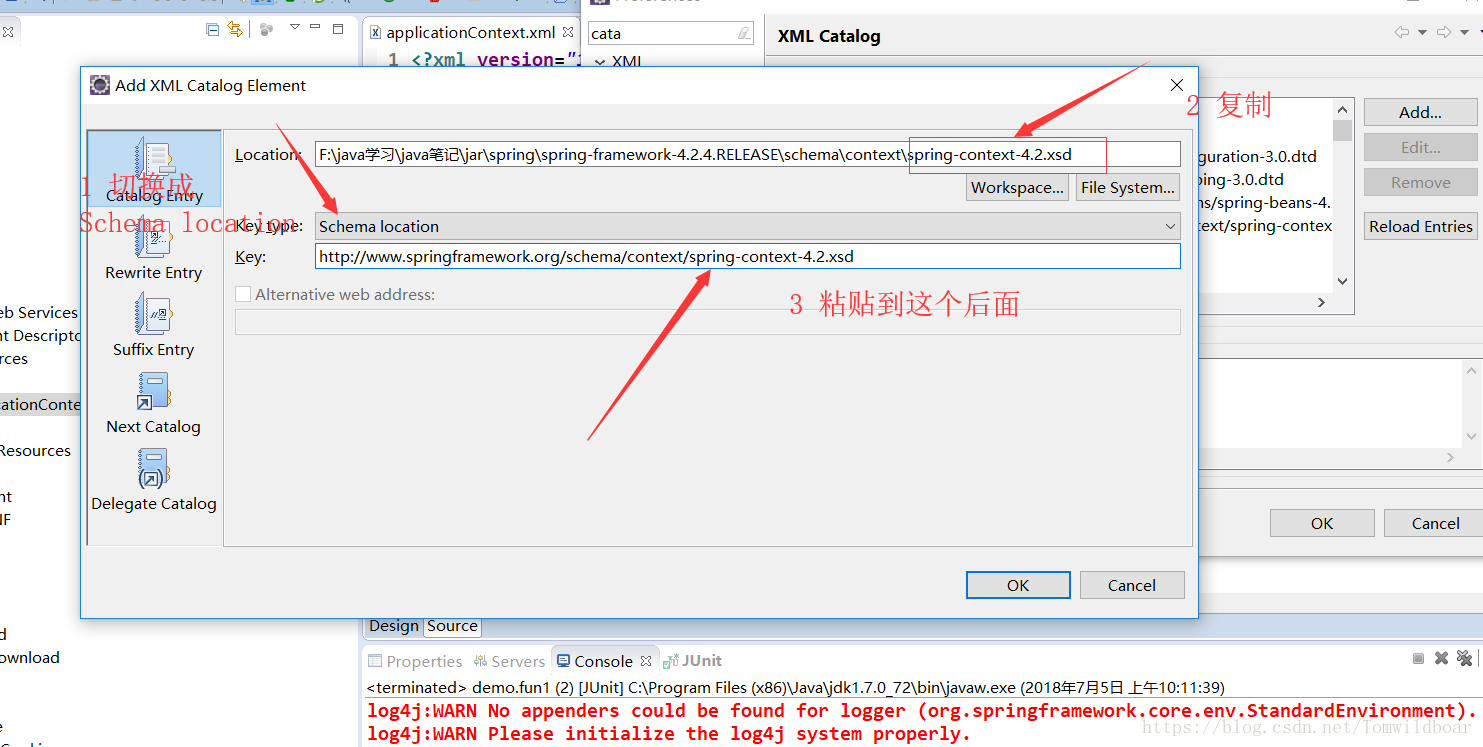
然后直接OK -> OK 就好了
3、配置约束
3-1 创建applicationContext.xml 并配置第一种约束,不懂得看开头链接。配置好了如下

3-2配置第二个约束
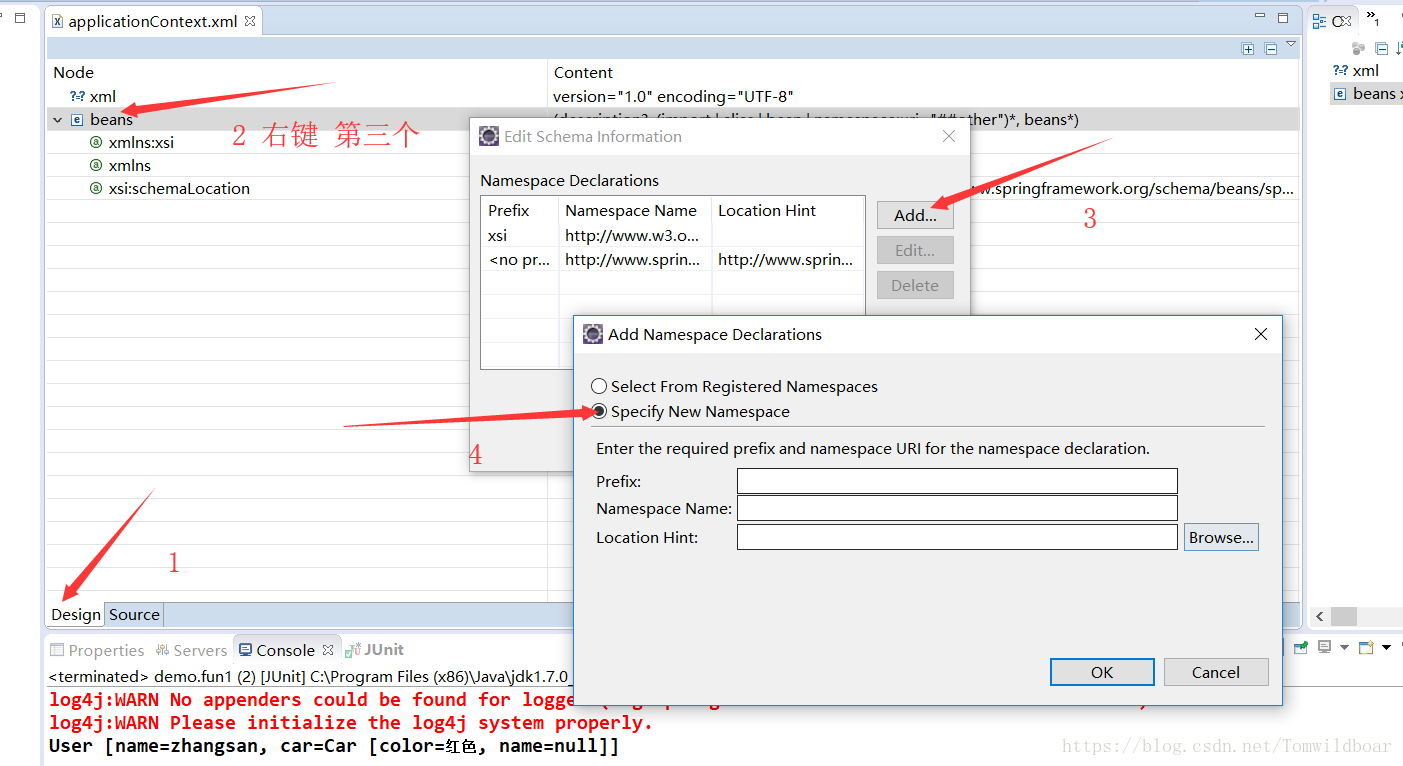
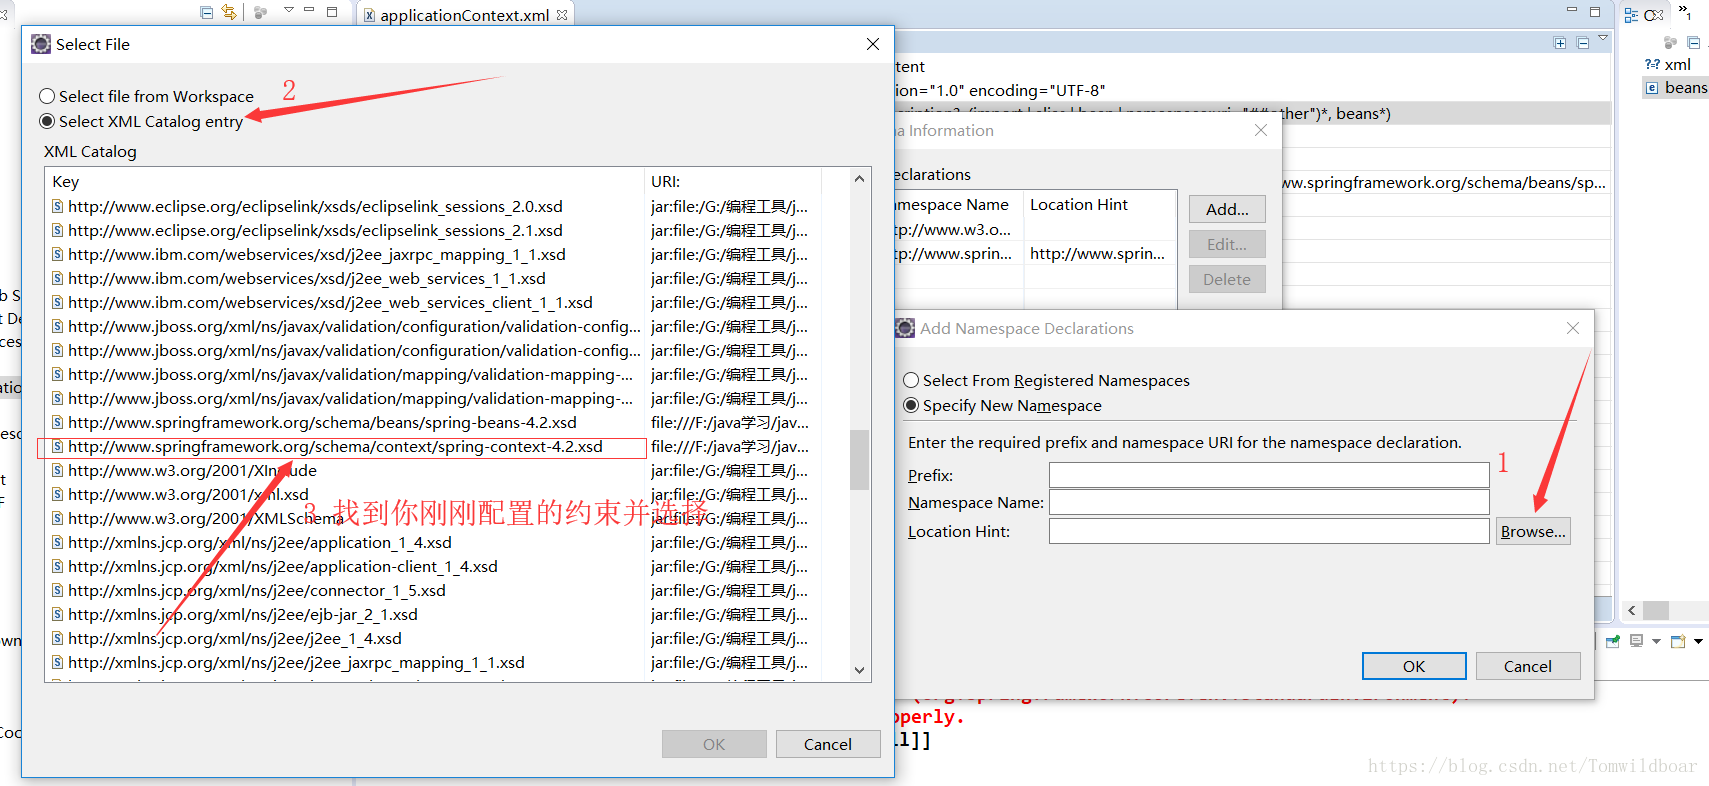

配置成功效果
4、实体创建 (注解基本都在这里了,我都在代码中详细解释了)
4-1 User实体主要实体注解基本都在这里面
package springDemo.bean;

import javax.annotation.PostConstruct;
import javax.annotation.PreDestroy;
import javax.annotation.Resource;

import org.springframework.beans.factory.annotation.Autowired;
import org.springframework.beans.factory.annotation.Qualifier;
import org.springframework.beans.factory.annotation.Value;
import org.springframework.context.annotation.Scope;
import org.springframework.stereotype.Component;
import org.springframework.stereotype.Controller;
import org.springframework.stereotype.Repository;
import org.springframework.stereotype.Service;

//相当于 <bean name="user" class="springDemo.bean.User" />
@Component("user")
//	@Service("user")		//service层
//	@Controller("user")		//web层
//	@Repository("user")		//dao层

//下面三个的Component的意义是一样的,但是为了使用者更好的阅读,一般建议采用下面的三个

//来指定对象的作用域
@Scope(scopeName="singleton")

public class User {

	//可以把value放在成员变量上或者set方法上
	//放在成员变量上 是通过反射的Fileld复制,破坏了封装性
	//放在sey方法上是通过Set方法复制,推荐使用

	//虽然放在成员变量上破坏了封装性但是更方便阅读,所以看个人喜欢把
	@Value("zhangsan")
	private String name;

	//@Autowired 和 @Qualifier 一般是配套使用,但是更建议使用@Resource(name="car")
	//@Autowired   //自动专配
	//问题:如果匹配多个类型一致的对象,将无法选择注入哪一个对象
	//@Qualifier("car") //值填写bean的name

	@Resource(name="car") //手动注入,指定注入对象
	private Car car;
	//在注入对象的时候,一定要先把这个对象配置到到域中  也就在Car类上加个 @Component("car")


	public Car getCar() {
		return car;
	}
	public void setCar(Car car) {
		this.car = car;
	}
	public String getName() {
		return name;
	}
	public void setName(String name) {
		this.name = name;
	}

	@PostConstruct   //在对象被创建后调用  init-method
	private void init() {
		System.out.println("初始化方法");
	}
	@PreDestroy     //在对象被销毁之前调用 destory-method
	private void destory() {
		System.out.println("销毁方法");
	}

	@Override
	public String toString() {
		return "User [name=" + name + ", car=" + car + "]";
	}

}
4-2 Car实体 辅助实体
package springDemo.bean;

import org.springframework.beans.factory.annotation.Value;
import org.springframework.stereotype.Component;

@Component("car")
public class Car {

	@Value("红色")
	private String color;
	private String name;
	public String getColor() {
		return color;
	}
	public void setColor(String color) {
		this.color = color;
	}
	public String getName() {
		return name;
	}
	public void setName(String name) {
		this.name = name;
	}
	@Override
	public String toString() {
		return "Car [color=" + color + ", name=" + name + "]";
	}

}
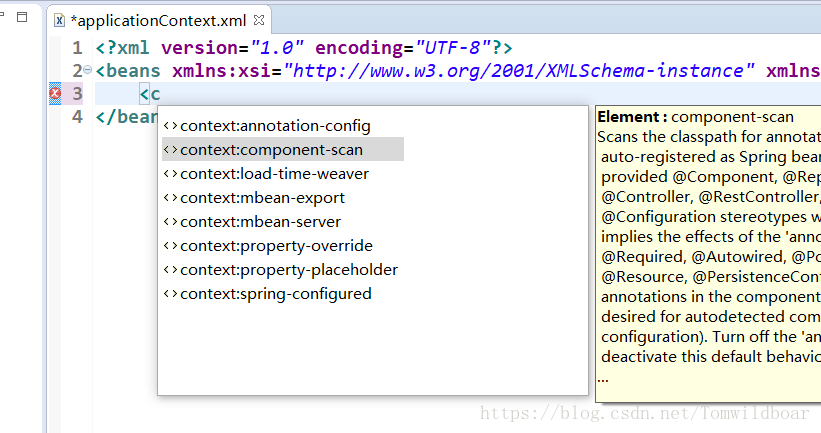
5、applicationContext.xml 配置
<?xml version="1.0" encoding="UTF-8"?>
<beans xmlns:xsi="http://www.w3.org/2001/XMLSchema-instance" xmlns="http://www.springframework.org/schema/beans" xmlns:context="http://www.springframework.org/schema/context" xsi:schemaLocation="http://www.springframework.org/schema/beans http://www.springframework.org/schema/beans/spring-beans-4.2.xsd http://www.springframework.org/schema/context http://www.springframework.org/schema/context/spring-context-4.2.xsd ">

	<!-- 开启使用注解代替配置文件 -->
	<!-- 指定扫描springDemo.bean包下的所有类中的注解,也会扫描下面所有的子包 -->
	<context:component-scan base-package="springDemo.bean"></context:component-scan>
</beans>
6、测试
package springDemo.test;

import org.junit.Test;
import org.springframework.context.ApplicationContext;
import org.springframework.context.support.ClassPathXmlApplicationContext;

import springDemo.bean.User;

public class Demo {

	@Test
	public void fun1(){

		//1、创建容器对象
		ApplicationContext ac = new ClassPathXmlApplicationContext("applicationContext.xml");

		//2、向容器要对象
		User u = (User) ac.getBean("user");
		System.out.println(u);

	}
}