1.服务端和服务端引入相关cxf的jar包:

(2).采用导包方式:

2.服务端编写:
(1).定义接口:

(2).实现该接口,进行相应的业务逻辑:

(3).spring的配置文件编写:
 1 <?xml version="1.0" encoding="UTF-8"?>
 2 <beans xmlns="http://www.springframework.org/schema/beans"
 3     xmlns:xsi="http://www.w3.org/2001/XMLSchema-instance"
 4     xmlns:cxf="http://cxf.apache.org/core"
 5     xmlns:jaxws="http://cxf.apache.org/jaxws"
 6     xmlns:jaxrs="http://cxf.apache.org/jaxrs"
 7     xsi:schemaLocation="
 8         http://www.springframework.org/schema/beans
 9         http://www.springframework.org/schema/beans/spring-beans.xsd
10         http://cxf.apache.org/core
11         http://cxf.apache.org/schemas/core.xsd
12         http://cxf.apache.org/jaxws
13         http://cxf.apache.org/schemas/jaxws.xsd
14         http://cxf.apache.org/jaxrs
15         http://cxf.apache.org/schemas/jaxrs.xsd
16         ">
17     <bean id="weatherService" class="cn.itcast.webservice.WeatherService"></bean>
18     <jaxws:server address="/weather">
19         <jaxws:serviceBean>
20             <ref bean="weatherService"/>
21         </jaxws:serviceBean>
22     </jaxws:server>
23
24 </beans>
这里xsd约束记得添加上,以及注册bean,以及jaxws:server的配置,别写成jaxrs:server了
(4)web.xml的配置:
1).简单版:
 1 <?xml version="1.0" encoding="UTF-8"?>
 2 <web-app xmlns:xsi="http://www.w3.org/2001/XMLSchema-instance"
 3     xmlns="http://java.sun.com/xml/ns/javaee"
 4     xsi:schemaLocation="http://java.sun.com/xml/ns/javaee http://java.sun.com/xml/ns/javaee/web-app_2_5.xsd"
 5     id="WebApp_ID" version="2.5">
 6     <display-name>ws2803</display-name>
 7     <welcome-file-list>
 8         <welcome-file>index.jsp</welcome-file>
 9     </welcome-file-list>
10
11     <!-- spring监听器 -->
12     <listener>
13         <listener-class>org.springframework.web.context.ContextLoaderListener</listener-class>
14     </listener>
15     <!-- 配置sprnig的配置文件 -->
16     <context-param>
17         <param-name>contextConfigLocation</param-name>
18         <param-value>classpath:applicationContext.xml</param-value>
19     </context-param>
20     <!-- CXF核心控制器的配置 -->
21     <servlet>
22         <servlet-name>cxf</servlet-name>
23         <servlet-class>org.apache.cxf.transport.servlet.CXFServlet</servlet-class>
24     </servlet>
25     <servlet-mapping>
26         <servlet-name>cxf</servlet-name>
27         <url-pattern>/ws/*</url-pattern>
28     </servlet-mapping>
29 </web-app>
配置spring的基本配置与cxf的核心控制器的配置
2).与spring的过滤器整合方式:
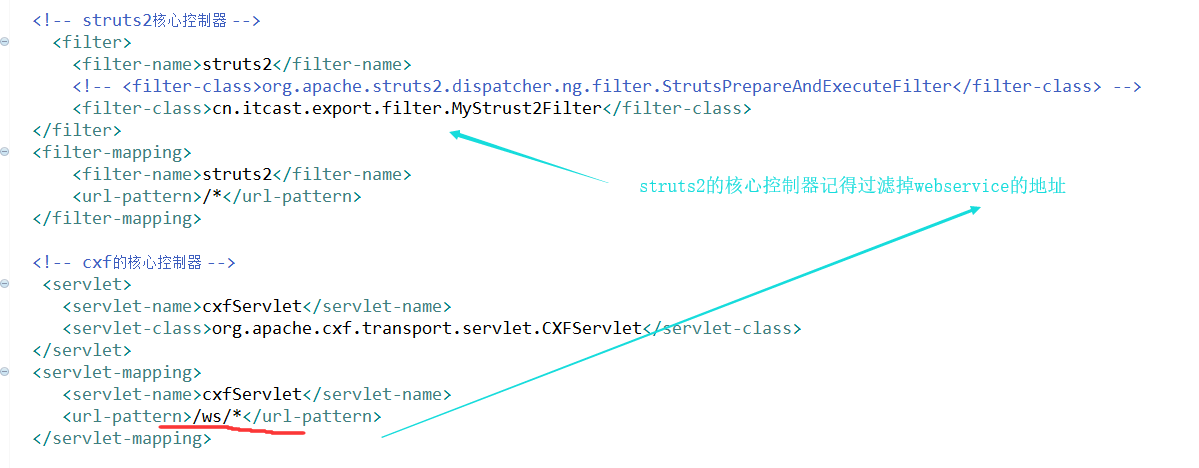
图 1

图 2
(5)部署发布:
1).如果是web项目直接服务器发布就行:

2).java工程采用main函数方式:

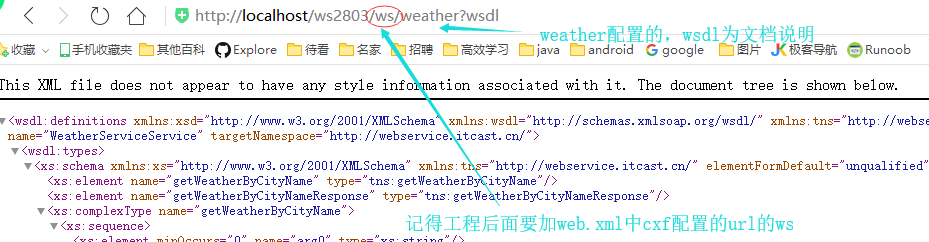
(6).测试是否发布成功:
3.客户端编写:
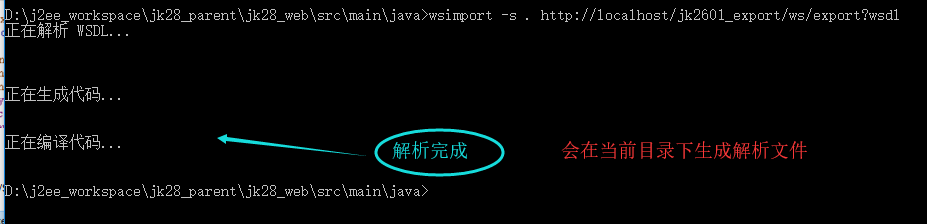
(1).采用jdk自带的wsimport.exe工具解析文档说明书(上面的wsdl):

(2).复制client的src目录,然后进入该目录,使用wsimport命令解析成java文件

wsimport -s . http://localhost/ws2803/ws/weather?wsdl
命令-s 解析到制定文件
命令. 指解析当当前文件
(3)spring中applicationContext.xml的配置,主要是客户端的配置,IWeatherService为解析出来的接口
 1 <?xml version="1.0" encoding="UTF-8"?>
 2 <beans xmlns="http://www.springframework.org/schema/beans"
 3     xmlns:xsi="http://www.w3.org/2001/XMLSchema-instance"
 4     xmlns:cxf="http://cxf.apache.org/core"
 5     xmlns:jaxws="http://cxf.apache.org/jaxws"
 6     xmlns:jaxrs="http://cxf.apache.org/jaxrs"
 7     xsi:schemaLocation="
 8         http://www.springframework.org/schema/beans
 9         http://www.springframework.org/schema/beans/spring-beans.xsd
10         http://cxf.apache.org/core
11         http://cxf.apache.org/schemas/core.xsd
12         http://cxf.apache.org/jaxws
13         http://cxf.apache.org/schemas/jaxws.xsd
14         http://cxf.apache.org/jaxrs
15         http://cxf.apache.org/schemas/jaxrs.xsd
16         ">
17
18     <jaxws:client id="weatherBean" address="http://localhost/ws2803/ws/weather?wsdl"
19         serviceClass="cn.itcast.webservice.IWeatherService">
20     </jaxws:client>
21 </beans>
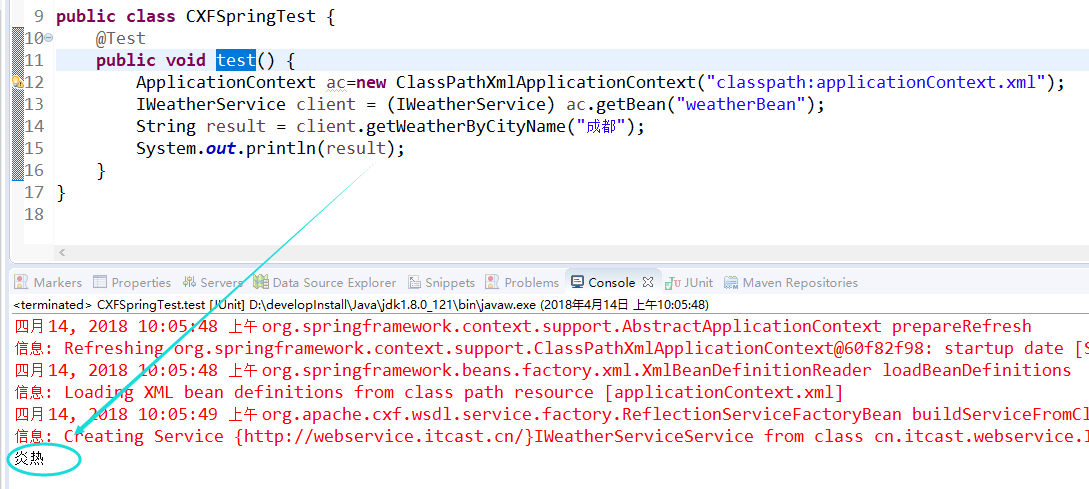
(4).测试:
1).引入applicationContext.xml形式
2).采用注解方式:
