一步一步安装(CentOS)
环境
- 系统: CentOS 7
- IP: 192.168.2.10
- 关闭 selinux 和防火墙
# CentOS 7
$ setenforce 0  # 可以设置配置文件永久关闭
$ systemctl stop iptables.service
$ systemctl stop firewalld.service

# 修改字符集,否则可能报 input/output error的问题,因为日志里打印了中文
$ localedef -c -f UTF-8 -i zh_CN zh_CN.UTF-8
$ export LC_ALL=zh_CN.UTF-8
$ echo 'LANG="zh_CN.UTF-8"' > /etc/locale.conf

# CentOS6
$ setenforce 0
$ service iptables stop

# 修改字符集,否则可能报 input/output error的问题,因为日志里打印了中文
$ localedef -c -f UTF-8 -i zh_CN zh_CN.UTF-8
$ export LC_ALL=zh_CN.UTF-8
$ echo 'LANG=zh_CN.UTF-8' > /etc/sysconfig/i18n
一. 准备 Python3 和 Python 虚拟环境
1.1 安装依赖包
$ yum -y install wget sqlite-devel xz gcc automake zlib-devel openssl-devel epel-release git
Yum 加速设置请参考 <http://mirrors.163.com/.help/centos.html>
1.2 编译安装
$ wget https://www.python.org/ftp/python/3.6.1/Python-3.6.1.tar.xz
$ tar xvf Python-3.6.1.tar.xz  && cd Python-3.6.1
$ ./configure && make && make install

# 这里必须执行编译安装,否则在安装 Python 库依赖时会有麻烦...
1.3 建立 Python 虚拟环境
因为 CentOS 6/7 自带的是 Python2,而 Yum 等工具依赖原来的 Python,为了不扰乱原来的环境我们来使用 Python 虚拟环境
$ cd /opt
$ python3 -m venv py3
$ source /opt/py3/bin/activate

# 看到下面的提示符代表成功,以后运行 Jumpserver 都要先运行以上 source 命令,以下所有命令均在该虚拟环境中运行
(py3) [root@localhost py3]
1.4 自动载入 Python 虚拟环境配置
此项仅为懒癌晚期的人员使用,防止运行 Jumpserver 时忘记载入 Python 虚拟环境导致程序无法运行。使用autoenv
$ cd /opt
$ git clone git://github.com/kennethreitz/autoenv.git
$ echo 'source /opt/autoenv/activate.sh' >> ~/.bashrc
$ source ~/.bashrc
二. 安装 Jumpserver
2.1 下载或 Clone 项目
项目提交较多 git clone 时较大,你可以选择去 Github 项目页面直接下载zip包。
$ cd /opt/
$ git clone https://github.com/jumpserver/jumpserver.git && cd jumpserver && git checkout master
# mv jumpserver-master jumpserver(如果是下载zip包,解压后需要手动改下名称)
$ echo "source /opt/py3/bin/activate" > /opt/jumpserver/.env  # 进入 jumpserver 目录时将自动载入 python 虚拟环境
2.2 安装依赖 RPM 包
$ cd /opt/jumpserver/requirements
# 首次进入 jumpserver 文件夹会有提示,按 y 即可
# Are you sure you want to allow this? (y/N) y
$ yum -y install $(cat rpm_requirements.txt) # 如果没有任何报错请继续
2.3 安装 Python 库依赖
$ pip install -r requirements.txt  # 不要指定-i参数,因为镜像上可能没有最新的包,如果没有任何报错请继续
(py3) [root@uu requirements]# pip install -r requirements.txt
Collecting amqp==2.1.4 (from -r requirements.txt (line 1))
  Could not fetch URL https://pypi.python.org/simple/amqp/: There was a problem confirming the ssl certificate: [SSL: CERTIFICATE_VERIFY_FAILED] certificate verify failed (_ssl.c:749) - skipping
  Could not find a version that satisfies the requirement amqp==2.1.4 (from -r requirements.txt (line 1)) (from versions: )
No matching distribution found for amqp==2.1.4 (from -r requirements.txt (line 1))
解决:
(py3) [root@uu requirements]# date
2017年 08月 19日 星期六 03:25:05 CST
(py3) [root@uu requirements]# crontab -e
no crontab for root - using an empty one
*/10 * * * * /usr/sbin/ntpdate pool.ntp.org >/dev/null 2>&1
Pip 加速设置请参考 <https://segmentfault.com/a/1190000011875306>
2.4 安装 Redis, Jumpserver 使用 Redis 做 cache 和 celery broke
$ yum -y install redis
$ systemctl start redis

# centos6
$ service redis start
2.5 安装 MySQL
本教程使用 Mysql 作为数据库,如果不使用 Mysql 可以跳过相关 Mysql 安装和配置
# centos7
$ yum -y install mariadb mariadb-devel mariadb-server # centos7下安装的是mariadb
$ systemctl enable mariadb
$ systemctl start mariadb

# centos6
$ yum -y install mysql mysql-devel mysql-server
$ chkconfig mysqld on
$ service mysqld start
2.6 创建数据库 Jumpserver 并授权
$ mysql
> create database jumpserver default charset 'utf8';
> grant all on jumpserver.* to 'jumpserver'@'127.0.0.1' identified by 'somepassword';
> flush privileges;
2.7 修改 Jumpserver 配置文件
$ cd /opt/jumpserver
$ cp config_example.py config.py
$ vi config.py

# 注意对齐,不要直接复制本文档的内容
注意: 配置文件是 Python 格式,不要用 TAB,而要用空格
"""
    jumpserver.config
    ~~~~~~~~~~~~~~~~~

    Jumpserver project setting file

    :copyright: (c) 2014-2017 by Jumpserver Team
 :license: GPL v2, see LICENSE for more details. """ import os BASE_DIR = os.path.dirname(os.path.abspath(__file__)) class Config: # Use it to encrypt or decrypt data # Jumpserver 使用 SECRET_KEY 进行加密,请务必修改以下设置 # SECRET_KEY = os.environ.get('SECRET_KEY') or '2vym+ky!997d5kkcc64mnz06y1mmui3lut#(^wd=%s_qj$1%x' SECRET_KEY = '请随意输入随机字符串(推荐字符大于等于 50位)' # Django security setting, if your disable debug model, you should setting that ALLOWED_HOSTS = ['*'] # DEBUG 模式 True为开启 False为关闭,默认开启,生产环境推荐关闭 # 注意:如果设置了DEBUG = False,访问8080端口页面会显示不正常,需要搭建 nginx 代理才可以正常访问了 DEBUG = False # 日志级别,默认为DEBUG,可调整为INFO, WARNING, ERROR, CRITICAL,默认INFO LOG_LEVEL = 'ERROR' LOG_DIR = os.path.join(BASE_DIR, 'logs') # 使用的数据库配置,支持sqlite3, mysql, postgres等,默认使用sqlite3 # See https://docs.djangoproject.com/en/1.10/ref/settings/#databases # 默认使用SQLite,如果使用其他数据库请注释下面两行 # DB_ENGINE = 'sqlite3' # DB_NAME = os.path.join(BASE_DIR, 'data', 'db.sqlite3') # # 如果需要使用mysql或postgres,请取消下面的注释并输入正确的信息,本例使用mysql做演示 DB_ENGINE = 'mysql' DB_HOST = '127.0.0.1' DB_PORT = 3306 DB_USER = 'jumpserver' DB_PASSWORD = 'somepassword' DB_NAME = 'jumpserver' # Django 监听的ip和端口,生产环境推荐把0.0.0.0修改成127.0.0.1,这里的意思是允许x.x.x.x访问,127.0.0.1表示仅允许自身访问 # ./manage.py runserver 127.0.0.1:8080 HTTP_BIND_HOST = '127.0.0.1' HTTP_LISTEN_PORT = 8080 # Redis 相关设置 REDIS_HOST = '127.0.0.1' REDIS_PORT = 6379 REDIS_PASSWORD = '' def __init__(self): pass def __getattr__(self, item): return None class DevelopmentConfig(Config): pass class TestConfig(Config): pass class ProductionConfig(Config): pass # Default using Config settings, you can write if/else for different env config = DevelopmentConfig()
2.8 生成数据库表结构和初始化数据
$ cd /opt/jumpserver/utils
$ bash make_migrations.sh
2.9 运行 Jumpserver
$ cd /opt/jumpserver
$ ./jms start all  # 后台运行使用 -d 参数./jms start all -d

# 新版本更新了运行脚本,使用方式./jms start|stop|status|restart all  后台运行请添加 -d 参数
运行不报错,请浏览器访问 http://192.168.2.10:8080/ 默认账号: admin 密码: admin 页面显示不正常先不用处理,跟着教程继续操作就行,后面搭建 nginx 代理就可以正常访问了
三. 安装 SSH Server 和 WebSocket Server: Coco
3.1 下载或 Clone 项目
新开一个终端,连接测试机,别忘了 source /opt/py3/bin/activate
$ cd /opt
$ source /opt/py3/bin/activate
$ git clone https://github.com/jumpserver/coco.git && cd coco && git checkout master
$ echo "source /opt/py3/bin/activate" > /opt/coco/.env  # 进入 coco 目录时将自动载入 python 虚拟环境

# 首次进入 coco 文件夹会有提示,按 y 即可
# Are you sure you want to allow this? (y/N) y
3.2 安装依赖
$ cd /opt/coco/requirements
$ yum -y  install $(cat rpm_requirements.txt)
$ pip install -r requirements.txt -i https://pypi.org/simple
3.3 修改配置文件并运行
$ cd /opt/coco
$ cp conf_example.py conf.py  # 如果 coco 与 jumpserver 分开部署,请手动修改 conf.py
$ vi conf.py

# 注意对齐,不要直接复制本文档的内容
注意: 配置文件是 Python 格式,不要用 TAB,而要用空格
#!/usr/bin/env python3
# -*- coding: utf-8 -*-
#

import os

BASE_DIR = os.path.dirname(__file__) class Config: """  Coco config file, coco also load config from server update setting below  """ # 项目名称, 会用来向Jumpserver注册, 识别而已, 不能重复 # NAME = "localhost" NAME = "coco" # Jumpserver项目的url, api请求注册会使用, 如果Jumpserver没有运行在127.0.0.1:8080,请修改此处 # CORE_HOST = os.environ.get("CORE_HOST") or 'http://127.0.0.1:8080' CORE_HOST = 'http://127.0.0.1:8080' # 启动时绑定的ip, 默认 0.0.0.0 # BIND_HOST = '0.0.0.0' # 监听的SSH端口号, 默认2222 # SSHD_PORT = 2222 # 监听的HTTP/WS端口号,默认5000 # HTTPD_PORT = 5000 # 项目使用的ACCESS KEY, 默认会注册,并保存到 ACCESS_KEY_STORE中, # 如果有需求, 可以写到配置文件中, 格式 access_key_id:access_key_secret # ACCESS_KEY = None # ACCESS KEY 保存的地址, 默认注册后会保存到该文件中 # ACCESS_KEY_STORE = os.path.join(BASE_DIR, 'keys', '.access_key') # 加密密钥 # SECRET_KEY = None # 设置日志级别 ['DEBUG', 'INFO', 'WARN', 'ERROR', 'FATAL', 'CRITICAL'] # LOG_LEVEL = 'INFO' # 日志存放的目录 # LOG_DIR = os.path.join(BASE_DIR, 'logs') # Session录像存放目录 # SESSION_DIR = os.path.join(BASE_DIR, 'sessions') # 资产显示排序方式, ['ip', 'hostname'] # ASSET_LIST_SORT_BY = 'ip' # 登录是否支持密码认证 # PASSWORD_AUTH = True # 登录是否支持秘钥认证 # PUBLIC_KEY_AUTH = True # 和Jumpserver 保持心跳时间间隔 # HEARTBEAT_INTERVAL = 5 # Admin的名字,出问题会提示给用户 # ADMINS = '' COMMAND_STORAGE = { "TYPE": "server" } REPLAY_STORAGE = { "TYPE": "server" } config = Config()
$ ./cocod start  # 后台运行使用 -d 参数./cocod start -d

# 新版本更新了运行脚本,使用方式./cocod start|stop|status|restart  后台运行请添加 -d 参数
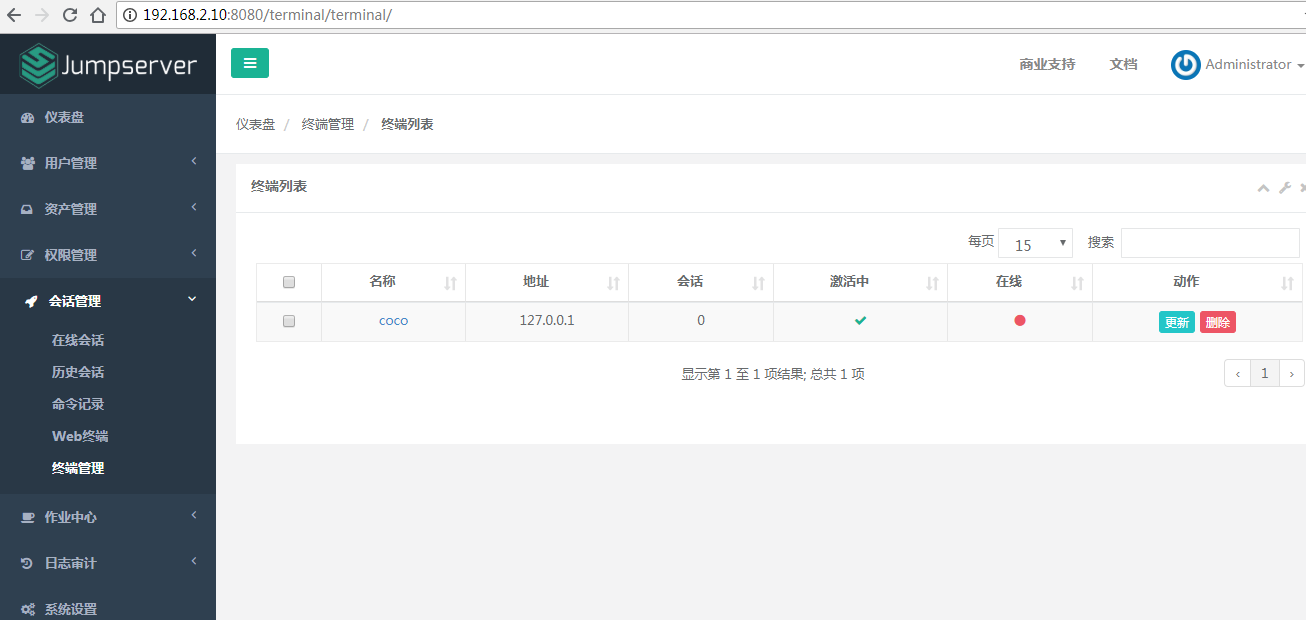
启动成功后去Jumpserver 会话管理-终端管理(http://192.168.2.10:8080/terminal/terminal/)接受coco的注册,如果页面不正常可以等部署完成后再处理
四. 安装 Web Terminal 前端: Luna
Luna 已改为纯前端,需要 Nginx 来运行访问
访问(https://github.com/jumpserver/luna/releases)下载对应版本的 release 包,直接解压,不需要编译
4.1 解压 Luna
$ cd /opt
$ wget https://github.com/jumpserver/luna/releases/download/1.3.2/luna.tar.gz
$ tar xvf luna.tar.gz
$ chown -R root:root luna
五. 安装 Windows 支持组件(如果不需要管理 windows 资产,可以直接跳过这一步)
因为手动安装 guacamole 组件比较复杂,这里提供打包好的 docker 使用, 启动 guacamole
5.1 Docker安装 (仅针对CentOS7,CentOS6安装Docker相对比较复杂)
$ yum remove docker-latest-logrotate  docker-logrotate  docker-selinux dockdocker-engine
$ yum install -y yum-utils   device-mapper-persistent-data   lvm2

# 添加docker官方源
$ yum-config-manager     --add-repo     https://download.docker.com/linux/centos/docker-ce.repo
$ yum makecache fast
$ yum install docker-ce


# 国内部分用户可能无法连接docker官网提供的源,这里提供阿里云的镜像节点供测试使用
$ yum-config-manager --add-repo http://mirrors.aliyun.com/docker-ce/linux/centos/docker-ce.repo
$ rpm --import http://mirrors.aliyun.com/docker-ce/linux/centos/gpg
$ yum makecache fast
$ yum -y install docker-ce

$ systemctl start docker
$ systemctl status docker
5.2 启动 Guacamole
这里所需要注意的是 guacamole 暴露出来的端口是 8081,若与主机上其他端口冲突请自定义
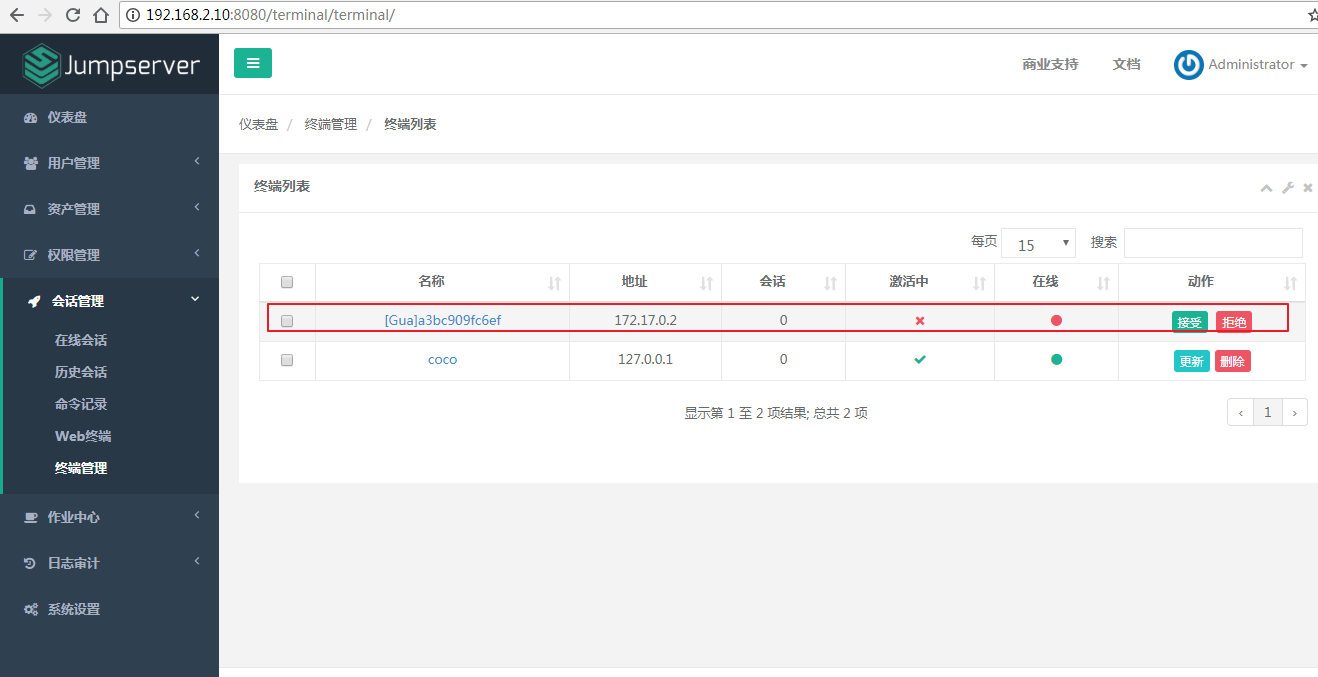
修改下面 docker run 里的 JUMPSERVER_SERVER 参数,填上 Jumpserver 的 url 地址, 启动成功后去 Jumpserver 会话管理-终端管理(http://192.168.2.10:8080/terminal/terminal/)接受[Gua]开头的一个注册,如果页面显示不正常可以等部署完成后再处理
# 注意:这里需要修改下 http://<填写jumpserver的url地址> 例: http://192.168.2.10, 否则会出错, 带宽有限, 下载时间可能有点长,可以喝杯咖啡,撩撩对面的妹子

$ docker run --name jms_guacamole -d \
  -p 8081:8080 -v /opt/guacamole/key:/config/guacamole/key \
  -e JUMPSERVER_KEY_DIR=/config/guacamole/key \
  -e JUMPSERVER_SERVER=http://<填写jumpserver的url地址>:8080 \
  registry.jumpserver.org/public/guacamole:latest
六. 配置 Nginx 整合各组件
6.1 安装 Nginx 根据喜好选择安装方式和版本
$ yum -y install nginx
6.2 准备配置文件 修改 /etc/nginx/nginx.conf
内容如下:
$ vim /etc/nginx/nginx.conf

... 省略
# 把默认server配置块改成这样

server {
    listen 80;  # 代理端口,以后将通过此端口进行访问,不再通过8080端口

    proxy_set_header X-Real-IP $remote_addr;
    proxy_set_header Host $host;
    proxy_set_header X-Forwarded-For $proxy_add_x_forwarded_for;

    location /luna/ {
        try_files $uri / /index.html;
        alias /opt/luna/;
    }

    location /media/ {
        add_header Content-Encoding gzip;
        root /opt/jumpserver/data/;
    }

    location /static/ {
        root /opt/jumpserver/data/;
    }

    location /socket.io/ {
        proxy_pass       http://localhost:5000/socket.io/;  # 如果coco安装在别的服务器,请填写它的ip
        proxy_buffering off;
        proxy_http_version 1.1;
        proxy_set_header Upgrade $http_upgrade;
        proxy_set_header Connection "upgrade";
    }

    location /guacamole/ {
        proxy_pass       http://localhost:8081/;  # 如果guacamole安装在别的服务器,请填写它的ip
        proxy_buffering off;
        proxy_http_version 1.1;
        proxy_set_header X-Forwarded-For $proxy_add_x_forwarded_for;
        proxy_set_header Upgrade $http_upgrade;
        proxy_set_header Connection $http_connection;
        access_log off;
        client_max_body_size 100m;  # Windows 文件上传大小限制
    }

    location / {
        proxy_pass http://localhost:8080;  # 如果jumpserver安装在别的服务器,请填写它的ip
    }
}

... 省略
6.3 运行 Nginx
nginx -t   # 确保配置没有问题, 有问题请先解决

# CentOS 7
$ systemctl start nginx
$ systemctl enable nginx


# CentOS 6
$ service nginx start
$ chkconfig nginx on
6.4 开始使用 Jumpserver
检查应用是否已经正常运行
$ cd /opt/jumpserver
$ ./jms status  # 确定jumpserver已经运行,如果没有运行请重新启动jumpserver

$ cd /opt/coco
$ ./cocod status  # 确定jumpserver已经运行,如果没有运行请重新启动coco

# 如果安装了 Guacamole
$ docker ps  # 检查容器是否已经正常运行,如果没有运行请重新启动Guacamole
服务全部启动后,访问 http://192.168.2.10,访问nginx代理的端口,不要再通过8080端口访问
默认账号: admin 密码: admin
如果部署过程中没有接受应用的注册,需要到Jumpserver 会话管理-终端管理 接受 Coco Guacamole 等应用的注册。
** 测试连接**
如果登录客户端是 macOS 或 Linux ,登录语法如下
$ ssh -p2222 [email protected]
$ sftp -P2222 [email protected]
密码: admin

如果登录客户端是 Windows ,Xshell Terminal 登录语法如下
$ ssh [email protected] 2222
$ sftp [email protected] 2222
密码: admin
如果能登陆代表部署成功

# sftp默认上传的位置在资产的 /tmp 目录下
# windows拖拽上传的位置在资产的 Guacamole RDP上的 G 目录下