参考:https://www.cnblogs.com/kevingrace/p/7821529.html
一,设置开启备份以及备份路径
/etc/gitlab/gitlab.rb
gitlab_rails['manage_backup_path'] = true               #开启备份
gitlab_rails['backup_path'] = "/data/gitlab/backups" #设置备份路径
gitlab_rails['backup_archive_permissions'] = 0644    #备份文件的权限
gitlab_rails['backup_keep_time'] = 604800                #备份保留天数这里单位是秒是7天
创建备份路径并且设置权限
mkdir -p /data/gitlab/backups
chown -R git.git /data/gitlab/backups
chmod -R 777 /data/gitlab/backups
设置生效
gitlab-ctl reconfigure
二,手动使用命令备份
gitlab-rake gitlab:backup:create

执行完毕可以在备份路径下面看到备份文件

设置脚步定时备份
gitlab_backup.sh
#!/bin/bash
/usr/bin/gitlab-rake gitlab:backup:create CRON=1
PS:环境变量CRON=1的作用是如果没有任何错误发生时, 抑制备份脚本的所有进度输出
crontab -e
0 0,6,12,18 * * * /bin/bash -x /data/gitlab/backups/gitlab_backup.sh > /dev/null 2>&1
三,恢复操作
停止数据库连接
gitlab-ctl stop unicorn
gitlab-ctl stop sidekiq
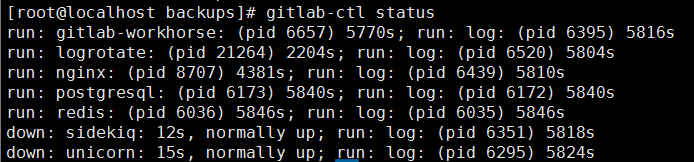
查看状态
gitlab-ctl status
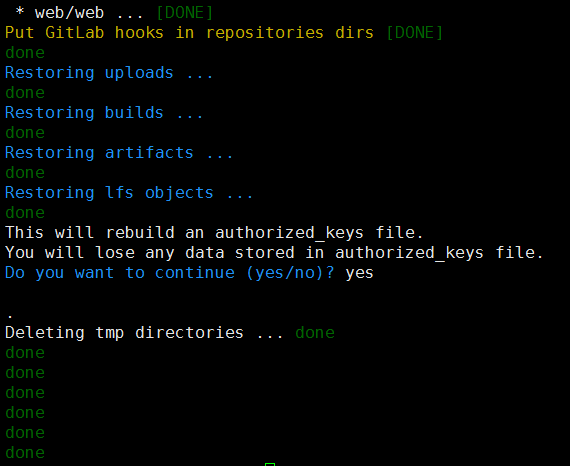
恢复(遇到需要输入则输入yes)
恢复之前可以删除一个测试库比如test然后在恢复以后看是否恢复
gitlab-rake gitlab:backup:restore backup=1525801521_gitlab_backup.tar
再次启动gitlab
gitlab-ctl start

PS:另外:Gitlab迁移与恢复一样,但是要求两个GitLab版本号一致