版权声明:本文为HaiyuKing原创文章,转载请注明出处!
前言
简单实现侧边栏(侧滑菜单)效果:
- 点击触发打开左侧侧边栏,手势滑动关闭左侧侧边栏;
- 手势滑动打开右侧侧边栏,手势滑动关闭右侧侧边栏;
- 简单实现打开侧边栏的动画效果(透明度、移动效果);
- 打开侧边栏的时候动态更改侧边栏中的数据;
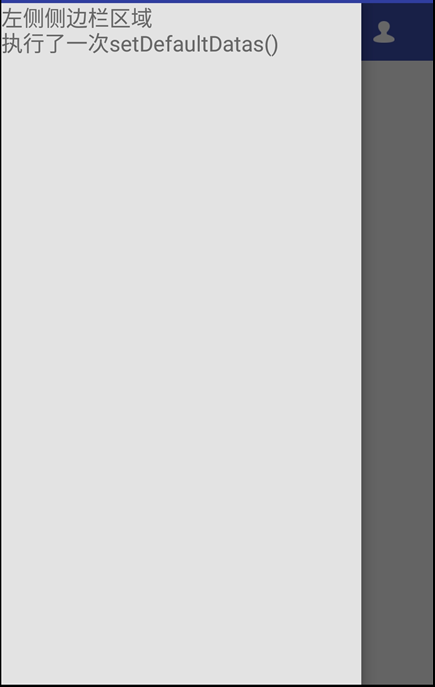
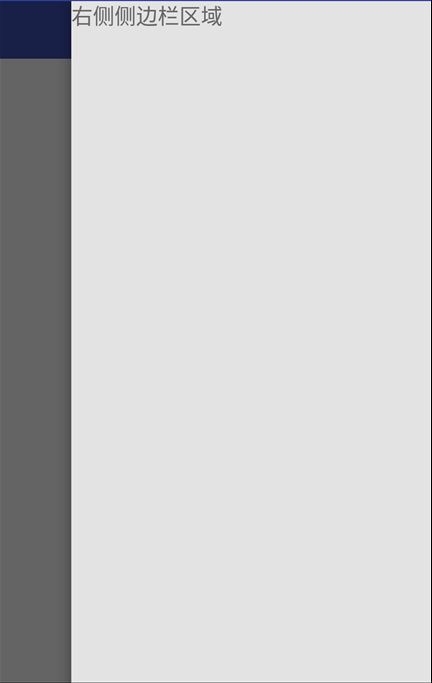
效果图

代码分析
此Demo只是简单实现侧边栏的效果,目的在于可以快速的导入到项目中。至于更复杂的效果,请阅读《参考资料》
使用步骤
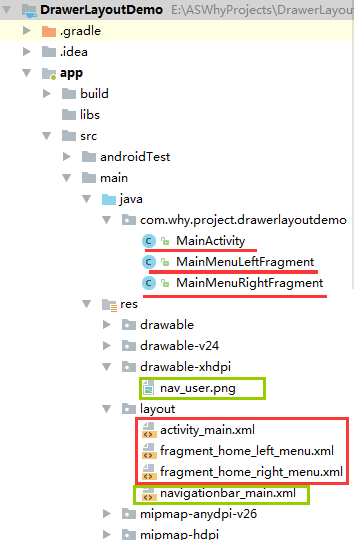
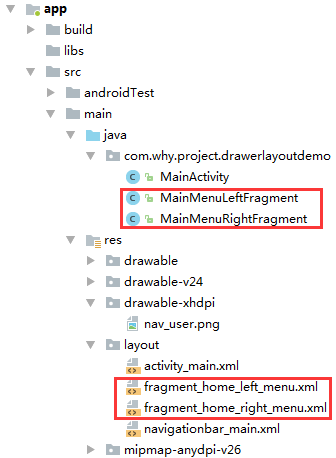
一、项目组织结构图
注意事项:
1、 导入类文件后需要change包名以及重新import R文件路径
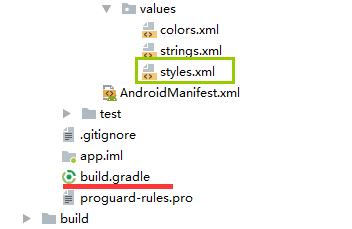
2、 Values目录下的文件(strings.xml、dimens.xml、colors.xml等),如果项目中存在,则复制里面的内容,不要整个覆盖
二、导入步骤
引入依赖库
在APP的build.gradle文件中添加以下代码:
apply plugin: 'com.android.application'

android {
    compileSdkVersion 26
    defaultConfig {
        applicationId "com.why.project.drawerlayoutdemo"
        minSdkVersion 16
        targetSdkVersion 26
        versionCode 1
        versionName "1.0"
        testInstrumentationRunner "android.support.test.runner.AndroidJUnitRunner"
    }
    buildTypes {
        release {
            minifyEnabled false
            proguardFiles getDefaultProguardFile('proguard-android.txt'), 'proguard-rules.pro'
        }
    }
}

dependencies {
    implementation fileTree(dir: 'libs', include: ['*.jar'])
    implementation 'com.android.support:appcompat-v7:26.1.0'
    implementation 'com.android.support.constraint:constraint-layout:1.0.2'
    testImplementation 'junit:junit:4.12'
    androidTestImplementation 'com.android.support.test:runner:1.0.1'
    androidTestImplementation 'com.android.support.test.espresso:espresso-core:3.0.1'

    //DrawerLayout侧边栏中动画效果用到的
    compile 'com.nineoldandroids:library:2.4.0'
}
在styles.xml文件中注释和添加以下代码:【主要是用于Demo中的使用自定义的顶部导航栏效果】
<resources> <!-- Base application theme. --> <!--<style name="AppTheme" parent="Theme.AppCompat.Light.DarkActionBar"> <!– Customize your theme here. –> <item name="colorPrimary">@color/colorPrimary</item> <item name="colorPrimaryDark">@color/colorPrimaryDark</item> <item name="colorAccent">@color/colorAccent</item> </style>--> <style name="AppTheme" parent="Theme.AppCompat.Light.NoActionBar"> <!-- Customize your theme here. --> <item name="colorPrimary">@color/colorPrimary</item> <item name="colorPrimaryDark">@color/colorPrimaryDark</item> <item name="colorAccent">@color/colorAccent</item> </style> </resources>
三、使用方法
在Activity布局文件中使用DrawerLayout【注意下面底色标记的代码】
<?xml version="1.0" encoding="utf-8"?>
<android.support.v4.widget.DrawerLayout xmlns:android="http://schemas.android.com/apk/res/android"
    xmlns:tools="http://schemas.android.com/tools"
    android:id="@+id/id_drawerLayout"
    android:layout_width="match_parent"
    android:layout_height="match_parent">

    <!-- 主内容视图一定要是DrawerLayout的第一个子视图【必须】 -->
    <LinearLayout
        android:layout_width="match_parent"
        android:layout_height="match_parent"
        android:orientation="vertical">

        <!-- 引入导航栏 -->
        <include
            android:id="@+id/main_navbar"
            layout="@layout/navigationbar_main" />

        <TextView
            android:layout_width="wrap_content"
            android:layout_height="wrap_content"
            android:text="内容区域"
            android:textSize="22sp"
            android:layout_gravity="center"/>

    </LinearLayout>

    <!-- 左侧区域侧边栏【可选】【如果想要只有一个右侧的侧边栏,那么就只需要留一个即可,注意的是left需要换成right】 -->
    <!-- android:tag="LEFT"用于java代码中通过drawerView.getTag()判断左侧还是右侧 -->
    <fragment
        android:id="@+id/fragment_leftmenu"
        android:name="com.why.project.drawerlayoutdemo.MainMenuLeftFragment"
        android:layout_width="300dp"
        android:layout_height="match_parent"
        android:layout_gravity="left"
        android:tag="LEFT" />

    <!-- 右侧区域侧边栏【可选】 -->
    <fragment
        android:id="@+id/fragment_rightmenu"
        android:name="com.why.project.drawerlayoutdemo.MainMenuRightFragment"
        android:layout_width="300dp"
        android:layout_height="match_parent"
        android:layout_gravity="right"
        android:tag="Right" />

</android.support.v4.widget.DrawerLayout>
顶部菜单栏布局文件navigationbar_main.xml【布局较简单,就不展开了】


<?xml version="1.0" encoding="utf-8"?>
<!-- 首页界面的导航栏布局文件 -->
<RelativeLayout xmlns:android="http://schemas.android.com/apk/res/android"
    android:id="@+id/nav_twoversion_home"
    android:layout_width="match_parent"
    android:layout_height="48dp"
    android:layout_gravity="center"
    android:background="#3F51B5" >

    <!-- 用户侧边栏图标 -->
    <ImageView
        android:id="@+id/nav_user"
        android:layout_width="wrap_content"
        android:layout_height="match_parent"
        android:layout_alignParentLeft="true"
        android:layout_centerVertical="true"
        android:paddingLeft="10dp"
        android:paddingRight="10dp"
        android:contentDescription="@string/app_name"
        android:gravity="center"
        android:src="@drawable/nav_user" />

    <!-- 标题 -->
    <TextView
        android:id="@+id/nav_title"
        android:layout_width="wrap_content"
        android:layout_height="match_parent"
        android:layout_centerInParent="true"
        android:gravity="center"
        android:text="@string/app_name"
        android:textColor="#ffffff"
        android:textSize="18sp" />

</RelativeLayout>
创建侧边栏碎片文件——MainMenuLeftFragment、MainMenuRightFragment【根据项目实际需求,可能只需要创建一个即可】【可参考demo中,直接复制到实际项目中,注意修改activity布局文件中的fragment的完整路径地址】
MainMenuLeftFragment.java
package com.why.project.drawerlayoutdemo;

import android.os.Bundle;
import android.support.v4.app.Fragment;
import android.util.Log;
import android.view.LayoutInflater;
import android.view.View;
import android.view.ViewGroup;
import android.widget.TextView;

/**
 * Created by HaiyuKing
 * Used 首页左侧侧边栏碎片界面
 */

public class MainMenuLeftFragment extends Fragment {
    private static final String TAG = "MainMenuLeftFragment";
    /**View实例*/
    private View myView;
    //
    private TextView tv_show;

    //重写
    public View onCreateView(LayoutInflater inflater, ViewGroup container, Bundle savedInstanceState) {
        Log.d(TAG,"onCreateView");
        myView = inflater.inflate(R.layout.fragment_home_left_menu, container, false);

        return myView;
    }

    @Override
    public void onActivityCreated(Bundle savedInstanceState) {
        // TODO Auto-generated method stub
        super.onActivityCreated(savedInstanceState);
        Log.d(TAG,"onActivityCreated");
        //初始化控件以及设置
        initView();
    }

    @Override
    public void onResume() {
        super.onResume();
        Log.d(TAG,"onResume");
        //初始化监听事件
        initEvent();
    }

    /**初始化控件*/
    private void initView(){
        Log.d(TAG,"initView");
        tv_show = myView.findViewById(R.id.tv_show);
    }

    /**初始化默认数据【这个需要在activity中执行,原因是:在布局文件中通过<fragment>的方式引用Fragment,打开Activity的时候,Fragment的生命周期函数均执行了】
     * 那么就存在一个问题,初始化fragment中的数据,可能会在activity数据初始化之前执行*/
    public void setDefaultDatas(){
        tv_show.setText(tv_show.getText() + "\n执行了一次setDefaultDatas()");
    }

    /**初始化监听事件*/
    private void initEvent(){

    }
}
fragment_home_left_menu.xml布局文件
<?xml version="1.0" encoding="utf-8"?>
<!-- 首页界面的左侧侧边栏界面布局文件 -->
<LinearLayout xmlns:android="http://schemas.android.com/apk/res/android"
    android:layout_width="match_parent"
    android:layout_height="match_parent"
    android:orientation="vertical"
    android:background="#E3E3E3">
    <TextView
        android:id="@+id/tv_show"
        android:layout_width="wrap_content"
        android:layout_height="wrap_content"
        android:text="左侧侧边栏区域"
        android:textSize="18sp"
        />
</LinearLayout>
在Activity中使用如下【继承FragmentActivity或者其子类AppCompatActivity】
package com.why.project.drawerlayoutdemo;

import android.content.Context;
import android.os.Bundle;
import android.support.v4.widget.DrawerLayout;
import android.support.v7.app.AppCompatActivity;
import android.util.Log;
import android.view.Gravity;
import android.view.View;
import android.widget.ImageView;

import com.nineoldandroids.view.ViewHelper;

public class MainActivity extends AppCompatActivity {

    private Context mContext;

    /**导航栏左侧的用户图标*/
    private ImageView nav_userImg;

    /**导航栏左侧的侧边栏的父容器*/
    private DrawerLayout mDrawerLayout;
    /**导航栏左侧的侧边栏碎片界面*/
    private MainMenuLeftFragment leftMenuFragment;

    @Override
    protected void onCreate(Bundle savedInstanceState) {
        super.onCreate(savedInstanceState);
        setContentView(R.layout.activity_main);

        mContext = this;
        //初始化控件
        initViews();
        //初始化数据
        initData();
        //初始化控件的点击事件
        initEvent();
    }

    private void initViews() {
        nav_userImg = (ImageView) findViewById(R.id.nav_user);
        mDrawerLayout = (DrawerLayout) findViewById(R.id.id_drawerLayout);
        //关闭手势滑动:DrawerLayout.LOCK_MODE_LOCKED_CLOSED(Gravity.LEFT:代表左侧的)
        mDrawerLayout.setDrawerLockMode(DrawerLayout.LOCK_MODE_LOCKED_CLOSED, Gravity.LEFT);

        leftMenuFragment = (MainMenuLeftFragment) getSupportFragmentManager().findFragmentById(R.id.fragment_leftmenu);
    }

    private void initData() {

    }

    private void initEvent() {
        //用户图标的点击事件
        nav_userImg.setOnClickListener(new View.OnClickListener() {
            @Override
            public void onClick(View v) {
                OpenLeftMenu();
            }
        });

        //侧边栏的事件监听
        mDrawerLayout.addDrawerListener(new DrawerLayout.DrawerListener()
        {
            /**
             * 当抽屉滑动状态改变的时候被调用
             * 状态值是STATE_IDLE(闲置-0),STATE_DRAGGING(拖拽-1),STATE_SETTLING(固定-2)中之一。
             */
            @Override
            public void onDrawerStateChanged(int newState)
            {
            }
            /**
             * 当抽屉被滑动的时候调用此方法
             * slideOffset 表示 滑动的幅度(0-1)
             */
            @Override
            public void onDrawerSlide(View drawerView, float slideOffset)
            {
                Log.w("onDrawerSlide", "slideOffset="+slideOffset);//0.0 -- 0.56 -- 1.0

                View mContent = mDrawerLayout.getChildAt(0);//内容区域view
                View mMenu = drawerView;

                float scale = 1 - slideOffset;

                if (drawerView.getTag().equals("LEFT"))
                {//左侧的侧边栏动画效果
                    //设置左侧区域的透明度0.6f + 0.4f * (0.0 ... 1.0)【也就是打开的时候透明度从0.6f ... 1.0f,关闭的时候反之】
                    ViewHelper.setAlpha(mMenu, 0.6f + 0.4f * slideOffset);
                    //移动内容区域:左侧侧边栏宽度 * (0.0 ... 1.0)【也就是打开的时候,内容区域移动从0 ... 左侧侧边栏宽度】
                    ViewHelper.setTranslationX(mContent,mMenu.getMeasuredWidth() * slideOffset);
                    mContent.invalidate();//重绘view

                } else
                {//右侧的侧边栏动画效果
                    //移动内容区域:-右侧侧边栏宽度 * (0.0 ... 1.0)【也就是打开的时候,内容区域移动从-0 ... -左侧侧边栏宽度】
                    ViewHelper.setTranslationX(mContent,-mMenu.getMeasuredWidth() * slideOffset);
                    mContent.invalidate();
                }

            }
            /**
             * 当一个抽屉被完全打开的时候被调用
             */
            @Override
            public void onDrawerOpened(View drawerView) {
                if (drawerView.getTag().equals("LEFT")){//如果感觉显示有延迟的话,可以放到nav_userImg的点击事件监听中执行
                    leftMenuFragment.setDefaultDatas();//打开的时候初始化默认数据【比如:请求网络,获取数据】
                }
            }
            /**
             * 当一个抽屉被完全关闭的时候被调用
             */
            @Override
            public void onDrawerClosed(View drawerView)
            {
                //关闭手势滑动:DrawerLayout.LOCK_MODE_LOCKED_CLOSED(Gravity.LEFT:代表左侧的)
                mDrawerLayout.setDrawerLockMode(DrawerLayout.LOCK_MODE_LOCKED_CLOSED, Gravity.LEFT);
            }
        });
    }

    /**打开左侧的侧边栏*/
    public void OpenLeftMenu()
    {
        mDrawerLayout.openDrawer(Gravity.LEFT);
        //打开手势滑动:DrawerLayout.LOCK_MODE_UNLOCKED(Gravity.LEFT:代表左侧的)
        mDrawerLayout.setDrawerLockMode(DrawerLayout.LOCK_MODE_UNLOCKED,Gravity.LEFT);
    }
}
混淆配置
无
参考资料
Android DrawerLayout 高仿QQ5.2双向侧滑菜单