开发工具:IntelliJ IDEA 2016.3
软件环境:tomcat 8.0 , jdk1.8
项目管理:maven
文件结构:

操作步骤:
1,引入jars(pom.xml)
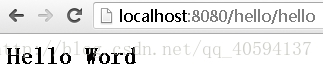
我试了一下,就简单的在index页面输出”Hello World“只需要 spring-webmvc这一个jar,里面包括了这些jar:

<project xmlns="http://maven.apache.org/POM/4.0.0" xmlns:xsi="http://www.w3.org/2001/XMLSchema-instance"
  xsi:schemaLocation="http://maven.apache.org/POM/4.0.0 http://maven.apache.org/maven-v4_0_0.xsd">
  <modelVersion>4.0.0</modelVersion>
  <groupId>com.zx</groupId>
  <artifactId>spring-mvc</artifactId>
  <packaging>war</packaging>
  <version>1.0-SNAPSHOT</version>
  <name>spring-mvc Maven Webapp</name>
  <url>http://maven.apache.org</url>
  <properties>
    <spring.version>5.0.2.RELEASE</spring.version>
  </properties>
  <dependencies>
    <!--包含Spring MVC 框架相关的所有类:包括框架的Servlets,Web MVC框架,控制器和视图支持-->
    <dependency>
      <groupId>org.springframework</groupId>
      <artifactId>spring-webmvc</artifactId>
      <version>${spring.version}</version>
    </dependency>
  </dependencies>
  <build>
    <finalName>spring-mvc</finalName>
  </build>
</project>
<?xml version="1.0" encoding="UTF-8"?>
<beans xmlns="http://www.springframework.org/schema/beans"
       xmlns:xsi="http://www.w3.org/2001/XMLSchema-instance"
       xmlns:context="http://www.springframework.org/schema/context"
       xsi:schemaLocation="http://www.springframework.org/schema/beans
       http://www.springframework.org/schema/beans/spring-beans.xsd
       http://www.springframework.org/schema/context
       http://www.springframework.org/schema/context/spring-context.xsd">
    <!--配置自动扫描包-->
    <context:component-scan base-package="com.zx.controller"/>

    <!--配置视图解析器-->
    <bean id="internalResourceViewResolver" class="org.springframework.web.servlet.view.InternalResourceViewResolver">
        <!--前缀-->
        <property name="prefix" value="/"/>
        <!--后缀-->
        <property name="suffix" value=".jsp"/>
    </bean>
</beans><?xml version="1.0" encoding="UTF-8"?>
<web-app xmlns="http://xmlns.jcp.org/xml/ns/javaee"
xmlns:xsi="http://www.w3.org/2001/XMLSchema-instance"
xsi:schemaLocation="http://xmlns.jcp.org/xml/ns/javaee
http://xmlns.jcp.org/xml/ns/javaee/web-app_3_1.xsd"
version="3.1">
<servlet>
<servlet-name>dispatcher</servlet-name>
<servlet-class>org.springframework.web.servlet.DispatcherServlet</servlet-class>
<init-param>
<!-- 加载spirng配置文件 -->
<param-name>contextConfigLocation</param-name>
<param-value>classpath:spring-mvc.xml</param-value>
</init-param>
</servlet>
<!-- 拦截所有请求 -->
<servlet-mapping>
<servlet-name>dispatcher</servlet-name>
<url-pattern>/</url-pattern>
</servlet-mapping>
</web-app>
package com.zx.controller;

import org.springframework.stereotype.Controller;
import org.springframework.ui.Model;
import org.springframework.web.bind.annotation.RequestMapping;

@Controller
@RequestMapping(value = "/hello")
public class HelloController {
    @RequestMapping(value = "hello")
    public String hello(Model model){
        model.addAttribute("hello","Hello World");
        return "index";
    }
}<html>
<body>
<h2>
${hello}
</h2>
</body>
</html>