在Spring Boot 里面含有两种常用的配置文件,一种是传统的.properties,另外一种就是.yml文件,这两种文件的配置常用于实际开发当中,但是本人更为推荐使用yml文件的配置,因为它的配置比较简便,可以省去很多不必要重复的代码。
接下来我们用几个实例来进行比较:(我用的IDE是idea2017)
实例一:使用.properties文件来给相应的配置类注入属性内容
首先我们需要在项目的资源区建立好相应的配置文件

然后往配置文件里面写下如下内容:
people.id=1005
people.name=idea
people.password=123456
接着再建立model实例类:(在这里我用了一个叫做lombok的jar,省去了那些繁琐的gett和sett方法以及构造函数和tostring方法)
package com.example.model;

import lombok.AllArgsConstructor;
import lombok.Builder;
import lombok.Data;
import lombok.NoArgsConstructor;
import org.springframework.boot.context.properties.ConfigurationProperties;

@Data
@Builder
@NoArgsConstructor
@AllArgsConstructor
@ConfigurationProperties(prefix = "people")
public class People {
    private int id;
    private String name;
    private String password;
}
在这里解释一下,@Data,@Builder,@NoArgsConstructor,@AllArgsConstructor 四个注解都是来自于lombok这个jar里面的,它们可以用于省去一些不必要的方法,从而简化代码量。
主要还是@ConfigurationProperties(prefix = “people”)这一句,这一注解是指将People类看做了一个专门用于配置的类,当Spring Boot运行的这个类的时候,会去查找相应的people.id,people.name,people.password这些属性的内容,然后将它们赋值到这个people类里面去。假若注解里面的prefix和properties里面的前半段people不符合的话,就没法注入成功。
接下来便是验证:
控制器部分
package com.example.controller;

import com.example.model.People;
import org.springframework.beans.factory.annotation.Autowired;
import org.springframework.boot.context.properties.EnableConfigurationProperties;
import org.springframework.web.bind.annotation.RequestMapping;
import org.springframework.web.bind.annotation.RestController;

@RestController
@EnableConfigurationProperties(People.class)
@RequestMapping("/PeopleAction")
public class PeopleAction {

    @Autowired
    private People people;
    @RequestMapping("/peopleIndex")
    public People userIndex(){
        return  people;
    }
}
控制器里面的@EnableConfigurationProperties(People.class)是指自动加载配置类People,然后通过 @Autowired申明,将相应的People通过SpringBoot这个容器来进行注入。
最后便是函数的入口:
package com.example;

import org.springframework.boot.SpringApplication;
import org.springframework.boot.autoconfigure.SpringBootApplication;

/**
 * Created by Administrator on 17/08/23.
 */
@SpringBootApplication
public class MainApplication {

    public static void main(String[] args) {
        SpringApplication.run(MainApplication.class,args);
    }
}
输入浏览器url得出结果:

实例二:使用.yml文件来给相应的配置类注入属性内容
yml文件进行属性的配置比一般的properties的配置要好用许多,原因是它能够省去很多重复性的代码。
以下便是yml配置的案例:
mysql:
   drive: com.mysql.jdbc.Driver
   url: jdbc:mysql://localhost:3306/springboot?useUnicode=true&characterEncoding=utf8
   user: root
   password: root
yml文件里面编写的内容有个特点,它会根据用户所输入的缩进来确定父子级别。
然后便是一个mysql的jdbc访问类:(同样还是使用了lombok这个jar,省去了gett和sett)
package com.example.config;

import lombok.AllArgsConstructor;
import lombok.Builder;
import lombok.Data;
import lombok.NoArgsConstructor;
import org.springframework.boot.context.properties.ConfigurationProperties;
import org.springframework.boot.context.properties.EnableConfigurationProperties;

import java.sql.Connection;
import java.sql.DriverManager;
import java.sql.SQLException;

@Data
@Builder
@NoArgsConstructor
@AllArgsConstructor
@ConfigurationProperties(prefix = "mysql")
public class MysqlConn {

    private String url;
    private String drive;
    private String user;
    private String password;

    private Connection conn;

    public Connection getConnection() throws SQLException, ClassNotFoundException {
        Class.forName(drive);
        conn=DriverManager.getConnection(url,user,password);
        return conn;
    }
}
控制器类:(已经在数据库里面设置了一张user表,并且插入了相关数据进行模拟测试了)
package com.example.controller;
import com.example.config.MysqlConn;
import com.example.model.People;
import org.springframework.beans.factory.annotation.Autowired;
import org.springframework.boot.context.properties.EnableConfigurationProperties;
import org.springframework.web.bind.annotation.RequestMapping;
import org.springframework.web.bind.annotation.RestController;
import java.sql.Connection;
import java.sql.ResultSet;
import java.sql.SQLException;
import java.sql.Statement;
@RestController
@EnableConfigurationProperties(MysqlConn.class)
@RequestMapping("/MysqlAction")
public class MysqlAction {
@Autowired
private MysqlConn mysqlConn;
private Connection connection;
@RequestMapping(value = "/getConnection")
public MysqlConn getConnection(){
return mysqlConn;
}
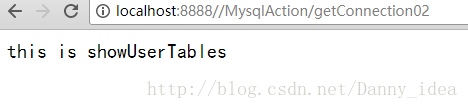
@RequestMapping(value = "/getConnection02")
public String showUserTables() throws SQLException, ClassNotFoundException {
connection=mysqlConn.getConnection();
Statement statement=connection.createStatement();
ResultSet resultSet=statement.executeQuery("SELECT * FROM USER ");
resultSet.last();
int total=resultSet.getRow();
resultSet.first();
for(int i=0;i<total;i++)
{
System.out.println(resultSet.getString("id"));
System.out.println(resultSet.getString("username"));
System.out.println(resultSet.getString("password"));
resultSet.next();
}
return "this is showUserTables";
}
}
访问成功!
控制台输出相应数据:
1
idea
123456
2
利纳斯
75624
实例3 :灵活使用yml文件加载相应属性
上边的两种实例主要都是通过@EnableConfigurationProperties去自动将整个类看做一个配置类进行加载属性的,但是有的时候,我们没有必要将整个类进行属性的预加载。例如说我们之前写的PeopleAction控制器里面,假若需要多添加一个字段,peopleMother
package com.example.controller;
import com.example.model.People;
import org.springframework.beans.factory.annotation.Autowired;
import org.springframework.beans.factory.annotation.Value;
import org.springframework.boot.context.properties.EnableConfigurationProperties;
import org.springframework.web.bind.annotation.RequestMapping;
import org.springframework.web.bind.annotation.RestController;
@RestController
@EnableConfigurationProperties(People.class)
@RequestMapping("/PeopleAction")
public class PeopleAction {
@Autowired
private People people;
@Value("${people.peopleMother}")
private String peopleMother;
@RequestMapping("/peopleIndex")
public People userIndex(){
return people;
}
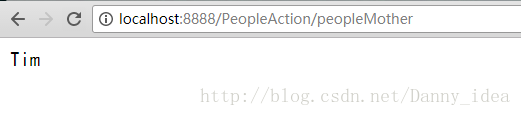
@RequestMapping("/peopleMother")
public String peopleMother(){
return peopleMother;
}
}
同样我们在.yml文件里面设置好相应属性:
people:
    peopleMother: Tim
此时浏览器输入url即可看见:
实例四 从配置文件里读取map或者list属性以及校验
一般在配置文件里面只要准守相应的语法即可:
  listParam:
    - aaa
    - bbb
    - ccc
  mapParam:
    key1: vlaue1
    key2: vlaue2
    key3: vlaue3
然后在bean里面可以自动赋值给相应类型和名称对应的属性。
  private List<String> listParam;
  private Map<String ,String> mapParam;
当然有些朋友可能会这么来写list集合在yml文件里面:
listvalue: aa,bb,cc,dd这个时候想要在后台获取到相应的内容就要这么来写:
@Value("#{'${listvalue}'.split(',')}")当在开启服务的时候需要进行校验,只需要在相应属性的上边添加以下注解即可:
@NotNull