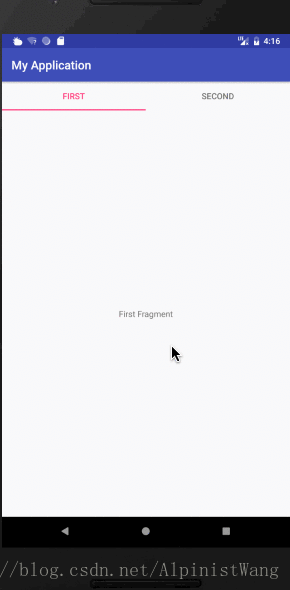
一、先看效果图
二、代码实现
1.在app模块build.gradle添加TabLayout依赖
implementation 'com.android.support:design:27.1.0'
2.布局中添加TabLayout和ViewPager
<?xml version="1.0" encoding="utf-8"?>
<android.support.constraint.ConstraintLayout android:layout_width="match_parent"
    android:layout_height="match_parent"
    xmlns:android="http://schemas.android.com/apk/res/android"
    xmlns:app="http://schemas.android.com/apk/res-auto">
    <android.support.design.widget.TabLayout
        android:id="@+id/tab"
        android:layout_width="match_parent"
        android:layout_height="wrap_content"
        app:layout_constraintTop_toTopOf="parent"
        app:tabIndicatorColor="@color/colorAccent"
        app:tabIndicatorHeight="2dp"
        app:tabMode="fixed"
        app:tabSelectedTextColor="@color/colorAccent">
    </android.support.design.widget.TabLayout>
    <android.support.v4.view.ViewPager
        android:id="@+id/viewpager"
        android:layout_width="match_parent"
        android:layout_height="0dp"
        app:layout_constraintTop_toBottomOf="@id/tab"
        app:layout_constraintBottom_toBottomOf="parent"
        >
    </android.support.v4.view.ViewPager>
</android.support.constraint.ConstraintLayout>
3.程序中找到控件,初始化页卡标题和页卡视图
public class MainActivity extends AppCompatActivity {
    private TabLayout mTabLayout;
    private ViewPager mViewPager;
    private ArrayList<String> mTitleList = new ArrayList<>();//页卡标题集合
    private Fragment firstFragment,secondFragment;//页卡视图
    private ArrayList<Fragment> mViewList = new ArrayList<>();//页卡视图集合
    @Override
    protected void onCreate(Bundle savedInstanceState) {
        super.onCreate(savedInstanceState);
        setContentView(R.layout.activity_main);

        mViewPager = findViewById(R.id.viewpager);
        mTabLayout = findViewById(R.id.tab);

        firstFragment = new FirstFragment();
        secondFragment = new SecondFragment();

        //添加页卡视图
        mViewList.add(firstFragment);
        mViewList.add(secondFragment);

        //添加页卡标题
        mTitleList.add("First");
        mTitleList.add("Second");

        mTabLayout.setTabMode(TabLayout.MODE_FIXED);//设置tab模式,当前为系统默认模式
        mTabLayout.addTab(mTabLayout.newTab().setText(mTitleList.get(0)));//添加tab选项卡
        mTabLayout.addTab(mTabLayout.newTab().setText(mTitleList.get(1)));
    }
}
4.给ViewPager设置一个适配器
mViewPager.setAdapter(new FragmentPagerAdapter(getSupportFragmentManager()) {

            //获取每个页卡
            @Override
            public android.support.v4.app.Fragment getItem(int position) {
                return mViewList.get(position);
            }

            //获取页卡数
            @Override
            public int getCount() {
                return mTitleList.size();
            }

            //获取页卡标题
            @Override
            public CharSequence getPageTitle(int position) {
                return mTitleList.get(position);
            }

        });
适配器中实现了三个方法
getItem 获取每个页卡
getCount 获取页卡数
getPageTitle 获取页卡标题
5.将TabLayout和ViewPager关联
mTabLayout.setupWithViewPager(mViewPager);//将TabLayout和ViewPager关联起来。
6.看一下MainActivity完整代码
public class MainActivity extends AppCompatActivity {
    private TabLayout mTabLayout;
    private ViewPager mViewPager;
    private ArrayList<String> mTitleList = new ArrayList<>();//页卡标题集合
    private Fragment firstFragment,secondFragment;//页卡视图
    private ArrayList<Fragment> mViewList = new ArrayList<>();//页卡视图集合
    @Override
    protected void onCreate(Bundle savedInstanceState) {
        super.onCreate(savedInstanceState);
        setContentView(R.layout.activity_main);

        mViewPager = findViewById(R.id.viewpager);
        mTabLayout = findViewById(R.id.tab);

        firstFragment = new FirstFragment();
        secondFragment = new SecondFragment();

        //添加页卡视图
        mViewList.add(firstFragment);
        mViewList.add(secondFragment);

        //添加页卡标题
        mTitleList.add("First");
        mTitleList.add("Second");

        mTabLayout.setTabMode(TabLayout.MODE_FIXED);//设置tab模式,当前为系统默认模式
        mTabLayout.addTab(mTabLayout.newTab().setText(mTitleList.get(0)));//添加tab选项卡
        mTabLayout.addTab(mTabLayout.newTab().setText(mTitleList.get(1)));

        mViewPager.setAdapter(new FragmentPagerAdapter(getSupportFragmentManager()) {

            //获取每个页卡
            @Override
            public android.support.v4.app.Fragment getItem(int position) {
                return mViewList.get(position);
            }

            //获取页卡数
            @Override
            public int getCount() {
                return mTitleList.size();
            }

            //获取页卡标题
            @Override
            public CharSequence getPageTitle(int position) {
                return mTitleList.get(position);
            }

        });

        mTabLayout.setupWithViewPager(mViewPager);//将TabLayout和ViewPager关联起来。
    }
}
程序里用到了FirstFragment和SecondFragment,我在这里贴出代码和布局
public class FirstFragment extends Fragment {
    private View rootView;

    @Override
    public View onCreateView(@NonNull LayoutInflater inflater, ViewGroup container, Bundle savedInstanceState) {
        rootView = inflater.inflate(R.layout.fragment_first, container, false);
        initUi();
        return rootView;
    }

    private void initUi() {
    }

}
public class SecondFragment extends Fragment {
    private View rootView;

    @Override
    public View onCreateView(@NonNull LayoutInflater inflater, ViewGroup container, Bundle savedInstanceState) {
        rootView = inflater.inflate(R.layout.fragment_second, container, false);
        initUi();
        return rootView;
    }

    private void initUi() {
    }
}
<?xml version="1.0" encoding="utf-8"?>
<android.support.constraint.ConstraintLayout xmlns:android="http://schemas.android.com/apk/res/android"
    xmlns:tools="http://schemas.android.com/tools"
    android:layout_width="match_parent"
    android:layout_height="match_parent"
    xmlns:app="http://schemas.android.com/apk/res-auto"
    tools:context=".FirstFragment">

    <TextView
        app:layout_constraintTop_toTopOf="parent"
        app:layout_constraintBottom_toBottomOf="parent"
        app:layout_constraintLeft_toLeftOf="parent"
        app:layout_constraintRight_toRightOf="parent"
        android:layout_width="wrap_content"
        android:layout_height="wrap_content"
        android:text="First Fragment" />

</android.support.constraint.ConstraintLayout>
<?xml version="1.0" encoding="utf-8"?>
<android.support.constraint.ConstraintLayout xmlns:android="http://schemas.android.com/apk/res/android"
    xmlns:tools="http://schemas.android.com/tools"
    android:layout_width="match_parent"
    android:layout_height="match_parent"
    xmlns:app="http://schemas.android.com/apk/res-auto"
    tools:context=".SecondFragment">

    <TextView
        app:layout_constraintTop_toTopOf="parent"
        app:layout_constraintBottom_toBottomOf="parent"
        app:layout_constraintLeft_toLeftOf="parent"
        app:layout_constraintRight_toRightOf="parent"
        android:layout_width="wrap_content"
        android:layout_height="wrap_content"
        android:text="Second Fragment" />

</android.support.constraint.ConstraintLayout>