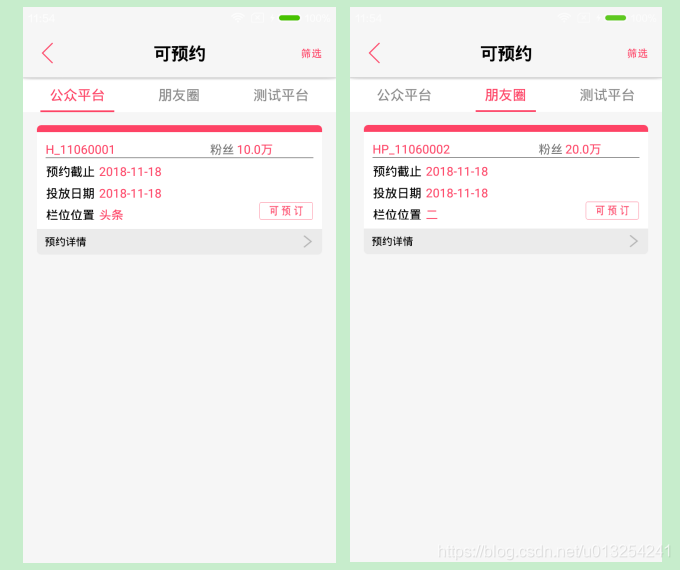
实现的效果图如下:
一、页面布局文件
1. 主页面tab_main.xml,代码如下:
<?xml version="1.0" encoding="utf-8"?>
<LinearLayout
    xmlns:android="http://schemas.android.com/apk/res/android"
    xmlns:app="http://schemas.android.com/apk/res-auto"
    android:layout_width="match_parent"
    android:background="@color/base_bg"
    android:orientation="vertical"
    android:layout_height="match_parent">
    <!-- 标题栏 -->
    <include layout="@layout/model_toolbar" />
    <!-- Tab栏 -->
    <android.support.design.widget.TabLayout
        android:layout_width="match_parent"
        android:layout_height="@dimen/dp135"
        android:id="@+id/tablayout"
        android:background="@color/white"
        app:tabMode="scrollable"
        app:tabSelectedTextColor="#ff0000ff"
        app:tabTextColor="#ff0000ff"
        app:tabBackground="@android:color/white"
        app:tabIndicatorColor="@color/base_app"
        >
    </android.support.design.widget.TabLayout>
    <!-- 内容区 -->
    <android.support.v4.view.ViewPager
        android:id="@+id/tab_vp"
        android:layout_width="match_parent"
        android:layout_height="match_parent"
        android:background="@color/base_bg">
    </android.support.v4.view.ViewPager>
</LinearLayout>
2. Tab自定义页面 tab_content.xml ,代码如下:
<?xml version="1.0" encoding="utf-8"?>
<RelativeLayout
    xmlns:android="http://schemas.android.com/apk/res/android"
    xmlns:app="http://schemas.android.com/apk/res-auto"
    android:background="@color/white"
    android:layout_width="wrap_content"
    android:layout_height="wrap_content">
    <LinearLayout
        android:layout_width="wrap_content"
        android:orientation="horizontal"
        android:gravity="center_vertical"
        android:layout_centerInParent="true"
        android:layout_height="wrap_content">
        <TextView
            android:layout_width="wrap_content"
            android:text="标题"
            android:id="@+id/tab_title"
            android:textSize="@dimen/dp54"
            android:textColor="@color/grey"
            android:layout_height="wrap_content" />
    </LinearLayout>
</RelativeLayout>
3.内容页面 fragment.xml, 代码如下:
<LinearLayout xmlns:android="http://schemas.android.com/apk/res/android"
    android:layout_width="match_parent"
    android:layout_height="match_parent"
    android:background="@color/base_bg"
    android:orientation="vertical">

    <android.support.v4.widget.SwipeRefreshLayout
        android:id="@+id/swipe_refresh_layout"
        android:layout_marginTop="@dimen/dp51"
        android:layout_width="match_parent"
        android:layout_height="match_parent">

        <android.support.v7.widget.RecyclerView
            android:id="@+id/subscribe_list"
            android:layout_width="match_parent"
            android:layout_height="match_parent"
            android:paddingLeft="@dimen/activity_horizontal_margin"
            android:paddingRight="@dimen/activity_horizontal_margin"/>

    </android.support.v4.widget.SwipeRefreshLayout>
</LinearLayout>
二、具体实现
1.初始化tab和viewPager
private void initTabView()
    {
        for (int i=0;i< tabList.size();i++)
        {
            TabLayout.Tab tab = tabLayout.newTab();
            View inflate = View.inflate(this, R.layout.content_tab_title, null);
            TextView textView = (TextView) inflate.findViewById(R.id.tab_title);
            Map<String,Object> map = tabList.get(i);
            textView.setText(map.get("tabName").toString());
            textView.setTag(map.get("tabId").toString());
            tab.setCustomView(inflate);
            tabLayout.addTab(tab);
            SubscribeTabFragment fragment = SubscribeTabFragment.newInstance();
            Bundle bundle = new Bundle();
            bundle.putString("tabId",map.get("tabId").toString());
            fragment.setArguments(bundle);
            fragmentList.add(fragment);
        }
        viewPager.setAdapter(new FragmentPagerAdapter(getSupportFragmentManager()) {
            @Override
            public Fragment getItem(int position) {
                return (Fragment) fragmentList.get(position);
            }

            @Override
            public int getCount() {
                return tabList.size();
            }
        });

        tabLayout.setOnTabSelectedListener(new TabLayout.OnTabSelectedListener() {
            @Override
            public void onTabSelected(TabLayout.Tab tab) {
                //更新选中的tabview的字体颜色
                updateTabView(tab,true);
                selIndex = tab.getPosition();
                Map<String,Object> map = tabList.get(selIndex);
                getIntent().putExtra(AppConsts._TAB_ID,map.get("tabId").toString());
                viewPager.setCurrentItem(tab.getPosition());
            }

            @Override
            public void onTabUnselected(TabLayout.Tab tab) {
                //更新未选中的tabview的字体颜色
                updateTabView(tab,false);
            }

            @Override
            public void onTabReselected(TabLayout.Tab tab) {
                //更新选中的tabview的字体颜色
                updateTabView(tab,true);
                selIndex = tab.getPosition();
                Map<String,Object> map = tabList.get(selIndex);
                getIntent().putExtra(AppConsts._TAB_ID,map.get("tabId").toString());
                viewPager.setCurrentItem(tab.getPosition());
            }
        });
        viewPager.addOnPageChangeListener(new ViewPager.OnPageChangeListener() {
            @Override
            public void onPageScrolled(int position, float positionOffset, int positionOffsetPixels) {

            }

            @Override
            public void onPageSelected(int position) {
                selIndex = position;
                updateAllTab(position);
            }

            @Override
            public void onPageScrollStateChanged(int state) {

            }
        });
        //修改tab下划线
        tabLayout.post(new Runnable() {
            @Override
            public void run() {
                setIndicator(tabLayout, 20, 20);
            }
        });
    }
2.手动设置选中和未选中的tabview的字体颜色
private void updateTabView(TabLayout.Tab tab,boolean isShowRed)
    {
        RelativeLayout relativeLayout = (RelativeLayout)tab.getCustomView();
        LinearLayout ll = (LinearLayout)relativeLayout.getChildAt(0);
        TextView tv = (TextView)ll.getChildAt(0);
        if(isShowRed)
        {
            //选中的字体为红色
            tv.setTextColor(getResources().getColor(R.color.base_app));
        }
        else
        {
            //未选中的字体为灰色
            tv.setTextColor(getResources().getColor(R.color.grey));
        }
    }

    private void updateAllTab(int position)
    {
        //重新设置TabLayout选中位置
        setIndicatorIndex(tabLayout,position,0);
        if(tabLayout != null && tabLayout.getTabCount() > 0)
        {
            for(int i=0;i<tabLayout.getTabCount();i++)
            {
                if(i == position)
                {
                    updateTabView(tabLayout.getTabAt(i),true);
                }
                else
                {
                    updateTabView(tabLayout.getTabAt(i),false);
                }
            }
        }
    }
3.利用反射修改TabLayout中tabview的宽度
public void setIndicator(TabLayout tabs, int leftDip, int rightDip){
        Class<?> tabLayout = tabs.getClass();
        Field tabStrip = null;
        try {
            tabStrip = tabLayout.getDeclaredField("mTabStrip");
        } catch (NoSuchFieldException e) {
            e.printStackTrace();
        }

        tabStrip.setAccessible(true);
        LinearLayout llTab = null;
        try {
            llTab = (LinearLayout) tabStrip.get(tabs);
        } catch (IllegalAccessException e) {
            e.printStackTrace();
        }

        int left = (int) TypedValue.applyDimension(TypedValue.COMPLEX_UNIT_DIP, leftDip, Resources.getSystem().getDisplayMetrics());
        int right = (int) TypedValue.applyDimension(TypedValue.COMPLEX_UNIT_DIP, rightDip, Resources.getSystem().getDisplayMetrics());
        int width = (int) TypedValue.applyDimension(TypedValue.COMPLEX_UNIT_DIP, 50, Resources.getSystem().getDisplayMetrics());

        if(llTab.getChildCount() == 2)
        {
            left = right = width;
        }
        for (int i = 0; i < llTab.getChildCount(); i++) {

            View tabView = llTab.getChildAt(i);
            RelativeLayout relativeLayout = (RelativeLayout)tabs.getTabAt(i).getCustomView();
            LinearLayout ll = (LinearLayout)relativeLayout.getChildAt(0);
            TextView tv = (TextView)ll.getChildAt(0);
            //因为我想要的效果是   字多宽线就多宽,所以测量tv的宽度
            width = tv.getWidth();
            if (width == 0)
            {
                tv.measure(0, 0);
                width = tv.getMeasuredWidth();
            }
            if(i==0)
            {
                tv.setTextColor(getResources().getColor(R.color.base_app));
            }
            tabView.setPadding(0, 0, 0, 0);

            LinearLayout.LayoutParams params = new LinearLayout.LayoutParams(LinearLayout.LayoutParams.WRAP_CONTENT, LinearLayout.LayoutParams.MATCH_PARENT, 1);
            params.width = width;
            params.leftMargin = left;
            params.rightMargin = right;
            tabView.setLayoutParams(params);
            tabView.invalidate();
        }
    }
4.现在还缺的效果是:滑动viewPager时上面的tab的下划线不会随着移动,通过利用反射修改TabLayout选中位置,来实现
//利用反射修改TabLayout选中位置
    private void setIndicatorIndex(TabLayout tabLayout,int index,float offset)
    {
        try
        {
            Field field = TabLayout.class.getDeclaredField("mTabStrip");
            field.setAccessible(true);
            Object ob = field.get(tabLayout);
            Class<?> c = Class.forName("android.support.design.widget.TabLayout$SlidingTabStrip");
            Method method = c.getDeclaredMethod("setIndicatorPositionFromTabPosition", int.class,float.class);
            method.setAccessible(true);
            method.invoke(ob, index,offset);
        }catch (Exception e){}
    }
上面很多代码思路是从其他人那学习的,自己只是稍加处理了下,感谢各位大神的分享。