Linux版本
Centos 6.5 (64位)- 1
ELK版本
Elasticsearch 5.1
Logstash 5.1
Kibana 5.1- 1
- 2
- 3
JAVA版本
ELK 5.1版本对JDK的最低要求是1.8,安装JAVA 1.8版本
yum -y list java*
yum -y install java-1.8.0-openjdk*- 1
- 2
如果之前安装了1.7版本,需要删除
yum list installed |grep java
yum -y remove java-1.7.0-openjdk*- 1
- 2
安装完毕后,配置JAVA_HOME
vim /etc/profile
export JAVA_HOME=/usr/lib/jvm/jre-1.8.0-openjdk.x86_64
export CLASSPATH=.:$JAVA_HOME/jre/lib/rt.jar:$JAVA_HOME/lib/dt.jar:$JAVA_HOME/lib/tools.jar
export PATH=$PATH:$JAVA_HOME/bin- 1
- 2
- 3
- 4
保存退出,在命令行输入. /etc/profile并回车使其生效。
配置主机名和网络
修改主机名
vim /etc/sysconfig/network
HOSTNAME=elk- 1
- 2
重启
reboot- 1
查看主机名
[root@elk]# hostname
elk- 1
- 2
配置网络
在/etc/hosts里添加
10.254.21.18 elk - 1
关闭防火墙
sudo service iptables stop- 1
或是不让其开启
chkconfig iptables off- 1
至此,前期准备工作结束。
安装Elasticsearch
安装
wget https://artifacts.elastic.co/downloads/elasticsearch/elasticsearch-5.1.1.rpm
rpm -ivh elasticsearch-5.1.1.rpm
chkconfig --add elasticsearch- 1
- 2
- 3
配置
vim /etc/elasticsearch/elasticsearch.yml
node.name: elk # 主机名
network.host: 10.254.21.18 # 主机IP
http.port: 9200 # api接口url
discovery.zen.ping.unicast.hosts: [elk]# 手动发现节点

# 以下两个为允许跨域,主要是5.1版本的head插件和以往安装的不一样
http.cors.enabled: true
http.cors.allow-origin: "*"- 1
- 2
- 3
- 4
- 5
- 6
- 7
- 8
- 9
启动
service elasticsearch start- 1
若是没有启动成功,可以到/var/log/elasticsearch/elasticsearch.log里看到这两条错误日志
max file descriptors [4096] for elasticsearch process likely too low, increase to at least [65536]
max number of threads [1024] for user [lishang] likely too low, increase to at least [2048]- 1
- 2
解决第一个,编辑limits.conf
vi /etc/security/limits.conf

* soft nofile 65536

* hard nofile 131072

* soft nproc 2048

* hard nproc 4096- 1
- 2
- 3
- 4
- 5
- 6
- 7
- 8
- 9
解决第二个,进入limits.d目录下修改配置文件
vi /etc/security/limits.d/90-nproc.conf

修改如下内容:

* soft nproc 1024

#修改为

* soft nproc 2048- 1
- 2
- 3
- 4
- 5
- 6
- 7
- 8
- 9
如果虚拟机内存小,也是启动不起来的,需加大内存。
安装elasticsearch-head插件
5.1版本的elasticsearch没有提供直接插件安装方法,但在该github上该插件作者给出了方法。
git clone git://github.com/mobz/elasticsearch-head.git- 1
如果虚拟机上没有安装node,则要安装node、npm、grunt。
# 这里下载的二进制包
wget https://nodejs.org/dist/v4.2.2/node-v4.2.2-linux-x64.tar.gz

# 解压
tar xf node-v4.2.2-linux-x64.tar.gz

# 设置软链
ln -s /usr/local/node-v4.2.2-linux-x64/bin/node /usr/sbin/node
ln -s /usr/local/node-v4.2.2-linux-x64/bin/npm /usr/sbin/npm

# 设置npm代理镜像
npm config set registry https://registry.npm.taobao.org

# 安装、配置grunt
npm install -g grunt
ln -s /usr/local/node-v4.2.2-linux-x64/lib/node_modules/grunt/bin/grunt /usr/sbin/grunt- 1
- 2
- 3
- 4
- 5
- 6
- 7
- 8
- 9
- 10
- 11
- 12
- 13
- 14
- 15
- 16
安装head
npm install- 1
修改_site/app.js
// 把localhost改为ip
this.base_uri = this.config.base_uri || this.prefs.get("app-base_uri") || "http://localhost:9200";
this.base_uri = this.config.base_uri || this.prefs.get("app-base_uri") || "http://10.254.21.18:9200";- 1
- 2
- 3
修改Gruntfile.js
connect: {
    server: {
        options: {
            hostname: "0.0.0.0", #这里
            port: 9100,
            base: '.',
            keepalive: true
        }
    }
}- 1
- 2
- 3
- 4
- 5
- 6
- 7
- 8
- 9
- 10
启动
grunt server &- 1

安装Logstash
安装
wget https://artifacts.elastic.co/downloads/logstash/logstash-5.1.1.tar.gz
tar xf logstash-5.1.1.tar.gz
- 1
- 2
- 3
写入elasticsearch
cd logstash-5.1.1
vim conf/elastic.conf
input {
    file {
        path => "/usr/local/openresty/nginx/logs/access.log"
    }
}
output {
    elasticsearch {
        hosts => "10.254.21.18"
        index => "nginx-access-%{+YYYY.MM.dd}"
    }
    stdout {
        codec => rubydebug
    }
}- 1
- 2
- 3
- 4
- 5
- 6
- 7
- 8
- 9
- 10
- 11
- 12
- 13
- 14
- 15
- 16
文件方式启动
/usr/local/logstash-5.1.1/bin/logstash -f /usr/local/logstash-5.1.1/config/elastic.conf - 1
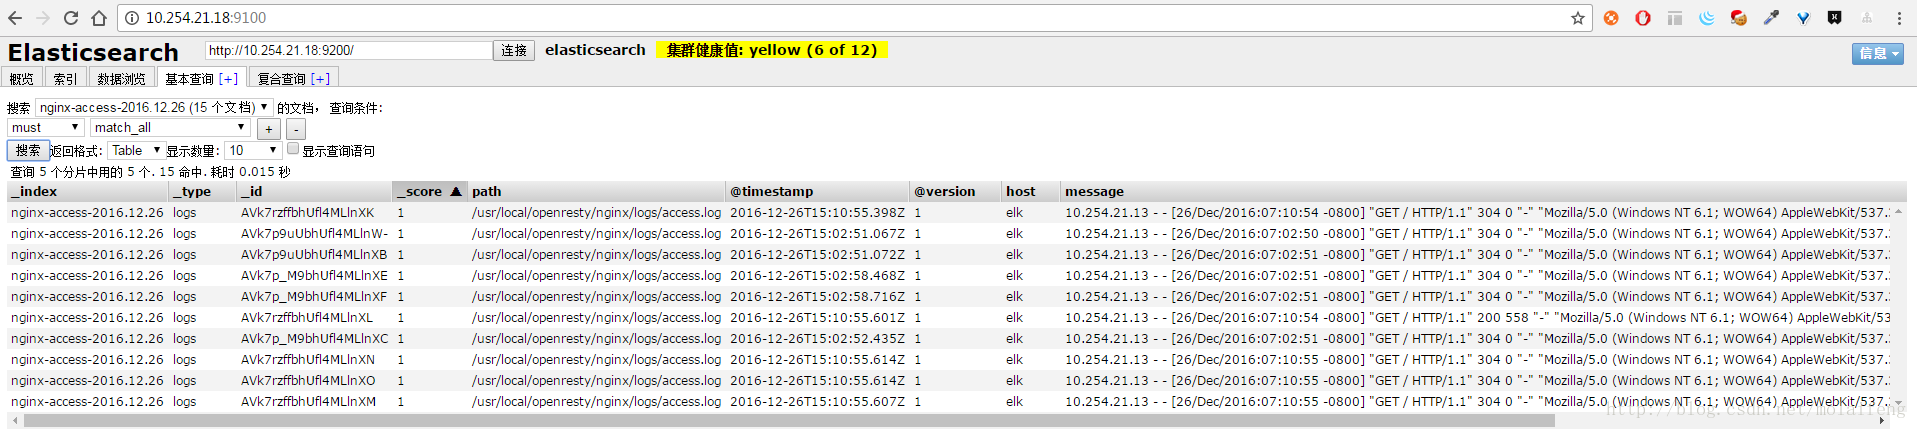
在Elasticsearch中查看
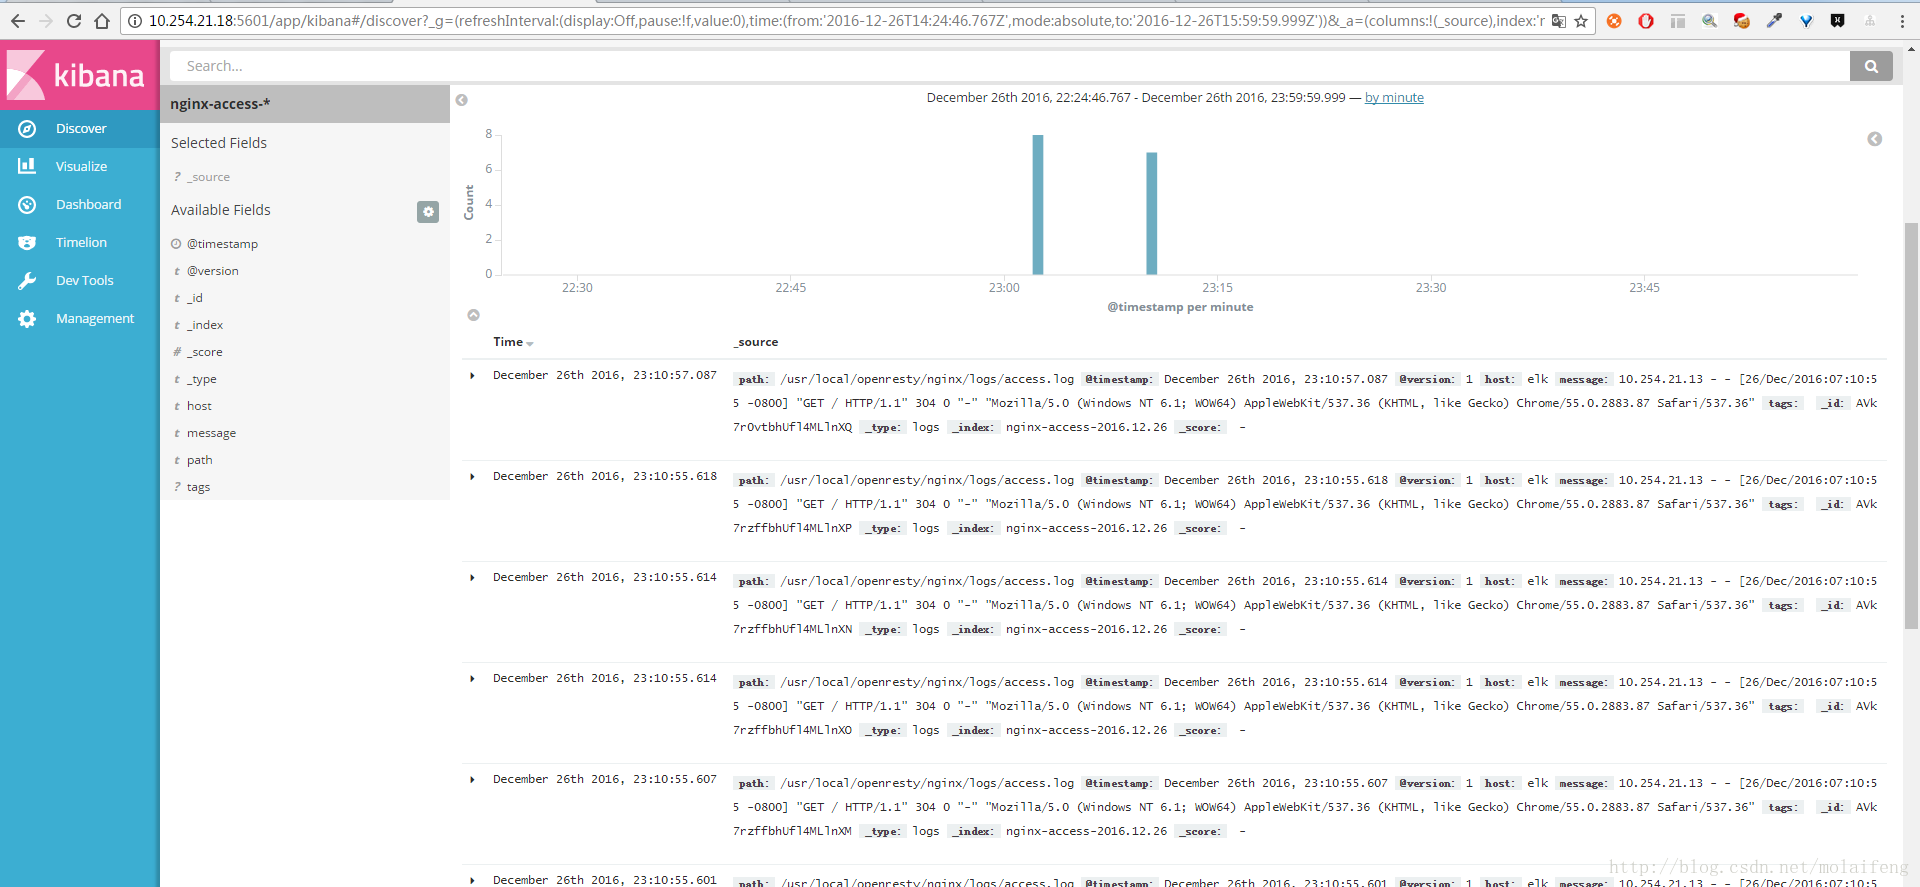
安装Kibana
安装
wget https://artifacts.elastic.co/downloads/kibana/kibana-5.1.1-x86_64.rpm
rpm -ivh kibana-5.1.1-x86_64.rpm- 1
- 2
配置
vim vim /etc/kibana/kibana.yml
server.port: 5601
server.host: "0.0.0.0"
elasticsearch.url: "http://elk:9200"- 1
- 2
- 3
- 4
启动
cd kibana/
./bin/kibana &- 1
- 2