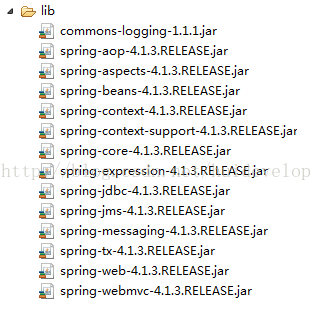
1、导包(springmvc单独使用的包)
2、在src下创建springmvc.xml配置文件
3、在web.xml中配置前端控制器
<!-- springmvc前端控制器配置 -->
<servlet>
<servlet-name>springmvc</servlet-name>
<servlet-class>org.springframework.web.servlet.DispatcherServlet</servlet-class>
<init-param>
<param-name>contextConfigLocation</param-name>
<param-value>classpath:springmvc.xml</param-value>
</init-param>
</servlet>
<servlet-mapping>
<servlet-name>springmvc</servlet-name>
<url-pattern>*.action</url-pattern>
</servlet-mapping>
4、使用spring注解方式书写controller类
/**
* 商品Controller
*
* @author Administrator
*
*/
@Controller
public class CommodityController {
@RequestMapping("/CommodityList.action")//url映射
public ModelAndView CommodityList() {
ModelAndView modelAndView = new ModelAndView();
List<CommodityItem> cItems =new ArrayList<>();
cItems.add(new CommodityItem(1, "1华为 荣耀8", 2399f, new Date(), "质量好!1"));
cItems.add(new CommodityItem(2, "2华为 荣耀8", 2399f, new Date(), "质量好!2"));
cItems.add(new CommodityItem(3, "3华为 荣耀8", 2399f, new Date(), "质量好!3"));
//设置数据
modelAndView.addObject("cItems", cItems);
//设置视图
modelAndView.setViewName("/WEB-INF/jsp/commodityList.jsp");
return modelAndView;
}
}
5、在springmvc.xml中配置注解扫描包
<beans xmlns:xsi="http://www.w3.org/2001/XMLSchema-instance"
xmlns="http://www.springframework.org/schema/beans" xmlns:context="http://www.springframework.org/schema/context"
xmlns:aop="http://www.springframework.org/schema/aop"
xsi:schemaLocation="http://www.springframework.org/schema/aop http://www.springframework.org/schema/aop/spring-aop-4.2.xsd
http://www.springframework.org/schema/beans http://www.springframework.org/schema/beans/spring-beans-4.2.xsd
http://www.springframework.org/schema/context http://www.springframework.org/schema/context/spring-context-4.2.xsd">
<!-- 扫描cn.znh.springmvc包下的注解 -->
<context:component-scan base-package="cn.znh.springmvc"/>
</beans>
6、在浏览器中输入http://localhost:8080/springmvc_demo1/CommodityList.action测试
7、配置三大组件(映射器、适配器、视图解释器)
先在springmvc中引入mvc约束
<!-- 默认的映射器过时了(仍然可以用),自己配置新的映射器 -->
<!-- <bean class="org.springframework.web.servlet.mvc.method.annotation.RequestMappingHandlerMapping"/> -->
<!-- 默认的处理器适配器过时了(仍然可以用),自己配置新的处理器适配器 -->
<!-- <bean class="org.springframework.web.servlet.mvc.method.annotation.RequestMappingHandlerAdapter"/> -->
<!-- 注解驱动 ,这行代码完全替代上面的手动配置映射器和适配器的代码 -->
<mvc:annotation-driven />
<!-- 视图解释器,自己手动配置可以添加前缀和后缀 ,这样在controller中设置视图时,视图路径可以简写-->
<bean
class="org.springframework.web.servlet.view.InternalResourceViewResolver">
<property name="prefix" value="/WEB-INF/jsp/" />
<property name="suffix" value=".jsp" />
</bean>
刚才CommodityController中的代码
//设置视图
modelAndView.setViewName("/WEB-INF/jsp/commodityList.jsp");
可以简化为
//设置视图
modelAndView.setViewName("commodityList");
二、ssm的整合
1、导包(spring和mybatis整合、springmvc和mybatis整合、ssm整合导入的jar包是一样的,可以参照spring和mybatis整合导的jar包)
2、在src下书写db.properties、applicationContext.xml、sqlMapConfig.xml、springmvc.xml
db.properties:
jdbc.driver=com.mysql.jdbc.Driver
jdbc.url=jdbc:mysql://localhost:3306/springmvc?characterEncoding=utf-8
jdbc.username=root
jdbc.password=123
sqlMapConfig.xml:
<?xml version="1.0" encoding="UTF-8"?>
<!DOCTYPE configuration
PUBLIC "-//mybatis.org//DTD Config 3.0//EN"
"http://mybatis.org/dtd/mybatis-3-config.dtd">
<configuration>
<typeAliases>
<!-- 批量别名定义,别名是指定的包下的每个类名(每个类的类名可以指代自身的全路径,大小写都可以) -->
<package name="cn.znh.springmvc.domain" />
</typeAliases>
</configuration>
<?xml version="1.0" encoding="UTF-8"?>
<beans xmlns:xsi="http://www.w3.org/2001/XMLSchema-instance"
xmlns="http://www.springframework.org/schema/beans" xmlns:context="http://www.springframework.org/schema/context"
xmlns:aop="http://www.springframework.org/schema/aop" xmlns:mvc="http://www.springframework.org/schema/mvc"
xsi:schemaLocation="http://www.springframework.org/schema/beans http://www.springframework.org/schema/beans/spring-beans-4.2.xsd http://www.springframework.org/schema/context http://www.springframework.org/schema/context/spring-context-4.2.xsd http://www.springframework.org/schema/aop http://www.springframework.org/schema/aop/spring-aop-4.2.xsd http://www.springframework.org/schema/mvc http://www.springframework.org/schema/mvc/spring-mvc-4.2.xsd ">
<!-- 扫描cn.znh.springmvc包下的注解 --><context:component-scan base-package="cn.znh.springmvc" />
<!-- 注解驱动 ,这行代码是手动配置映射器和适配器的代码 -->
<mvc:annotation-driven />
<!-- 视图解释器,自己手动配置可以添加前缀和后缀 ,这样在controller中设置视图时,视图路径可以简写-->
<bean
class="org.springframework.web.servlet.view.InternalResourceViewResolver">
<property name="prefix" value="/WEB-INF/jsp/" />
<property name="suffix" value=".jsp" />
</bean>
</beans>
applicationContext.xml:
<?xml version="1.0" encoding="UTF-8"?>
<beans xmlns:xsi="http://www.w3.org/2001/XMLSchema-instance"
xmlns="http://www.springframework.org/schema/beans" xmlns:context="http://www.springframework.org/schema/context"
xmlns:aop="http://www.springframework.org/schema/aop"
xsi:schemaLocation="http://www.springframework.org/schema/aop http://www.springframework.org/schema/aop/spring-aop-4.2.xsd
http://www.springframework.org/schema/beans http://www.springframework.org/schema/beans/spring-beans-4.2.xsd
http://www.springframework.org/schema/context http://www.springframework.org/schema/context/spring-context-4.2.xsd">
<!-- 扫描cn.znh.springmvc包下的注解 -->
<context:component-scan base-package="cn.znh.springmvc" />
<!-- 引入db配置文件 -->
<context:property-placeholder location="classpath:db.properties" />
<!-- 数据库连接池 -->
<bean id="dataSource" class="org.apache.commons.dbcp.BasicDataSource"
destroy-method="close">
<property name="driverClassName" value="${jdbc.driver}" />
<property name="url" value="${jdbc.url}" />
<property name="username" value="${jdbc.username}" />
<property name="password" value="${jdbc.password}" />
<property name="maxActive" value="10" />
<property name="maxIdle" value="5" />
</bean>
<!-- Mybatis的工厂 -->
<bean id="sqlSessionFactoryBean" class="org.mybatis.spring.SqlSessionFactoryBean">
<property name="dataSource" ref="dataSource" />
<!-- 核心配置文件的位置 -->
<property name="configLocation" value="classpath:sqlMapConfig.xml" />
</bean>
<!-- Mapper(dao)包扫描方式,不需要指定具体的mapperInterface,会自动扫描指定包下面的所有mapper -->
<bean class="org.mybatis.spring.mapper.MapperScannerConfigurer">
<!-- 基本包 -->
<property name="basePackage" value="cn.znh.springmvc.dao"/>
</bean>
</beans>
3、在web.xml中配置
<!-- Spring监听器 -->
<listener>
<listener-class>org.springframework.web.context.ContextLoaderListener</listener-class>
</listener>
<context-param>
<param-name>contextConfigLocation</param-name>
<param-value>classpath:applicationContext.xml</param-value>
</context-param>
<!-- 前端控制器 -->
<servlet>
<servlet-name>springmvc</servlet-name>
<servlet-class>org.springframework.web.servlet.DispatcherServlet</servlet-class>
<init-param>
<param-name>contextConfigLocation</param-name>
<param-value>classpath:springmvc.xml</param-value>
</init-param>
</servlet>
<servlet-mapping>
<servlet-name>springmvc</servlet-name>
<url-pattern>*.action</url-pattern>
</servlet-mapping>
4、展示商品列表的示例代码:
A、书写dao(Mapper)层接口,和dao(Mapper)的xml文件,两者要名称一样并放在一个目录下(具体原因查看mybatis的基本使用)
/**
* 商品dao层接口
*
* @author Administrator
*
*/
public interface ItemsDao {
List<Items> getItemList();
}
<?xml version="1.0" encoding="UTF-8" ?>
<!DOCTYPE mapper
PUBLIC "-//mybatis.org//DTD Mapper 3.0//EN"
"http://mybatis.org/dtd/mybatis-3-mapper.dtd">
<mapper namespace="cn.znh.springmvc.dao.ItemsDao">
<select id="getItemList" resultType="Items">
select * from items
</select>
</mapper>
B、书写service层
/**
* 商品service层
* @author Administrator
*
*/
@Service
public class ItemsServiceImpl implements ItemsService {
//依赖dao层,通过注解从spring中获取dao
@Autowired
private ItemsDao itemsDao;
@Override
public List<Items> getItemList() {
return itemsDao.getItemList();
}
}
C、书写controller层
/**
* 商品Controller
*
* @author Administrator
*
*/
@Controller
public class ItemsController {
// 依赖service层,从spring中获取service
@Autowired
private ItemsService itemsService;
@RequestMapping("/ItemList.action")
public ModelAndView CommodityList() {
//获取数据
List<Items> itemsList = itemsService.getItemList();
ModelAndView modelAndView = new ModelAndView();
// 设置数据
modelAndView.addObject("itemList", itemsList);
// 设置视图
modelAndView.setViewName("itemList");
return modelAndView;
}
}
D、访问http://localhost:8080/springmvc_mybatis/ItemList.action测试
5、简单类型参数绑定
dao层和service层代码省略,controller中添加方法:
//根据商品id查询商品
@RequestMapping("/itemEdit.action")
public ModelAndView getItemById(Integer id) {
//获取数据
Items items = itemsService.getItemById(id);
ModelAndView modelAndView = new ModelAndView();
// 设置数据
modelAndView.addObject("item", items);
// 设置视图
modelAndView.setViewName("editItem");
return modelAndView;
}
绑定的是参数,方法中的参数是jsp中传递过来的,形参名称要和jsp中的参数名称相同(这里方法中的形参名称是id,jsp中的参数名称也是id)
jsp代码:
<a href="${pageContext.request.contextPath }/itemEdit.action?id=2">修改</a>
6、对象类型参数绑定(pojo类型,包装类型参数绑定和这种方式一样,只是多叠加一层)
dao层和service层代码省略,controller中添加方法:
//修改商品信息
@RequestMapping("/updateitem.action")
public ModelAndView updateItem(Items items) {
//获取数据
Items itemsNew = itemsService.updateItem(items);
ModelAndView modelAndView = new ModelAndView();
// 设置视图
modelAndView.setViewName("success");
return modelAndView;
}
方法形参items和jsp没有关系,可以任意命名,但是jsp中的每个字段的名称必须和Items类中的属性一样
jsp代码:
<input type="text" name="name" value="${item.name }" />
7、自定义参数类型绑定
A、先在springmvc中配置转换器
<!-- 注解驱动-->
<mvc:annotation-driven conversion-service="conversionServiceFactoryBean" />
<!-- 配置Conveter转换器 转换工厂-->
<bean id="conversionServiceFactoryBean"
class="org.springframework.format.support.FormattingConversionServiceFactoryBean">
<!-- 可以配置 多个转换器 -->
<property name="converters">
<list>
<bean class="cn.znh.springmvc.conversion.DateConversion" />
</list>
</property>
</bean>
B、书写转换器类(这里是日期转换器)
/**
* 日期转换器,第一个泛型参数是转换之前的格式,第二个泛型参数转换后的类型格式
*
* @author Administrator
*
*/
public class DateConversion implements Converter<String, Date> {
@Override
public Date convert(String strDate) {
DateFormat dFormat = new SimpleDateFormat("yyyy_MM_dd");
try {
return dFormat.parse(strDate);
} catch (ParseException e) {
// TODO Auto-generated catch block
e.printStackTrace();
}
return null;
}
C、正常接收参数(yyyy_MM_dd格式的字符串形式的日期,在controller里接收参数时,会自动转换为Date类型)
8、数组参数类型绑定(如果是list类型则必须放在包装类中,让list作为包装类的一个属性,springmvc不支持单独接收list数据)
// 删除多个商品
@RequestMapping("/deletes.action")
public ModelAndView deleteItems(Integer[] ids) {
// 获取数据
Items itemsNew = itemsService.deleteItems(ids);
System.out.print(ids.length);
ModelAndView modelAndView = new ModelAndView();
// 设置视图
modelAndView.setViewName("success");
return modelAndView;
}
多选框,一次提交多个商品id
<td><input type="checkbox" name="ids" value="${item.id }"></td>
9、解决post乱码问题
<!-- 处理POST提交乱码问题 -->
<filter>
<filter-name>encoding</filter-name>
<filter-class>org.springframework.web.filter.CharacterEncodingFilter</filter-class>
<init-param>
<param-name>encoding</param-name>
<param-value>UTF-8</param-value>
</init-param>
</filter>
<filter-mapping>
<filter-name>encoding</filter-name>
<url-pattern>*.action</url-pattern>
</filter-mapping>
10、上面所写的controller层的方法的返回值都是ModelAndView,其实这种方式并不常用,因为耦合性太强了。还有其他两种返回值:
A、返回string,返回的是视图路径,数据放在形参里的Model中。这样使视图和数据解耦。
B、返回值是void,不需要跳转视图的时候使用,比如客户端网络请求,返回json数据时。
三、异常处理器
springmvc提供一个异常处理器接口HandlerExceptionResolver,我们需要写出它的实现类,然后在自己写的实现类中处理异常。
A、基本使用
/**
* 自定义异常处理类,实现springmvc中的异常处理器接口HandlerExceptionResolver
* @author Administrator
*
*/
@Component
public class CustomExceptionDeal implements HandlerExceptionResolver {
/**
* request 请求
* response 响应
* object 出错的位置,能定位到具体的出错的方法(包含能找到方法的完整信息,包+类+方法名+返回值+参数)
* exception 异常信息
*/
@Override
public ModelAndView resolveException(HttpServletRequest request,
HttpServletResponse response, Object object, Exception exception) {
ModelAndView modelAndView=new ModelAndView();
modelAndView.addObject("error",exception.getMessage());
modelAndView.setViewName("error");
return modelAndView;
}
}
可以在程序中定义一个除0异常进行测试,错误方法位置信息为:
public org.springframework.web.servlet.ModelAndView cn.znh.springmvc.controller.ItemsController.CommodityList()
B、根据业务需求,手动抛出异常,在根据异常进行业务处理,比如接收的参数为空,就可以手动抛出异常,跳转到指定错误页面。
/**
* 自定义异常类,处理一些自己预期的业务上的异常(根据业务需要,自己手动抛出的异常)
*
* @author Administrator
*
*/
public class MessageException extends Exception {
private String msg;
public MessageException(String msg) {
super();
this.msg = msg;
}
public String getMsg() {
return msg;
}
public void setMsg(String msg) {
this.msg = msg;
}
}
// 根据商品id查询商品
@RequestMapping("/itemEdit.action")
public ModelAndView getItemById(Integer id) throws MessageException {
//id为空就抛自定义异常
if(id==null){
throw new MessageException("id不能为空");
}
// 获取数据
Items items = itemsService.getItemById(id);
ModelAndView modelAndView = new ModelAndView();
// 设置数据
modelAndView.addObject("item", items);
// 设置视图
modelAndView.setViewName("editItem");
return modelAndView;
}
/**
* 自定义异常处理类,实现springmvc中的异常处理器接口HandlerExceptionResolver
*
* @author Administrator
*
*/
@Component
public class CustomExceptionDeal implements HandlerExceptionResolver {
/**
* request 请求
* response 响应
* object 出错的位置,能定位到具体的出错的方法(包含能找到方法的完整信息,包+类+方法名+返回值+参数)
* exception 异常信息
*/
@Override
public ModelAndView resolveException(HttpServletRequest request,
HttpServletResponse response, Object object, Exception exception) {
ModelAndView modelAndView = new ModelAndView();
if (exception instanceof MessageException) {//自己预期的异常,进行业务处理
modelAndView.addObject("error", ((MessageException) exception).getMsg());
} else {//不是自己预期的异常
modelAndView.addObject("error", "未知异常");
}
modelAndView.setViewName("error");
return modelAndView;
}
}
四、json交互
A、引入jquery,放在WebContent目录下。
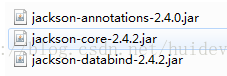
B、导包
<script type="text/javascript" src="${pageContext.request.contextPath }/js/jquery-1.4.4.min.js"></script>
<script type="text/javascript">
$(function(){
var params = '{"id": 1,"name": "商品名称","price": 100,"detail": "商品详情"}';
//进行网络请求
$.ajax({
url : "${pageContext.request.contextPath }/json.action",
data : params,
contentType : "application/json;charset=UTF-8",//指定发送数据的格式
type : "post",
dataType : "json",//回调是json格式
success : function(data){
alert(data.name);
}
});
});
</script>
D、书写controller层的代码
// json数据交互
@RequestMapping(value = "/json.action")
public @ResponseBody
CommodityItem json(@RequestBody CommodityItem item) {
System.out.println(item);
return item;
}
五、springmvc中的拦截器使用(可以在里面做全局操作)
在springmvc.xml中配置拦截器
<!-- Springmvc的拦截器 ,拦截器列表-->
<mvc:interceptors>
<mvc:interceptor>
<mvc:mapping path="/**"/>//拦截所有
<!-- 自定义的拦截器类 -->
<bean class="cn.znh.springmvc.interceptor.Interceptor1"/>
</mvc:interceptor>
<mvc:interceptor>
<mvc:mapping path="/**"/>
<!-- 自定义的拦截器类 -->
<bean class="cn.znh.springmvc.interceptor.Interceptor2"/>
</mvc:interceptor>
</mvc:interceptors>
书写拦截器类(Interceptor1和Interceptor2,这里只书写Interceptor1)
public class Interceptor1 implements HandlerInterceptor{
public boolean preHandle(HttpServletRequest request, HttpServletResponse response, Object arg2) throws Exception {
System.out.println("方法前执行----------1");
//可以在这做全局登录判断,如果没有登陆就重定向到登陆页面(不放行),如果登陆了就放行,继续执行后面的业务逻辑
String requestURI = request.getRequestURI();
if(!requestURI.contains("/login")){//登录页面不拦截
String username = (String) request.getSession().getAttribute("user_name");
if(null == username){
response.sendRedirect(request.getContextPath() + "/login.action");
return false;
}
}
return true;
}
public void postHandle(HttpServletRequest arg0, HttpServletResponse arg1, Object arg2, ModelAndView arg3)
throws Exception {
System.out.println("方法后执行----------1");
}
public void afterCompletion(HttpServletRequest arg0, HttpServletResponse arg1, Object arg2, Exception arg3)
throws Exception {
System.out.println("页面渲染后执行----------1");
}
}