nenux启动好了,那我们还需要配置我们的maven 的setttings.xml文件。但是到底该怎么配置呢?我也不知道,每次都是别人说要这样改,要那样该。不如直接看官网中的说明吧。
Configuring Apache Maven
To use repository manager with Apache Maven, configure Maven to check the repository manager instead of the default, built-in connection to the Central Repository.
To do this, you add a mirror configuration and override the default configuration for the central repository in your ~/.m2/settings.xml, shown below:
大概意思就是说,为了使用maven的仓库管理器,需要配置他替代默认的。你要添加一个镜像配置,并重载默认的中央仓库配置。
那我们就按照这个试试吧!
<settings>
    <localRepository>/run/media/snail/workspace1/WrokSstation/repository</localRepository>

   <servers>
    <server>
        <id>nexus</id>
        <username>admin</username>
        <password>admin123</password>
    </server>

    </servers>


  <mirrors>
    <mirror>
      <!--This sends everything else to /public -->
      <id>nexus</id>
      <mirrorOf>*</mirrorOf>
      <url>http://localhost:8081/repository/maven-public/</url>
    </mirror>
  </mirrors>


  <profiles>
    <profile>
      <id>nexus</id>
      <!--Enable snapshots for the built in central repo to direct -->
      <!--all requests to nexus via the mirror -->
      <repositories>
        <repository>
          <id>central</id>
          <url>http://central</url>
          <releases><enabled>true</enabled></releases>
          <snapshots><enabled>true</enabled></snapshots>
        </repository>
      </repositories>
     <pluginRepositories>
        <pluginRepository>
          <id>central</id>
          <url>http://central</url>
          <releases><enabled>true</enabled></releases>
          <snapshots><enabled>true</enabled></snapshots>
        </pluginRepository>
      </pluginRepositories>
    </profile>
  </profiles>


  <activeProfiles>
    <!--make the profile active all the time -->
    <activeProfile>nexus</activeProfile>
  </activeProfiles>


</settings>
找到自己安装的maven位置,在conf文件夹下编辑settings.xml
<settings>
<localRepository>/run/media/snail/workspace1/WrokSstation/repository</localRepository>

<servers>
<server>
    <id>nexus</id>
    <username>respuser</username>
    <password>2018</password>
</server>
</servers>
<mirrors>
<mirror>
  <!--This sends everything else to /public -->
  <id>nexus</id>
  <mirrorOf>*</mirrorOf>
  <url>http://localhost:8081/repository/maven-public/</url>
</mirror>
</mirrors>
<profiles>
<profile>
  <id>nexus</id>
  <!--Enable snapshots for the built in central repo to direct -->
  <!--all requests to nexus via the mirror -->
  <repositories>
    <repository>
      <id>central</id>
      <url>http://central</url>
      <releases><enabled>true</enabled></releases>
      <snapshots><enabled>true</enabled></snapshots>
    </repository>
  </repositories>
 <pluginRepositories>
    <pluginRepository>
      <id>central</id>
      <url>http://central</url>
      <releases><enabled>true</enabled></releases>
      <snapshots><enabled>true</enabled></snapshots>
    </pluginRepository>
  </pluginRepositories>
</profile>
</profiles>
<activeProfiles>
<!--make the profile active all the time -->
<activeProfile>nexus</activeProfile>
</activeProfiles>
</settings>
我们看看能不能通过maven 把包传到仓库中
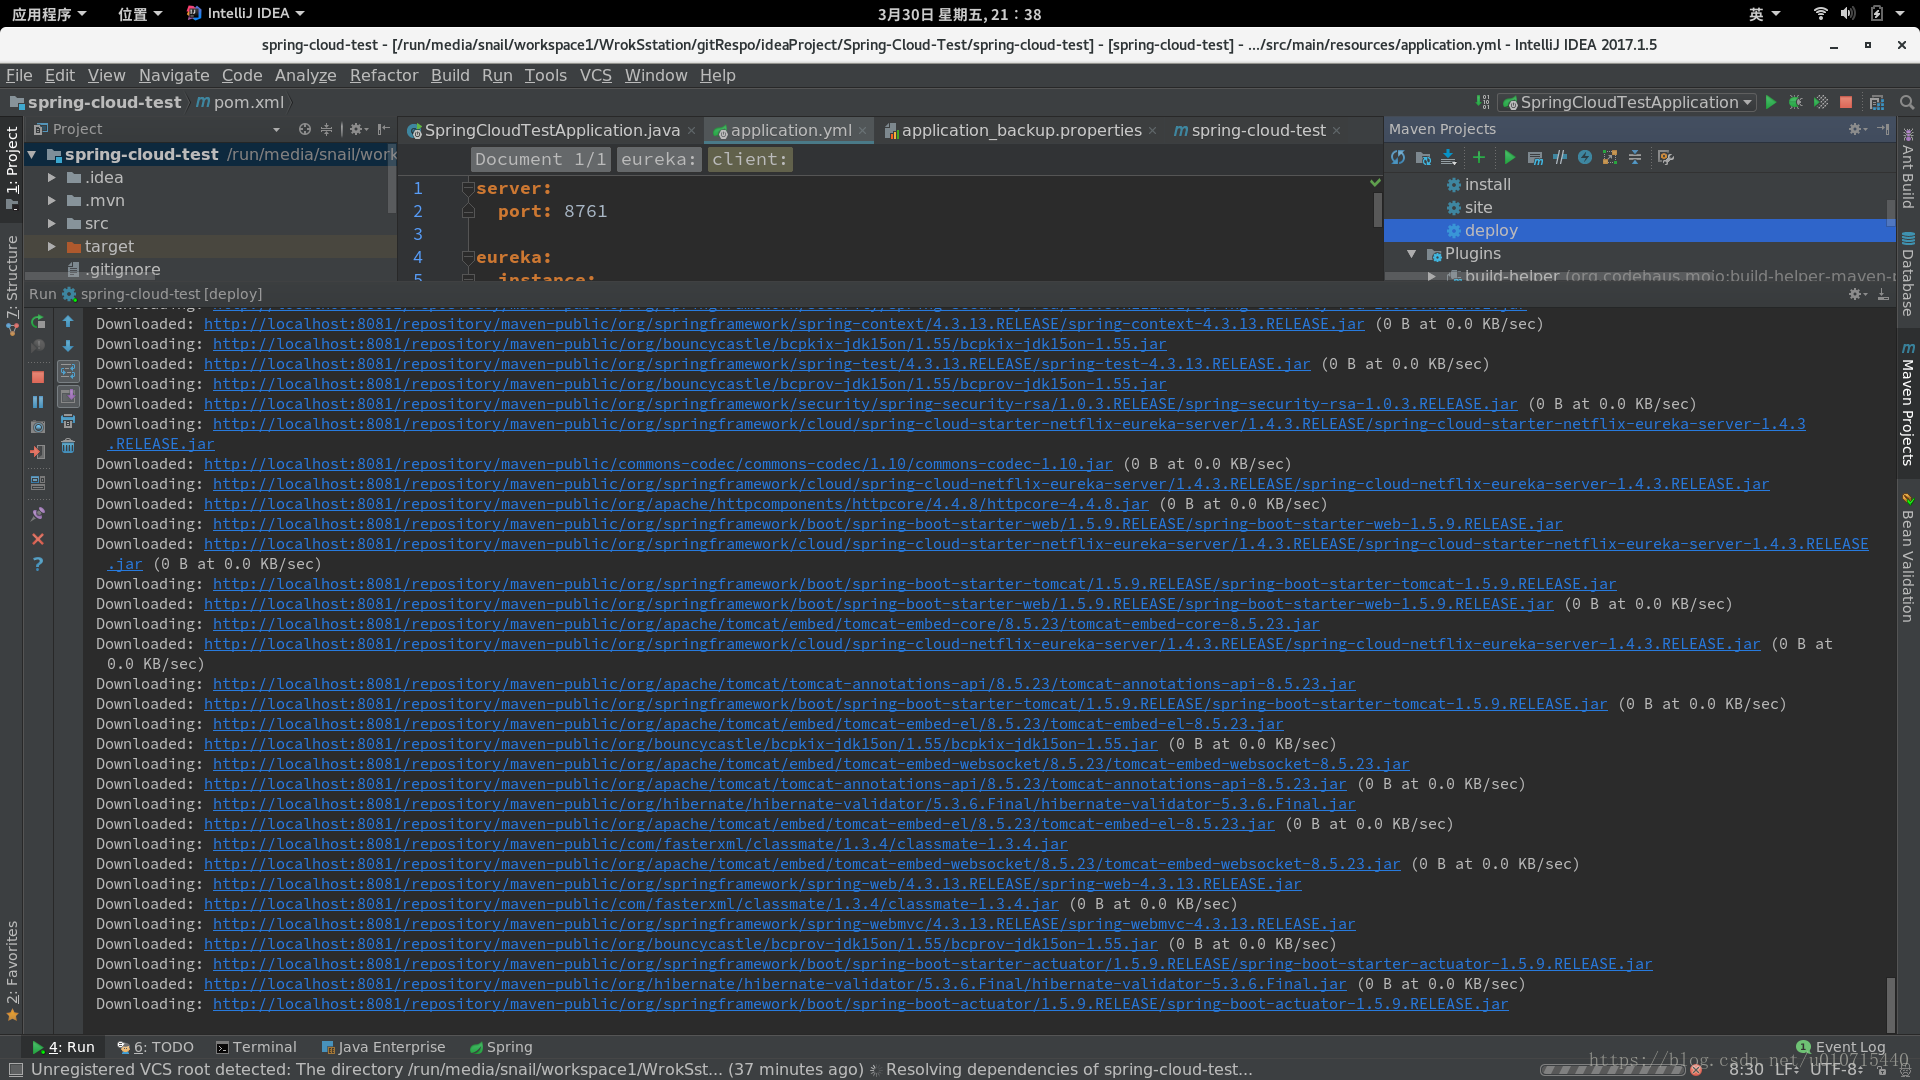
我们看到会自动把项目依赖下载下来:
把我们的项目放到仓库中 : mvn deploy
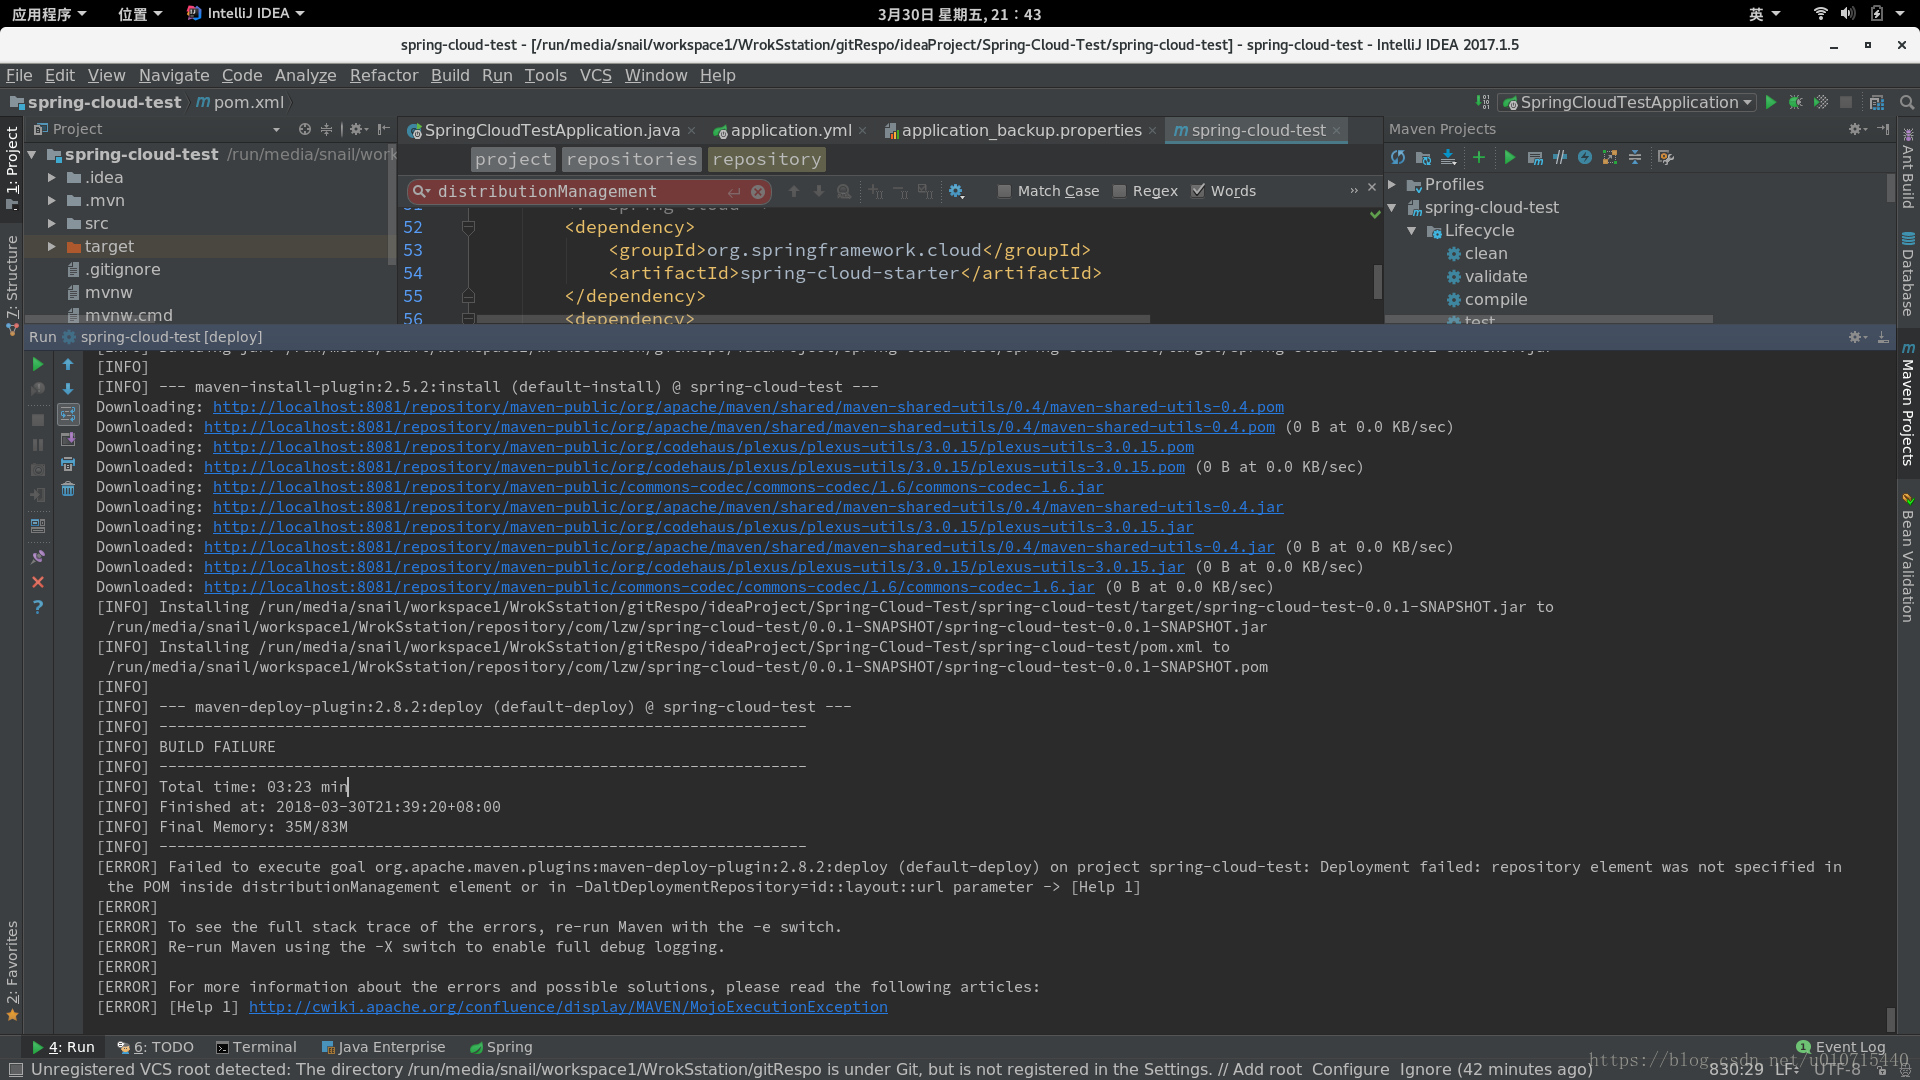
失败了!!! why?
折腾半小时,终于搞好了,就是pom.xml与settings.xml中设置的用户中id要一直。最终pom.xml文件是这样的
<?xml version="1.0" encoding="UTF-8"?>
<project xmlns="http://maven.apache.org/POM/4.0.0" xmlns:xsi="http://www.w3.org/2001/XMLSchema-instance"
xsi:schemaLocation="http://maven.apache.org/POM/4.0.0 http://maven.apache.org/xsd/maven-4.0.0.xsd">
<modelVersion>4.0.0</modelVersion>
<groupId>com.lzw</groupId>
<artifactId>spring-cloud-test</artifactId>
<version>0.0.1-SNAPSHOT</version>
<packaging>jar</packaging>
<name>spring-cloud-test</name>
<description>Spring-cloud 学习</description>
<parent>
<groupId>org.springframework.boot</groupId>
<artifactId>spring-boot-starter-parent</artifactId>
<version>1.5.9.RELEASE</version>
</parent>
<dependencyManagement>
<dependencies>
<dependency>
<groupId>org.springframework.cloud</groupId>
<artifactId>spring-cloud-dependencies</artifactId>
<version>Edgware.SR2</version>
<type>pom</type>
<scope>import</scope>
</dependency>
</dependencies>
</dependencyManagement>
<properties>
<project.build.sourceEncoding>UTF-8</project.build.sourceEncoding>
<project.reporting.outputEncoding>UTF-8</project.reporting.outputEncoding>
<java.version>1.8</java.version>
</properties>
<dependencies>
<dependency>
<groupId>org.springframework.boot</groupId>
<artifactId>spring-boot-starter</artifactId>
</dependency>
<dependency>
<groupId>org.springframework.boot</groupId>
<artifactId>spring-boot-starter-test</artifactId>
<scope>test</scope>
</dependency>
<!--spring-cloud-->
<dependency>
<groupId>org.springframework.cloud</groupId>
<artifactId>spring-cloud-starter</artifactId>
</dependency>
<dependency>
<groupId>org.springframework.cloud</groupId>
<artifactId>spring-cloud-starter-netflix-eureka-server</artifactId>
</dependency>
</dependencies>
<repositories>
<repository>
<id>spring-milestones</id>
<name>Spring Milestones</name>
<url>https://repo.spring.io/libs-milestone</url>
<snapshots>
<enabled>true</enabled>
</snapshots>
</repository>
</repositories>
<distributionManagement>
<repository>
<!--要与settting.xml中 server中的id一致-->
<id>nexus</id>
<name>Releases</name>
<url>http://localhost:8081/repository/maven-releases</url>
</repository>
<snapshotRepository>
<id>nexus</id>
<name>Snapshot</name>
<url>http://localhost:8081/repository/maven-snapshots</url>
</snapshotRepository>
</distributionManagement>
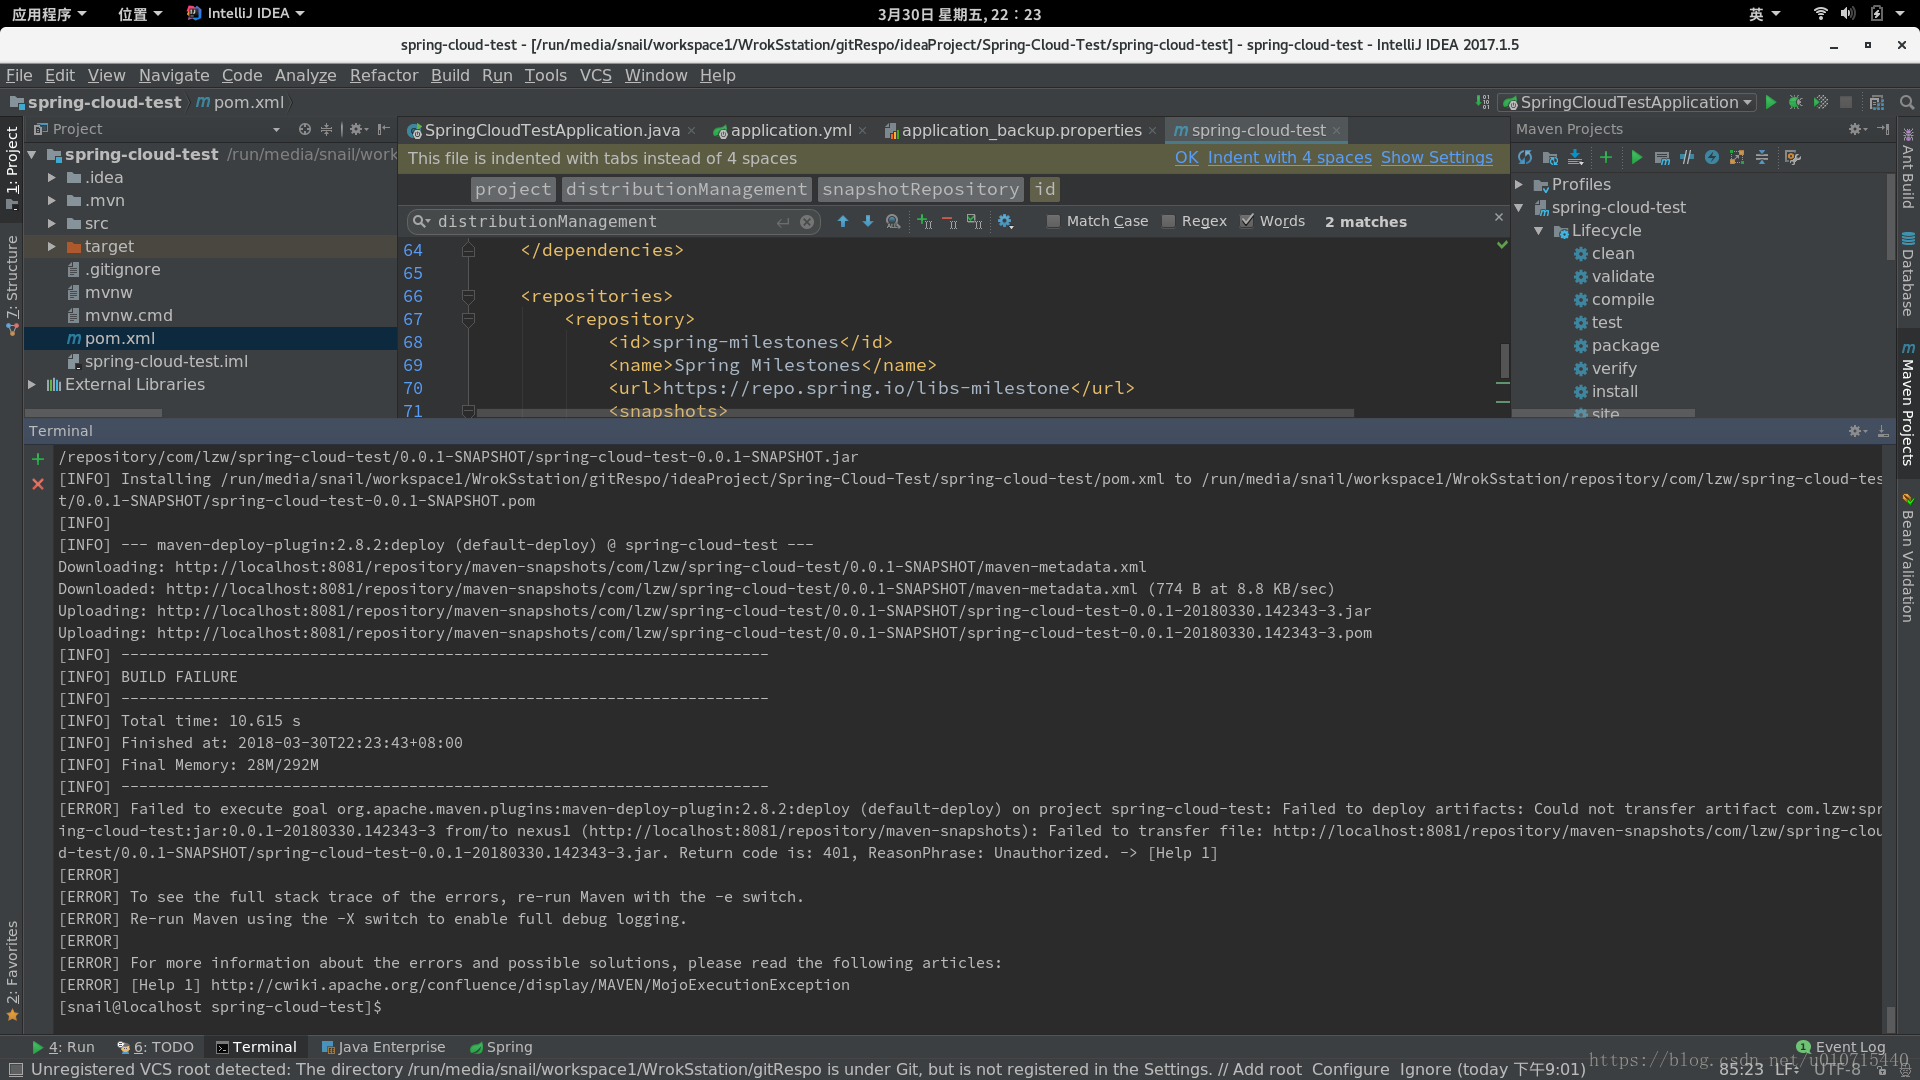
</project>再执行一次就可以了,看看我们的仓库有没有
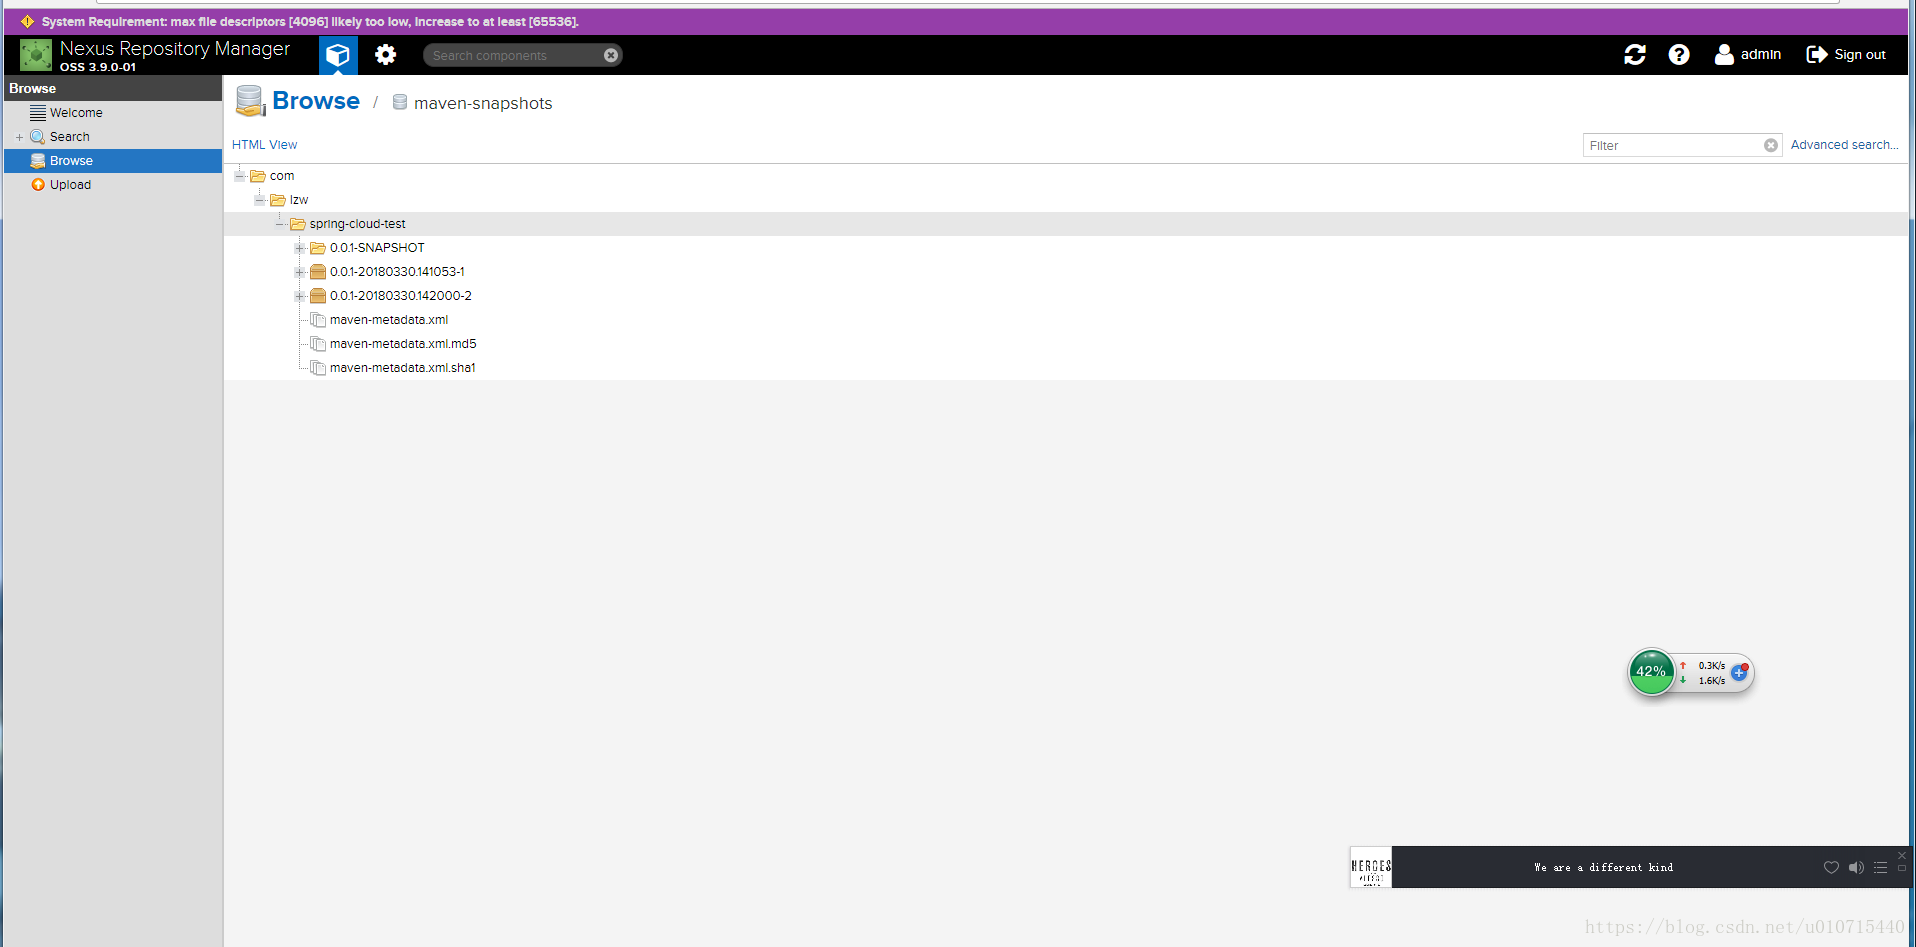
可以啦。当然这个东西我也是第一次弄,实际生产中能不能这么搞还不知道呢,仅供参考。