修改RAC环境下IP是一个同事在移动的生产环境上面做过的 我把其整理一下 在自己虚拟机上重新做了一遍
以下这些在生产库上也可以做
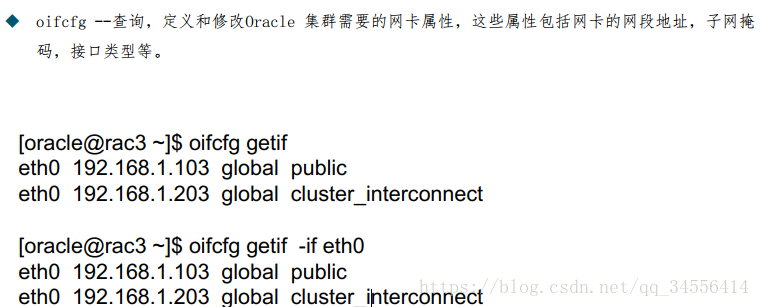
RAC中网络管理层oifconfig命令:
操作系统:Oracle Linux 6.5
数据库版本:11.2.0.4
目标:
修改前/etc/hosts配置
[root@RAC1 ~]# cat /etc/hosts
127.0.0.1 localhost localhost.localdomain localhost4 localhost4.localdomain4
::1 localhost localhost.localdomain localhost6 localhost6.localdomain6
192.168.56.101 rac1
192.168.56.11 rac1-vip
10.10.10.1 rac1-priv
192.168.56.102 rac2
192.168.56.12 rac2-vip
10.10.10.2 rac2-priv
192.168.56.103 scan
修改后 所有的IP都需要修改
192.168.56.201 rac1
192.168.56.21 rac1-vip
10.10.10.11 rac1-priv
192.168.56.202 rac2
192.168.56.22 rac2-vip
10.10.10.12 rac2-priv
192.168.56.203 scan
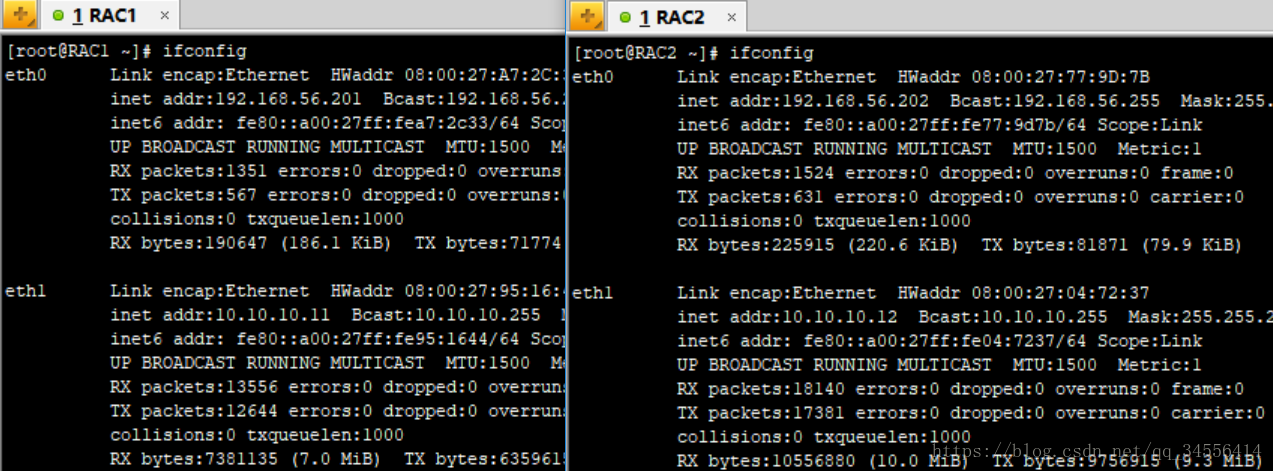
1、首先把网卡上的IP先修改为你需要的IP并且重启网络,在要修改的两个节点上面进行修改。这里实际情况进行修改,如果只改Public IP那么只需要修改其对应网卡IP,至于Private IP是不需要修改的,那么其对应的网卡信息也不需要修改。
vi /etc/sysconfig/network-scripts/ifcfg-eth0
vi /etc/sysconfig/network-scripts/ifcfg-eth1
service network restart
2、停止CRS相关资源并且关闭自启动
除了2.6以下均在一个节点运行即可,只需在其中一个节点执行即可
2.1 停止监听
# /u01/app/11.2.0/grid/bin/srvctl disable listener
#/u01/app/11.2.0/grid/bin/srvctl stop listener
2.2 停止数据库资源
#/u01/app/11.2.0/grid/bin/srvctl disable database -d oradb
#/u01/app/11.2.0/grid/bin/srvctl stop database -d oradb -o immediate
2.3 停止vip资源(-n选项后面是主机名,-i选项是/etc/hosts下面vip的名字))
#/u01/app/11.2.0/grid/bin/srvctl disable vip -i rac1-vip
#/u01/app/11.2.0/grid/bin/srvctl stop vip -n rac1
#/u01/app/11.2.0/grid/bin/srvctl disable vip -i rac2-vip
#/u01/app/11.2.0/grid/bin/srvctl stop vip -n rac2
2.4 停止scan_listener资源
#/u01/app/11.2.0/grid/bin/srvctl disable scan_listener
#/u01/app/11.2.0/grid/bin/srvctl stop scan_listener
2.5 停止scan资源
#/u01/app/11.2.0/grid/bin/srvctl disable scan
#/u01/app/11.2.0/grid/bin/srvctl stop scan
2.6 停止集群
#/u01/app/11.2.0/grid/bin/crsctl stop crs ------节点一二均执行
3、 修改/etc/hosts中的public ip,vip,scan ip 注意此处不能修改privite ip,后面步骤再去修改
修改后:
#cat /etc/hosts
# rac1
192.168.56.201 rac1
192.168.56.21 rac1-vip
10.10.10.1 rac1-priv(不修改)
# rac2
192.168.56.202 rac2
192.168.56.22 rac2-vip
10.10.10.2 rac2-priv(不修改)
# scan-ip
192.168.56.203 scan
3.1 启动CRS服务
#/u01/app/11.2.0/grid/bin/crsctl start crs (在几个节点上面均执行这条命令)
3.2 修改public ip
#/u01/app/11.2.0/grid/bin/oifcfg getif ------查看public配置,即查看集群的VIP
#/u01/app/11.2.0/grid/bin/oifcfg delif -global eth0
#/u01/app/11.2.0/grid/bin/oifcfg setif -global eth0/192.168.56.0:public
#/u01/app/11.2.0/grid/bin/oifcfg getif
(结果:eth1 10.10.10.0 global cluster_interconnect
eth0 192.168.56.0 global public)
3.3 修改vip
-----查看vip配置
#/u01/app/11.2.0/grid/bin/srvctl config vip -n rac1
([root@RAC1 ~]# /u01/app/11.2.0/grid/bin/srvctl config vip -n rac1
VIP exists: /rac1-vip/192.168.56.21/192.168.56.0/255.255.255.0/eth0, hosting node rac1)
#/u01/app/11.2.0/grid/bin/srvctl config vip -n rac2
([root@RAC1 ~]# /u01/app/11.2.0/grid/bin/srvctl config vip -n rac2
VIP exists: /rac2-vip/192.168.56.22/192.168.56.0/255.255.255.0/eth0, hosting node rac2)
-----修改vip配置,将VIP绑定到主机上面物理网卡上面
#/u01/app/11.2.0/grid/bin/srvctl modify nodeapps -n rac1 -A 192.168.56.21/255.255.255.0/eth0
#/u01/app/11.2.0/grid/bin/srvctl modify nodeapps -n rac2 -A 192.168.56.22/255.255.255.0/eth0
3.3 修改scan ip
-----查看scanip配置
#/u01/app/11.2.0/grid/bin/srvctl config scan
#/u01/app/11.2.0/grid/bin/srvctl modify scan -n 192.168.56.203
# /u01/app/11.2.0/grid/bin/srvctl config scan --查看配置后的结果
SCAN name: 192.168.56.203, Network: 1/192.168.56.0/255.255.255.0/eth0
SCAN VIP name: scan1, IP: /192.168.56.203/192.168.56.203
3.4 修改private ip
如果之前只有一个私有网卡,直接删除会出现报错,PRIF-31:Failed to delete the specified network ....
#/u01/app/11.2.0/grid/bin/oifcfg delif -global eth1
#/u01/app/11.2.0/grid/bin/oifcfg setif -global eth1/10.10.10.0:cluster_interconnect
3.5 修改/etc/hosts文件为
192.168.56.201 rac1
192.168.56.21 rac1-vip
10.10.10.11 rac1-priv(修改之前未修改的private ip)
192.168.56.202 rac2
192.168.56.22 rac2-vip
10.10.10.12 rac2-priv(修改之前未修改的private ip)
192.168.56.203 scan
3.6 修改CRS相关资源自启动(只需要在一个节点执行)
#/u01/app/11.2.0/grid/bin/srvctl enable listener
#/u01/app/11.2.0/grid/bin/srvctl enable database -d oradb
#/u01/app/11.2.0/grid/bin/srvctl enable vip -i rac1-vip
#/u01/app/11.2.0/grid/bin/srvctl enable vip -i rac2-vip
#/u01/app/11.2.0/grid/bin/srvctl enable scan_listener
#/u01/app/11.2.0/grid/bin/srvctl enable scan
3.7 重启crs服务(每个节点都执行)
#/u01/app/11.2.0/grid/bin/crsctl stop crs
#/u01/app/11.2.0/grid/bin/crsctl start crs
3.8查看修改后网卡属性
#/u01/app/11.2.0/grid/bin/oifcfg getif
eth1 10.10.10.0 global cluster_interconnect
eth0 192.168.56.0 global public
#/u01/app/11.2.0/grid/bin/oifcfg getif -if eth0
eth0 192.168.56.0 global public
#/u01/app/11.2.0/grid/bin/oifcfg getif -if eth1
eth1 10.10.10.0 global cluster_interconnect
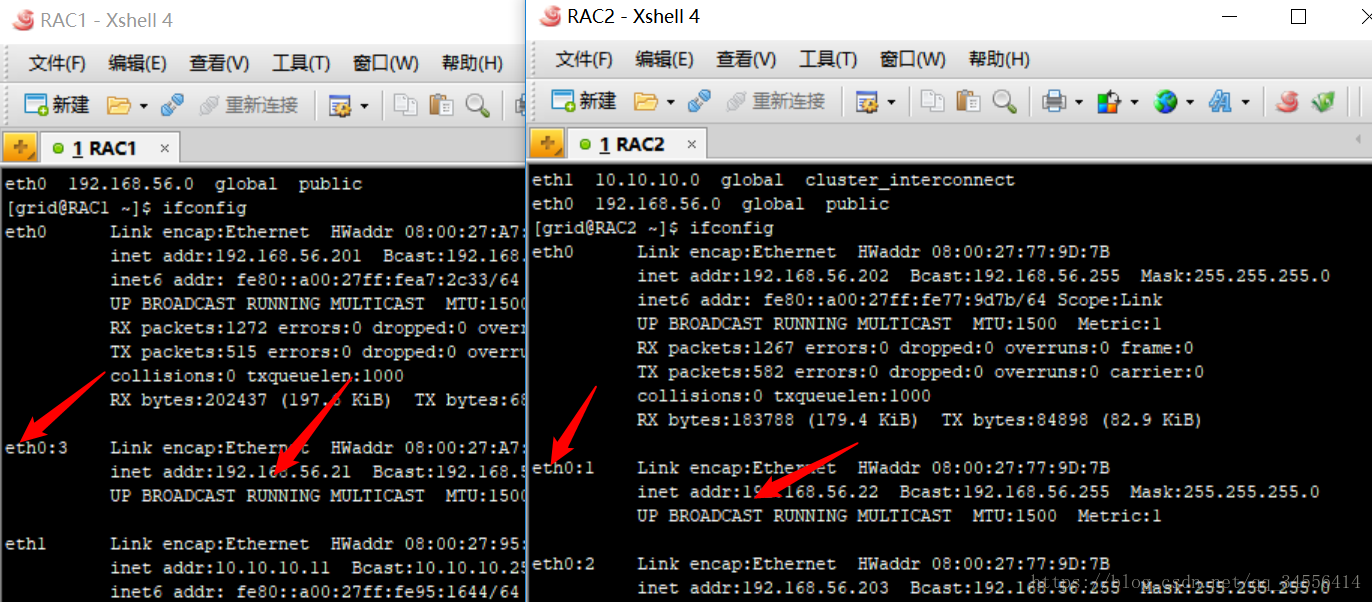
可以看到VIP已经绑定到物理网卡上面了。
4 、查看集群资源是否正常
/u01/app/11.2.0/grid/bin/srvctl status nodeapps
VIP rac1-vip is enabled
VIP rac1-vip is running on node: rac1
VIP rac2-vip is enabled
VIP rac2-vip is running on node: rac2
Network is enabled
Network is running on node: rac1
Network is running on node: rac2
GSD is disabled
GSD is not running on node: rac1
GSD is not running on node: rac2
ONS is enabled
ONS daemon is running on node: rac1
ONS daemon is running on node: rac2
5、在sqlplus里面启动数据库
6、可能会遇到的问题
两节点local_listener参数没修改的话,会导致客户端连接不上数据库报错
修改local_listener参数的方法
SQL>alter system set local_listener='(ADDRESS = (PROTOCOL = TCP)(HOST = rac1-vip)(PORT = 1521))' scopt=both sid='rac1';
SQL>alter system set local_listener='(ADDRESS = (PROTOCOL = TCP)(HOST = rac2-vip)(PORT = 1521))' scopt=both sid='rac2';