之前的俩个小短文简单的写了fabric基础网络的搭建,但是要在实际使用的时候要将cli容器实体化,即将在原cli容器中的代码进行自动化即创建一个客户端,这样的需求就引进了sdk的使用,下面是fabric-sdk-go的具体实现过程,作者使用的是golang编译环境。【注意go依赖的拉取】
一、前期准备工作

1、现将之前我们的基础环境放到fixtures文件夹中,这个是fabric的基础网络配置文件。
2、将之前的链码放到同阶层的chaincode文件夹中,这个是fabric的链码文件。
3、同阶层的config.yaml文件,这个是将fixtures的基础网络进行简化配置【sdk会加载这个文件进行fabric网络配置】,代码如下:【作者进行了备注,这里没加证书的配置】
version: 1.0.0
# SDK使用的客户端部分 意思就是换客户端 从这里换
client:
# 应用程序所属的Org组织名
organization: org1
logging:
level: info
# 指定存储证书所在目录
cryptoconfig:
path: /root/go/src/sdk-test/fixtures/crypto-config
# 指定密钥存储库
credentialStore:
path: "/tmp/state-store"
cryptoStore:
# Specific to the underlying KeyValueStore that backs the crypto key store.
path: /tmp/msp
# 为客户端配置BCCSP 密码算法模块 基本都这样写
BCCSP:
security:
enabled: true
default:
provider: "SW"
hashAlgorithm: "SHA2"
softVerify: true
level: 256
# 证书池策略,默认为false,提高身份认证速率
tlsCerts:
# [Optional]. Use system certificate pool when connecting to peers, orderers (for negotiating TLS) Default: false
systemCertPool: true
# [Optional]. Client key and cert for TLS handshake with peers and orderers
client:
# 客户端密钥路径
key:
path: /root/go/src/sdk-test/fixtures/crypto-config/peerOrganizations/org1.traceability.com/users/[email protected]/tls/client.key
# 证书路径
cert:
path: /root/go/src/sdk-test/fixtures/crypto-config/peerOrganizations/org1.traceability.com/users/[email protected]/tls/client.crt
channels:
# 指定通道信息
mychannel:
peers:
peer0.org1.traceability.com:
endorsingPeer: true # 是否为背书节点,默认为true
chaincodeQuery: true # 是否接受链码查询,默认为true
ledgerQuery: true # 是否接受不需要链码的查询,默认为true
eventSource: true # 是否为SDK侦听器注册的目标,默认为true
peer0.org2.traceability.com:
endorsingPeer: true
chaincodeQuery: true
ledgerQuery: true
eventSource: true
policies:
queryChannelConfig: # 检索通道配置块选项
minResponses: 1 # 从目标/peers的最小响应数
maxTargets: 1 # 通道配置随机检索目标数量
retryOpts: #查询区块配置的重试选项
attempts: 5 # 重试次数
initialBackoff: 500ms # 第一次重试的间隔时间
maxBackoff: 5s # 重试的最大间隔时间
backoffFactor: 2.0
discovery:
#[Optional] discovery info will be retrieved for these number of random targets
maxTargets: 2
#[Optional] retry options for retrieving discovery info
retryOpts:
#[Optional] number of retry attempts
attempts: 4
#[Optional] the back off interval for the first retry attempt
initialBackoff: 500ms
#[Optional] the maximum back off interval for any retry attempt
maxBackoff: 5s
#[Optional] he factor by which the initial back off period is exponentially incremented
backoffFactor: 2.0
#
# list of participating organizations in this network
#
organizations: # 指定网络环境中的组织信息
org1:
mspid: Org1MSP
# This org's MSP store (absolute path or relative to client.cryptoconfig)
cryptoPath: peerOrganizations/org1.traceability.com/users/{username}@org1.traceability.com/msp
peers:
- peer0.org1.traceability.com
org2:
mspid: Org2MSP
# This org's MSP store (absolute path or relative to client.cryptoconfig)
cryptoPath: peerOrganizations/org2.traceability.com/users/{username}@org2.traceability.com/msp
peers:
- peer0.org2.traceability.com
ordererorg:
# Membership Service Provider ID for this organization
mspID: OrdererMSP
# Needed to load users crypto keys and certs for this org (absolute path or relative to global crypto path, DEV mode)
cryptoPath: ordererOrganizations/traceability.com/users/{username}@traceability.com/msp
二、具体客户端操作过程【原cli容器的执行过程】
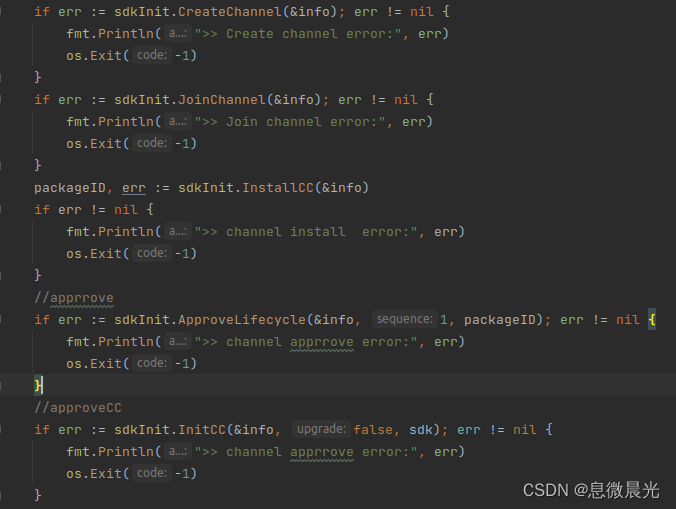
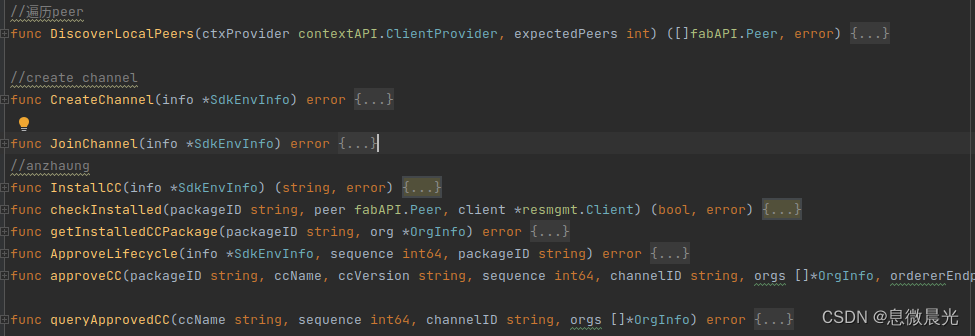
创建通道------>加入通道---------->更新锚节点----------->打包链码---------->安装链码---------->链码认证--------->链码提交------------->链码初始化---------->链码调用
【具体体现就是sdkSetting.go中的一个个函数】
1、在sdkInt中的sdkInt.go配置所用的建立组织、通道信息的结构体:

2、建立一个main.go的主函数:
同时注意在 主函数中进行,建一个基础信息的初始化,根据自己的配置信息修改实际路径:

3、在sdkInt的文件中建立sdk配置的主文件,sdkSetting.go中建立setup函数,这个是启动sdk,其中包括启动fabric-sdk-go实例化、client实例化、链码实例化等;【了解具体介绍可参考Hyperledger fabric-SDK-GO客户端开发篇(六) - 风云傲天 - 博客园 (cnblogs.com)】
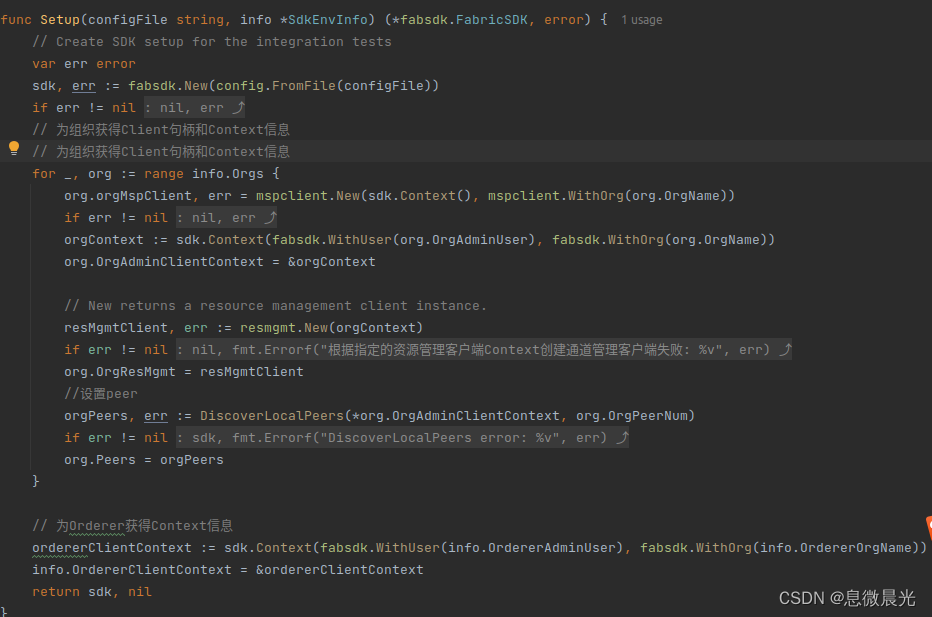
在main.go的主函数中通过sdk, err := sdkInit.Setup("config.yaml", &info) 进行sdk启动。
4、启动了sdk后,进行接下来的操作创建、加入通道和打包、安装链码等,具体的过程之前文章提过;提到的sdkInt的函数在sdkSetting.go中。
main.go
sdkSetting.go【网上具体函数代码很多,都可以参考】
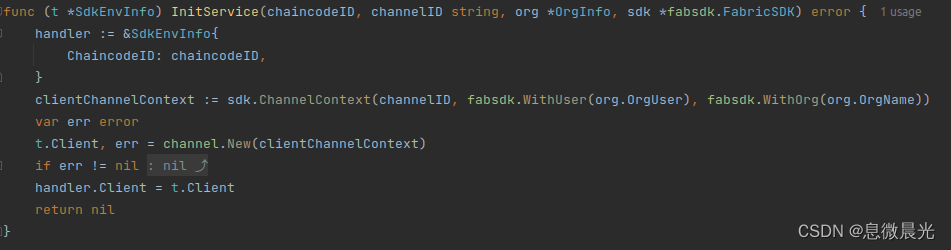
5、挡完成链码的提交之后要进行链码的初始化
获取对应用通道闸中对链码的操作权限权限通过sdkSetting.go的initService函数【注意:这个函数是通过结构体调用的】
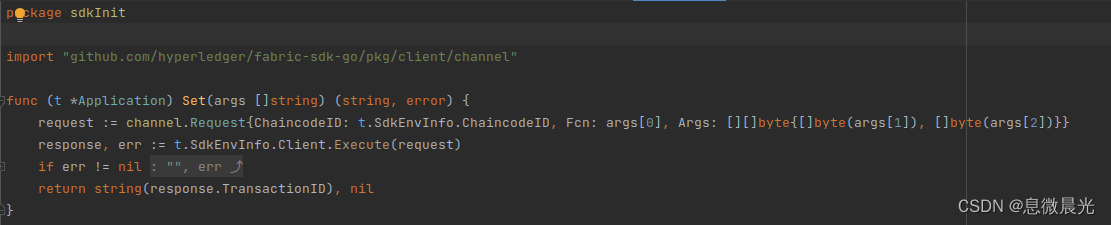
函数set.go:【上链】
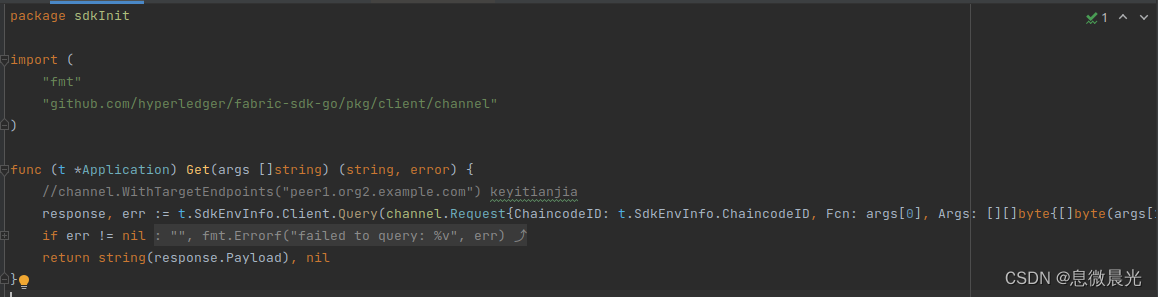
函数get.go:【查询】
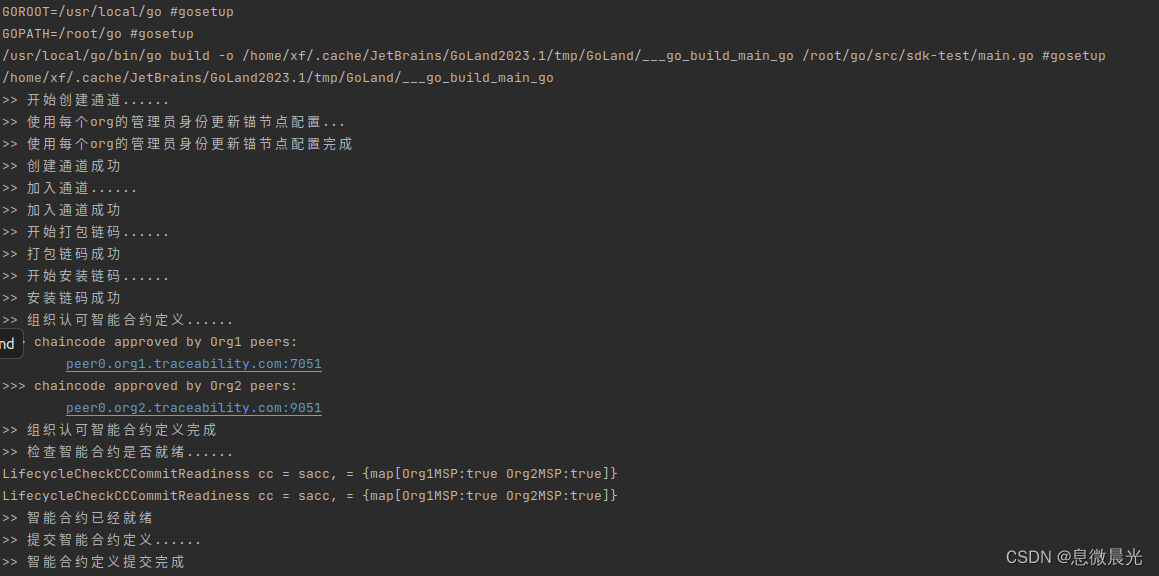
成功执行
注意事项:
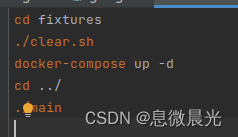
1、进行单个函数debug测试的时候,记得先启动基本网络 docker-compose up -d【测试正式完成会都会写一个小脚本,前期就没必要了】
2、有些依赖会要求go的版本,还有golang编译器的debug模式也会要求go的版本【作者之前的16版本不够,只能生成18版本的】