在Unity环境中使用强化学习训练Donkey Car
- 1.Introduction 简介
- 2. Train Donkey Car with Reinforcement Learning 使用强化学习训练Donkey Car
- 3. Simulation to Reality 从仿真到现实
- 4. Donkey Car Simulator 车辆模拟器
- 5. Lane Segmentation to cut out background noise 通过传统图像处理算法提升对背景图像的抗干扰能力
- 6. The Next Steps 展望
- 7. Source Code 源码
- 8. Acknowledgement 致谢
文章来源: Train Donkey Car in Unity Simulator with Reinforcement Learning
1.Introduction 简介
Donkey Car is an open source DIY self driving platform for small scale RC cars. For those of you who want to know more about self driving but without the knowledge or background to build one, the platform provides all the necessary details to build one yourself. It covers both the hardware and software stack. Following the guide, I was able to assemble the car without any prior background in hardware.
Donkey Car是一个开源的DIY自驾平台,适用于小型遥控车。对于那些想了解更多关于自动驾驶的知识,但没有建立自动驾驶的知识或背景的人,该平台提供了自己建立自动驾驶的所有必要细节。它包括硬件和软件堆栈。按照指南,我能够在没有任何硬件背景的情况下组装汽车。
Right now, the most common methods to train the car to perform self driving are behavioral cloning and line following. On a high level, behavioral cloning works by using a convolutional neural network to learn a mapping between car images (taken by the front camera) and steering angle and throttle values through supervised learning. The other method, line following, works by using computer vision techniques to track the middle line and utilizes a PID controller to get the car to follow the line. I tried both methods and they work!!!
目前,训练汽车进行自动驾驶最常用的方法是行为克隆(Behavioral Cloning)和线路跟踪。在高层次上,行为克隆通过使用卷积神经网络来学习汽车图像(由前摄像头拍摄)与转向角和油门值之间的映射,通过监督学习实现。另一种方法是直线跟踪,利用计算机视觉技术跟踪中线,并利用PID控制器使汽车跟随直线。我尝试了两种方法,它们都有效!!!

Donkey Cars trained with Behavioral Cloning to avoid obstacles
(Video taken at local Donkeycar Meetup in Hong Kong on May 12, 2018)
2. Train Donkey Car with Reinforcement Learning 使用强化学习训练Donkey Car
Essentially, the goal of Donkey Car is to build the fastest self driving car to compete in a race (fastest time to complete a single lap on a track). I thought reinforcement learning would be a great method to train a racing car. We only need to design a reward that maximizes the car’s velocity while having it stay within the track region, and let the algorithm figure out the rest. Sounds easy enough? In reality however, training reinforcement learning in a physical setting is proven to be very challenging. Reinforcement learning essentially learns by trial and error, it is very hard, if not impossible, to have the car drives randomly for hours in the real world and wait (or pray) for it to start learning before crashing into pieces. Training duration is an issue too, since it is not uncommon for RL agents to train for hundreds of episodes before it starts to pick up the learning signals. Hence, reinforcement learning is rarely performed in a physically setting.
从本质上说,Donkey Car的目标是制造最快的自动驾驶汽车来参加比赛(在赛道上完成单圈的最快时间)。我认为强化学习是训练赛车的好方法。我们只需要设计一个奖励,使汽车的速度最大化,同时使其保持在轨道区域内,然后让算法计算出其余部分。听起来很简单?然而,事实证明,在物理环境中训练强化学习是非常具有挑战性的。强化学习本质上是通过反复试验来学习的,如果不是不可能的话,让汽车在现实世界中随机行驶数小时,然后等待(或祈祷!)它在撞坏前能学习点东西,是非常困难的。训练持续时间(太长)也是一个问题,因为强化学习的Agent在开始有效利用信号并输出合理动作之前,训练数百episodes并不少见。因此,强化学习很少在实际环境中应用。
3. Simulation to Reality 从仿真到现实
Recently, there are some studies on simulation to reality, that is, to first train the car in a virtual simulator using reinforcement learning and then transfer the trained agent to the real world. For example, OpenAI recently trained a human-like dexterous robot hand to manipulate physical objects, and the entire training was conducted in simulation; In another experiment, Google Brain trained a Quadruped Robot (Ghost Robotics Minitaur) to learn agile locomotion using simulation to reality techniques. The control policy was learned in a physics simulator and then successfully deployed on the real robot. Hence, it looks like in order to train Donkey Car with reinforcement learning, a feasible approach is to have it trained in simulation first then port the learned policy to the real car.
最近,有一些关于仿真到现实(SIm2Real)的研究,即首先使用强化学习在虚拟环境中训练汽车,然后将训练好的Agent转移到现实世界中。例如,OpenAI最近训练了一只机械手来操纵实际对象,整个训练是在仿真环境中进行的;在另一个实验中,Google Brain训练了一个四足机器人,利用模拟现实技术来学习灵活的人类动作。控制策略在物理模拟器中学习,然后成功地部署到实际机器人上。因此,为了用强化学习训练Donkey Car,一种可行的方法是先在仿真中训练Donkey Car,然后将学习到的策略移植到真实的汽车上。
4. Donkey Car Simulator 车辆模拟器
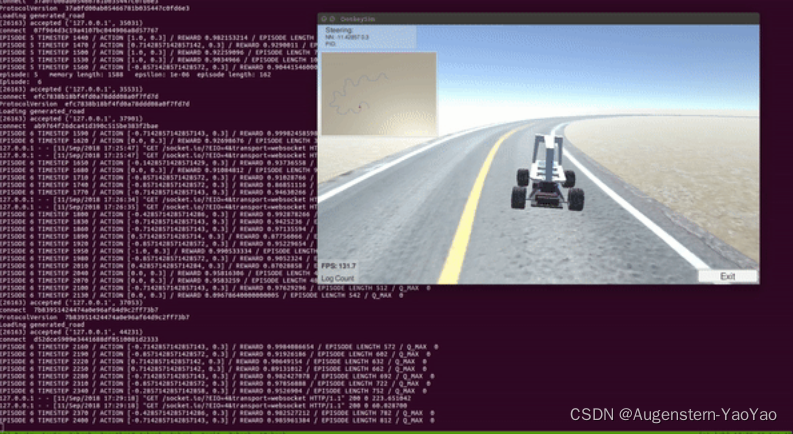
The first step is to create a high fidelity simulator for Donkey Car. Fortunately, someone from the Donkey Car community has generously created a Donkey Car simulator in Unity. However, it is specifically designed to perform behavioral learning (i.e. save the camera images with the corresponding steering angles and throttle values in a file for supervised learning), but not cater for reinforcement learning at all. What I was expecting is an OpenAI gym like interface where I can manipulate the simulated environment through calling reset() to reset the environment and step(action) to step through the environment. Well, I decided to start with the existing Unity simulator and make some modifications to make it compatible with reinforcement learning.
第一步是为Donkey Car创建高保真模拟器。幸运的是,来自Donkey Car社区的人慷慨地在Unity中创建了Donkey Car模拟器。但是,它专门设计用于执行行为学习Behavioral Learning(即,将具有相应转向角和油门值的摄像头图像保存在文件中以供监督学习),但根本不适合强化学习。我期待的是一个类似OpenAI gym的界面,在这里我可以通过调用 reset() 来重置环境,并通过 step(action) 来逐步完成环境,从而操纵模拟环境。我决定从现有的Unity模拟器开始,做一些修改,使其与强化学习兼容。
4.1. Establish a way to get Python communicate with Unity 建立Python与Unity的通信
Since we are going to write our reinforcement learning code in python, we have to first figure out a way to get python communicate with the Unity environment. It turns out that the Unity simulator created by Tawn Kramer also comes with python code for communicating with Unity. The communication is done through the Websocket protocol. Websocket protocol, unlike HTTP, allows two way bidirectional communication between server and client. In our case, our python “server” can push messages directly to Unity (e.g. steering and throttle actions), and our Unity “client” can also push information (e.g. states and rewards) back to the python server.
因为我们要用python编写强化学习代码,所以我们必须首先找到一种让python与Unity环境通信的方法。事实证明,Tawn Kramer创建的Unity模拟器还附带了用于与Unity通信的python代码。通信是通过Websocket协议完成的。与HTTP不同,Websocket协议允许服务器和客户端之间的双向通信。在我们的例子中,我们的python“服务器”可以将消息直接推送到Unity(例如转向和油门动作),而Unity“客户端”也可以将信息(例如状态和奖励)返回给python服务器。
In additional to Websocket, I also briefly considered using gRPC. gRPC is a high performance server-client communication framework open sourced by Google in late August 2016. It is adopted by Unity as the communication protocol for its ml-agents plugin. However, its set up is a bit cumbersome (i.e. need to define the RPC data structures and methods in protobuf format) and the performance gain isn’t worth it. So I’ve decided to stick with Websocket.
除了Websocket之外,我还简单考虑了下能否使用gRPC。gRPC是谷歌于2016年8月底开源的高性能服务器-客户端通信框架。Unity采用它作为其ml-agents插件的通信协议。但是,它的设置有点麻烦(即需要以protobuf格式定义RPC数据结构和方法),性能的提升不值得我大费周章去做。所以我决定坚持使用Websocket。
4.2. Create a customized OpenAI gym environment for Donkey Car 建立具有统一代码规范的 OpenAI gym-Donkey Car交互环境
The next step is to create an OpenAI gym like interface for training reinforcement learning algorithms. For those of you who are have trained reinforcement learning algorithms before, you should be accustomed to the use of a set of API for the RL agent to interact with the environment. The common ones are reset(), step(), is_game_over(), etc. We can customize our own gym environment by extending the OpenAI gym class and implementing the methods above.
下一步是创建一个类似OpenAI gym的界面,用于训练强化学习算法。对于那些之前受过强化学习算法培训的人,您应该习惯于使用一组API让RL agent与环境交互。常见的有 reset(), step(), is_game_over() 等。我们可以通过扩展OpenAI gym类并实现上述方法来定制我们自己的gym环境。
The resulting environment is compatible with OpenAI gym. We can interact with the Donkey environment using the familiar gym like interface:
生成的环境与OpenAI gym兼容。我们可以使用熟悉的类似gym的界面与Donkey Car环境交互:
env = gym.make("donkey-v0")
state = env.reset()
action = get_action()
state, reward, done, info = env.step(action)
The environment also allows us to set frame_skipping and train the RL agent in headless mode (i.e. without Unity GUI).
该环境还允许我们设置 frame_skipping,并在Unity静默模式下训练RL Agent(即没有Unity GUI)。
In the meantime, there are 3 Unity scenes available (created by Tawn Kramer): generated roads, warehouse, and Sparkfun AVC for training. Before we start running our own RL training algorithm, we have to either build the Donkey Car Unity environment ourselves (need to install Unity) or download the pre-built environment executables. Detailed instructions of how to set up the environment for training with RL can be found in my github page here.
同时,有3个Unity场景可用(由Tawn Kramer创建):道路、仓库和Sparkfun AVC用于训练。在开始运行我们自己的RL训练算法之前,我们必须自己构建Donkey Car Unity环境(需要安装Unity)或下载预构建的环境可执行文件。有关如何设置RL培训环境的详细说明,请参见github页面 。
4.3. Train Donkey Car with Double Deep Q Learning (DDQN) using the environment 使用DDQN训练Donkey Car
With the RL friendly environment in place, we are now ready to build our own reinforcement algorithm to train our Donkey Car in Unity! I’ve implemented the Double Deep Q Learning (DDQN) algorithm with Keras. This is the classic RL algorithm developed by DeepMind to play Atari and is well tested and relatively simple to code up. I’ve tested the implementation in OpenAI gym cartpole and VizDoom so if there is anything bad happen it should be the Unity environment but not the algorithm. I am not going to go through how DQN works here. For those of you who are interested, feel free to check out my previous blog post on DQN or this excellent post.
有了友好的强化学习训练 环境,我们现在准备建立我们自己的强化算法来统一训练我们的Donkey Car!我已经用Keras实现了双深度Q学习(DDQN)算法。这是DeepMind为玩Atari开发的经典RL算法,经过良好测试,代码编写相对简单。我已经在OpenAI gym cartpole和VizDoom中测试了实现,所以如果出现任何不好的情况,应该是Unity环境,而不是算法。我不打算在这里讨论DQN是如何工作的。对于那些感兴趣的人,请随时查看我以前关于DQN的博客文章或这篇优秀的文章。
4.3.1. State Space 状态空间定义
We take the pixel images taken by the front camera of the Donkey car, and perform the following transformations:
我们先获得Donkey Car前摄像头拍摄的像素图像,并执行以下转换:
1)Resize it from (120,160) to (80,80)
2)Turn it into grayscale
3)Frame stacking: Stack 4 frames from previous time steps together
4)The final state is of dimension (1,80,80,4).
1.尺寸裁剪;2.转换为灰度图;3.帧堆叠,4帧图像为数据;4.最终数据维度为80×80×4
4.3.2. Action Space 动作空间
Both the Donkey car in the real world and the Donkey car in the simulator takes continuous steering and throttle values as input. For simplicity sake, we set throttle value as constant (i.e. 0.7) and only opt to control the steering. The steering value ranges from -1 to 1. However, DQN can only handle discrete actions, so I discretized the steering value into 15 categorical bins.
现实世界中的Donkey car和模拟器中的Donkey Car都采用连续转向和油门值作为输入。为了简单起见,我们将油门值设置为常量(即0.7),并且只选择控制转向。转向值的范围为-1到1。然而,DQN只能处理离散动作,因此我将转向值离散化为15个分类箱。
4.3.3. Q Network Architecture 值网络架构
Our Q network is a 3-layer convolutional neural network that takes stacked frame states as input and output 15 values representing the 15 discretized steering categories.
我们的Q网络是一个三层卷积神经网络,以堆叠的帧状态作为输入和输出15个值,代表15个离散化的转向类别。
4.3.4. Rewards 奖励
Reward is a function of cross track error (cte) which is provided by the Unity environment. Cross track error measures the distance between the center of the track and car. Our shaped reward is given by the following formula:
奖励是Unity环境提供的交叉跟踪误差(Cross Track Error, cte)的函数。交叉轨道误差测量轨道中心和车辆之间的距离。我们的奖励值由以下公式给出:
R = 1 − a b s ( c t e ) max ( c t e ) R\,\,=\,\,1-\frac{\mathrm{abs} \left( cte \right)}{\max \left( cte \right)} R=1−max(cte)abs(cte)
Where max(cte) is just a normalizing constant so that the reward is within the range of 0 and 1. We terminate the episode if abs(cte) is larger than max(cte).
max(cte)为常数以将奖励值限制在0-1之间,如果abs(cte)大于max(cte),则本episode结束。
*Edit: I’ve found that using a reward function: reward = abs(prev_cte) - abs(cte) works even better. The resulting agent converged to a good policy in ~30 episodes as compared to 100 episodes for the reward above.
更新:我发现使用下列奖励函数训练效果甚至会更好:R=prev(cte)-abs(cte),从结果来看,30左右episode的奖励值就达到了之前奖励函数在训练100 episodes左右的效果。
4.3.5. Other notable variables 其他值得注意的变量
Frame skipping is set to 2 to stabilize training. Memory replay buffer (i.e. storing <state, action, reward, next_state> tuples) has a capacity of 10000. Target Q network is updated at the end of each episode. Batch size for training the CNN is 64. Epsilon-greedy is used for exploration. Epsilon is initially set to 1 and gradually annealed to a final value of 0.02 in 10,000 time steps.
跳帧设置为2以稳定训练。内存重放缓冲区(即存储<状态、动作、奖励、下一个状态>元组)的容量为10000。目标Q网络在每集结束时更新。训练CNN的批量是64。Epsilon贪婪用于探索。ε最初设置为1,并在10000个时间步内逐渐退火至最终值0.02。
4.3.6. Results 结果分析
With the setup above, I trained DDQN for around 100 episodes on a single CPU and a GTX 1080 GPU. The entire training took around 2 to 3 hours. As we can see from the video below, the car was able to learn a pretty good policy to drive itself!
在上述设置的基础上,我在GTX1080上训练了2-3小时,从上述视频中可以看到,车辆可以获得非常好的自主导向的能力。
5. Lane Segmentation to cut out background noise 通过传统图像处理算法提升对背景图像的抗干扰能力
Essentially, we want our RL agent to base its output decision (i.e. steering) only on the location and orientation of the lane lines and neglect everything else in the background. However, since we give it the full pixel camera images as inputs, it might overfit to the background patterns instead of recognizing the lane lines. This is especially problematic in the real world settings where there might be undesirable objects lying next to the track (e.g. tables and chairs) and people walking around the track. If we ever want to transfer the learned policy from the simulation to the real world, we should get the agent to neglect the background noise and just focus on the track lines.
本质上,我们希望我们的RL Agent仅根据车道线的位置和方向来做出输出决策(即转向),而忽略背景中的其他一切。然而,由于我们给它全像素的摄像头图像作为输入,它可能会对环境背景的样式过度拟合,而不是识别车道线。这在现实环境中尤其有问题,因为在现实环境中,轨道旁边可能有不需要的对象(例如桌子和椅子)以及人们在轨道周围走动。如果我们想要将学习到的策略从模拟世界转移到现实世界,我们应该让 Agent忽略背景噪声,只关注轨迹线。
To address this problem, I’ve created a pre-processing pipeline to segment out the lane lines from the raw pixel images before feeding them into the CNN. The segmentation process is inspired by this excellent blog post. The procedure is described as follows:
为了解决这个问题,我创建了一个预处理流程,在将原始像素图像输入CNN之前,从中分割出车道线。细分过程的灵感来自这篇优秀的博客文章。程序描述如下:
1)Detect and extract all edges using Canny Edge Detector 使用Canny边缘检测器检测并提取所有边缘
2)Identify the straight lines through Hough Line Transform 通过Hough线变换识别直线
3)Separate the straight lines into positive sloped and negative sloped (candidates for left and right lines of the track) 将直线分为正斜线和负斜线(轨道左右线的候选线)
4)Reject all the straight lines that do not belong to the track utilizing slope information 利用坡度信息拒绝所有不属于轨道的直线
The resulting transformed images consists of 0 to 2 straight lines representing the lane, illustrated as follows:
生成的变换图像由0到2条表示车道的直线组成,如下图所示:

I then took the segmented images, resize them to (80,80), stack 4 successive frames together and use it as the new input states. I trained DDQN again with the new states. The resulting RL agent was again able to learn a good policy to drive the car!
然后,我将分割的图像调整为(80,80),将4个连续帧堆叠在一起,并将其用作新的输入状态。我再次在新的州训练DDQN。由此产生的RL Agent再次能够学习驾驶汽车的良好策略!
However, I’ve noticed that not only training took longer, but the learned policy was also less stable and the car wriggled frequently especially when making turns. I think this happened because we threw away useful background information and line curvature information. In return, the agent should be less prone to overfitting and can even be generalize to unseen and real world tracks.
然而,我注意到,不仅训练需要更长的时间,而且学习到的策略也不太稳定,而且汽车经常扭动,尤其是在转弯时。我认为这是因为我们丢弃了有用的背景信息和线条曲率信息。作为回报, Agent应该不太容易过度拟合,甚至可以推广到看不见的和真实世界的轨道。
6. The Next Steps 展望
In this blog post, I’ve introduced an OpenAI gym compatible environment for training Donkey car in Unity simulator with reinforcement learning. I’ve also successfully trained the car to drive itself using Double Deep Q Learning. But this is far from done. Below are things that I am planning to do next.
在这篇博文中,我介绍了一个与OpenAI gym兼容的环境,用于在Unity模拟器中使用强化学习训练Donkey car。我还使用双深度Q学习成功地训练了汽车自动驾驶。但这远远没有实现。下面是我计划下一步要做的事情。
6.1. Train the car to maximize speed with Reinforcement Learning 提升车辆运行速度,考虑纵向动力学
Right now the RL agent only generates steering output, with the throttle value held fixed. The next step will be to have the agent learn to output a throttle value as well to optimize vehicle speed. For example, it should learn to increase throttle when the vehicle is driving straight and decrease throttle when the vehicle is making sharp turns. To achieve this, we need to further shape the reward with vehicle velocity.
目前,RL Agent仅在油门值保持不变的情况下生成转向输出。下一步是让 Agent学习输出油门值,并优化车速。例如,它应该学会在车辆直线行驶时增加油门,在车辆急转弯时减少油门。为了实现这一点,我们需要进一步利用车辆速度来塑造奖励。
6.2. Simulation to Reality 从仿真到现实
Another interesting task is to transfer the learned policy from the simulator to the real world. Closing the reality gap is no easy task. One way to achieve this is to utilize the lane segmentation trick as covered earlier to obtain a unified representation of the input states for both the simulated and real worlds. Other commonly adopted sim-to-real tricks involved domain randomization (e.g. randomizing the width, color, friction of the track, adding shadows, randomizing throttle values, etc) so that the learned policy is robust enough to be deployed to the real world.
另一个有趣的任务是将学到的策略从模拟器转移到现实世界。缩小现实差距绝非易事。实现这一点的一种方法是利用前面介绍的车道分割技巧,为模拟世界和真实世界获得输入状态的统一表示。其他常用的模拟到真实技巧涉及领域随机化(例如,随机化轨道的宽度、颜色、摩擦、添加阴影、随机化油门值等),以便学习的策略足够鲁棒,可以部署到真实世界。
7. Source Code 源码
The source code for the simulator and reinforcement learning implementations are hosted on github and can be found here.
源代码
8. Acknowledgement 致谢
I want to thank Tawn Kramer for creating a high fidelity Unity simulator for Donkey car. What I did was modifying his existing code to make it reinforcement learning compatible. I also want to thank the Donkey car community for initiating this wonderful project for me to learn about self driving! If you have any questions or thoughts feel free to leave a comment below. You can also follow me on Twitter at @flyyufelix.