文章目录
一、canvas元素
- canvas只能在html中定义width和height。默认是宽300px、高150px。
<canvas id="canvas" width="1200" height="800">
	你的浏览器不支持canvas,请升级你的浏览器
</canvas>
二、前期准备
绘制都建立在 HTML 中有 canvas 元素的基础上。
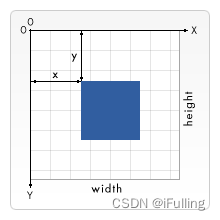
1. 坐标系
2. canvas属性
① 获取canvas元素
const canvas = document.getElementById('canvas')
② 把canvas实例化为2D
const ctx = canvas.getContext("2d");
③ 设置路径颜色
ctx.strokeStyle = "blue";
④ 设置路径宽度
ctx.lineWidth = 5;
⑤ 设置路径末端形状
butt:线段末端以方形结束。
round:线段末端以圆形结束。
square:线段末端以方形结束,但是增加了一个宽度和线段相同,高度是线段厚度一半的矩形区域。
ctx.lineCap = "round"; // butt、round、square
⑥ 设置路径相连时的相连部分形状
round:通过填充一个额外的,圆心在相连部分末端的扇形,绘制拐角的形状。圆角的半径是线段的宽度。
bevel:在相连部分的末端填充一个额外的以三角形为底的区域,每个部分都有各自独立的矩形拐角。
miter:通过延伸相连部分的外边缘,使其相交于一点,形成一个额外的菱形区域。这个设置可以通过 miterLimit 属性看到效果。
ctx.lineJoin = "round"; // round、bevel、miter
⑦ 透明度
- 0 表示完全透明,1 表示完全不透明
globalAlpha = 1
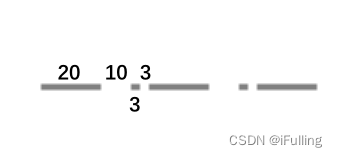
⑦ 虚线
setLineDash(<segments-array>)方法在填充线时使用虚线模式- 数组中的长度交替绘制线段和间距。
const canvas = document.querySelector("canvas")
if(!canvas.getContext) throw SyntaxError();
let ctx = canvas.getContext('2d');

ctx.beginPath()
ctx.setLineDash([20, 10, 3, 3]);
ctx.moveTo(100, 100);
ctx.lineTo(500, 100);
ctx.stroke()
ctx.closePath()
三、绘制图行
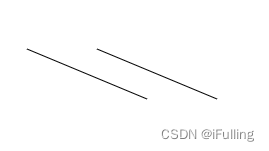
1. 绘制线段
- 线从 (30, 50) 处开始,并在 (150, 100) 处结束。
moveTo(x, y):移动画笔到 (x, y)lineTo(x, y):连接线段到 (x, y)stroke():绘制路径。样式要永远放在stroke之上,否则无效。(fill同理)beginPath():清空子路径列表开始一个新路径closePath():笔点返回到当前子路径起始点
const canvas = document.querySelector("canvas")
if(!canvas.getContext) throw SyntaxError();
let ctx = canvas.getContext('2d');

ctx.beginPath()
ctx.moveTo(30, 50);
ctx.lineTo(150, 100);
ctx.moveTo(100, 50);
ctx.lineTo(220, 100);
ctx.closePath()
ctx.stroke();
2. 绘制三角形
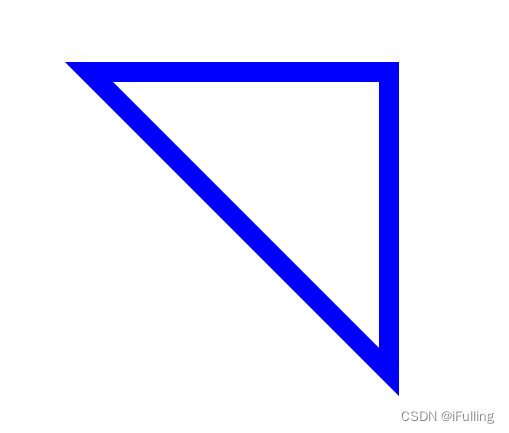
① 空心三角形
const canvas = document.querySelector("canvas")
if(!canvas.getContext) throw SyntaxError();
let ctx = canvas.getContext('2d');

ctx.beginPath()
ctx.moveTo(200, 200);
ctx.lineTo(500, 200);
ctx.lineTo(500, 500);
ctx.lineTo(200, 200);
ctx.strokeStyle = "blue";
ctx.lineWidth = 20;
ctx.closePath()
ctx.stroke();
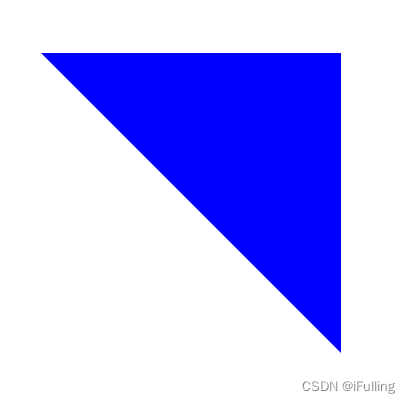
② 实心三角形
- stroke是绘制路径,fill是填充。只需要把
stroke...替换成fill...即可。
const canvas = document.querySelector("canvas")
if(!canvas.getContext) throw SyntaxError();
let ctx = canvas.getContext('2d');

ctx.beginPath()
ctx.moveTo(200, 200);
ctx.lineTo(500, 200);
ctx.lineTo(500, 500);
ctx.lineTo(200, 200);
ctx.fillStyle = "blue";
ctx.lineWidth = 20;
ctx.closePath()
ctx.fill();
3. 绘制矩形
① 空心矩形
strokeRect()和rect():参数都是 x, y, width, height
const canvas = document.querySelector("canvas")
if(!canvas.getContext) throw SyntaxError();
let ctx = canvas.getContext('2d');

// 方法一,比较繁琐
ctx.beginPath()
ctx.moveTo(100, 100);
ctx.lineTo(100, 200);
ctx.lineTo(200, 200);
ctx.lineTo(200, 100);
ctx.lineTo(100, 100);
ctx.strokeStyle = "blue";
ctx.lineWidth = 2;
ctx.closePath()
ctx.stroke();

// 方法二,同时连接路径和绘制
ctx.beginPath()
ctx.strokeStyle = "red";
ctx.lineWidth = 2;
ctx.strokeRect(300, 100, 100, 100);
ctx.closePath()

// 方法三,路径和绘制分开
ctx.beginPath()
ctx.rect(500, 100, 100, 100);
ctx.strokeStyle = "yellow";
ctx.lineWidth = 2;
ctx.stroke();
ctx.closePath()

② 实心矩形
- 同样是三种方法。把stroke替换成fill就能绘制出实心矩形。
const canvas = document.querySelector("canvas")
if(!canvas.getContext) throw SyntaxError();
let ctx = canvas.getContext('2d');

// 方法一
ctx.beginPath()
ctx.moveTo(100, 100);
ctx.lineTo(100, 200);
ctx.lineTo(200, 200);
ctx.lineTo(200, 100);
ctx.lineTo(100, 100);
ctx.fillStyle = "blue";
ctx.lineWidth = 2;
ctx.closePath()
ctx.fill();

// 方法二
ctx.beginPath()
ctx.fillStyle = "red";
ctx.lineWidth = 2;
ctx.fillRect(300, 100, 100, 100);
ctx.closePath()

// 方法三
ctx.beginPath()
ctx.rect(500, 100, 100, 100);
ctx.fillStyle = "yellow";
ctx.lineWidth = 2;
ctx.fill();
ctx.closePath()

4. 绘制圆和圆弧
接下来将不再区分实心和空心。根据下方的实例可以得出下图角度图。
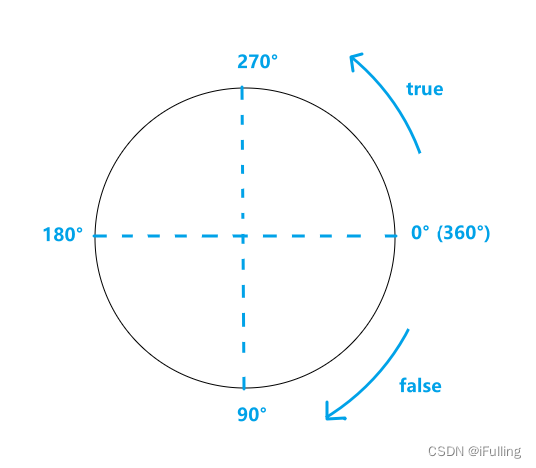
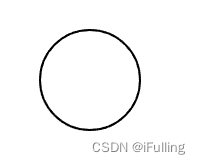
① 圆
- 使用 arc() 方法
- 写法:
ctx.arc(x, y, radius, startAngle, endAngle[, anticlockwise]); - 其中角度使用弧度制,顺逆时针方向
anticlockwise为可选。
const canvas = document.querySelector("canvas")
if(!canvas.getContext) throw SyntaxError();
let ctx = canvas.getContext('2d');

ctx.beginPath()
ctx.fillStyle = "blue";
ctx.lineWidth = 2;
ctx.arc(100,100,50,(Math.PI / 180) * 0,(Math.PI / 180) * 360)
ctx.stroke()
ctx.closePath()
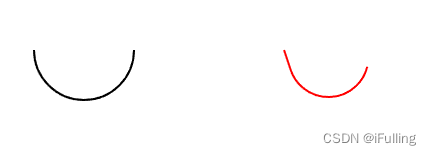
② 圆弧
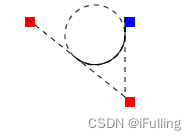
- 方法一:使用
arc方法。参数上面都有提到 - 方法二:使用
arcTo方法。写法:ctx.arcTo(x1, y1, x2, y2, radius); - (x1, y1) 表示角顶点,(x2, y2)表示第二条边。
const canvas = document.querySelector("canvas")
if(!canvas.getContext) throw SyntaxError();
let ctx = canvas.getContext('2d');

ctx.setLineDash([])
ctx.beginPath();
ctx.moveTo(150, 20);
ctx.arcTo(150,100,50,20,30);
ctx.stroke();

ctx.fillStyle = 'blue';
// base point
ctx.fillRect(150, 20, 10, 10);

ctx.fillStyle = 'red';
// control point one
ctx.fillRect(150, 100, 10, 10);
// control point two
ctx.fillRect(50, 20, 10, 10);
//
ctx.setLineDash([5,5])
ctx.moveTo(150, 20);
ctx.lineTo(150,100);
ctx.lineTo(50, 20);
ctx.stroke();
ctx.beginPath();
ctx.arc(120,38,30,0,2*Math.PI);
ctx.stroke();
const canvas = document.querySelector("canvas")
if(!canvas.getContext) throw SyntaxError();
let ctx = canvas.getContext('2d');

// 方法一
ctx.beginPath()
ctx.fillStyle = "blue";
ctx.lineWidth = 2;
ctx.arc(100, 100, 50, (Math.PI / 180) * 0, (Math.PI / 180) * 180);
ctx.stroke()
ctx.closePath()

// 方法二
ctx.beginPath();
ctx.strokeStyle = "red"
ctx.moveTo(300, 100);
ctx.arcTo(350, 250, 400, 50, 40);
ctx.stroke();
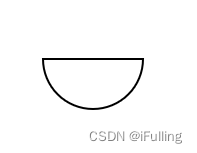
③ 半圆
- 即闭合圆弧
const canvas = document.querySelector("canvas")
if(!canvas.getContext) throw SyntaxError();
let ctx = canvas.getContext('2d');

ctx.beginPath()
ctx.fillStyle = "blue";
ctx.lineWidth = 2;
ctx.arc(100, 100, 50, (Math.PI / 180) * 0, (Math.PI / 180) * 180);
ctx.closePath()
ctx.stroke()
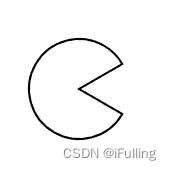
③ 圆弧和点连接
- 多绘制一条直线,最后起止点相连。
const canvas = document.querySelector("canvas")
if(!canvas.getContext) throw SyntaxError();
let ctx = canvas.getContext('2d');

ctx.beginPath()
ctx.fillStyle = "blue";
ctx.lineWidth = 2;
ctx.arc(100, 100, 50, (Math.PI / 180) * 30, (Math.PI / 180) * 330);
ctx.lineTo(100, 100);
ctx.closePath()
ctx.stroke()
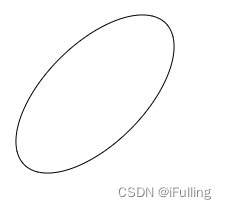
5. 椭圆
ellipse():绘制椭圆路径- 写法:
ctx.ellipse(x, y, radiusX, radiusY, rotation, startAngle, endAngle[, anticlockwise]); - (x, y) 为圆心,radiusX为长轴半径,radiusY为短轴半径,rotation为旋转角度,角度均为弧度制。
const canvas = document.querySelector("canvas")
if(!canvas.getContext) throw SyntaxError();
let ctx = canvas.getContext('2d');

ctx.beginPath()
ctx.ellipse(100, 100, 50, 100, (Math.PI / 180) * 45, 0, (Math.PI / 180) * 360);
ctx.stroke()
ctx.closePath()
6. 贝塞尔曲线
① 一次贝塞尔
- 是一根直线
② 二次贝塞尔
quadraticCurveTo():绘制二次贝塞尔曲线路径- 语法:
ctx.quadraticCurveTo(cpx, cpy, x, y); - (cpx, cpy)是控制点坐标,(x, y) 是结束点坐标。
const canvas = document.querySelector("canvas")
if(!canvas.getContext) throw SyntaxError();
let ctx = canvas.getContext('2d');

ctx.beginPath()
ctx.moveTo(100,100)
ctx.quadraticCurveTo(150, 150, 200, 100);
ctx.stroke()
ctx.closePath()

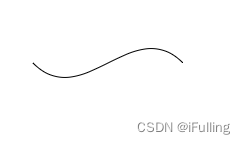
③ 三次贝塞尔
bezierCurveTo(): 绘制三次贝赛尔曲线路径- 语法:
ctx.bezierCurveTo(cp1x, cp1y, cp2x, cp2y, x, y); - 参数同二次贝塞尔类似,只多了一个控制点。
const canvas = document.querySelector("canvas")
if(!canvas.getContext) throw SyntaxError();
let ctx = canvas.getContext('2d');

ctx.beginPath()
ctx.moveTo(100,100)
ctx.bezierCurveTo(150, 150, 200, 50, 250, 100);
ctx.stroke()
ctx.closePath()
四、绘制文本
1. 文本属性
① font
- 设置文本大小和字体。
- 语法:
ctx.font = "40px Verdana";
② textAlign
- 设置文本水平对齐方式。
- 可选参数有 left、right、center、start、end
- 语法:
ctx.textAlign = "center";
③ textBaseline
- 设置文本垂直对齐方式。
- 可选参数有 alphabetic、top、hanging、middle、ideographic、bottom
- 语法:
ctx.textBaseline = "middle";
④ direction
- 设置文本的绘制方向
- 可选参数有 ltr(left to right)、rtl(right to left)
- 语法:
ctx.direction = 'ltr'
2. 绘制文本
strokeText():在给定的 (x, y) 位置绘制文本- 语法:
ctx.strokeText(text, x, y [, maxWidth]); - 如果超过了 maxWidth, 会缩小字体。
const canvas = document.querySelector("canvas")
if(!canvas.getContext) throw SyntaxError();
let ctx = canvas.getContext('2d');

ctx.beginPath()
ctx.font = "50px Verdana"
ctx.strokeText("Hello", 100, 100);
ctx.closePath()

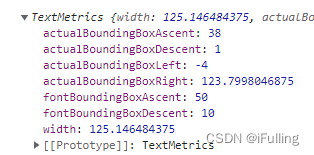
3. 获取文本属性
measureText():被测量文本对象包含的信息
const canvas = document.querySelector("canvas")
if(!canvas.getContext) throw SyntaxError();
let ctx = canvas.getContext('2d');

ctx.beginPath()
ctx.font = "50px Verdana"
ctx.strokeText("Hello", 100, 100);
console.log(ctx.measureText("Hello"));
ctx.closePath()