一、使用场景
现在我们有两台电脑,一台是拥有高算力的服务器,另一台是普通的轻薄笔记本电脑。如何在服务器上运行jupyter notebook,同时映射到笔记本电脑上的pycharm客户端中进行操作呢?
二、软件
pycharm专业版,jupyter notebook。注意只有专业版的pycharm才能编辑jupyter notebook。此外服务器和笔记本要在同一个内网中。
三、操作步骤
3.1 生成jupyter_notebook_config.py文件
jupyter notebook --generate-config3.2 设置密码
jupyter notebook password命令执行完成后,会生成一个json文件
3.3 复制token
vim /.jupyter/jupyter_notebook_config.json复制该json文件中的一串字符
3.4 修改jupyter_notebook_config.py文件
c.NotebookApp.ip='localhost' # 修改打开jupyter notebook网页的ip, 我这边改为了localhost,其实就是127.0.0.1
c.NotebookApp.allow_remote_access = True  # 允许远程连接
c.NotebookApp.password = u'……'  # 与json文件生成的token对应
c.NotebookApp.open_browser = False  # 不自动打开浏览器
c.NotebookApp.port = 8888 # 修改打开jupyter notebook网页的端口
3.5 端口映射到笔记本电脑端
ssh -L localhost:9999:localhost:8888 [email protected]这一步很重要,在笔记本上打开cmd,作用是把服务器上的jupyter notebook网页映射到笔记本端。这里要改四个地方:
- 9999是笔记本上jupyter notebook的端口号
- 8888是服务器上jupyter notebook的端口号
- username 服务器上的用户名
- ip:服务器的ip
输入密码后就可以登录啦!
3.6 设置pycharm客户端
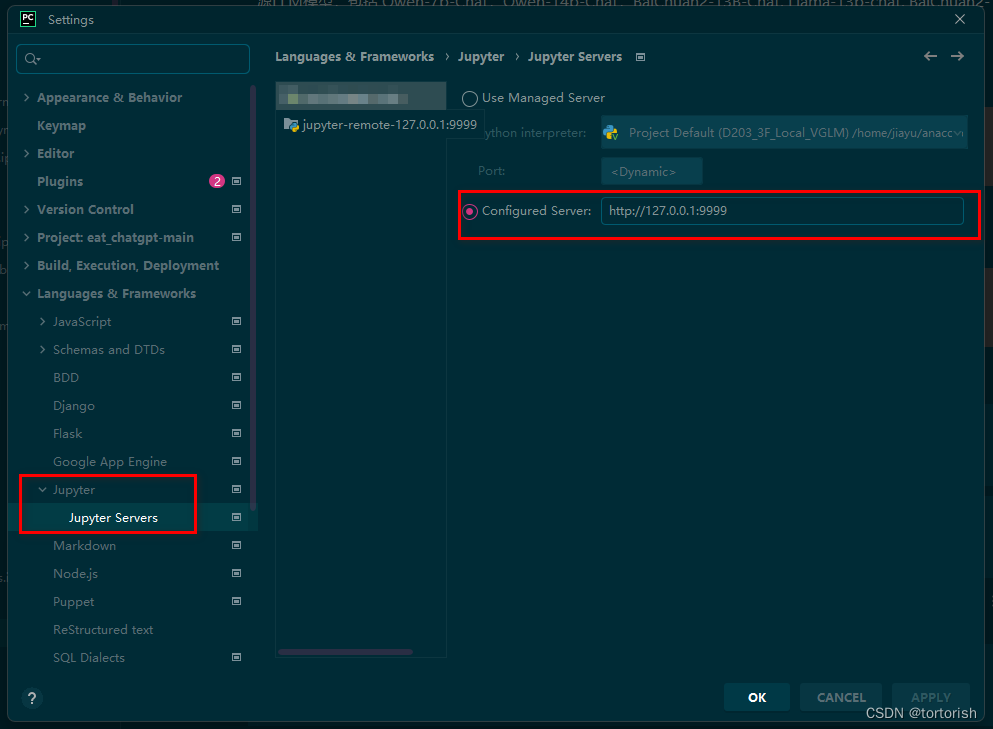
在pycharm中打开jupyter notebook,按照上图进行设置,接着就可以愉快的编辑了!