前言
springboot笔记集合: springboot笔记合计
没用的废话理论不多说,会用就完了
1.什么是Swagger和Knife4j
Swagger是一种开源的API描述语言,就是描述API的,- 同时Swagger还提供了一组工具(也叫Swagger),可以帮助开发人员自动生成API文档、测试API并与其他系统集成。
- Knife4j是基于Swagge语言延伸的另一组api工具,简单来说,就是Swagger工具能干的它也能干,不能干的也能干,Knife4j就是Swagger的增强
2.Swagger和Knife4j怎么用
2.1 引入依赖
因为Knife4j是基于Swagger的,所以两个的依赖都要引进来,下面是我的案例:
- 不同的Swagger和Knife4j版本可能有版本问题,以下这个搭配起码我用的时候没有问题
- 我的springboot2.7.6
<dependency>
            <groupId>io.springfox</groupId>
            <artifactId>springfox-swagger2</artifactId>
            <version>2.9.2</version>
        </dependency>

        <dependency>
            <groupId>io.springfox</groupId>
            <artifactId>springfox-swagger-ui</artifactId>
            <version>2.9.2</version>
        </dependency>
        <dependency>
            <groupId>com.github.xiaoymin</groupId>
            <artifactId>knife4j-spring-boot-starter</artifactId>
            <!--在引用时请在maven中央仓库搜索2.X最新版本号-->
            <version>2.0.9</version>
        </dependency>
2.2 设置配置类
/**
 * 自定义Swagger配置类
 * @imb.zz
 */
@Configuration // 配置类
//@EnableSwagger2 // 开启 swagger2 的自动配置
@EnableSwagger2
@EnableKnife4j
@Profile({

    "dev","test"})
public class SwaggerConfig {


    /**
     * 创建swagger对象:
     *
     * @return
     */
    @Bean
    public Docket mapRestApi() {


        return new Docket(DocumentationType.SWAGGER_2)
                .groupName("地图坐标转化APIs") //随便写
                .apiInfo(apiInfo()) //不用变
                .select() //不用变
                .apis(RequestHandlerSelectors.basePackage("com.example.yupao.controller"))//写你的controller的api包路径
                .paths(PathSelectors.any())//不用变
                .build();
    }


    /**
     * 设置api信息
     * title:swagger题目
     * description:描述
     * cotact:创建者 name url email
     *
     * @return
     */
    private ApiInfo apiInfo() {


        return new ApiInfoBuilder()
                .title("这里写项目名")
                .description("这里写项目描述")
                .termsOfServiceUrl("这里写github链接,如果有的话")
                .contact(new Contact("imbzz",null ,"[email protected]"))//个人信息
                .version("1.0")//版本提示
                .build();
    }
}
2.3 启动验证
- 出现第一个红色框成功
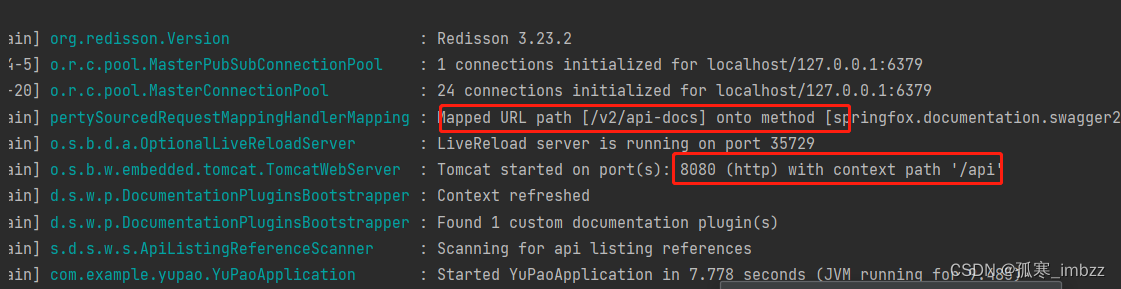
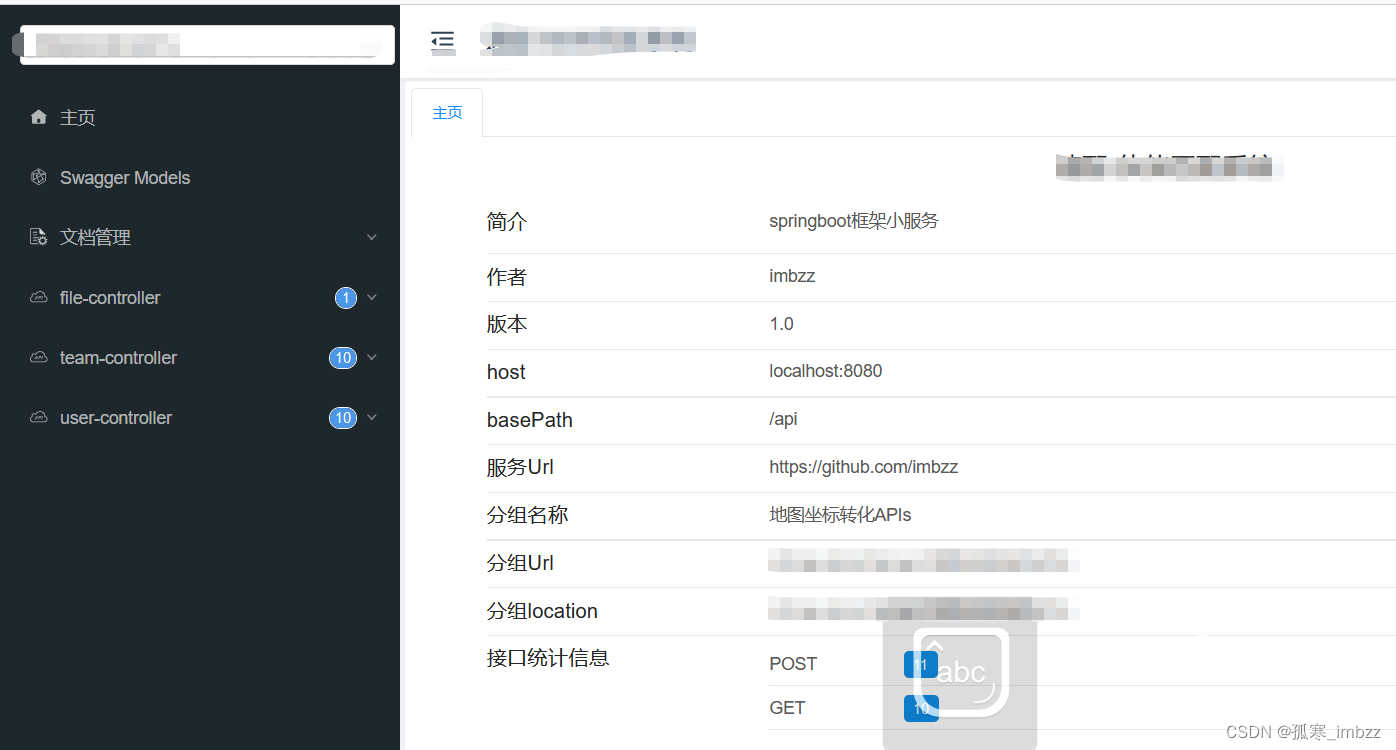
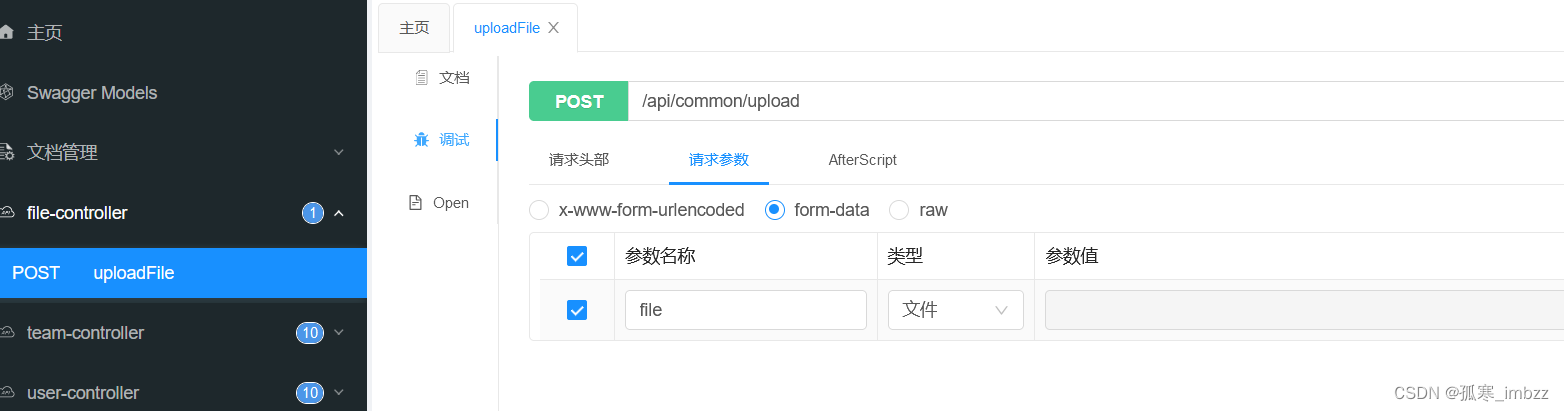
- 直接在浏览器打开 : localhost:8080/api/doc.html出现下面的页面就成了,可以直接测试接口
- 端口由你自己指定,比如这个的8080
- /api的路径是我自定义的,如果你别加 ,直接localhost:8080/doc.html
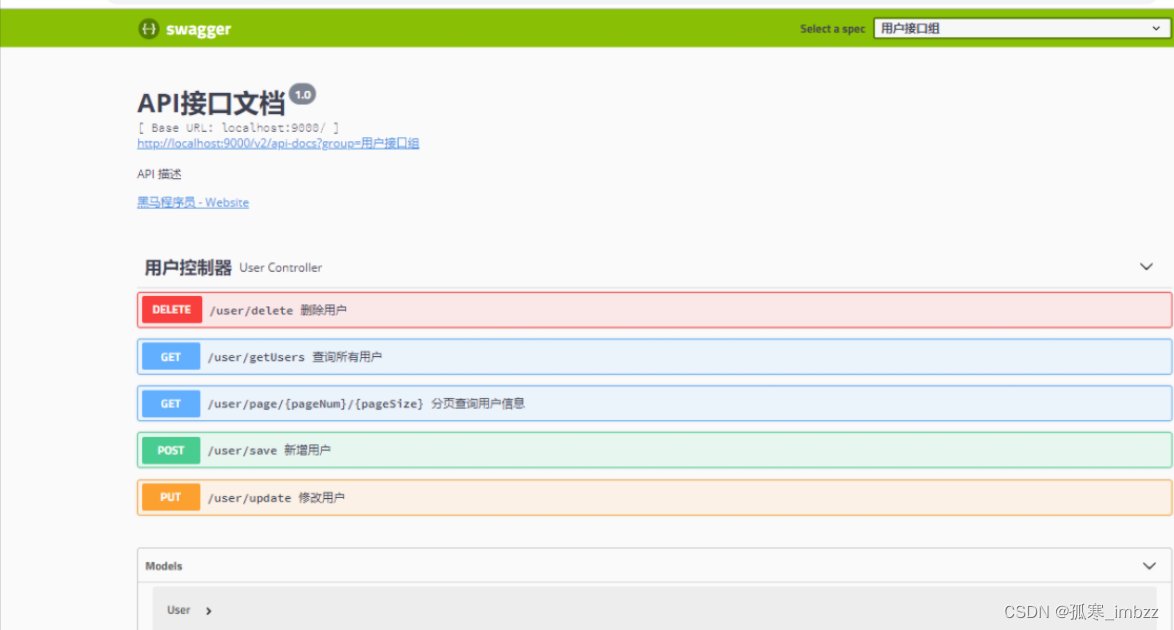
如果有人说Swagger长什么样,下面这个丑样: 听说没那么好用,咱也是直接上Knife4jKnife4j
3.完结撒花