一、SpringCloud简介
Spring Cloud是一系列框架的有序集合。它利用Spring Boot的开发便利性巧妙地简化了分布式系统基础设施的开发,如服务发现注册、配置中心、消息总线、负载均衡、断路器、数据监控等,都可以用Spring Boot的开发风格做到一键启动和部署。Spring Cloud并没有重复制造轮子,它只是将目前各家公司开发的比较成熟、经得起实际考验的服务框架组合起来,通过Spring Boot风格进行再封装屏蔽掉了复杂的配置和实现原理,最终给开发者留出了一套简单易懂、易部署和易维护的分布式系统开发工具包。
二、构建SpirngCloud当中的Eureka模块
我们在上一篇文章当中讲解了如何在一个SpringBoot应用当中构建多模块应用,这边接上一篇的代码继续进行。假如想这样构建,首先需要去看一下上一篇《SpringBoot多模块项目的创建和配置》。
我们可以看到,我们在其中构建了三个模块,分别为Mall_EurekaCenter、Mall_ManageService和Mall_WechatService模块。
现在,我们要实现的任务是把Mall_EurekaCenter当作微服务的服务注册中心,把其他的两个服务分别向注册中心进行注册。
第一步:配置Mall_EurekaCenter模块(服务注册中心)
首先我们在父工程的pom文件当中引入依赖
<?xml version="1.0" encoding="UTF-8"?>
<project xmlns="http://maven.apache.org/POM/4.0.0" xmlns:xsi="http://www.w3.org/2001/XMLSchema-instance"
	xsi:schemaLocation="http://maven.apache.org/POM/4.0.0 http://maven.apache.org/xsd/maven-4.0.0.xsd">
	<modelVersion>4.0.0</modelVersion>

	<groupId>com.smartisan</groupId>
	<artifactId>RediaMallCloud</artifactId>
	<version>0.0.1-SNAPSHOT</version>
	<!--父模块打包类型必须为pom-->
	<packaging>pom</packaging>

	<!--在父pom文件当中添加模块的名称,子模块pom中<name>标签当中的值-->
	<modules>
		<module>Mall_EurekaCenter</module>
		<module>Mall_ManagerService</module>
		<module>Mall_WechatService</module>
	</modules>

	<name>RediaMallCloud</name>
	<description>Demo project for Spring Boot</description>

	<!-- parent指明继承关系,给出被继承的父项目的具体信息-->
	<parent>
		<groupId>org.springframework.boot</groupId>
		<artifactId>spring-boot-starter-parent</artifactId>
		<version>2.0.3.RELEASE</version>
		<relativePath/> <!-- lookup parent from repository -->
	</parent>

	<properties>
		<project.build.sourceEncoding>UTF-8</project.build.sourceEncoding>
		<project.reporting.outputEncoding>UTF-8</project.reporting.outputEncoding>
		<java.version>1.8</java.version>
		<!--与《SpringBoot多模块项目的创建和配置》当中唯一区别点当中的版本管理信息-->
		<spring-cloud.version>Finchley.RELEASE</spring-cloud.version>
		<!-- 在properties中统一控制依赖包的版本,更清晰-->
		<dubbo.version>2.5.3</dubbo.version>
		<zkclient.version>0.10</zkclient.version>
	</properties>

	<!--需要使用SpringCloud组件,首先要在pom文件当中加入下面的这个依赖,这个是与《SpringBoot多模块项目的创建和配置》当中的唯一区别点-->
	<dependencyManagement>
		<dependencies>
			<dependency>
				<groupId>org.springframework.cloud</groupId>
				<artifactId>spring-cloud-dependencies</artifactId>
				<version>${spring-cloud.version}</version>
				<type>pom</type>
				<scope>import</scope>
			</dependency>
		</dependencies>
	</dependencyManagement>

	<dependencies>
		<dependency>
			<groupId>org.springframework.boot</groupId>
			<artifactId>spring-boot-starter</artifactId>
		</dependency>

		<dependency>
			<groupId>org.springframework.boot</groupId>
			<artifactId>spring-boot-starter-test</artifactId>
			<scope>test</scope>
		</dependency>
	</dependencies>

	<build>
		<plugins>
			<plugin>
				<groupId>org.springframework.boot</groupId>
				<artifactId>spring-boot-maven-plugin</artifactId>
			</plugin>
		</plugins>
	</build>


</project>
然后在Mall_EurekaCenter模块当中的pom文件引入依赖
<?xml version="1.0" encoding="UTF-8"?>
<project xmlns="http://maven.apache.org/POM/4.0.0" xmlns:xsi="http://www.w3.org/2001/XMLSchema-instance"
	xsi:schemaLocation="http://maven.apache.org/POM/4.0.0 http://maven.apache.org/xsd/maven-4.0.0.xsd">
	<modelVersion>4.0.0</modelVersion>

	<groupId>com.smartisan</groupId>
	<artifactId>malleurekacenter</artifactId>
	<version>0.0.1-SNAPSHOT</version>
	<packaging>jar</packaging>

	<name>Mall_EurekaCenter</name>
	<description>Demo project for Spring Boot</description>

	<!-- 把原有的parent的信息注释掉,继承我们的父工程-->
	<parent>
		<!--<groupId>org.springframework.boot</groupId>
		<artifactId>spring-boot-starter-parent</artifactId>
		<version>2.0.3.RELEASE</version>
		<relativePath/>--> <!-- lookup parent from repository -->
		<groupId>com.smartisan</groupId>
		<artifactId>RediaMallCloud</artifactId>
		<version>0.0.1-SNAPSHOT</version>
	</parent>

	<properties>
		<project.build.sourceEncoding>UTF-8</project.build.sourceEncoding>
		<project.reporting.outputEncoding>UTF-8</project.reporting.outputEncoding>
		<java.version>1.8</java.version>
	</properties>

	<dependencies>
		<dependency>
			<groupId>org.springframework.cloud</groupId>
			<artifactId>spring-cloud-starter-netflix-eureka-server</artifactId>
		</dependency>
		<dependency>
			<groupId>org.springframework.boot</groupId>
			<artifactId>spring-boot-starter-web</artifactId>
		</dependency>

		<dependency>
			<groupId>org.springframework.boot</groupId>
			<artifactId>spring-boot-starter-test</artifactId>
			<scope>test</scope>
		</dependency>
	</dependencies>

	<build>
		<plugins>
			<plugin>
				<groupId>org.springframework.boot</groupId>
				<artifactId>spring-boot-maven-plugin</artifactId>
			</plugin>
		</plugins>
	</build>
</project>
在MallEurekaCenterApplication类上面加上@EnableEurekaServer注解,声明这是一个EurekaServer。
import org.springframework.boot.SpringApplication;
import org.springframework.boot.autoconfigure.SpringBootApplication;
import org.springframework.cloud.netflix.eureka.server.EnableEurekaServer;

@EnableEurekaServer
@SpringBootApplication
public class MallEurekaCenterApplication {

	public static void main(String[] args) {
		SpringApplication.run(MallEurekaCenterApplication.class, args);
	}
}
然后在Mall_EurekaCenter模块当中编写application.yml文件的信息:
#注册中心应用名称
spring:
  application:
      name: eureka-server
#eureka.server.enableSelfPreservation:是否向注册中心注册自己
#通过eureka.client.registerWithEureka:false和fetchRegistry:false来表明自己是一个eureka server.
eureka:
  server:
      enableSelfPreservation: false
  instance:
      hostname: localhost
#      prefer-ip-address: true
#      preferIpAddress: true
#      ip-address: 172.193.225.185
#      instance-id: ${spring.cloud.client.ipAddress}:${server.port}
  client:
      fetch-registry: false
      register-with-eureka: false
      service-url:
           defaultZone: http://${eureka.instance.hostname}:${server.port}/eureka/
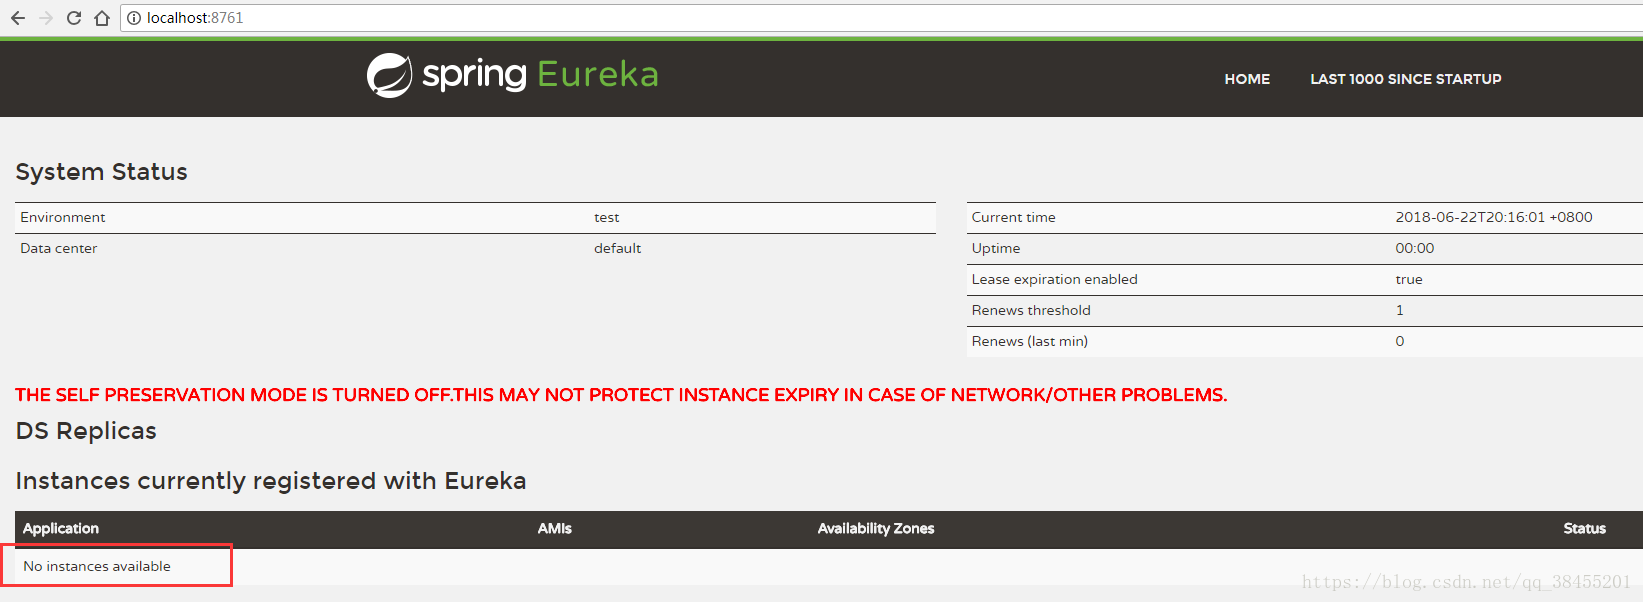
这个时候我们启动Mall_EurekaCenter这个工程,打开浏览器,输入:http://localhost:8761/,界面如下,发现还没有服务实例出现(因为我们还没有向注册中心注册服务)。
第二步:编写服务提供者(这里编写Mall_ManagerService模块,Mall_WechatService模块相同)并向注册中心进行注册。
首先编写服务提供者的pom文件
<?xml version="1.0" encoding="UTF-8"?>
<project xmlns="http://maven.apache.org/POM/4.0.0" xmlns:xsi="http://www.w3.org/2001/XMLSchema-instance"
	xsi:schemaLocation="http://maven.apache.org/POM/4.0.0 http://maven.apache.org/xsd/maven-4.0.0.xsd">
	<modelVersion>4.0.0</modelVersion>

	<groupId>com.smartisan</groupId>
	<artifactId>mallmanagerservice</artifactId>
	<version>0.0.1-SNAPSHOT</version>
	<packaging>jar</packaging>

	<name>Mall_ManagerService</name>
	<description>Demo project for Spring Boot</description>

	<!-- 把原有的parent的信息注释掉,继承我们的父工程-->
	<parent>
		<!--<groupId>org.springframework.boot</groupId>
		<artifactId>spring-boot-starter-parent</artifactId>
		<version>2.0.3.RELEASE</version>
		<relativePath/>--> <!-- lookup parent from repository -->
		<groupId>com.smartisan</groupId>
		<artifactId>RediaMallCloud</artifactId>
		<version>0.0.1-SNAPSHOT</version>
	</parent>

	<properties>
		<project.build.sourceEncoding>UTF-8</project.build.sourceEncoding>
		<project.reporting.outputEncoding>UTF-8</project.reporting.outputEncoding>
		<java.version>1.8</java.version>
	</properties>

	<dependencies>
		<dependency>
			<groupId>org.springframework.cloud</groupId>
			<artifactId>spring-cloud-starter-netflix-eureka-server</artifactId>
		</dependency>
		<dependency>
			<groupId>org.springframework.cloud</groupId>
			<artifactId>spring-cloud-starter-eureka</artifactId>
		</dependency>
		<dependency>
			<groupId>org.springframework.boot</groupId>
			<artifactId>spring-boot-starter-web</artifactId>
		</dependency>
		<dependency>
			<groupId>org.springframework.boot</groupId>
			<artifactId>spring-boot-starter-test</artifactId>
			<scope>test</scope>
		</dependency>
	</dependencies>
	<build>
		<plugins>
			<plugin>
				<groupId>org.springframework.boot</groupId>
				<artifactId>spring-boot-maven-plugin</artifactId>
			</plugin>
		</plugins>
	</build>
</project>
在主类上面增加@EnableEurekaClient注解,声明自己是一个服务提供者
import org.springframework.boot.SpringApplication;
import org.springframework.boot.autoconfigure.SpringBootApplication;
import org.springframework.cloud.netflix.eureka.EnableEurekaClient;

@EnableEurekaClient
@SpringBootApplication
public class MallManagerServiceApplication {

	public static void main(String[] args) {
		SpringApplication.run(MallManagerServiceApplication.class, args);
	}
}
编写服务提供者的application.yml文件
#服务提供者的运行端口
server:
  port: 8011
#服务提供者的应用名称,http://localhost:8761/页面当中会显示出来
spring:
  application:
    name: mall-managerservice

#用户配置开发(dev),测试(test),生产(prod)的配置文件,避免频繁改动
  profiles:
    active: dev
#打包之前注释掉
eureka:
  client:
    serviceUrl:
       defaultZone: http://admin:password@localhost:8761/eureka/
  instance:
    prefer-ip-address: true
按照上面的步骤,编写Mall_WechatService模块,这样我们编写好了两个服务提供者,运行之后,我们在Mall_EurekaCenter的运行日志当中看到如下信息:

打开浏览器,输入:http://localhost:8761/,界面如下,发现两个服务实例出现
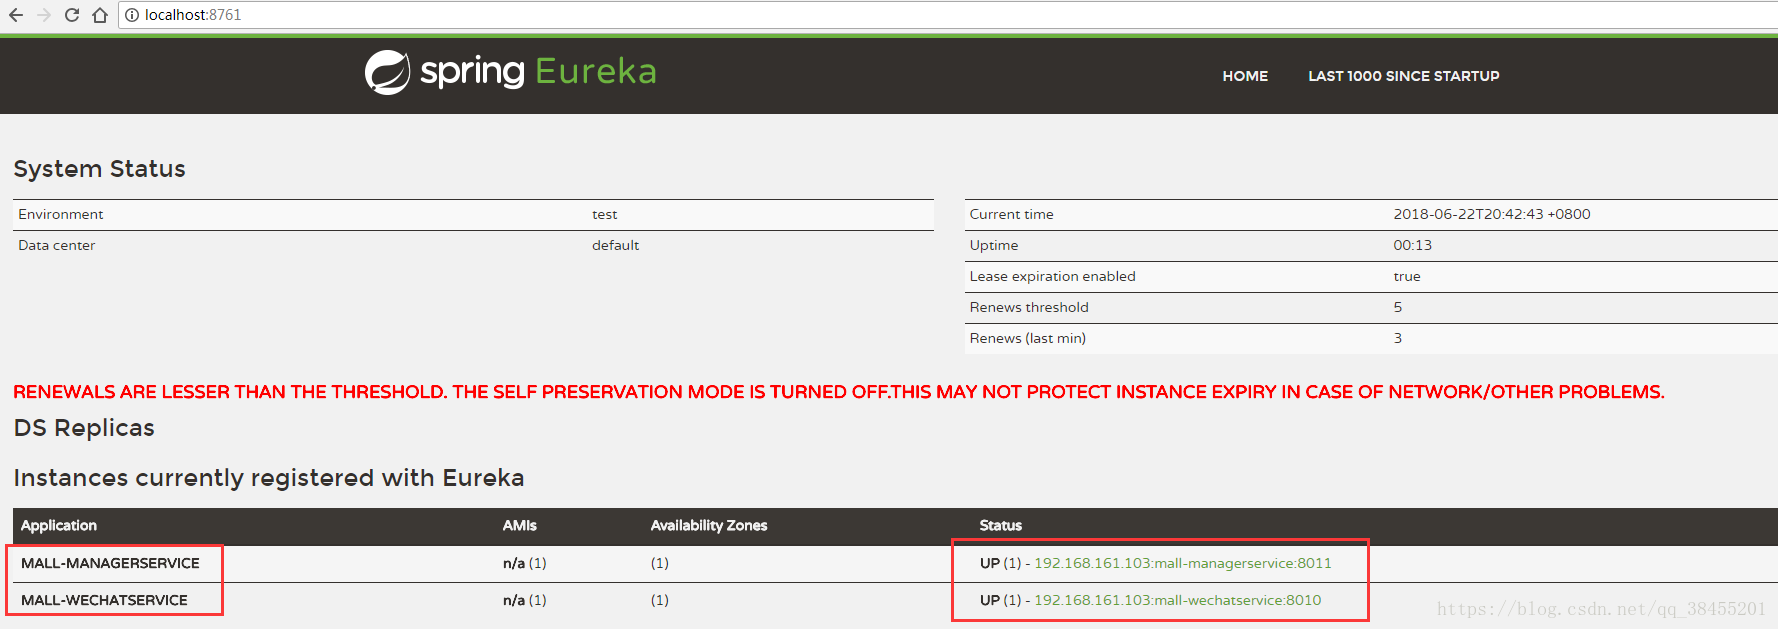
经过以上步骤,我们就声明了两个微服务并且向注册中心进行了注册。
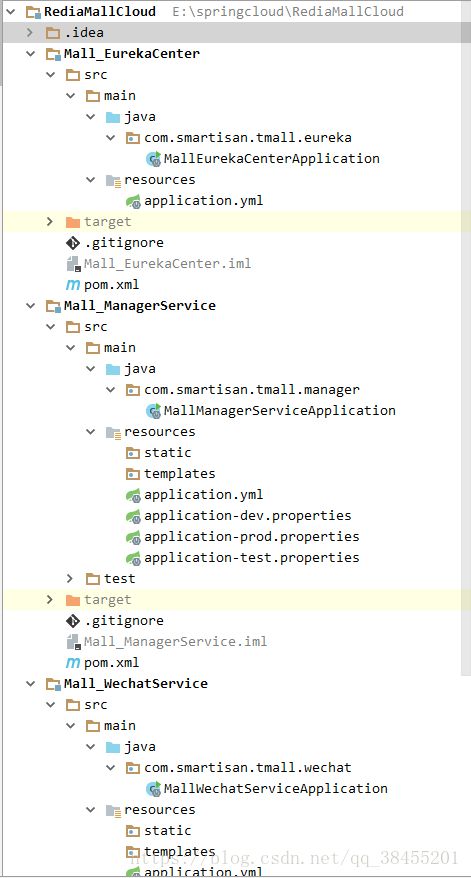
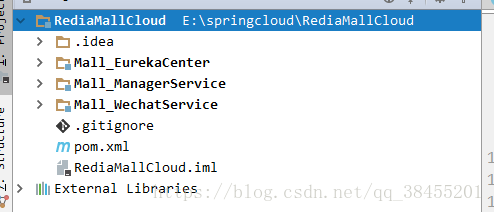
整个工程的结构如下: