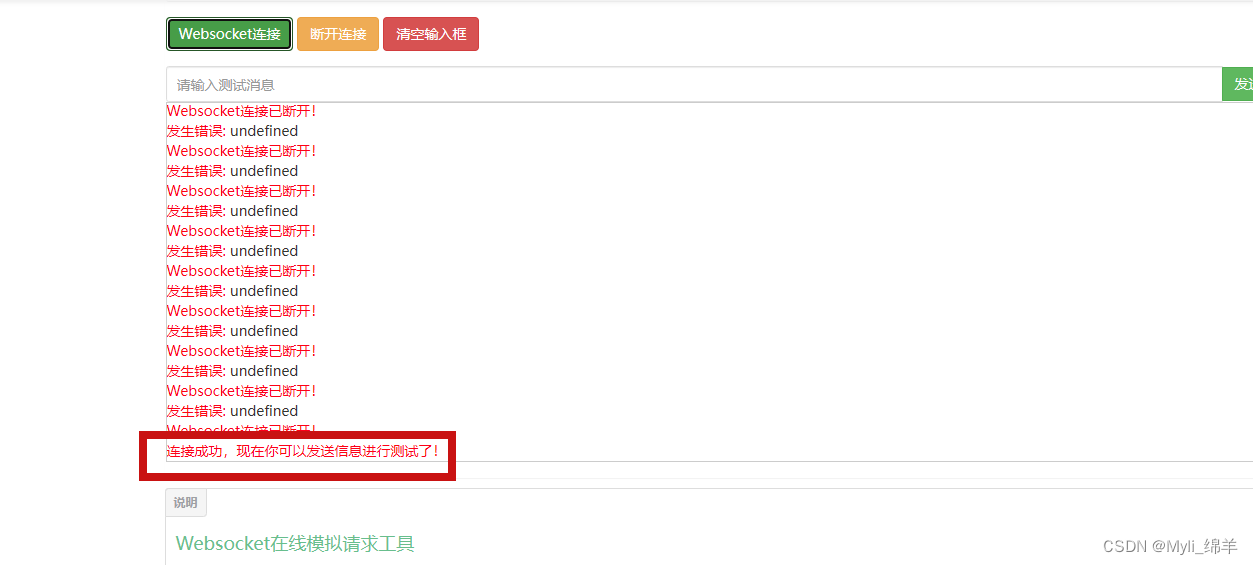
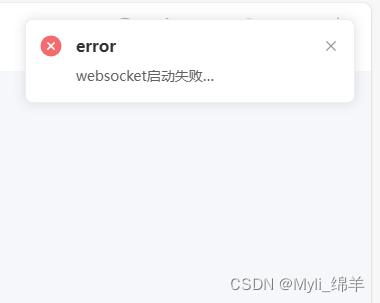
【找了无数的文档资料总结】
【不停的找文档试】
【每一次都显示连接不上】
【终于成了……】

当使用Spring Boot框架配置WebSocket时,
通常会使用@ServerEndpoint注解来标识WebSocket端点,
并通过ServerEndpointExporter来注册这些端点。以下是配置WebSocket的步骤:
步骤 1:添加依赖
确保在项目的pom.xml文件中添加了Spring WebSocket和Spring Boot Starter依赖:
<dependency>
    <groupId>org.springframework.boot</groupId>
    <artifactId>spring-boot-starter-websocket</artifactId>
</dependency>
步骤 2:创建WebSocket端点类
创建一个类,并使用@ServerEndpoint注解标识为WebSocket端点。例如:
import org.springframework.stereotype.Component;
import javax.websocket.*;
import javax.websocket.server.ServerEndpoint;

@ServerEndpoint("/websocket")
@Component
public class WebSocketEndpoint {


    @OnOpen
    public void onOpen(Session session) {


        // 处理WebSocket连接建立时的逻辑
    }

    @OnMessage
    public void onMessage(String message, Session session) {


        // 处理接收到的WebSocket消息
    }

    @OnClose
    public void onClose(Session session, CloseReason closeReason) {


        // 处理WebSocket连接关闭时的逻辑
    }

    @OnError
    public void onError(Session session, Throwable throwable) {


        // 处理WebSocket错误时的逻辑
    }
}
步骤 3:配置ServerEndpointExporter【重点!!】
在Spring Boot的主应用程序类上添加@EnableWebSocket注解,以启用WebSocket支持,并注入ServerEndpointExporter bean。例如:
import org.springframework.boot.SpringApplication;
import org.springframework.boot.autoconfigure.SpringBootApplication;
import org.springframework.context.annotation.Bean;
import org.springframework.web.socket.server.standard.ServerEndpointExporter;

@SpringBootApplication
@EnableWebSocket
public class WebSocketApplication {


    public static void main(String[] args) {


        SpringApplication.run(WebSocketApplication.class, args);
    }

    @Bean
    public ServerEndpointExporter serverEndpointExporter() {


        return new ServerEndpointExporter();
    }
}
步骤 4:配置WebSocket的端点路径
在application.properties或application.yml文件中配置WebSocket端点的路径:
server:
  servlet:
    context-path: /your-context-path
将 /your-context-path 替换为想要的上下文路径。
步骤 5:启动应用程序
运行主应用程序类,启动Spring Boot应用程序。
完成上述步骤后,就可以通过 ws://your-host:your-port/your-context-path/websocket 这样的地址连接到WebSocket端点了。确保替换 your-host,your-port 和 your-context-path 为相应的主机名、端口和上下文路径。
我的后端代码配置
package com.power.query.resutful.workbench;

import com.alibaba.fastjson.JSONObject;
import com.power.query.services.workbench.details.flowInfo.FlowInfoDetailsService;
import lombok.extern.slf4j.Slf4j;
import org.springframework.stereotype.Component;

import javax.annotation.Resource;
import javax.websocket.*;
import javax.websocket.server.PathParam;
import javax.websocket.server.ServerEndpoint;
import java.util.concurrent.ConcurrentHashMap;
import java.util.concurrent.CopyOnWriteArraySet;

/**
 * WorkbenchWebsocket
 *
 * @author: LiMingy  c
 * @Date: 2023/11/16 17:33
 * @version: 1.0
 */
//ws://your-host:your-port/your-context-path/websocket/orgId
@ServerEndpoint("/websocket/{orgId}")
@Component
@Slf4j
public class WorkbenchWebsocket {


    //与某个客户端的连接会话,需要通过它来给客户端发送数据
    private Session session;
    /**
     * 用户ID
     */
    private String orgId;

    //concurrent包的线程安全Set,用来存放每个客户端对应的MyWebSocket对象。
    //虽然@Component默认是单例模式的,但springboot还是会为每个websocket连接初始化一个bean,所以可以用一个静态set保存起来。
    //  注:底下WebSocket是当前类名
    private static CopyOnWriteArraySet<WorkbenchWebsocket> webSockets =new CopyOnWriteArraySet<>();
    // 用来存在线连接用户信息
    private static ConcurrentHashMap<String,Session> sessionPool = new ConcurrentHashMap<String,Session>();

    @Resource
    FlowInfoDetailsService flowInfoDetailsService;
    @OnOpen
    public void onOpen(Session session ,@PathParam("orgId") String orgId){


        // 处理WebSocket连接建立时的逻辑
        try {


            this.session = session;
            this.orgId = orgId;
            webSockets.add(this);
            sessionPool.put(orgId, session);
            log.info("【websocket消息】有新的连接,总数为:"+webSockets.size());
        } catch (Exception e) {


        }
    }

    @OnMessage
    public void onMessage(String message, Session session) {


        // 处理接收到的WebSocket消息
    }

    @OnClose
    public void onClose(Session session, CloseReason closeReason) {


        // 处理WebSocket连接关闭时的逻辑
        try {


            webSockets.remove(this);
            sessionPool.remove(this.orgId);
            log.info("【websocket消息】连接断开,总数为:"+webSockets.size());
        } catch (Exception e) {


        }
    }

    @OnError
    public void onError(Session session, Throwable throwable) {


        // 处理WebSocket错误时的逻辑
    }


    // 此为广播消息
    public void sendAllMessage(String message) {


        log.info("【websocket消息】广播消息:"+message);
        for(WorkbenchWebsocket webSocket : webSockets) {


            try {


                if(webSocket.session.isOpen()) {


                    webSocket.session.getAsyncRemote().sendText(message);
                }
            } catch (Exception e) {


                e.printStackTrace();
            }
        }
    }

    // 此为单点消息
    public void sendOneMessage(String orgId, String message) {


        Session session = sessionPool.get(orgId);
        if (session != null&&session.isOpen()) {


            try {


                log.info("【websocket消息】 单点消息:"+message);
                session.getAsyncRemote().sendText(message);
            } catch (Exception e) {


                e.printStackTrace();
            }
        }
    }

    // 此为单点消息(多人)
    public void sendMoreMessage(String[] userIds, String message) {


        for(String orgId:userIds) {


            Session session = sessionPool.get(orgId);
            if (session != null&&session.isOpen()) {


                try {


                    log.info("【websocket消息】 单点消息:"+message);
                    session.getAsyncRemote().sendText(message);
                } catch (Exception e) {


                    e.printStackTrace();
                }
            }
        }
    }
    //定时器3秒一次
//    @Scheduled(cron = "0/5 * * * * ?")
//    @Scheduled(cron = "0 0/3 * * * ?")//定时器3分钟一次
    public void sendMsg() {


        //查看是否有连接
        for(WorkbenchWebsocket webSocket : webSockets) {


            try {


                if(webSocket.session.isOpen()) {


                    String orgId = webSocket.orgId;
                    //判断orgId是否为空
                    if(orgId==null && orgId.equals("")&&orgId== "undefined"){


                        return;
                    }else{


                        //如果有,连接查询该用户的信息
                        String messageNumByOrgId = flowInfoDetailsService.findMessageNumByOrgId(orgId);
                        JSONObject jsonObject = new JSONObject();
                        if(Integer.valueOf(messageNumByOrgId)==0){


                            System.out.println("没有最新动态消息!");
                        }else{


                            jsonObject.put("cmd", "info");
                            jsonObject.put("orgId", orgId);
                            jsonObject.put("data", messageNumByOrgId);
                            webSocket.sendOneMessage(orgId, jsonObject.toJSONString());
                        }

                    }
                }
            } catch (Exception e) {


                e.printStackTrace();
            }
        }
    }

}
前端配置
找一个必定所有页面都过的页面
import {initWebSocket} from "@/utils/websoket";
onMounted(() => {
//
//获取一下你要传的orgId 参数
//
 initWebSocket('ws://localhost:8080/psy-query/websocket'+'/'+orgId)
  }
把websocket配置写在js里 其他人引用即可
ElNotification 是全局提醒

// Usage: websoket.
import {

    ElNotification} from 'element-plus'

let socketUrl = "";  // WebSocket的URL
let websocket = null;  // WebSocket对象
let heartTime = null;  // 心跳定时器
let socketHeart = 0;  // 心跳计数
let HeartTimeOut = 3000;  // 心跳超时时间
let socketError = 0;  // 错误计数

/**
 * 初始化WebSocket
 * @param {string} url WebSocket的URL
 */
const initWebSocket = (url) => {


    socketUrl = url;
    websocket = new WebSocket(url);
    websocketonopen();//接成功回调
    websocketonmessage();//消息接收回调
    // sendSocketHeart();
};

/**
 * WebSocket连接成功回调
 */
const websocketonopen = () => {


    websocket.onopen = function (e) {


        console.log("连接 websocket 成功", e);
        // resetHeart();
        ElNotification.success({


            title: 'success',
            message: 'websocket实时动态流转开始检测……',
            showClose: false,
        })
    };
};

/**
 * WebSocket连接错误回调
 */
const websocketonerror = () => {


    websocket.onerror = function (e) {


        console.log("连接 websocket 失败", e);
    };
};

/**
 * WebSocket关闭回调
 */
const websocketclose = () => {


    websocket.onclose = function (e) {


        console.log("断开连接", e);
    };
};

/**
 * WebSocket消息接收回调
 */
const websocketonmessage = () => {


    websocket.onmessage = function (e) {


        let msg = JSON.parse(e.data);
        console.log('已接收到信息', msg);
        if (msg.cmd === 'heartbeat') {


            // resetHeart();
            console.log("心跳");
        }
        if (msg.cmd === 'info') {


            // resetHeart();
            let recentlyMessageNum =msg.data;
            console.log("recentlyMessageNum",recentlyMessageNum);
            ElNotification.success({


                title: 'Info',
                message: '你有'+recentlyMessageNum+'条新的流转信息',
                showClose: false,
            })
        }

    };
};

/**
 * 发送消息到WebSocket服务器
 * @param {string} data 要发送的数据
 */
const sendMsg = (data) => {


    websocket.send(data);
};

/**
 * WebSocket错误回调
 */
const websocketError = () => {


    websocket.onerror = function (e) {


        console.log("socket 错误", e);
    };
};

/**
 * 重置心跳计数和错误计数,并重新发送心跳
 */
const resetHeart = () => {


    socketHeart = 0;
    socketError = 0;
    clearInterval(heartTime);
    // sendSocketHeart();
};

/**
 * 发送心跳到WebSocket服务器
 */
const sendSocketHeart = () => {


    heartTime = setInterval(() => {


        if (socketHeart <= 2) {


            console.log("心跳发送:", socketHeart);
            websocket.send(
                JSON.stringify({


                    content: "",
                    requestId: "aa9872be-d5b9-478e-aba4-50527cd3ef32",
                    type: "heartbeat"
                })
            );
            socketHeart = socketHeart + 1;
        } else {


            reconnect();
        }
    }, HeartTimeOut);
};

/**
 * 重新连接WebSocket服务器
 */
const reconnect = () => {


    if (socketError <= 2) {


        clearInterval(heartTime);
        initWebSocket(socketUrl);
        socketError = socketError + 1;
        console.log("socket重连", socketError);
    } else {


        console.log("重试次数已用完的逻辑", socketError);
        clearInterval(heartTime);
    }
};


export {


    initWebSocket,
    websocketonmessage,
    sendMsg,
    websocketonopen,
    websocketonerror,
    websocketclose,
    websocketError,
    resetHeart,
    sendSocketHeart,
    reconnect,
};
心跳
js中有心跳设置之类的,想加的话,需要自己再调后端的配置
【能实现功能为优先,之后的再迭代】