目录
数据持久化
数据持久化将瞬时数据保存到存储设备中,保证即使在手机或计算机关机状况下,这些数据仍然不会丢失。
三种方式实现持久化
文件存储
SharedPrenrences存储
介绍
使用键值对的方式存储数据。
当保存数据时提供一个对应的键,在读取数据的时候就可以通过这个键把对应的值取出来。
数据类型
支持多种不同数据类型存储,存储的数据为整型读取出来就是整型;存储的数据为字符串读取出来就是字符串。
数据库存储
一、文件存储
存入数据:openFileOutput()
Context类中的openFileOutput()方法,用于将数据存储到指定的文件中。默认存储到/data/data/<package name>/files/目录下。
如何进入该目录:
调出搜索功能,输入:
Device File Explorer
<package name>:
openFileOutput()有两个参数:
第一个参数是文件名:
将数据存储到指定文件中,表示该文件已经存在,如果不存在则创建文件。
第二个参数是文件的操作模式:
MODE_PRIVATE:出现相同名则覆盖内容,即重新写入;
MODE_APPEND:在原文件后面接着写。
示例如下:
private fun save(inputText:String){
        try {
            val output=openFileOutput("data",Context.MODE_PRIVATE)
            val writer=BufferedWriter(OutputStreamWriter(output))
            writer.use{
                it.write(inputText)
            }
        } catch (e:IOException){
            e.printStackTrace()
        }
    }
读取数据:openFileinput()
Context类中的openFileinput()方法,用于从文件中读取数据。
示例如下:
private fun load():String{
        val content=StringBuilder()
        try {
            val input = openFileInput("data")
            val reader = BufferedReader(InputStreamReader(input))
            reader.use {
                //forEachLine是kotlin的内置扩展,将读取的每个行内容添加到Lambda中
                reader.forEachLine {
                    //出现多个类时,带有继承关系指向父类的用this;如果不带有任何继承关系则使用it
                    content.append(it)
                }
            }
        }
        catch (e:IOException){
            e.printStackTrace()
        }
        return content.toString()
    }
具体实现:
代码:
MainActivity.kt
import android.content.Context
import androidx.appcompat.app.AppCompatActivity
import android.os.Bundle
import android.widget.EditText
import android.widget.Toast
import java.io.BufferedReader
import java.io.BufferedWriter
import java.io.IOException
import java.io.InputStreamReader
import java.io.OutputStreamWriter

class MainActivity : AppCompatActivity() {
    lateinit var EditText1:EditText
    override fun onCreate(savedInstanceState: Bundle?) {
        super.onCreate(savedInstanceState)
        setContentView(R.layout.activity_main)
        EditText1=findViewById(R.id.editText)
        val inputText=load()
        if (inputText.isNotEmpty()){
            EditText1.setText(inputText)
            EditText1.setSelection(inputText.length)//获取文本长度,将光标移动到文本末尾
            Toast.makeText(this,"restore has success",Toast.LENGTH_LONG).show()
        }
    }

    override fun onDestroy() {
        super.onDestroy()
        val inputText=EditText1.text.toString()//调用其中的文本并转换成字符串
        save(inputText)
    }

    private fun save(inputText:String){
        //捕获错误
        try {
            val output=openFileOutput("data",Context.MODE_PRIVATE)
            //将数据存储到指定文件中,表示该文件已经存在,如果不存在则创建文件。第二个参数MODE_PRIVATE出现相同名则覆盖,即重新写入,MODE_APPEND在原文件后面接着写
            val writer=BufferedWriter(OutputStreamWriter(output))//BufferedWriter缓冲器,
            writer.use{
                it.write(inputText)
            }

        } catch (e:IOException){
            e.printStackTrace()
        }
    }
    //重新启动程序时EditText中能保留我们上次输入的内容
    private fun load():String{
        val content=StringBuilder()
        try {
            val input = openFileInput("data")
            val reader = BufferedReader(InputStreamReader(input))
            reader.use {
                //forEachLine是kotlin的内置扩展,将读取的每个行内容添加到Lambda中
                reader.forEachLine {
                    content.append(it)
                    //出现多个类,带有继承关系,指向父类的用this;如果不带有任何继承关系则使用it
                }
            }
        }
        catch (e:IOException){
            e.printStackTrace()
        }
        return content.toString()
    }
}
运行,在界面中的文本框输入内容。
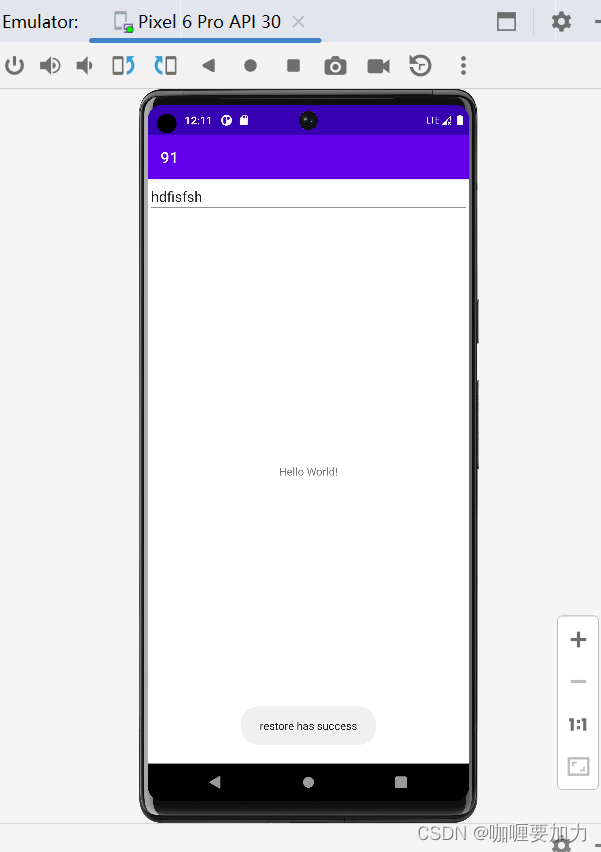
结果:
在Device File Explorer(在右侧栏最下方)中,进入data/data/当前项目名称文件夹,可以看到生成files/data文件,打卡查看,内容正是文本框输入内容。

二、SharePreferences存储
获取对象:
//调用SharePreferences对象的edit()方法获取一个SharePreferences.Editor对象
val editor=getSharedPreferences("data",Context.MOOE_PRIVATE).edit()
添加数据:
//添加一个布尔型数据就使用putBoolean()方法,添加字符串就使用putString()方法......
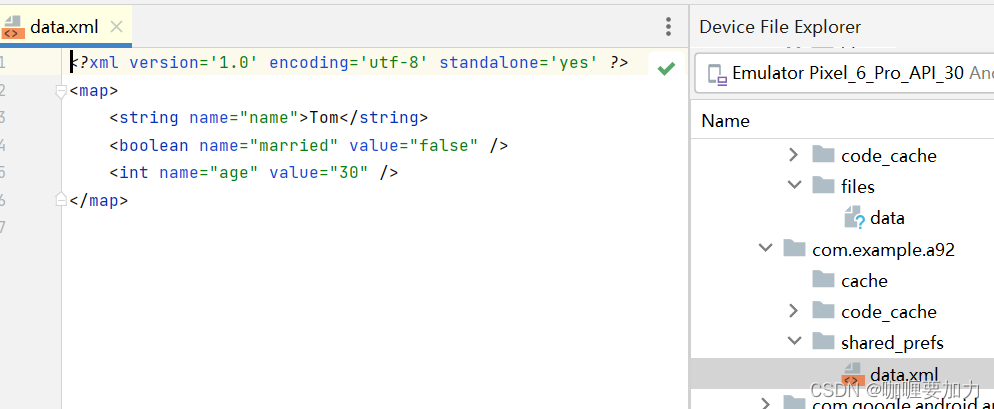
editor.putString("name","Tom")
editor.putInt("age",30)
editor.putBoolean("married",false)数据存储:
//调用apply()方法将添加的数据提交
editor.apply()
具体实现:
建立两个按钮,点击按钮实现数据的存储和输出。
代码:
res/layout中activity_main.xml
<?xml version="1.0" encoding="utf-8"?>
<androidx.constraintlayout.widget.ConstraintLayout xmlns:android="http://schemas.android.com/apk/res/android"
    xmlns:app="http://schemas.android.com/apk/res-auto"
    xmlns:tools="http://schemas.android.com/tools"
    android:layout_width="match_parent"
    android:layout_height="match_parent"
    tools:context=".MainActivity">

    <Button
        android:id="@+id/button1"
        android:layout_width="match_parent"
        android:layout_height="wrap_content"
        android:text="存入数据"
        />
    <Button
        android:id="@+id/button2"
        android:layout_width="wrap_content"
        android:layout_height="match_parent"
        android:text="显示数据"
        />

</androidx.constraintlayout.widget.ConstraintLayout>
MainActivity.kt
import android.content.Context
import androidx.appcompat.app.AppCompatActivity
import android.os.Bundle
import android.util.Log
import android.widget.Button
import android.widget.Toast
class MainActivity : AppCompatActivity() {
override fun onCreate(savedInstanceState: Bundle?) {
super.onCreate(savedInstanceState)
setContentView(R.layout.activity_main)
val button1: Button = findViewById(R.id.button1)
val button2: Button = findViewById(R.id.button2)
//存入
button1.setOnClickListener{
val editor=getSharedPreferences("data", MODE_PRIVATE).edit()
editor.putString("name","Tom")
editor.putInt("age",30)
editor.putBoolean("married",false)
editor.apply()
}
//获取
button2.setOnClickListener {
val prefs=getSharedPreferences("data",Context.MODE_PRIVATE)
//如果存入字段存在,则此处自动填入存入字段,如果存入字段不存在,则填入此处的值
val name=prefs.getString("name","")
val age=prefs.getInt("age",0)
val married=prefs.getBoolean("married",true)
val gradutate=prefs.getString("gradutate","he is postgraduate")
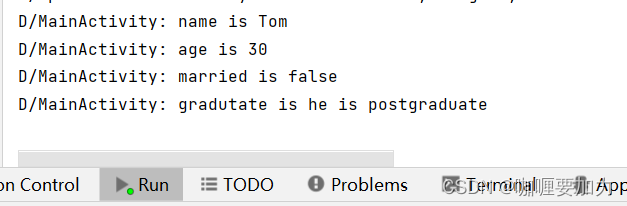
//第一种形式:日志显示数据
Log.d("MainActivity","name is $name")
Log.d("MainActivity","age is $age")
Log.d("MainActivity","married is $married")
Log.d("MainActivity","gradutate is $gradutate")//未存入字段
}
}
}运行,点击界面的存入数据按钮,再点击显示数据按钮,查看显示台
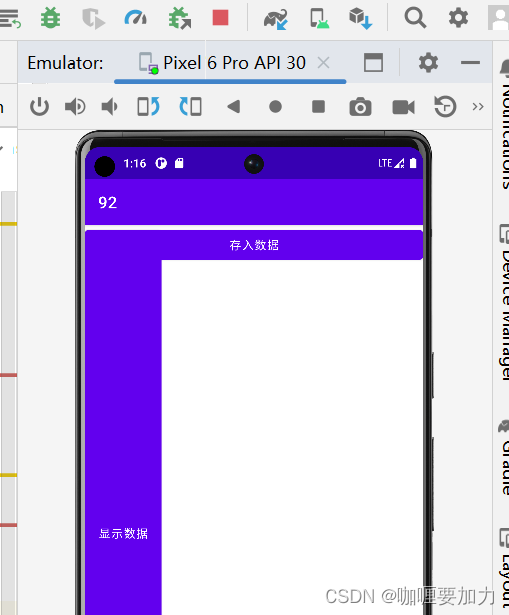
结果:
在Device File Explorer(在右侧栏最下方)中,进入data/data/当前项目名称,可以看到生成了shared_pref/data.xml文件。
三、数据库存储(SQLite)
添加数据:
SQLite Database中提供了insert() 方法,
这个方法接收3个参数:第一个接受数据的表名,第二个是给未指定数据的字段赋NULL,一般不用设为null;第三个ContentValues()对象,传入的数据。
val dbHelper=MyDatabaseHelper(this,"BookStore.db",2)
val db=dbHelper.writableDatabase
val values=ContentValues().apply{
    put("author","Dan Brown")
    put("name","The Da Vinci Code")
    put("pages",280)
    put("price",13.28)
}
db.insert("Book",null,values)
更新数据:
SQLite Database中提供了update() 方法,
这个方法接收4个参数:第一个指定更新数据的表名; 第二个参数是Content Values对象, 要把更新数据在这里组装进去; 第三、第四个参数用于约束更新哪几行中的数据,不指定默认更新所有行。
示例如下:
val dbHelper=MyDatabaseHelper(this,"BookStore.db",2)
val db=dbHelper.writableDatabase
val values=ContentValues()
values.put("price",10.99)
db.update("Book",values,"name=?",array Of("The Da Vinci Code"))
放进按钮进行监听:
import android.content.Context
import androidx.appcompat.app.AppCompatActivity
import android.os.Bundle
import android.widget.Button
import android.widget.Toast

class MainActivity : AppCompatActivity() {
    override fun onCreate(savedInstanceState: Bundle?) {
        super.onCreate(savedInstanceState)
        setContentView(R.layout.activity_main)
        val button: Button = findViewById(R.id.button1)
        //更新
        button.setOnClickListener{
            val dbHelper=MyDatabaseHelper(this,"BookStore.db",2)
            val db=dbHelper.writableDatabase
            val values=ContentValues()
            values.put("price",10.99)
            db.update("Book",values,"name=?",array Of("The Da Vinci Code"))
            Toast.makeText(this,"更新完成",Toast.LENGTH_SHORT).show()
        }
    }

}
删除数据:
SQLiteDatabase中提供了delete()方法,
这个方法接收3个参数:第一个指定需要删除的数据的表名;第二、第三个用于约束删除的是哪几行数据,不指定默认删除所有行。
val dbHelper = MyDatabaseHelper(this,"BookStore.db",2)
val db = dbHelper.writableDatabase
db.delete("Book","pages>?",arrayOf("500"))
查询数据:
SQLiteDatabase中提供了query()方法,
这个方法需要传入7个参数:
| query()参数 | 对应SQL部分 | 描述 |
| table | from table_name | 指定查询的表名 |
| columns | select column1,column2 | 指定查询的列名 |
| selection | where column = value | 指定where的约束条件 |
| selectionArgs | - | 为where中的占位符提供具体的值 |
| groupBy | group by column | 指定需要group by的列 |
| having | having column = value | 对group by后的结果进一步约束 |
| orderBy | order by column1,column2 | 指定查询结果的排列方式 |
val dbHelper = MyDatabaseHelper(this, "BookStore.db", 2)
val db = dbHelper.writableDatabase
// 查询Book表中所有的数据
val cursor = db.query("Book", null, null, null, null, null, null)
if (cursor.moveToFirst()) {
    do {
        // 遍历Cursor对象,取出数据并打印
        val name = cursor.getString(cursor.getColumnIndex("name"))
        val author = cursor.getString(cursor.getColumnIndex("author"))
        val pages = cursor.getInt(cursor.getColumnIndex("pages"))
        val price = cursor.getDouble(cursor.getColumnIndex("price"))
        Log.d("MainActivity", "book name is $name")
        Log.d("MainActivity", "book author is $author")
        Log.d("MainActivity", "book pages is $pages")
        Log.d("MainActivity", "book price is $price")
    } while (cursor.moveToNext())
}
cursor.close()