目录
一.单机项目
当我们拿到已开发完的项目后,首先需要在我们自己的主机上进行测试,开发完的项目是否存在一些问题。
拿到开发完的项目之后,进行解压,会有如图几个文件 :
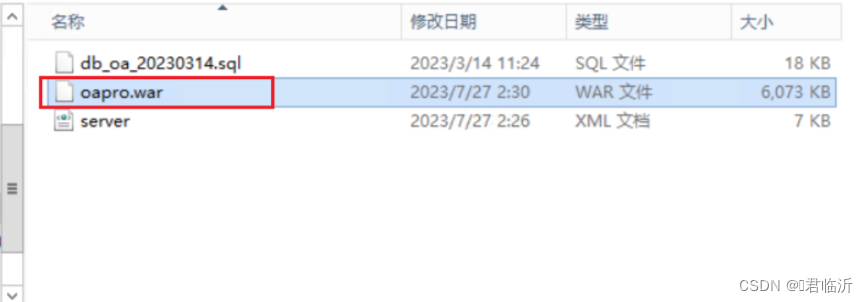
其中是数据库脚本及开发完成的项目
1.1. 本机测试
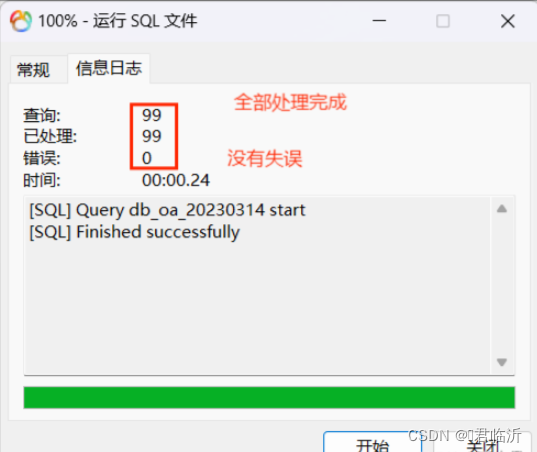
在主机上的数据库先测试数据库脚本有没有问题,随机选择一个数据库对数据脚本进行导入
如图说明没有问题 :
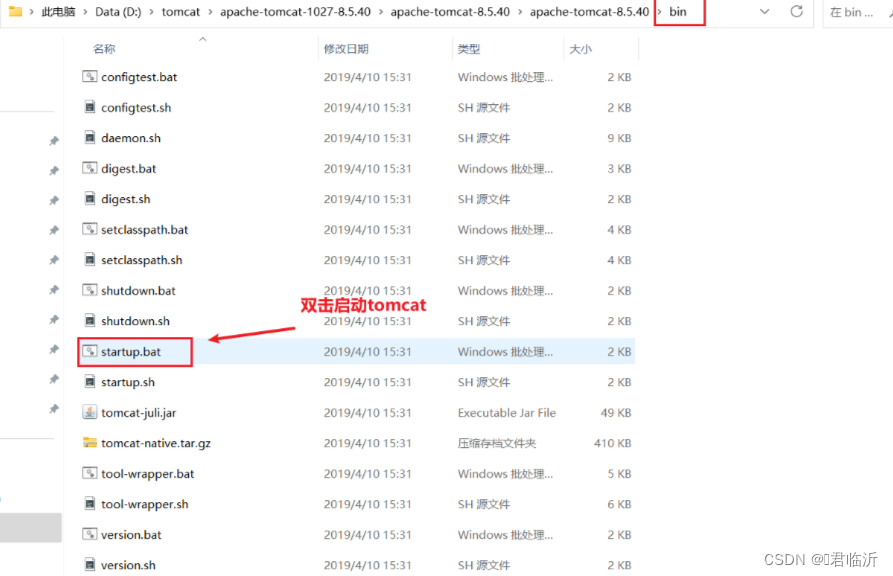
在将开发完项目的wer,复制到主机的tomcat下的webapps目录中
如图:

之后tomcat的bin目录下,找到startup.bat文件双击进行启动tomcat
如图 :
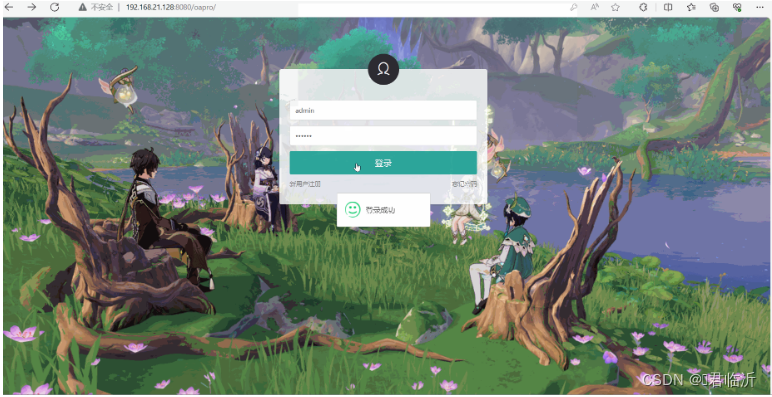
开启后,在浏览器中进行路径服务,该路径是根据开发项目的请求路径进行输入访问的,
首先是进入导入页面,登入成功后,根据项目需求看看里面的功能有没有错误。
1.2.部署
- 将主机远程连接到虚拟机,在虚拟机里面进行项目的部署
- 之后在虚拟机中文件共享,并将开发完成的项目拷贝到虚拟机的文件中,进行
- 将单机项目进行解压,将wer的项目包放到虚拟机的tomcat的webapps目录中。
- 到主机数据库中,找到连接了虚拟机的数据库,创建与单机项目中的数据库名称一样的数据库,并且将数据库脚本导入到数据库中。
- tomcat的bin目录下,找到startup.bat文件双击进行启动tomcat
- 在主机的浏览器中进行访问虚拟机中部署的项目,访问的请求地址中需要增加虚拟机的IP,可以进行访问说明完成部署。
如图 :
如果登入不上,很有可能是数据库的密码和项目配置的数据库密码不一致,在tomcat已开启的项目中进行修改,找到项目中配置数据库密码的配置文件,在里面进行修改密码即可:
列如 : ( tomcat/webapps/ssm/WEB-INF/classes )
如图 :

二.前后端
3.1.准备
- 在虚拟机中,将后台项目解压,解压后将后端项目的wer包放到tomcat的webapps目录中。
- 并且将后端项目的数据库,通过主机将数据表导入进虚拟机的数据库,当然,需要数据库的名称是很后端的数据库配置的名称一致,不一致可以新创建一个数据库,在导入数据。
- 后端准备好后,就是前端了
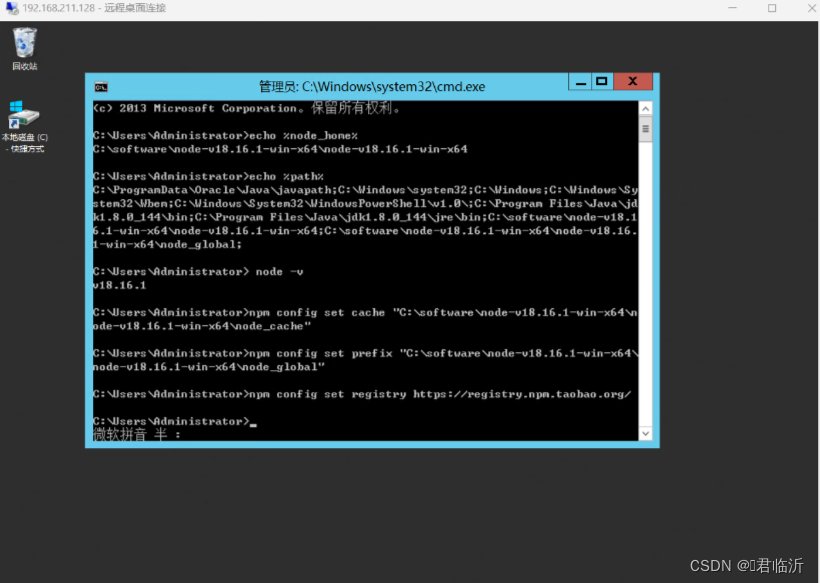
- 将node.js下载安装好,并且在环境变量里面进行配置好,然后配置npm全局模块路径和cache默认安装位置,以及配置淘宝源
3.2.部署
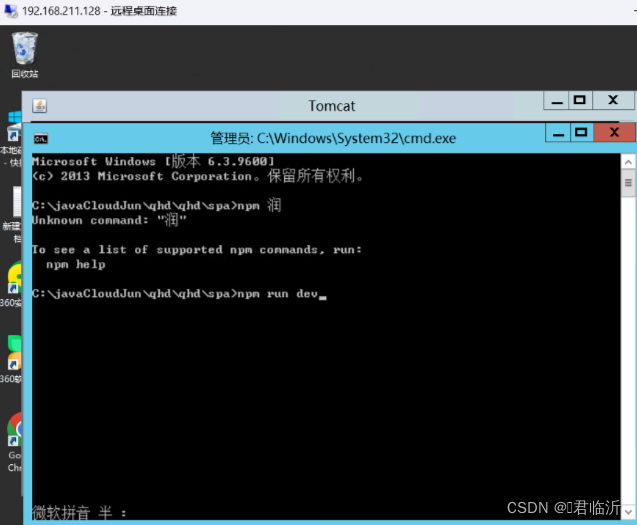
在虚拟机中开启tomcat,并且在项目的前端项目的跟目录输入启动命令。
在前端项目的根路径,cmd打开窗口,输入以下命令启动:
npm run dev
如图:
在此呢,会发现一个问题。在主机中的浏览器不能访问虚拟机中的前端项目。
是因为主机在虚拟机中的前端项目的被端口限制了的问题。
解决以下问题呢,有两种方法可以解决。
如图:弹出

第一种
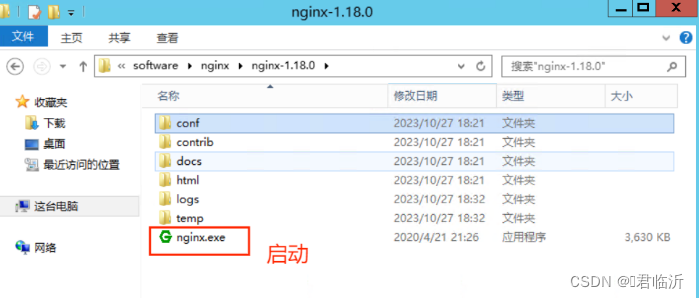
利用nginx做反向代理处理该问题
在nginx文件中找到nginx.conf 文件,将文件种的 location 进行修改,将端口代理访问
#access_log logs/host.access.log main;
location / {
proxy_pass http://localhost:8081;
}#error_page 404 /404.html;
不知道怎么搞可以在nginx的官网进行下载,解压使用即可 :
修改后想使用,双击其中的启动文件即可,如图 :
nginx.conf全部代码
#user nobody;
worker_processes 1;
#error_log logs/error.log;
#error_log logs/error.log notice;
#error_log logs/error.log info;
#pid logs/nginx.pid;
events {
worker_connections 1024;
}
http {
include mime.types;
default_type application/octet-stream;
#log_format main '$remote_addr - $remote_user [$time_local] "$request" '
# '$status $body_bytes_sent "$http_referer" '
# '"$http_user_agent" "$http_x_forwarded_for"';
#access_log logs/access.log main;
sendfile on;
#tcp_nopush on;
#keepalive_timeout 0;
keepalive_timeout 65;
#gzip on;
server {
listen 80;
server_name localhost;
#charset koi8-r;
#access_log logs/host.access.log main;
location / {
proxy_pass http://localhost:8081;
}
#error_page 404 /404.html;
# redirect server error pages to the static page /50x.html
#
error_page 500 502 503 504 /50x.html;
location = /50x.html {
root html;
}
# proxy the PHP scripts to Apache listening on 127.0.0.1:80
#
#location ~ \.php$ {
# proxy_pass http://127.0.0.1;
#}
# pass the PHP scripts to FastCGI server listening on 127.0.0.1:9000
#
#location ~ \.php$ {
# root html;
# fastcgi_pass 127.0.0.1:9000;
# fastcgi_index index.php;
# fastcgi_param SCRIPT_FILENAME /scripts$fastcgi_script_name;
# include fastcgi_params;
#}
# deny access to .htaccess files, if Apache's document root
# concurs with nginx's one
#
#location ~ /\.ht {
# deny all;
#}
}
# another virtual host using mix of IP-, name-, and port-based configuration
#
#server {
# listen 8000;
# listen somename:8080;
# server_name somename alias another.alias;
# location / {
# root html;
# index index.html index.htm;
# }
#}
# HTTPS server
#
#server {
# listen 443 ssl;
# server_name localhost;
# ssl_certificate cert.pem;
# ssl_certificate_key cert.key;
# ssl_session_cache shared:SSL:1m;
# ssl_session_timeout 5m;
# ssl_ciphers HIGH:!aNULL:!MD5;
# ssl_prefer_server_ciphers on;
# location / {
# root html;
# index index.html index.htm;
# }
#}
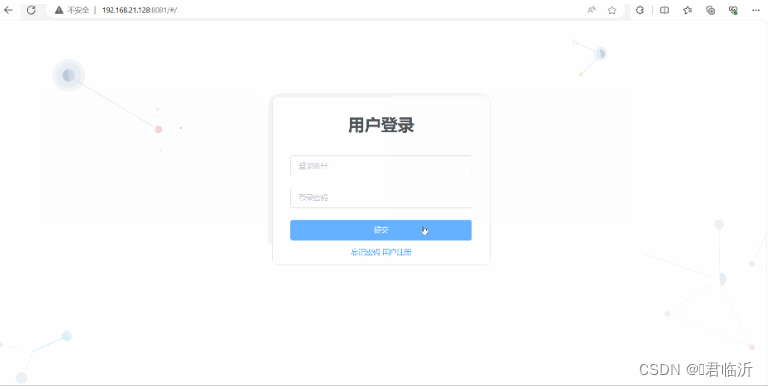
}之后进行访问,如图 :
第二种
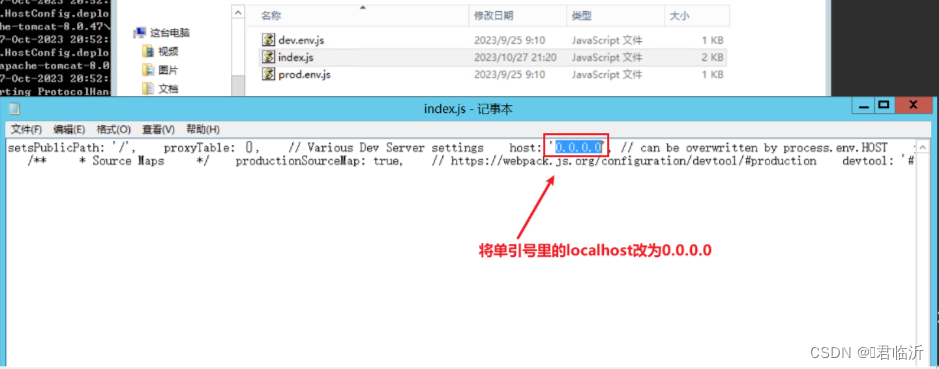
在前端项目的路径中,找到index.js文件,将端口改为开放式的端口,在前端路径下的跟目录中的 config 文件中.
打开 index. js 文件,找到 location 配置端口的位置,修改为 : 0.0.0.0
如图 :
之后重新启动前端项目在主机中访问 :
两种方法都可以,看你喜欢用哪个