华为云之轻松搭建 Nginx 静态网站
一、本次实践介绍
1. 本次实践目的
1.熟练使用华为ECS弹性云服务器;
2.了解Nginx的基本概念;
3.学会使用nginx部署静态网页,配置一台简单的web服务器。
2. 本次实践环境
1.本次实践环境为华为云ECS弹性云服务器;
2.使用的操作系统为centos7.6。
二、ECS弹性云服务器介绍
弹性云服务器(Elastic Cloud Server, ECS)是一种云上可随时自助获取、可弹性伸缩的计算服务,可帮助您打造安全、可靠、灵活、高效的应用环境。

三、准备实践环境
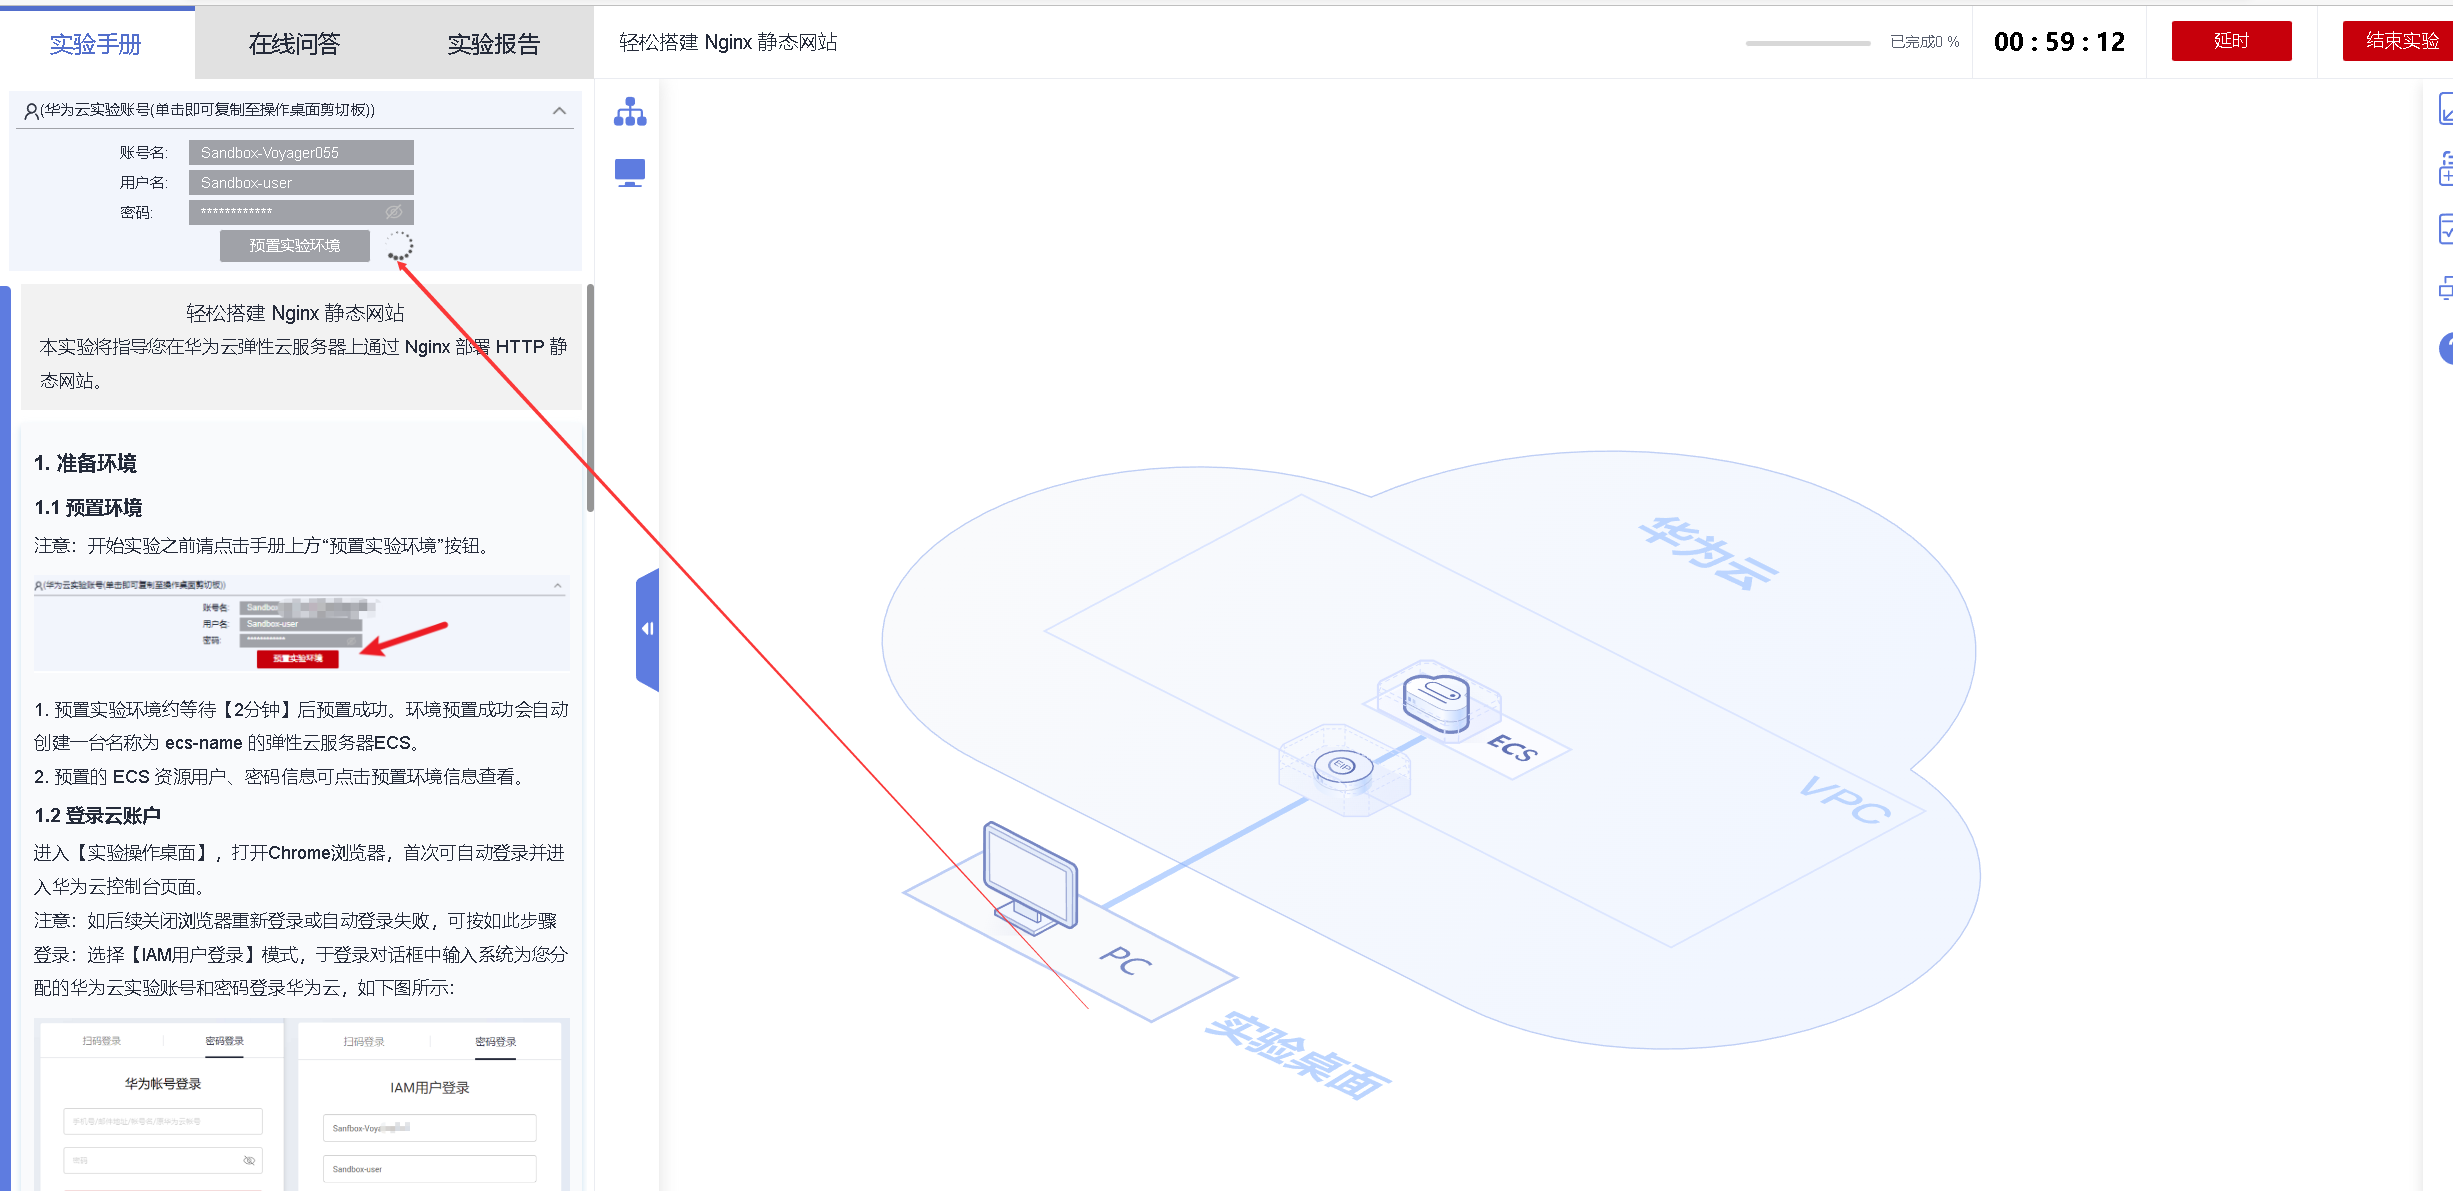
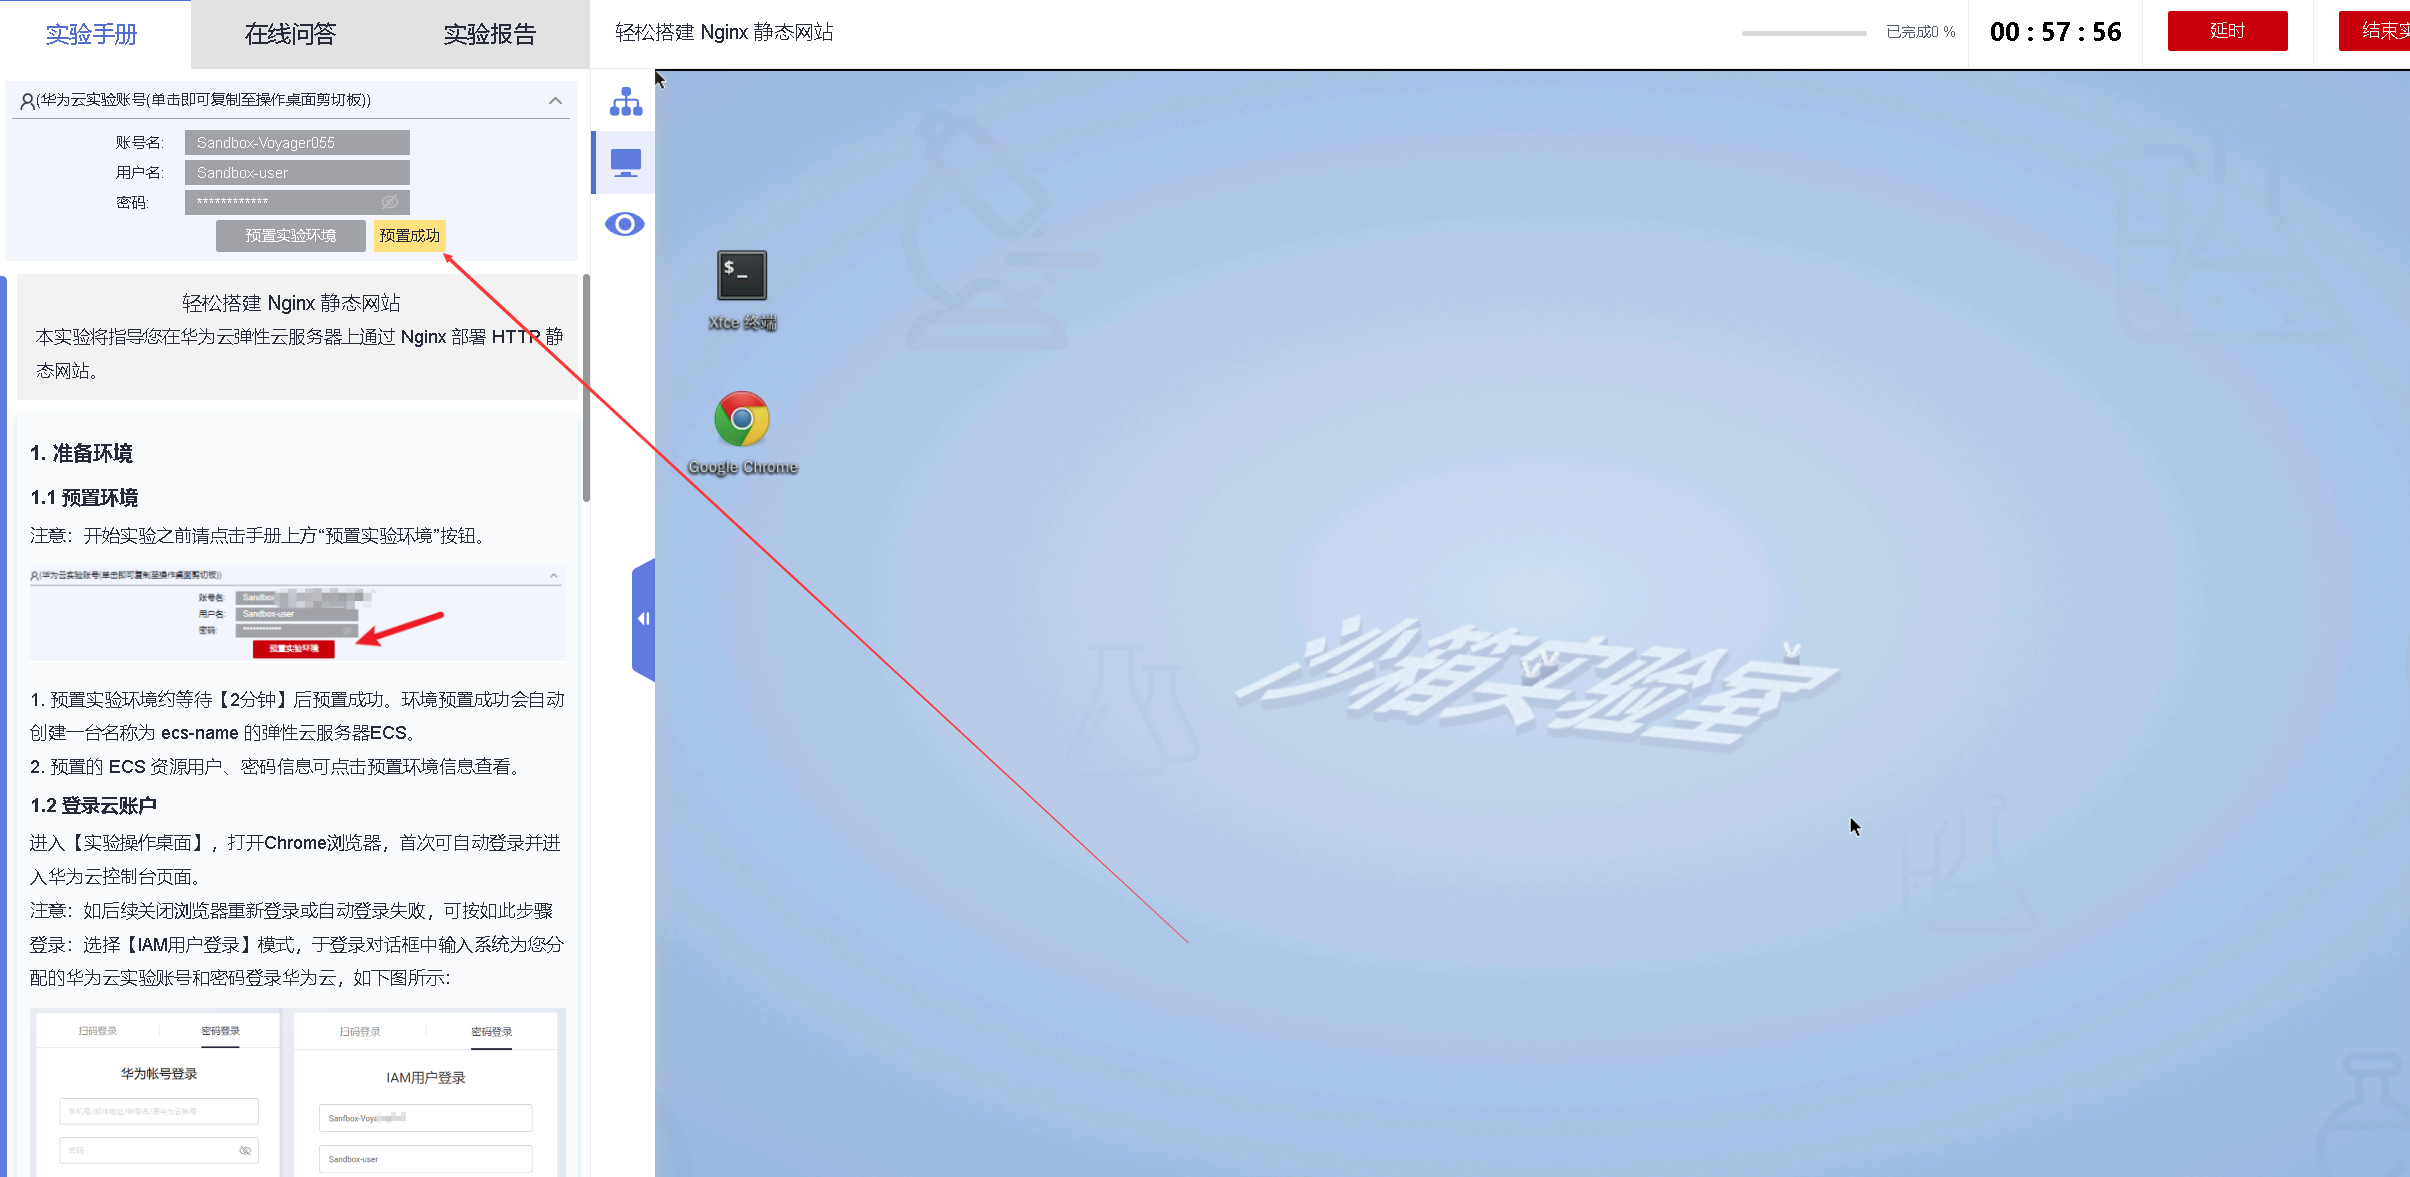
1. 预置环境
开始实验之前请点击手册上方“预置实验环境”按钮。
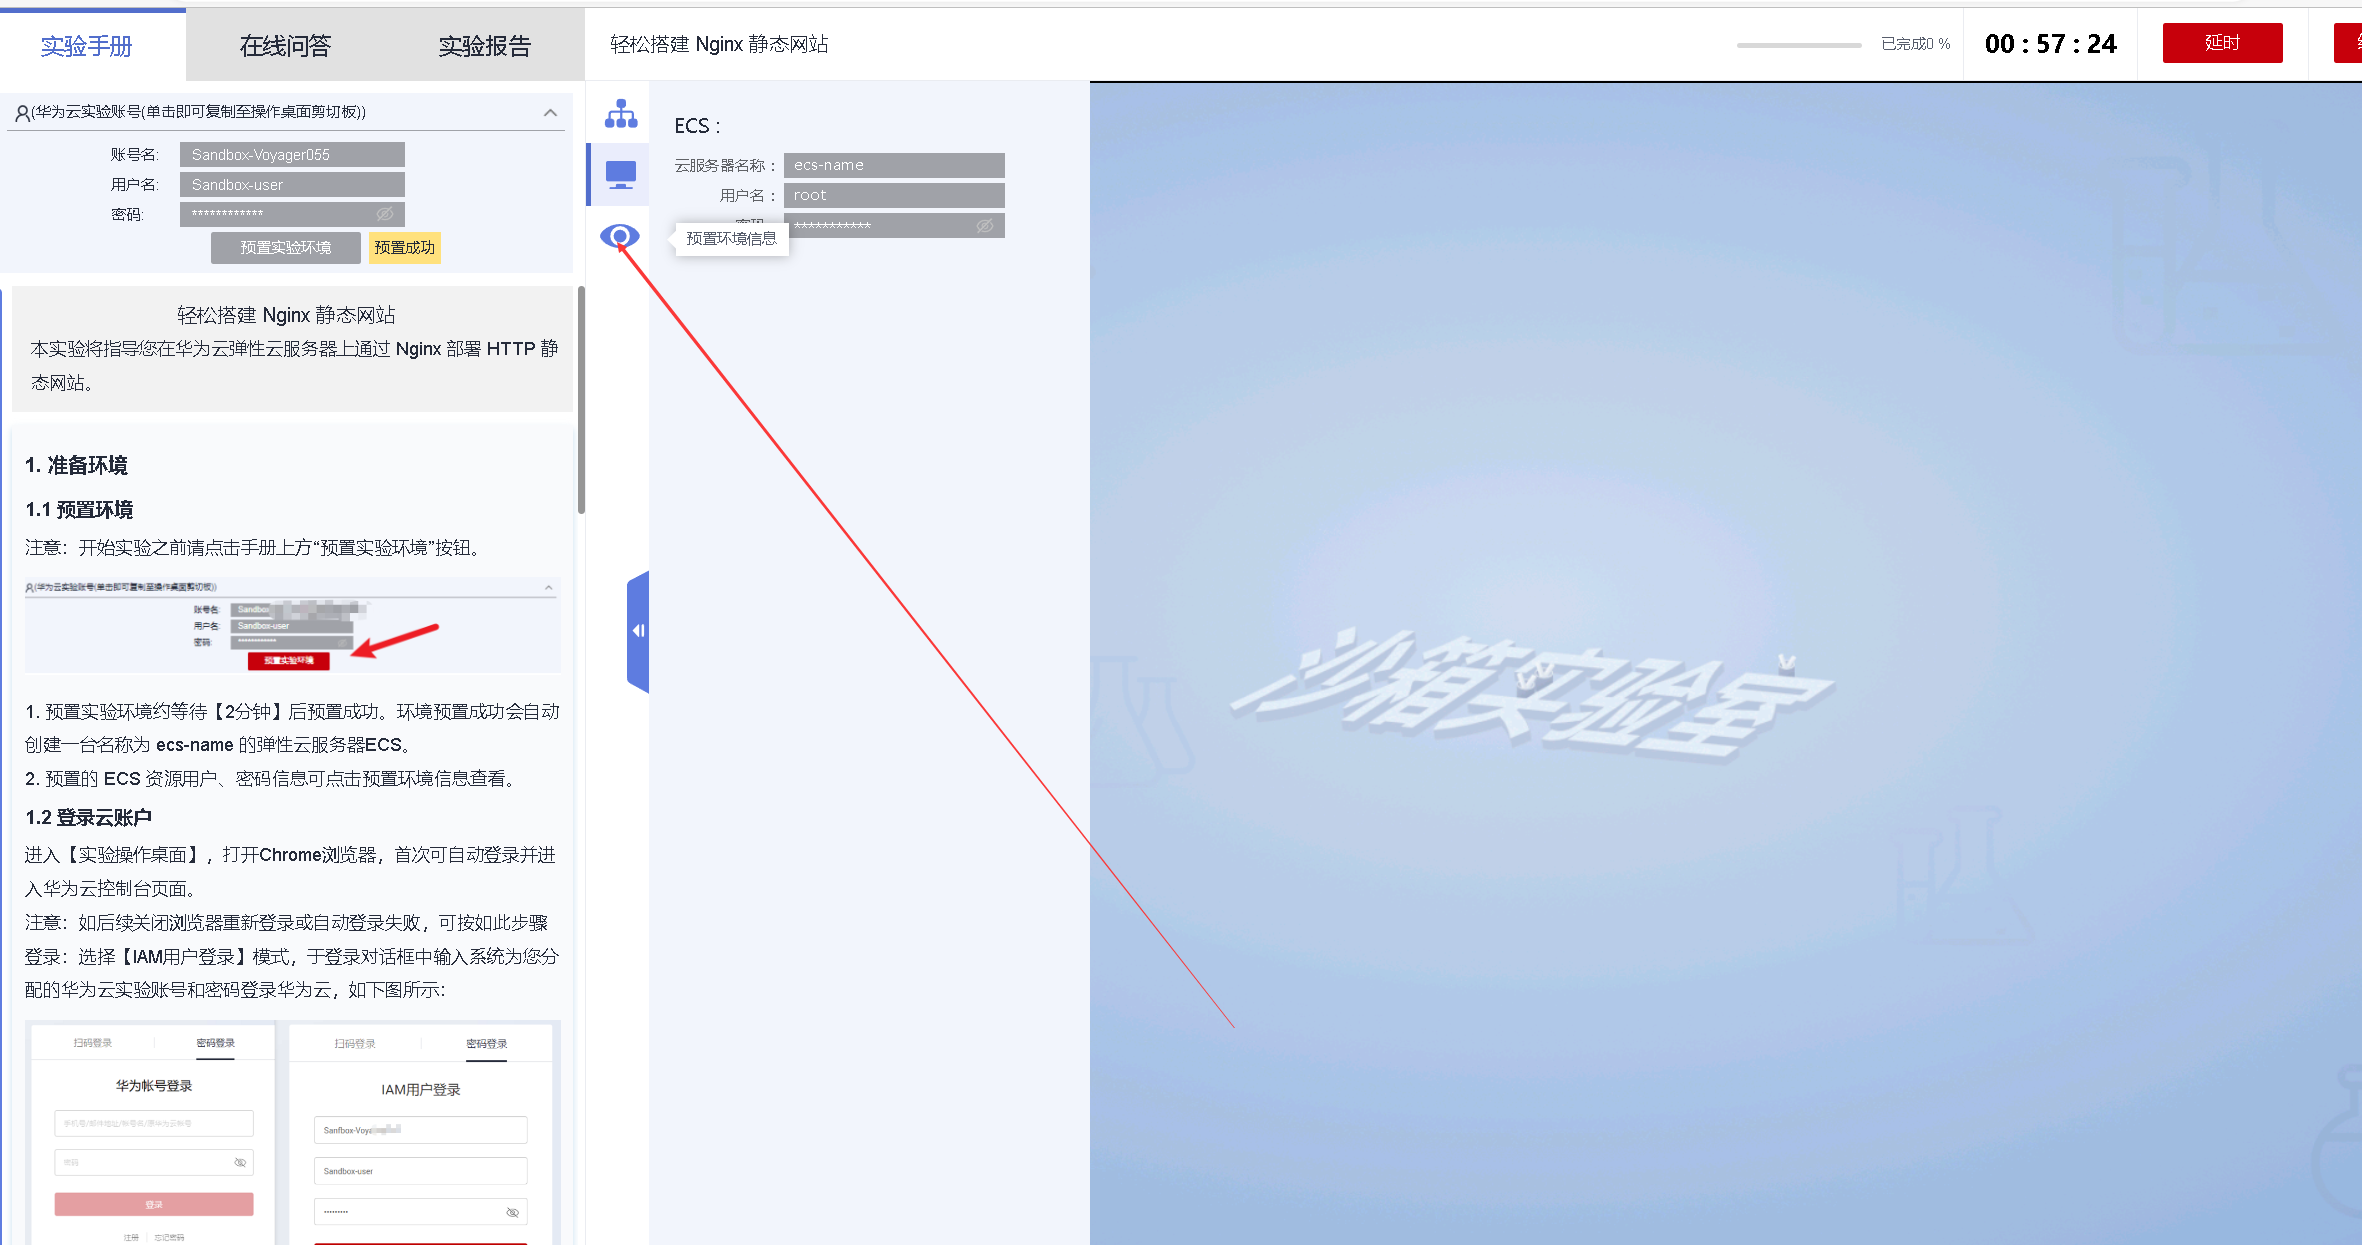
- 预置实验环境约等待【2分钟】后预置成功。环境预置成功会自动创建一台名称为 ecs-name 的弹性云服务器ECS。
- 预置的 ECS 资源用户、密码信息可点击预置环境信息查看。
2. 查看ECS服务器的账号密码信息
点击预置环境信息,查看ECS服务器的密码信息。
3. 登录华为云
选择【IAM用户登录】模式,于登录对话框中输入系统为您分配的华为云实验账号和密码登录华为云,如下图所示.


4. 远程登录ECS服务器
进入ECS服务器的控制台,服务列表,点击ECS弹性服务器,进入ECS控制台页面。

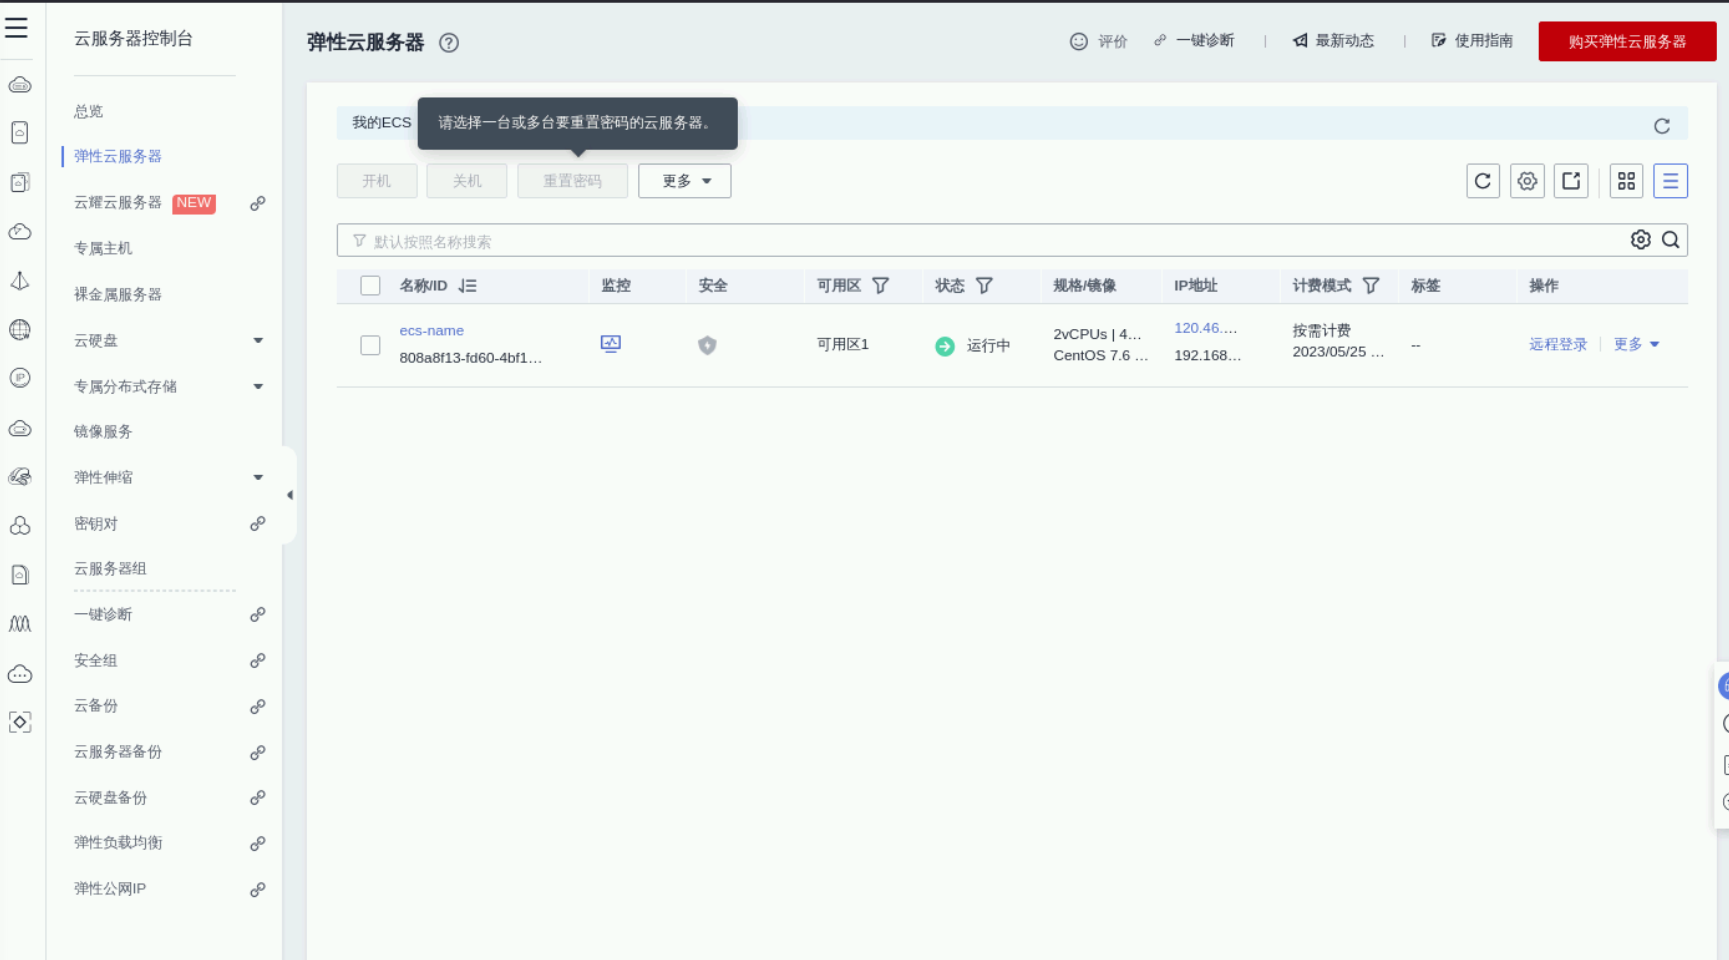
打开桌面浏览器,进入ECS控制台,复制ECS的弹性公网IP。
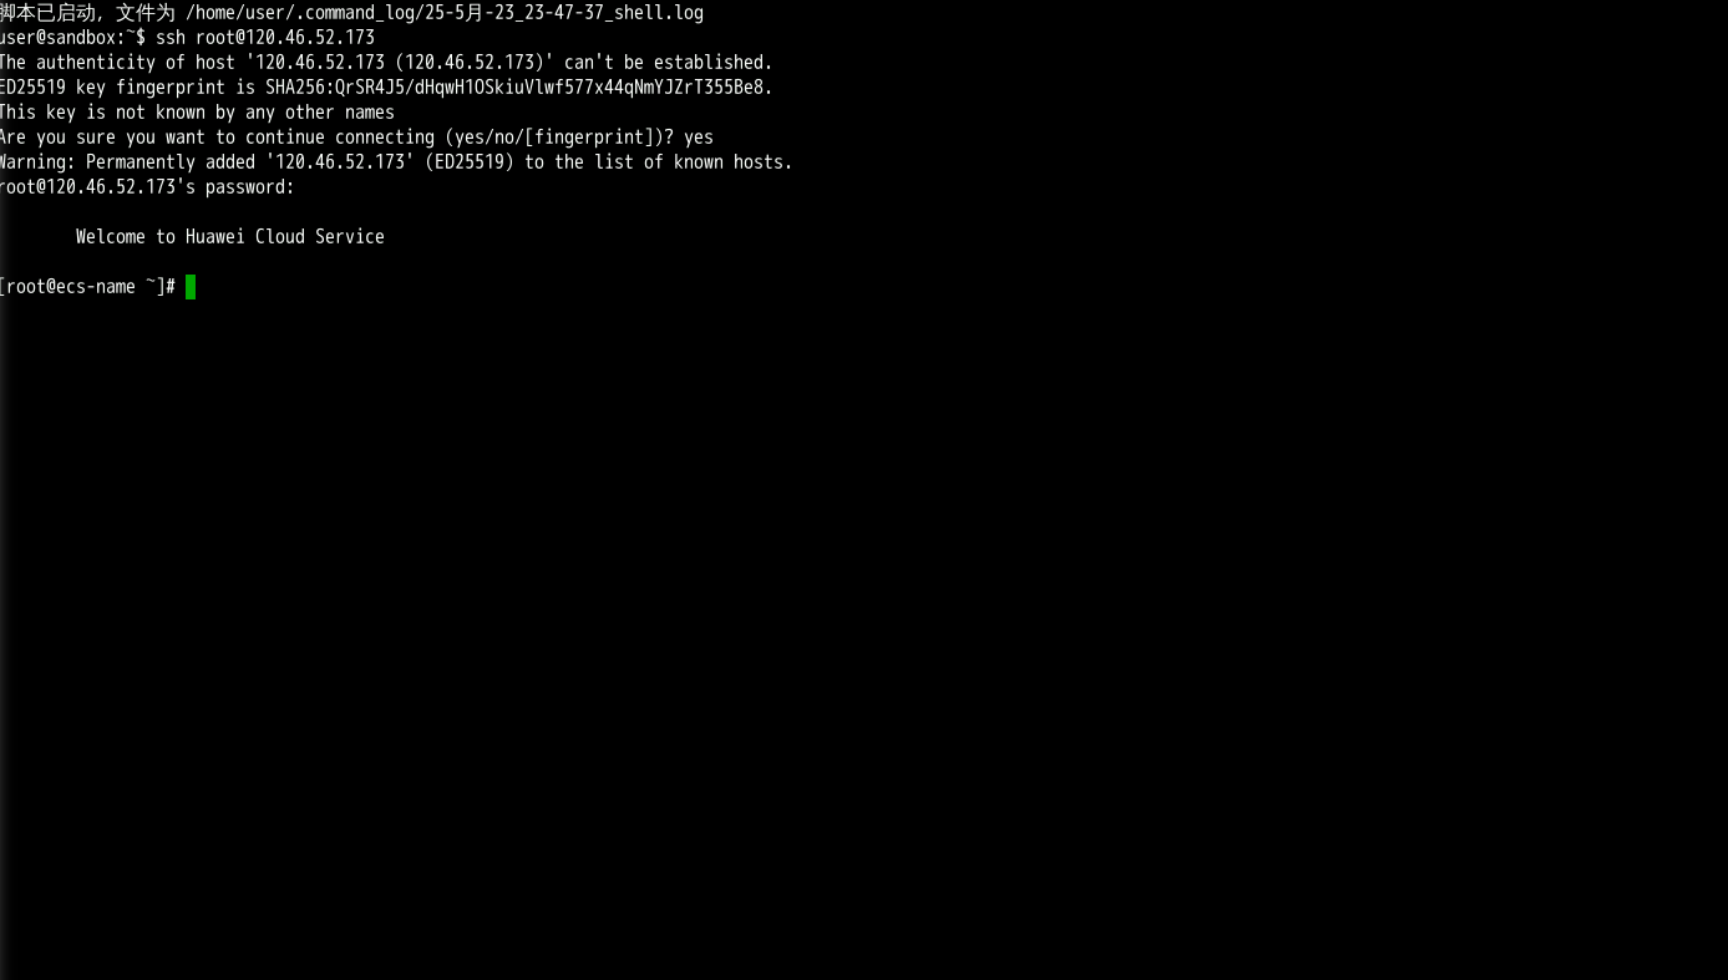
打开桌面的Xfce终端,输入命令连接远程服务器 。
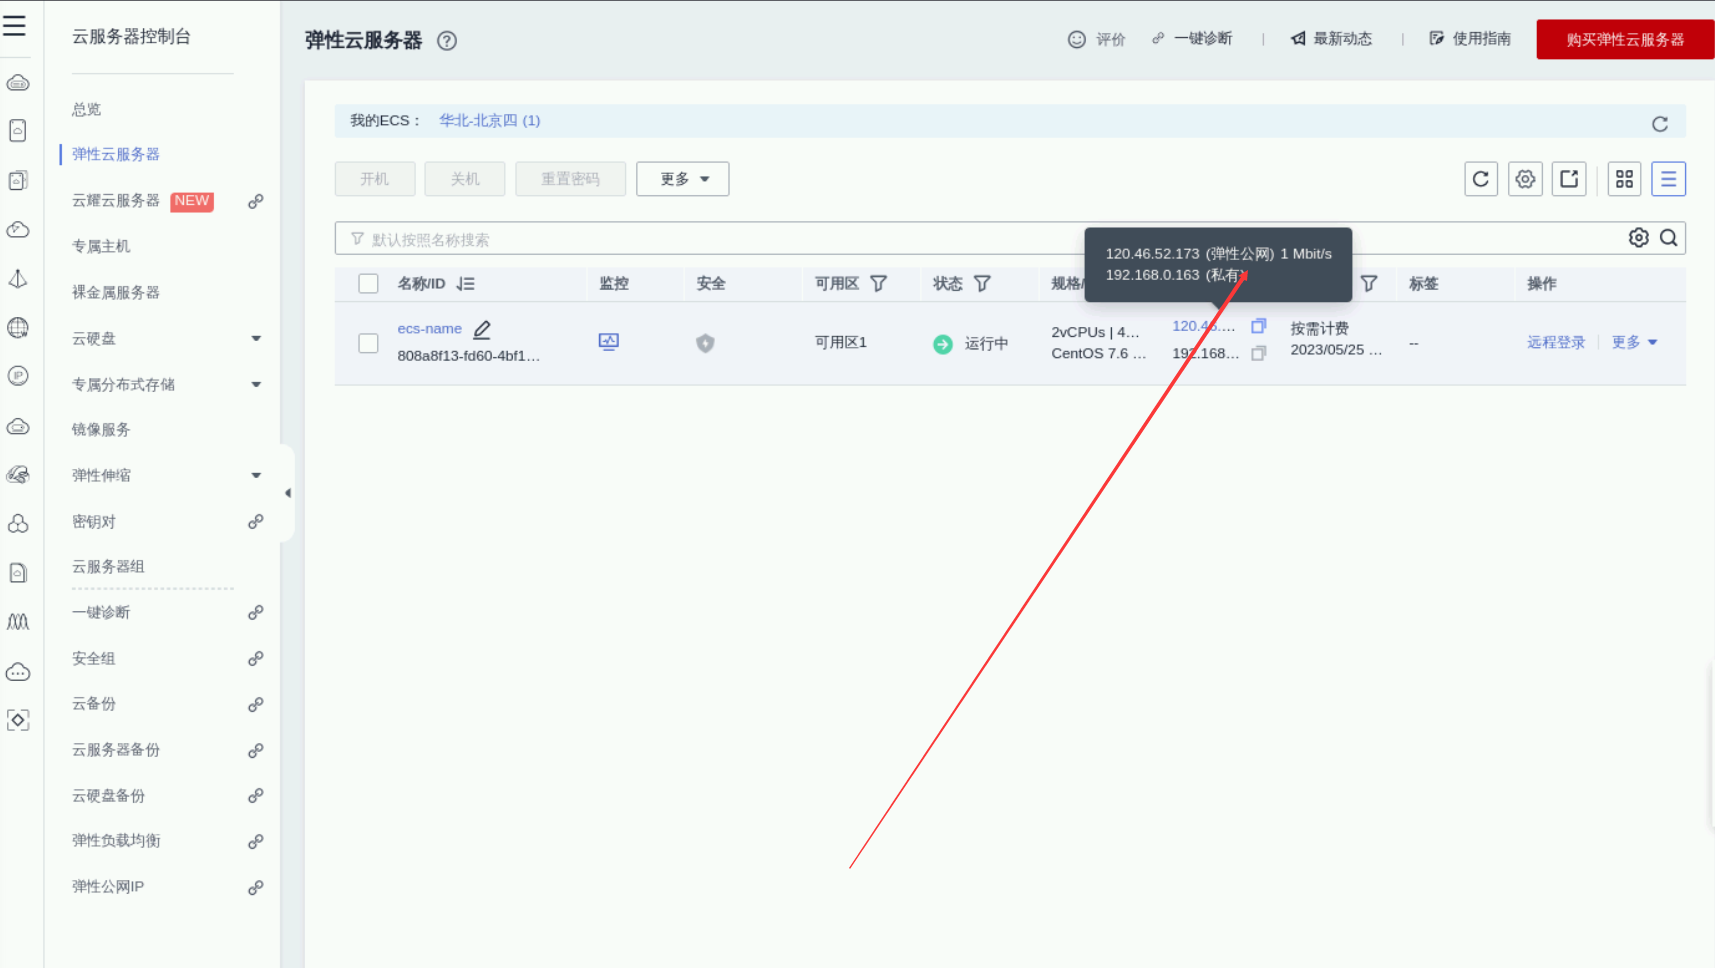
ssh root@EIP
四、安装配置 Nginx
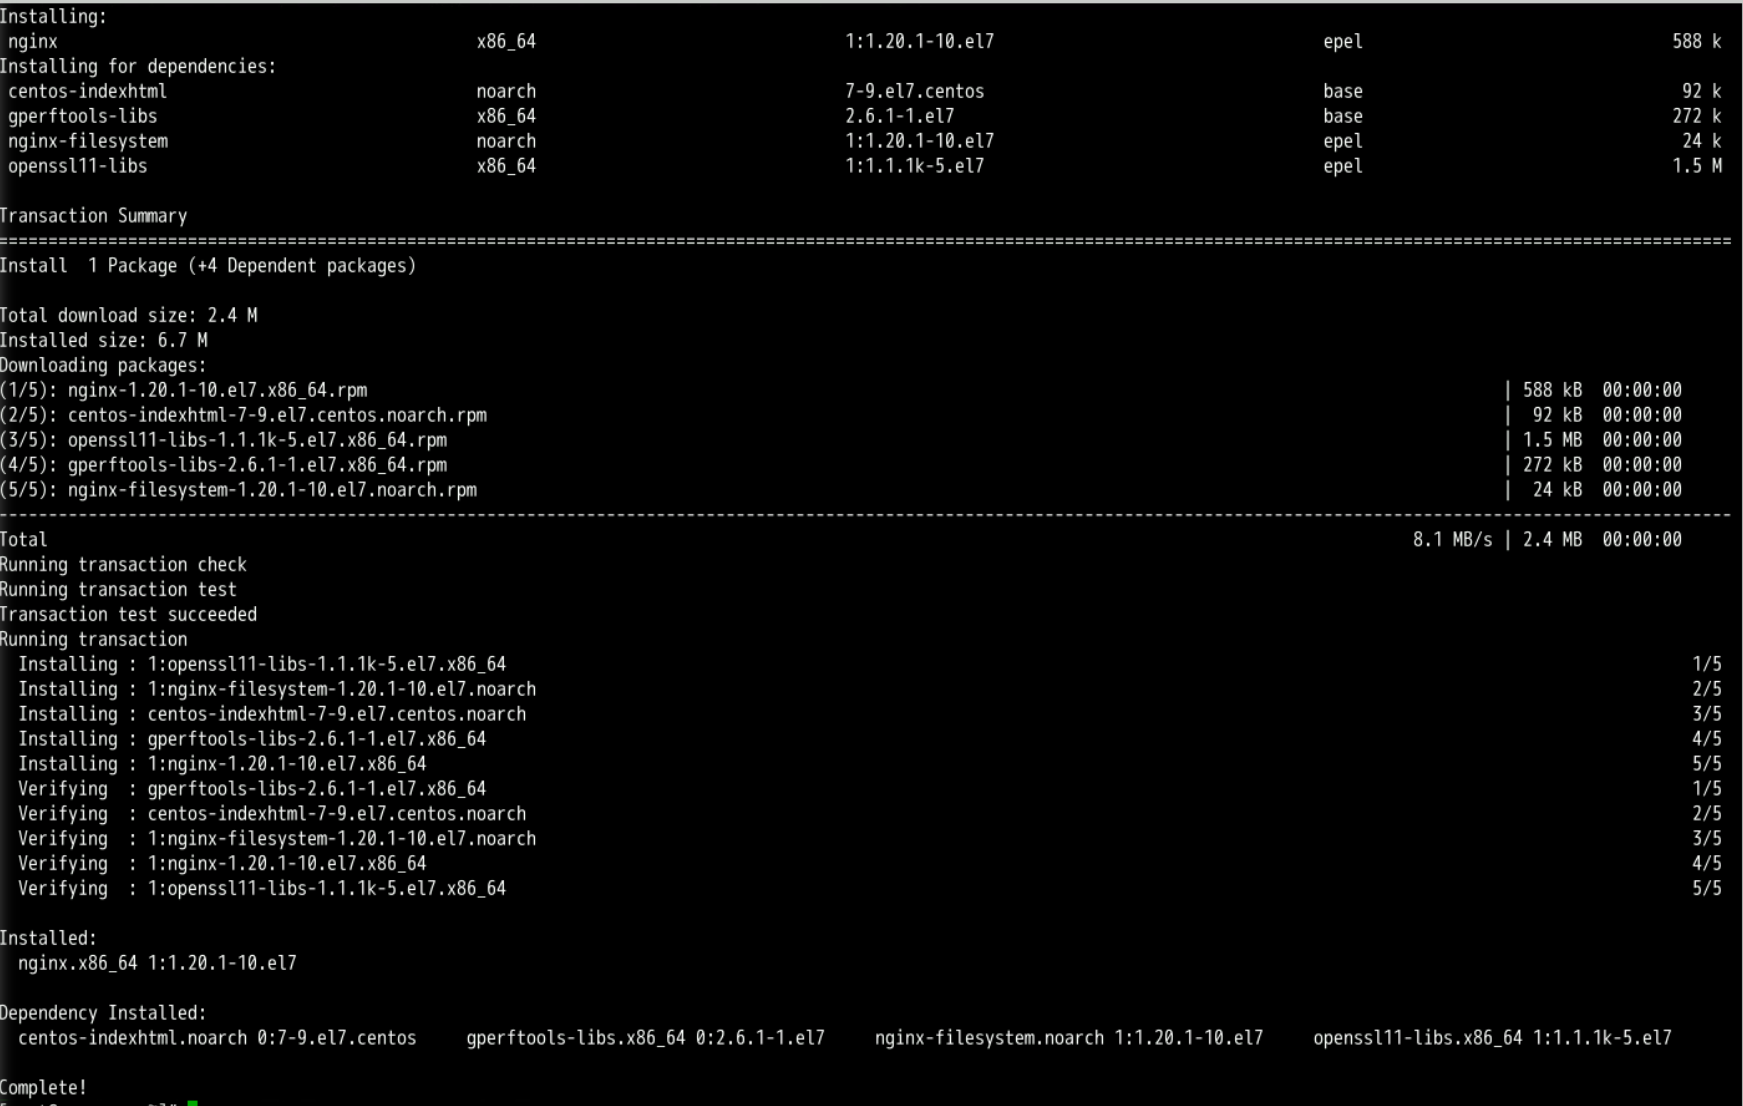
1. 安装nginx
直接使用yum命令安装nginx
yum install nginx -y
2. 启动nginx
启动nginx,并设置开机自启。
[root@ecs-name ~]# systemctl enable --now nginx
Created symlink from /etc/systemd/system/multi-user.target.wants/nginx.service to /usr/lib/systemd/system/nginx.service.
查看nginx服务状态
[root@ecs-name ~]# systemctl status nginx
\u25cf nginx.service - The nginx HTTP and reverse proxy server
   Loaded: loaded (/usr/lib/systemd/system/nginx.service; enabled; vendor preset: disabled)
   Active: active (running) since Thu 2023-05-25 23:50:44 CST; 1min 4s ago
  Process: 7925 ExecStart=/usr/sbin/nginx (code=exited, status=0/SUCCESS)
  Process: 7921 ExecStartPre=/usr/sbin/nginx -t (code=exited, status=0/SUCCESS)
  Process: 7919 ExecStartPre=/usr/bin/rm -f /run/nginx.pid (code=exited, status=0/SUCCESS)
 Main PID: 7927 (nginx)
   CGroup: /system.slice/nginx.service
           \u251c\u25007927 nginx: master process /usr/sbin/nginx
           \u251c\u25007928 nginx: worker process
           \u2514\u25007929 nginx: worker process

May 25 23:50:44 ecs-name systemd[1]: Starting The nginx HTTP and reverse proxy server...
May 25 23:50:44 ecs-name nginx[7921]: nginx: the configuration file /etc/nginx/nginx.conf syntax is ok
May 25 23:50:44 ecs-name nginx[7921]: nginx: configuration file /etc/nginx/nginx.conf test is successful
May 25 23:50:44 ecs-name systemd[1]: Started The nginx HTTP and reverse proxy server.
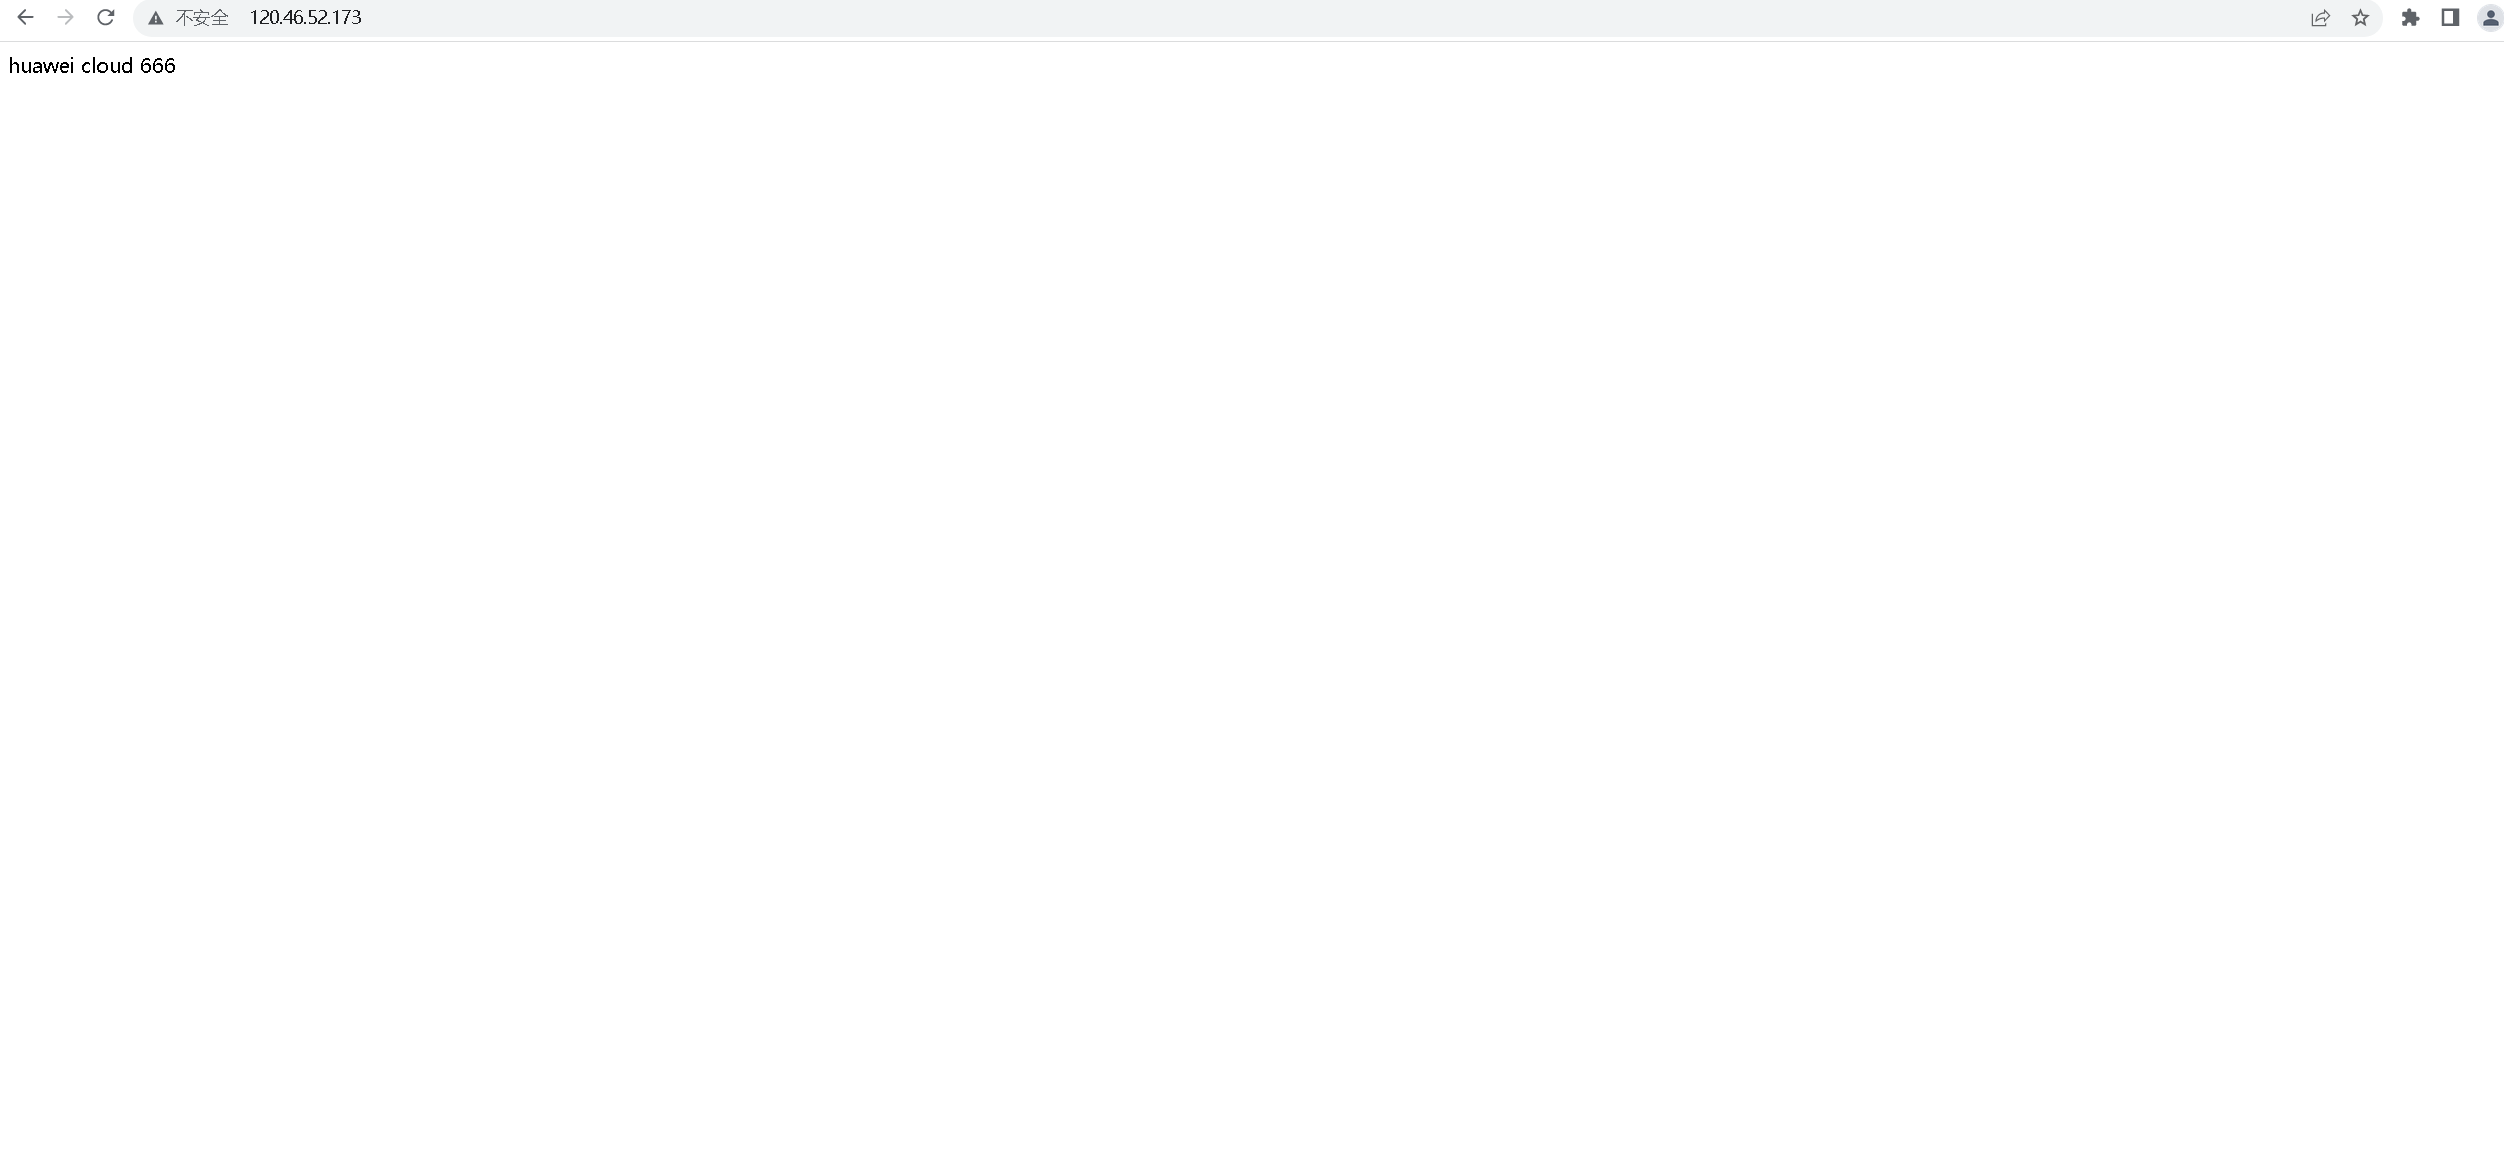
3. 浏览器中访问nginx服务
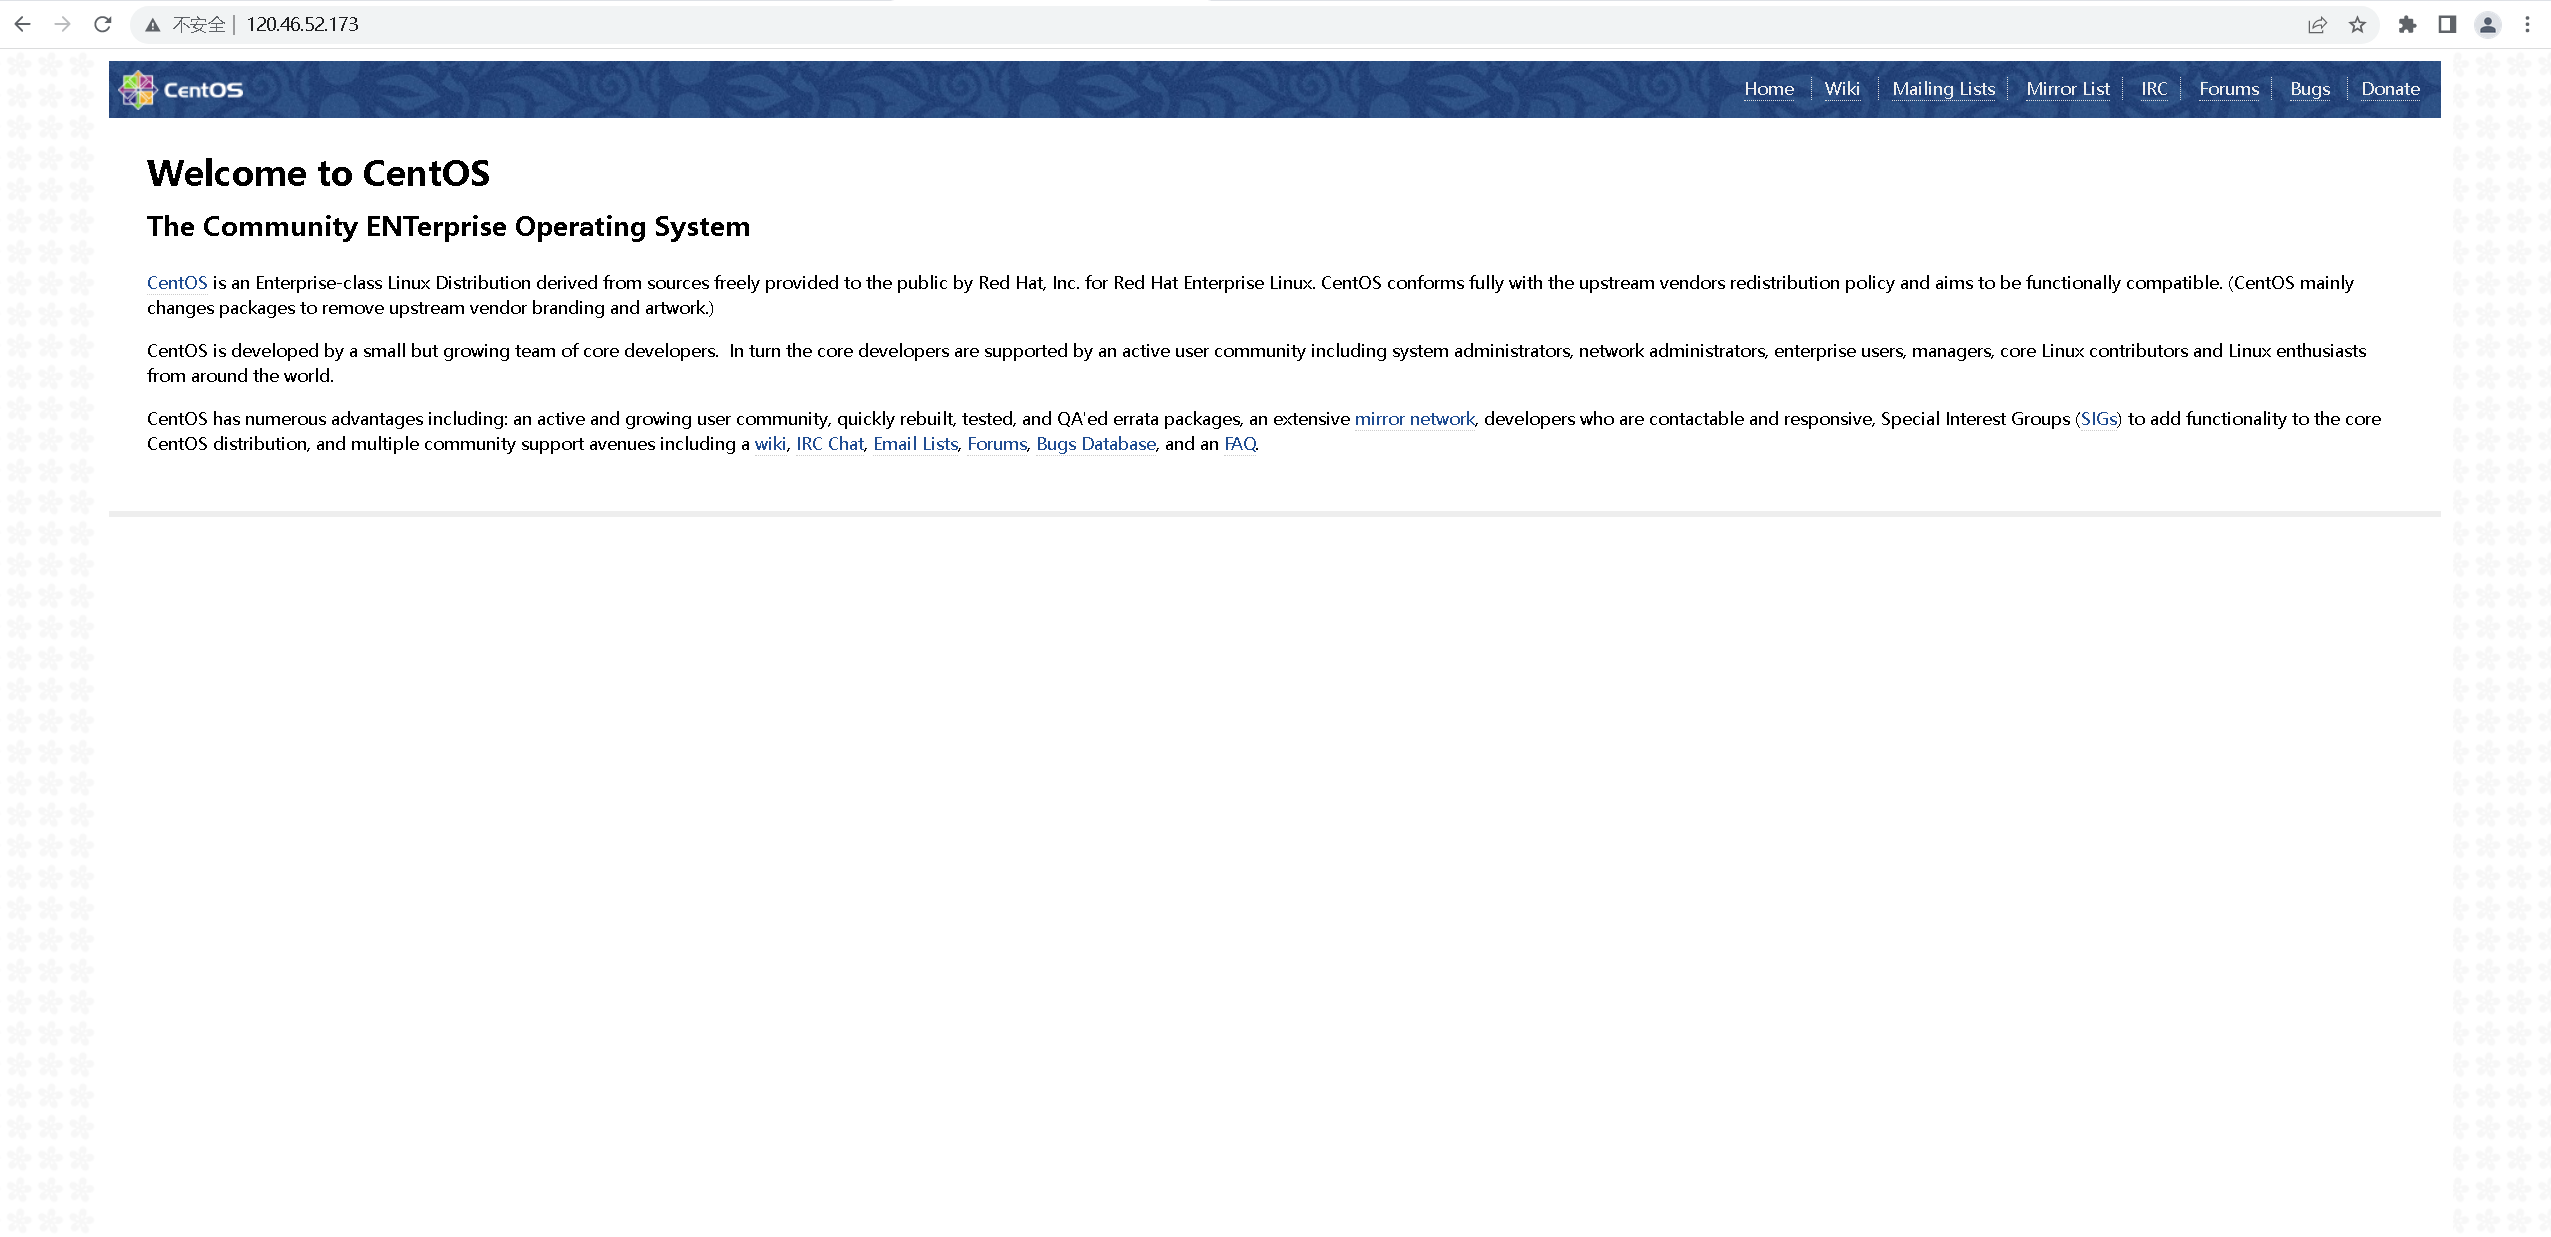
浏览器打开ECS的公网IP地址:http://120.46.52.173/
可以正常打开,表示nginx服务启动正常。
4. 修改nginx配置
新建 /data/www 目录
mkdir -p /data/www
修改 /etc/nginx/conf.d/default.conf,
点击 i 键进入编辑模式,将以下内容复制到default.conf中,去除对 IPv6 地址的监听,并将 root /data/www 作为所有静态资源请求的根路径。
server {


    listen       80 default_server;
    # listen       [::]:80 default_server;
    server_name  _;
    root         /data/www;

    # Load configuration files for the default server block.
    include /etc/nginx/default.d/*.conf;

    location / {


    }

    error_page 404 /404.html;
        location = /40x.html {


    }

    error_page 500 502 503 504 /50x.html;
        location = /50x.html {


    }
}
5.重启nginx服务
重启nginx服务
systemctl restart nginx
五、测试验证
1. 编辑测试网页内容
切换到 /data/www 目录下,新建 index.html 添加如下内容,并保存:
[root@ecs-name ~]# cd /data/www/
[root@ecs-name www]# echo huawei cloud 666 > index.html
2. 重启nginx服务
重启nginx服务
systemctl restart nginx
3. 本地访问静态网页
本地浏览器输入ECS的弹性公网IP地址,这里访问的是:http://120.46.52.173/