【作者主页】:吴秋霖
【作者介绍】:Python领域优质创作者、阿里云博客专家、华为云享专家。长期致力于Python与爬虫领域研究与开发工作!
【作者推荐】:对JS逆向感兴趣的朋友可以关注《爬虫JS逆向实战》,对分布式爬虫平台感兴趣的朋友可以关注《分布式爬虫平台搭建与开发实战》
还有未来会持续更新的验证码突防、APP逆向、Python领域等一系列文章
1. APP端抓包配置
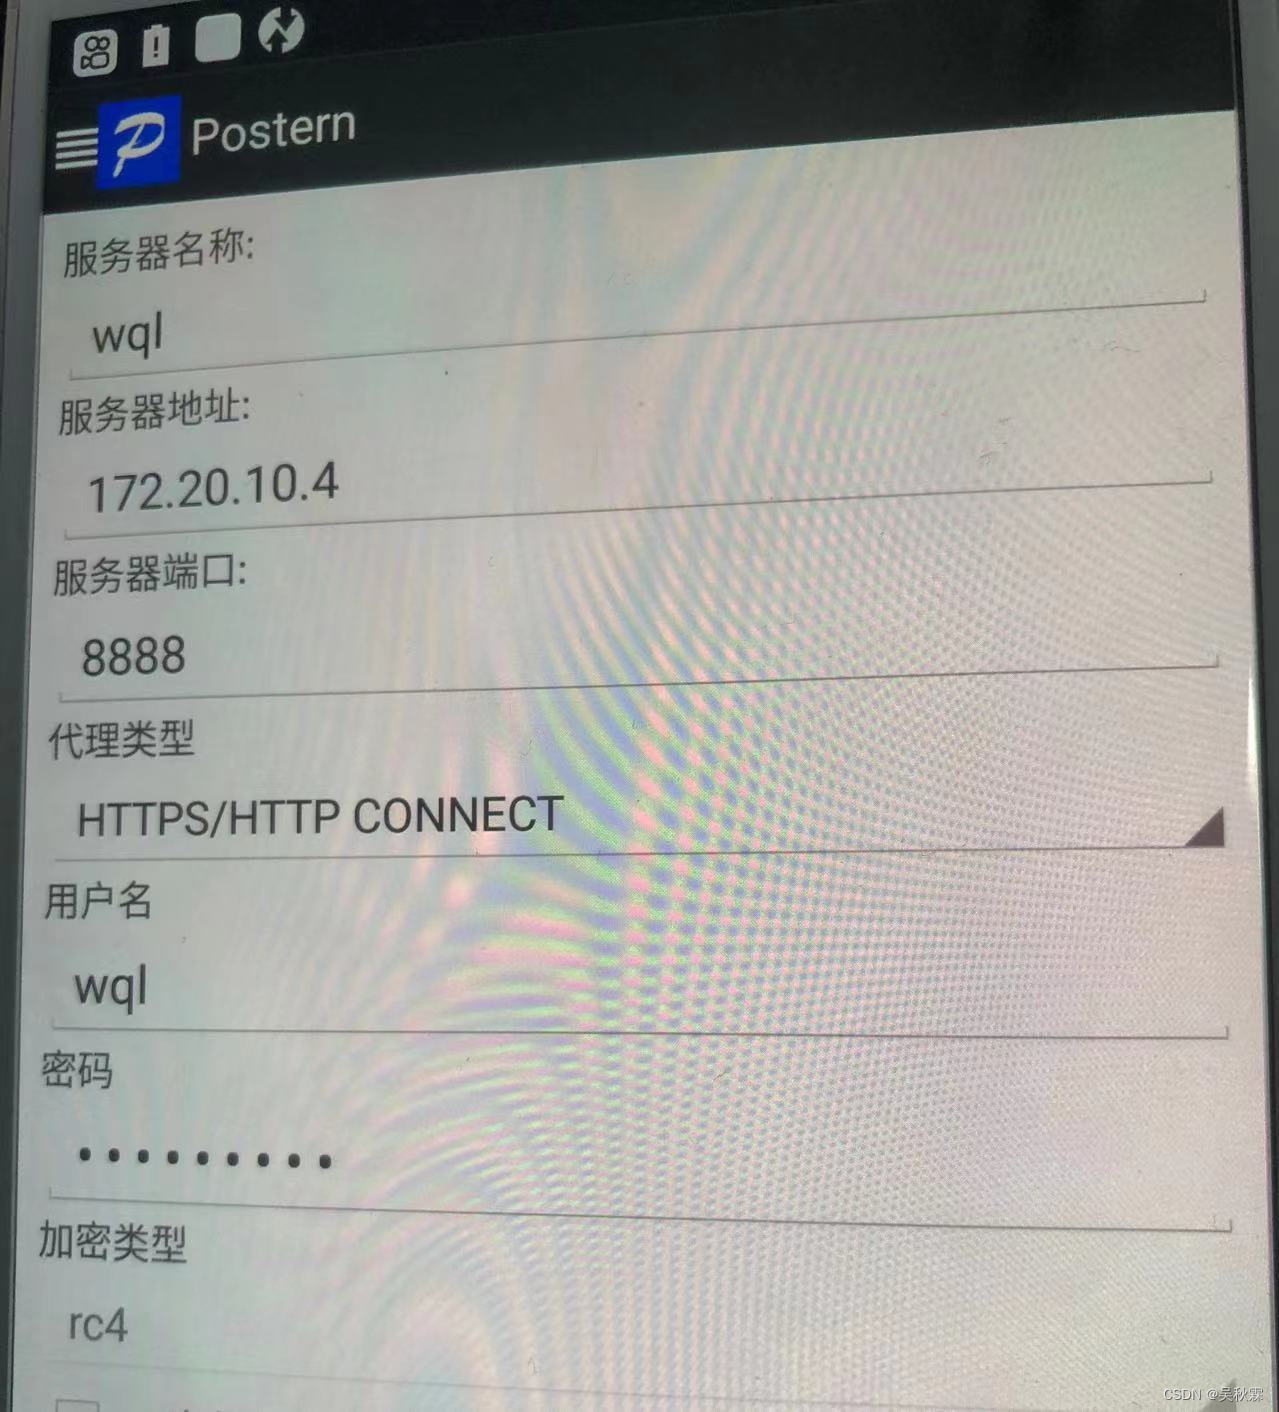
在开始抓包配置之前相关的配置操作,可以看我之前的文章:某软件商店app抓包分析,这次咱们用postern来做转发,ssl证书配置移步上面文章查看,手机保证已经root,同时把frida server服务拉起来,首先设置代理配置,如下所示:
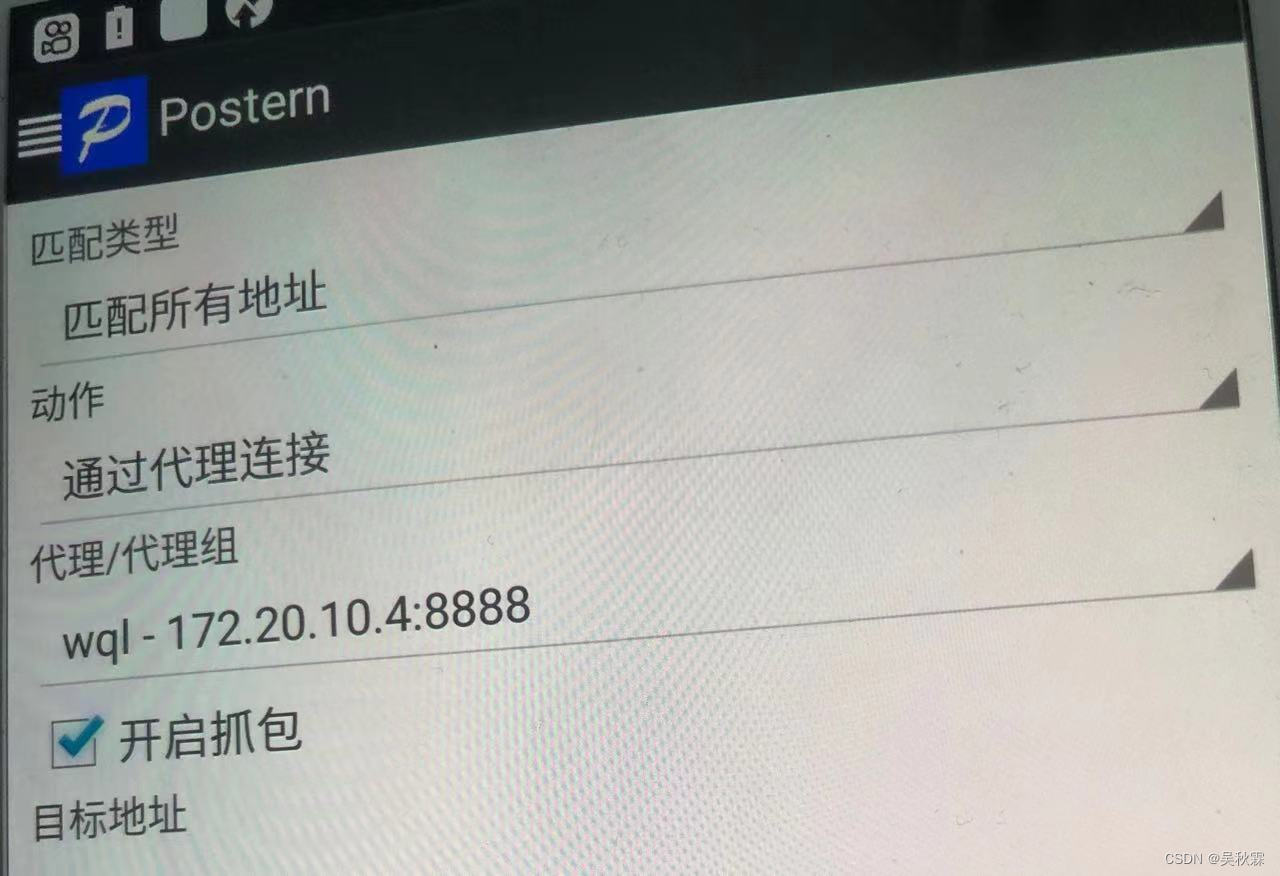
再设置规则配置,如下所示:
Hook 脚本如下所示:
Java.perform(function () {


    var ll = Java.use('com.kuaishou.aegon.Aegon');
    ll.nativeUpdateConfig.implementation = function (a, b) {


        console.log(`原参数a ---> ${

      a}`)
        a = '{"nqe_params":{"HalfLifeSeconds":"20", "EffectiveConnectionTypeRecomputationInterval":"5"},"enable_quic": false, "enable_redirect_info_report":true,"enable_nqe_report":true,"quic_host_blacklist": [".yximgs.com",".kwimgs.com",".etoote.com",".kwaicdn.com","112.6.83.72","112.6.83.73","112.6.83.74","112.6.83.77","112.6.83.78","112.6.83.79","112.6.83.80","112.6.83.81"],"congestion_control_frame_interval_sec": 0, "quic_max_v6_packet_size": 1232, "cdn_preresolver_ip_blacklist":["0.0.0.0","1.1.1.1","127.0.0.1"], "preconnect_num_streams": 2, "quic_idle_timeout_sec": 180, "quic_use_bbr": true, "altsvc_broken_time_max": 600, "altsvc_broken_time_base": 60, "proxy_host_blacklist": ["*"],"max_os_version_libdispatch_fix_enable":"16.2", "enable_mtrequest_by_header":true,"resolver_ip_blacklist":["0.0.0.0","1.1.1.1","127.0.0.1"]}';
        return this.nativeUpdateConfig(a, b);
    }
})
上面脚本使用frida来进行hook,对com.kuaishou.aegon.Aegon类的 nativeUpdateConfig方法,然后在调用这个方法时修改参数a的值,最后调用原始方法,注入命令如下:
frida -U -l ks.js -f com.smile.gifmaker
2. APP端抓包分析
一切前置工作准备就绪后,打开预先下载好的APP,我这里下载的版本是10.0的,随便点击一个视频,查看抓包信息,如下所示:
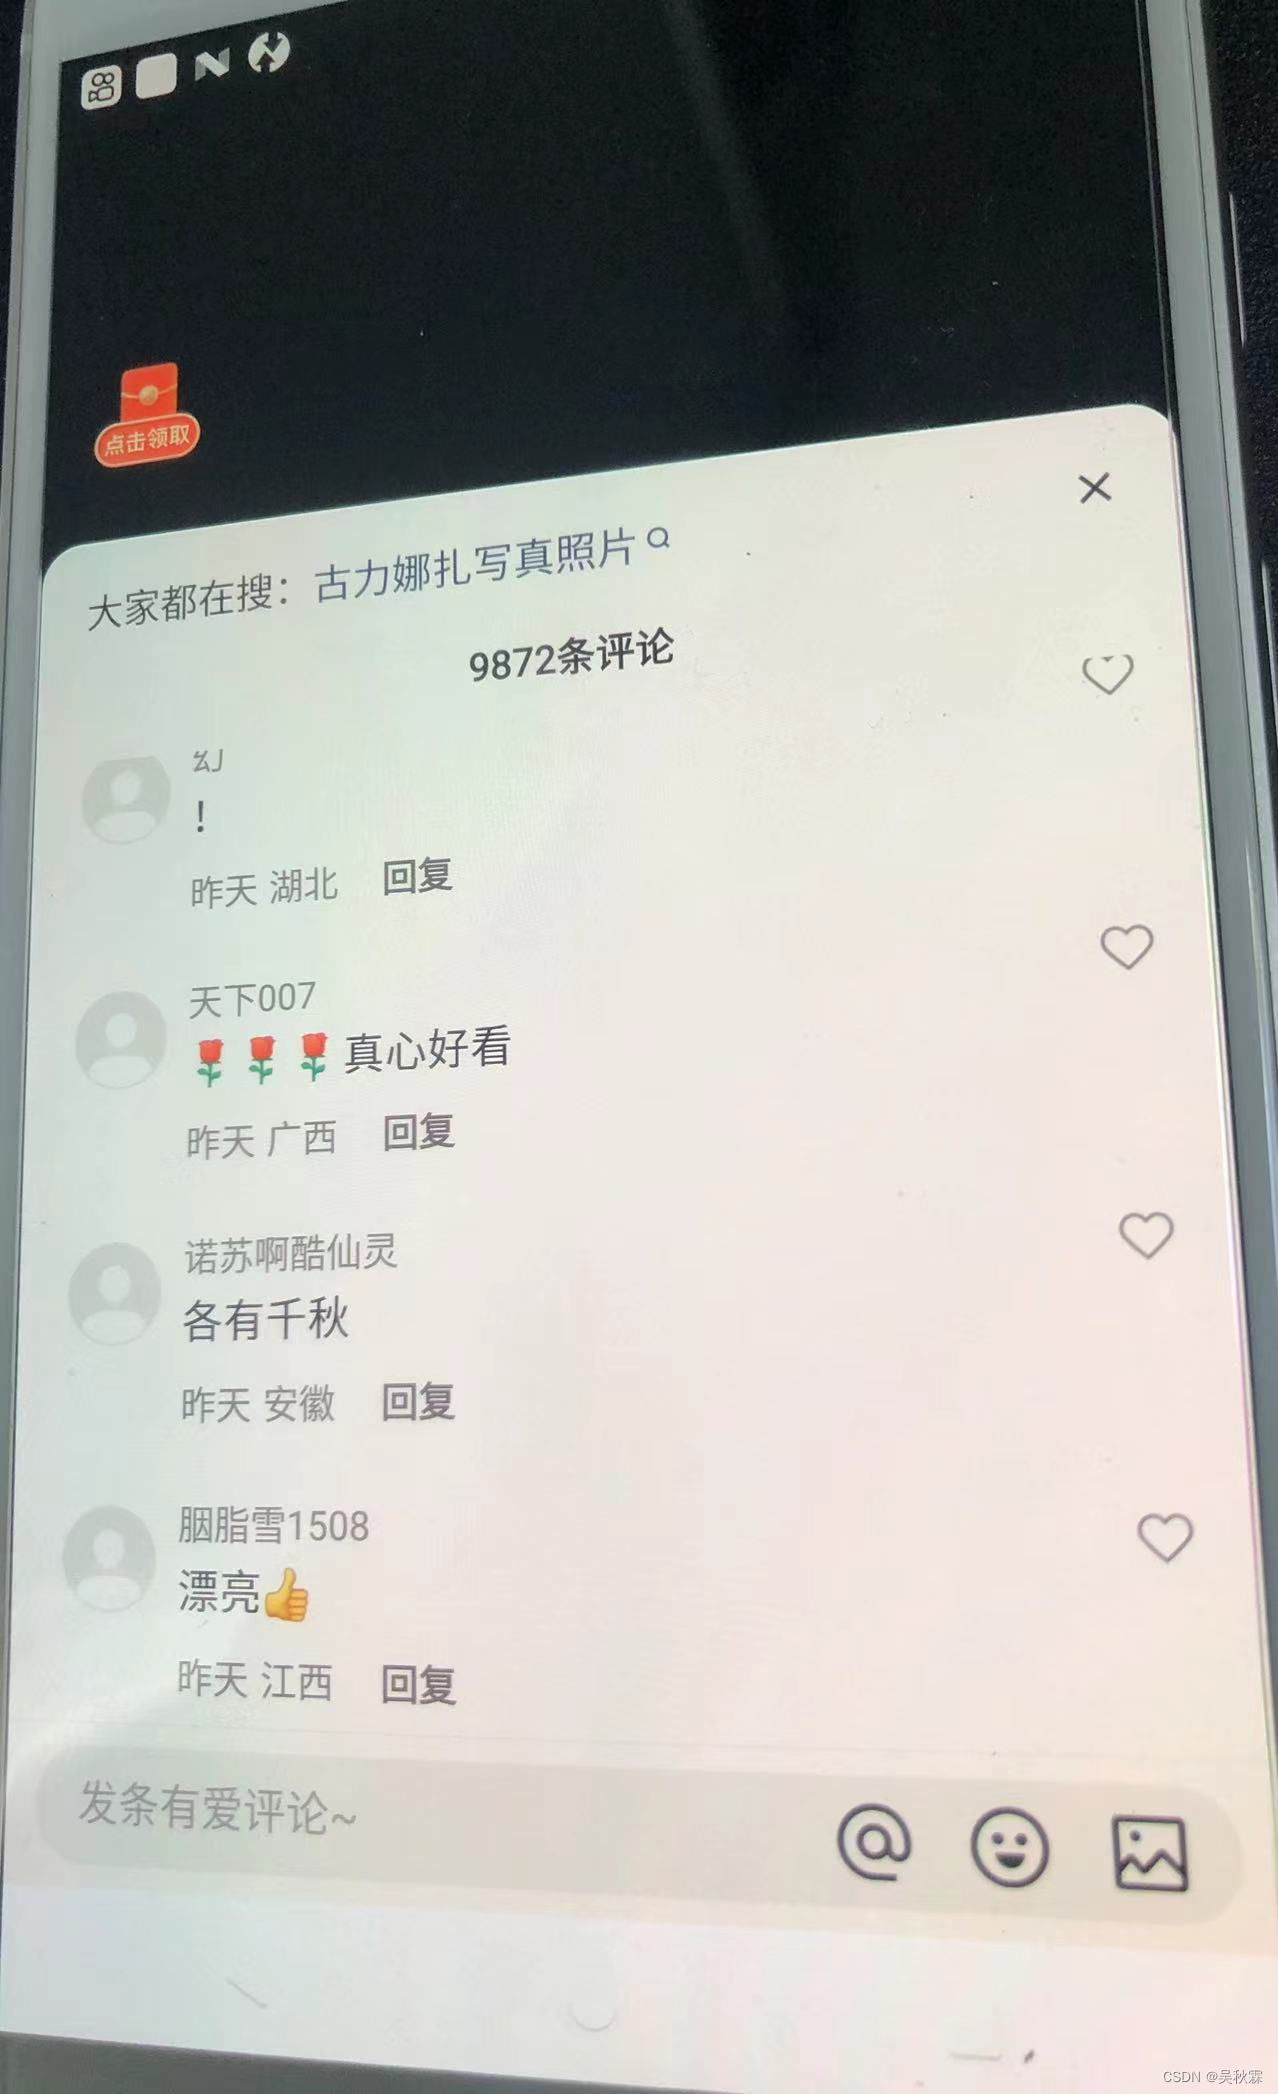
抓包看来是OK的,正常拿到评论加载的接口信息:
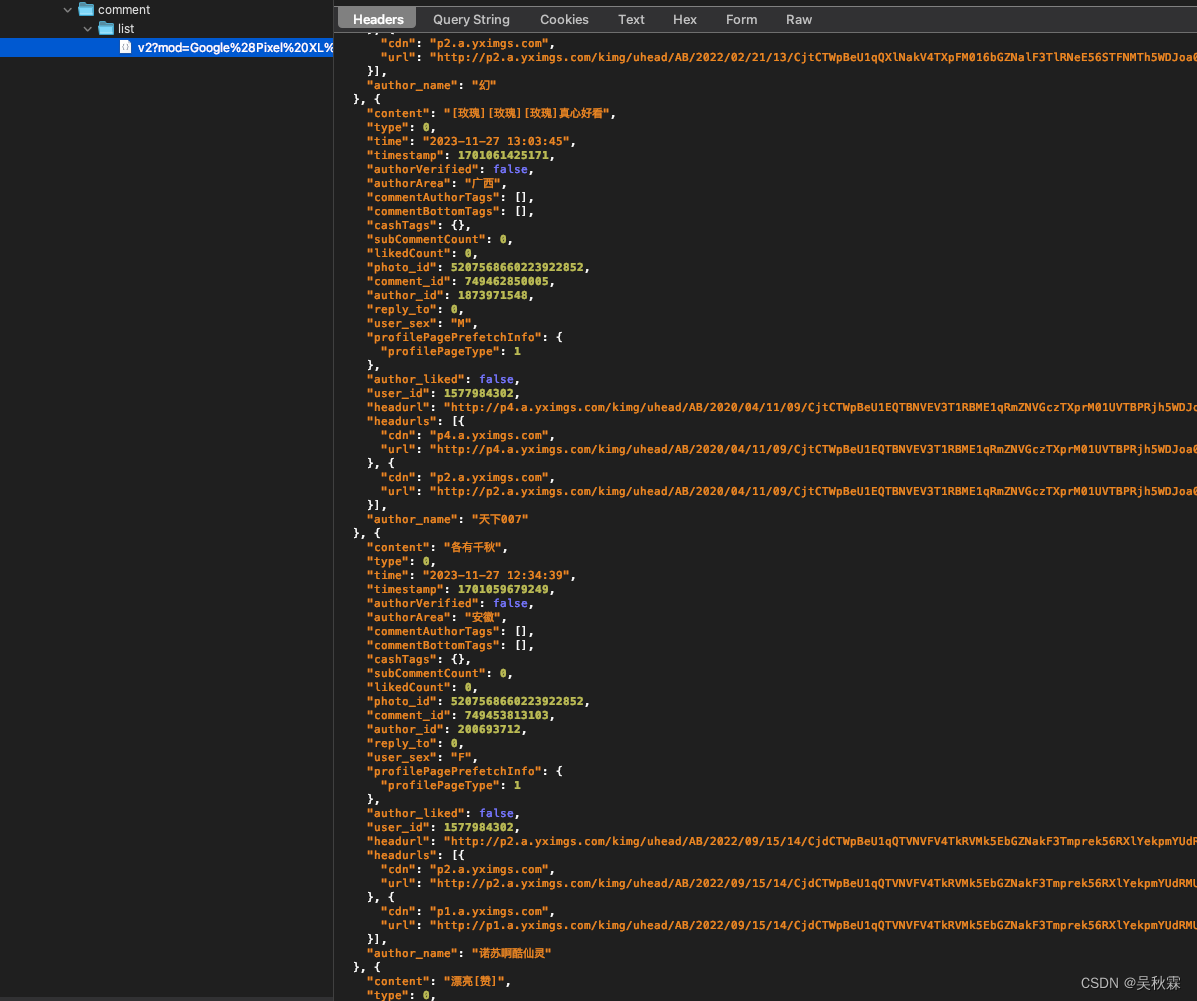
这里抓包可以看到有sig参数的,这个签名字段是POST请求,看过我之前文章的读者,应该可以先盲猜一下这个签名的算法,大概率是一个MD5的就加密算法,如下所示:
它是将POST里面的参数一起排序做的计算,我想想!记得跟之前的某麦方式极其相似
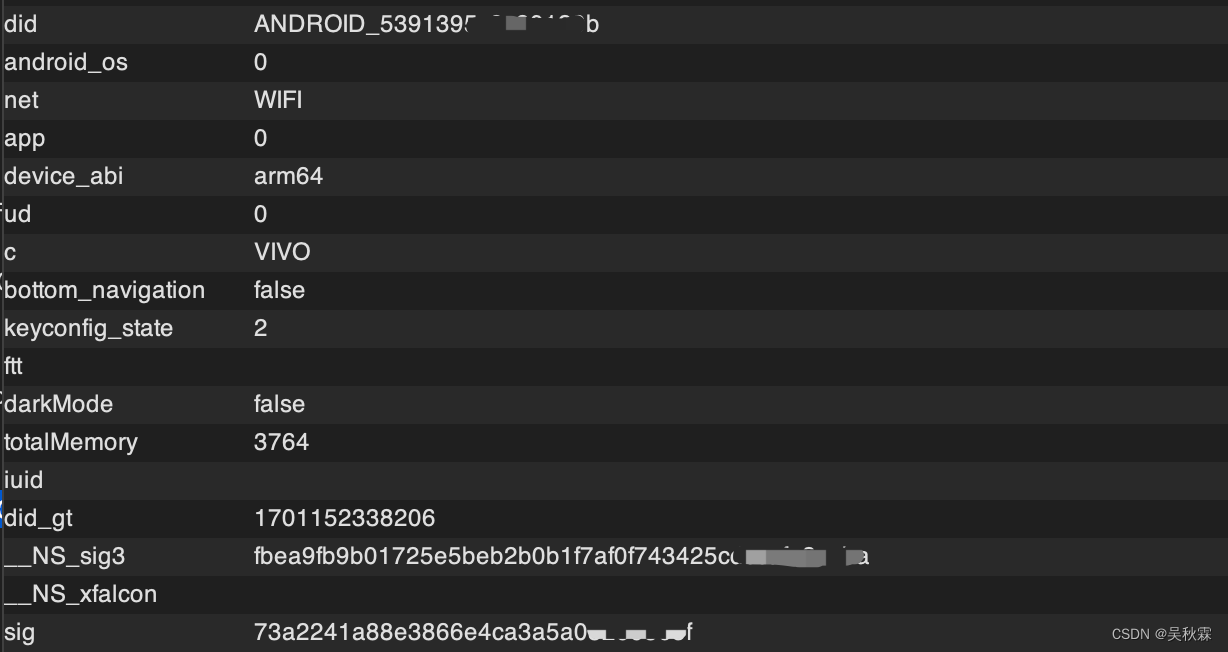
另外爬虫这个圈子的人都知道,设备注册,上面的did这个过滑块也是要带上的,某音的话是device_id,目前这些自媒体、电商都是有滑块验证的
上面的这些个一系列内容值得深入去持续研究分析,而且每一项都可以单独拿出来说,等之后深入分析后我也会陆续的汇总出来,今天我们主要只针对爬虫数据层面获取
3. Web端抓包分析
你如果不想分析移动端,它也是有Web端的。Web端很简单,一些少量数据分析指标,完全可以从这里入手,首先我们通过关键词搜索作者,抓包分析如下:
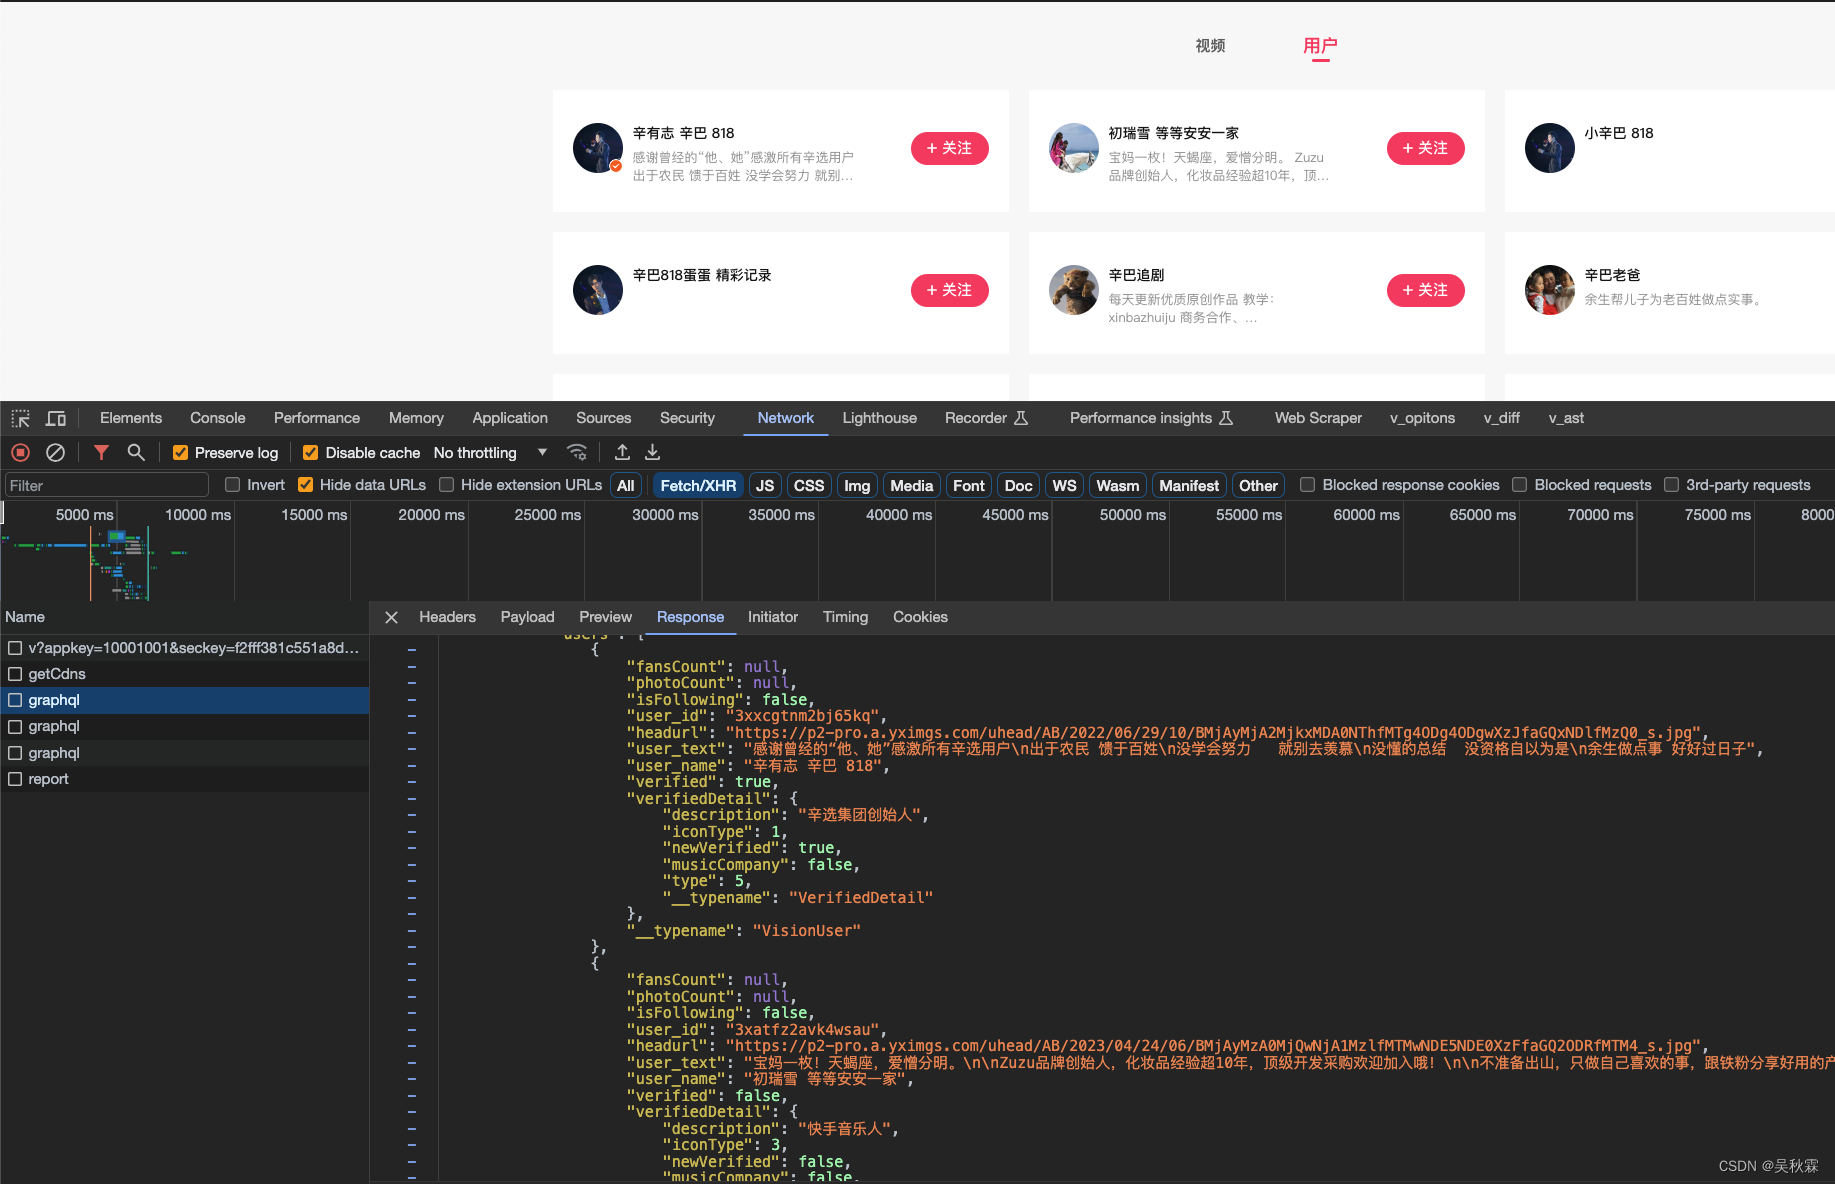
可以看到graphql的数据请求接口,搜索跟评论的接口是一样的,提交请求的头跟参数来区别,如下所示:
https://www.kuaishou.com/graphql
动态加载接口中,GraphQL在境外的些网站也经常见到,对于传统的 RESTful API,使用的场景也是蛮多的
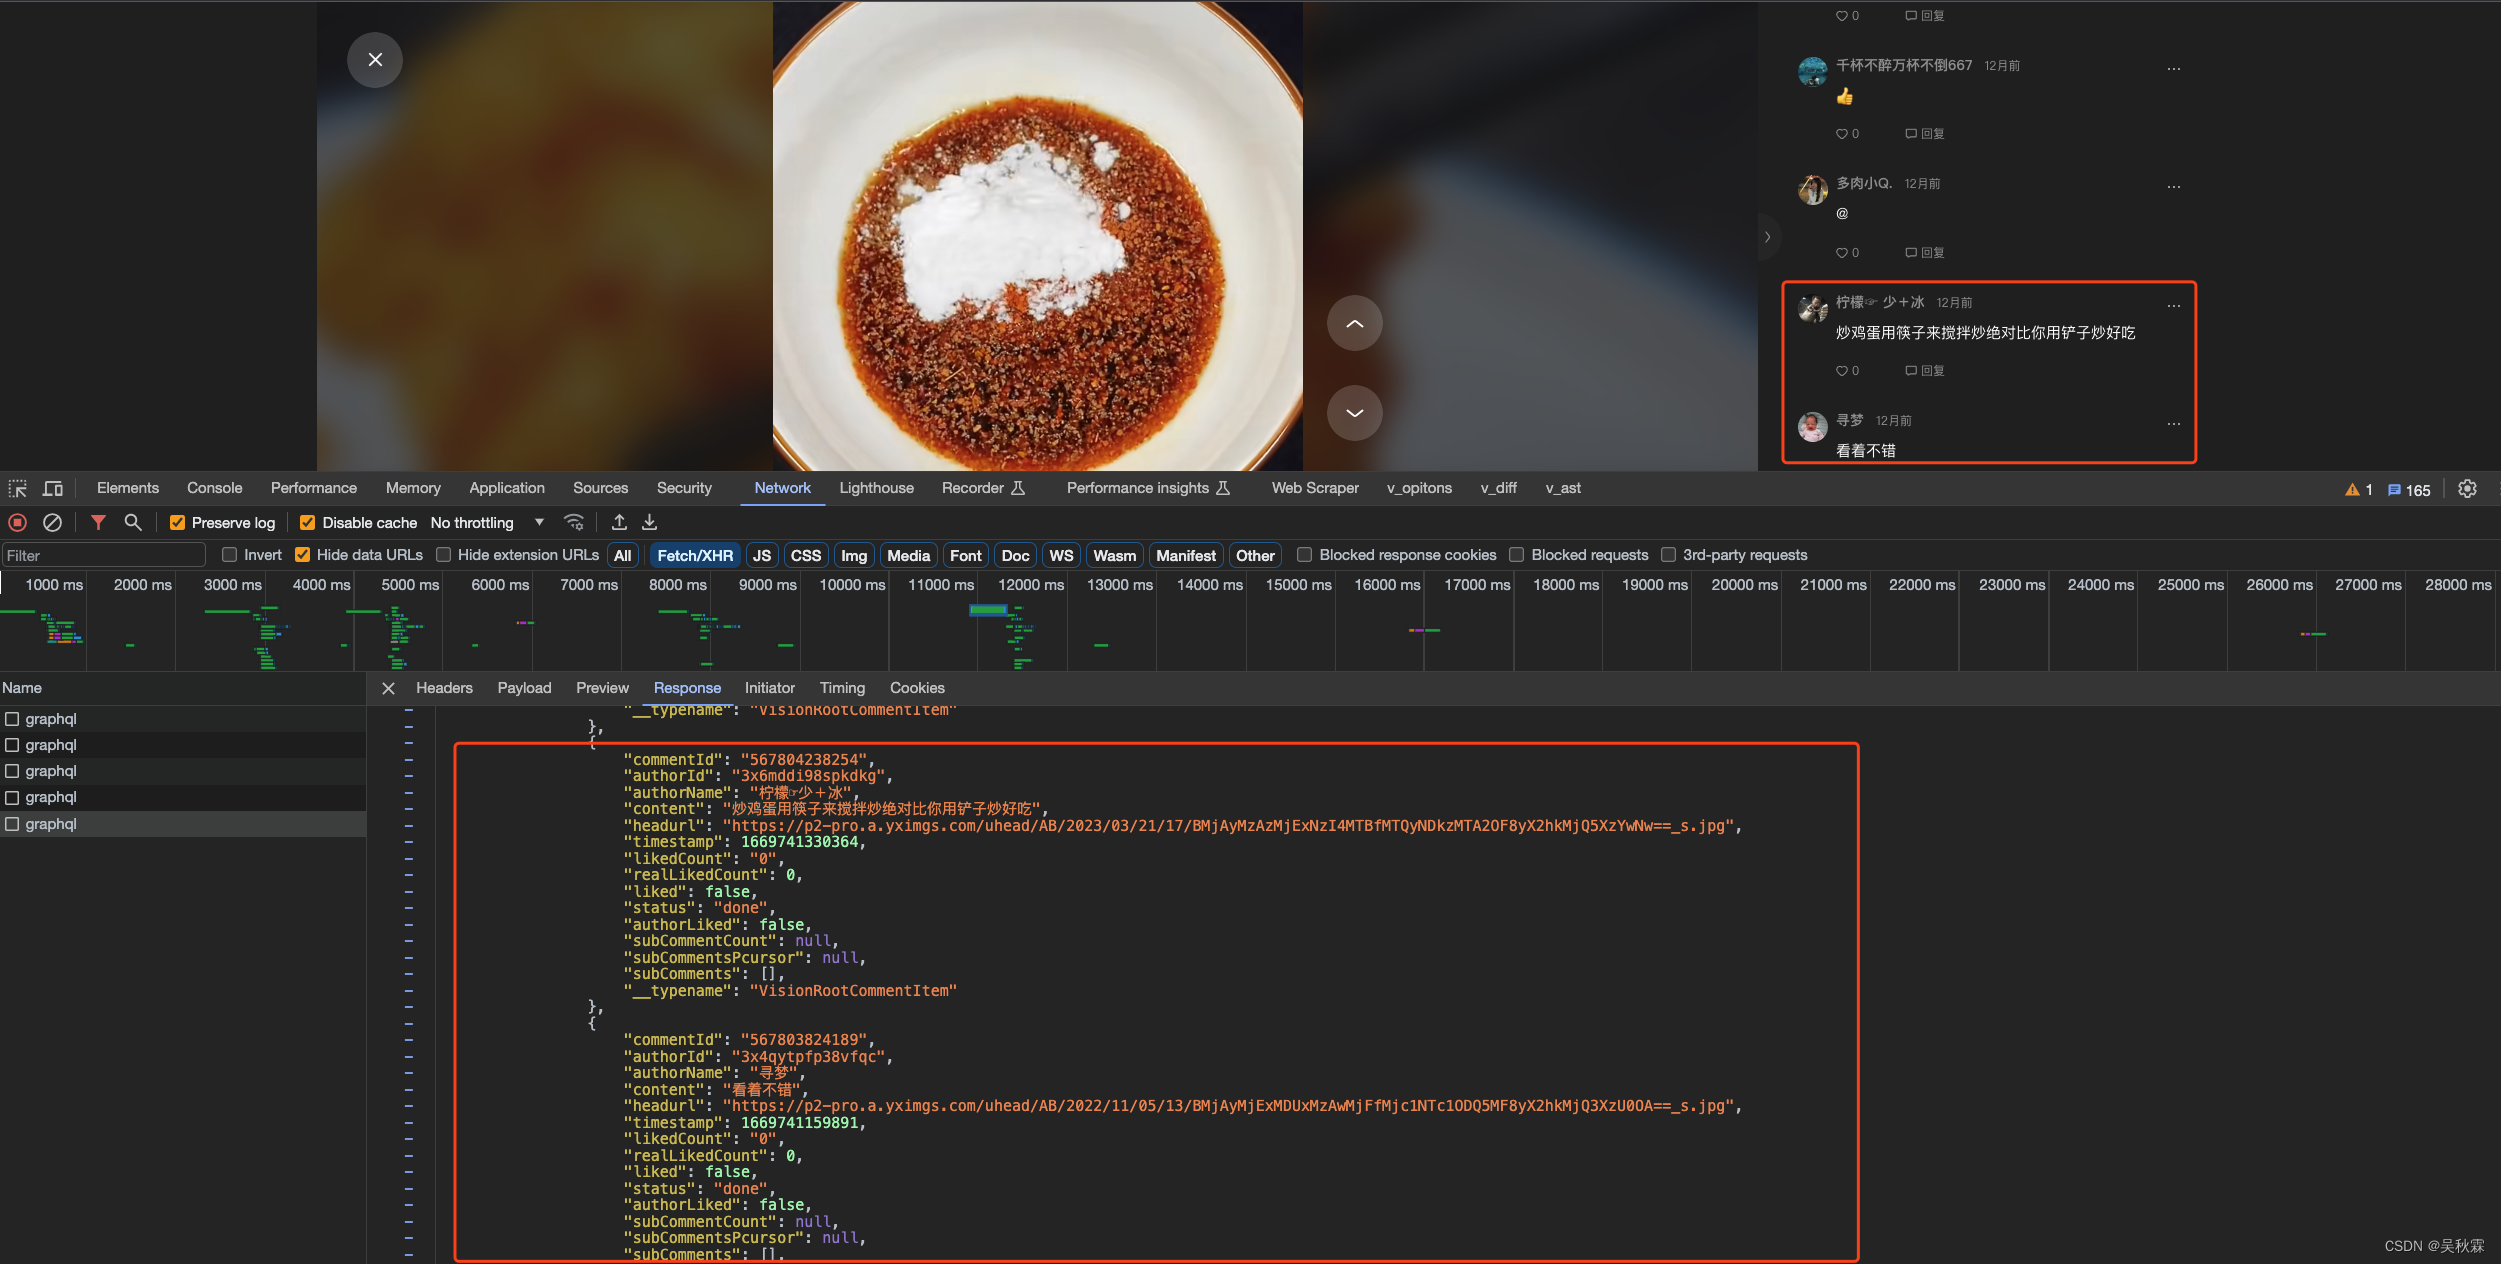
接下来我们再看看评论,抓包分析一下请求:
4. 爬虫代码实现
针对上述简介信息的抓包分析情况,开始编写Python爬虫的测试代码,代码实现如下:
import aiohttp
import asyncio

async def make_request():
    url = 'https://www.kuaishou.com/graphql'
    headers = {


        'Accept-Language': 'en-US,en;q=0.9,zh-CN;q=0.8,zh;q=0.7',
        'Cache-Control': 'no-cache',
        'Connection': 'keep-alive',
        'Cookie': '' # cookies,
        'Origin': 'https://www.kuaishou.com',
        'Pragma': 'no-cache',
        'Referer': 'https://www.kuaishou.com/search/author?searchKey=%E8%BE%9B%E5%B7%B4',
        'Sec-Fetch-Dest': 'empty',
        'Sec-Fetch-Mode': 'cors',
        'Sec-Fetch-Site': 'same-origin',
        'User-Agent': 'Mozilla/5.0 (Macintosh; Intel Mac OS X 10_15_7) AppleWebKit/537.36 (KHTML, like Gecko) Chrome/117.0.0.0 Safari/537.36',
        'accept': '*/*',
        'content-type': 'application/json',
        'sec-ch-ua': '"Google Chrome";v="117", "Not;A=Brand";v="8", "Chromium";v="117"',
        'sec-ch-ua-mobile': '?0',
        'sec-ch-ua-platform': '"macOS"',
    }
    data = {


        'operationName': 'graphqlSearchUser',
        'variables': {

    'keyword': '辛巴'},
        'query': 'query graphqlSearchUser($keyword: String, $pcursor: String, $searchSessionId: String) {\n  visionSearchUser(keyword: $keyword, pcursor: $pcursor, searchSessionId: $searchSessionId) {\n    result\n    users {\n      fansCount\n      photoCount\n      isFollowing\n      user_id\n      headurl\n      user_text\n      user_name\n      verified\n      verifiedDetail {\n        description\n        iconType\n        newVerified\n        musicCompany\n        type\n        __typename\n      }\n      __typename\n    }\n    searchSessionId\n    pcursor\n    __typename\n  }\n}\n'
    }

    async with aiohttp.ClientSession() as session:
        async with session.post(url, headers=headers, json=data) as response:
            response_text = await response.text()
            print(response_text)

asyncio.run(make_request())
针对上述评论信息的抓包分析情况,开始编写Python爬虫的测试代码,就请求头稍微不一样,然后就是请求的参数,代码如下:
import aiohttp
import asyncio

async def make_request():
    url = 'https://www.kuaishou.com/graphql'
    data = {


        'operationName': 'commentListQuery',
        'variables': {

    'photoId': '3xb9bfwgtrtfj8s', 'pcursor': '750067524554'},
        'query': 'query commentListQuery($photoId: String, $pcursor: String) {\n  visionCommentList(photoId: $photoId, pcursor: $pcursor) {\n    commentCount\n    pcursor\n    rootComments {\n      commentId\n      authorId\n      authorName\n      content\n      headurl\n      timestamp\n      likedCount\n      realLikedCount\n      liked\n      status\n      authorLiked\n      subCommentCount\n      subCommentsPcursor\n      subComments {\n        commentId\n        authorId\n        authorName\n        content\n        headurl\n        timestamp\n        likedCount\n        realLikedCount\n        liked\n        status\n        authorLiked\n        replyToUserName\n        replyTo\n        __typename\n      }\n      __typename\n    }\n    __typename\n  }\n}\n'
    }

    async with aiohttp.ClientSession() as session:
        async with session.post(url, headers=headers, json=data) as response:
            response_text = await response.text()
            print(response_text)

asyncio.run(make_request())

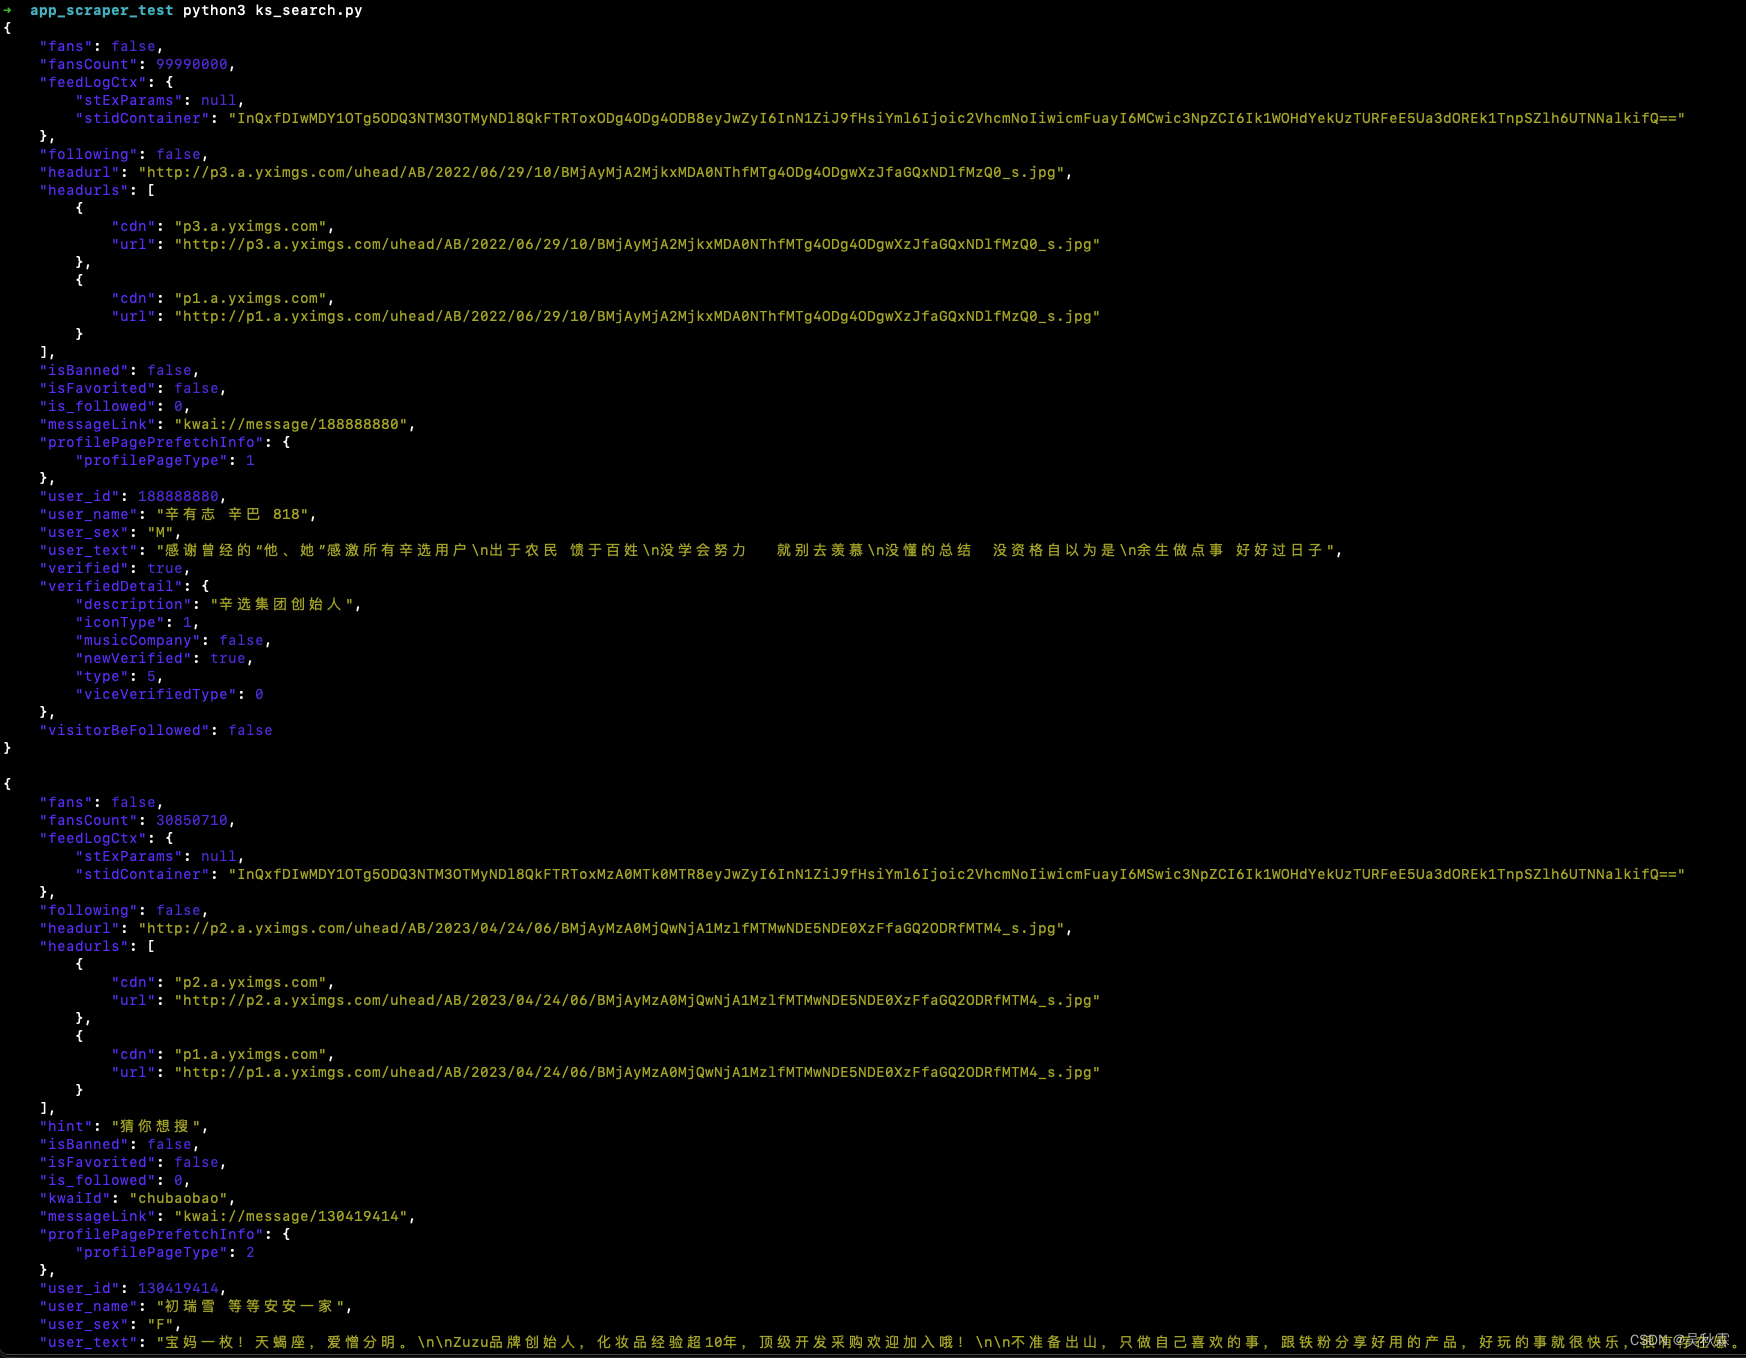
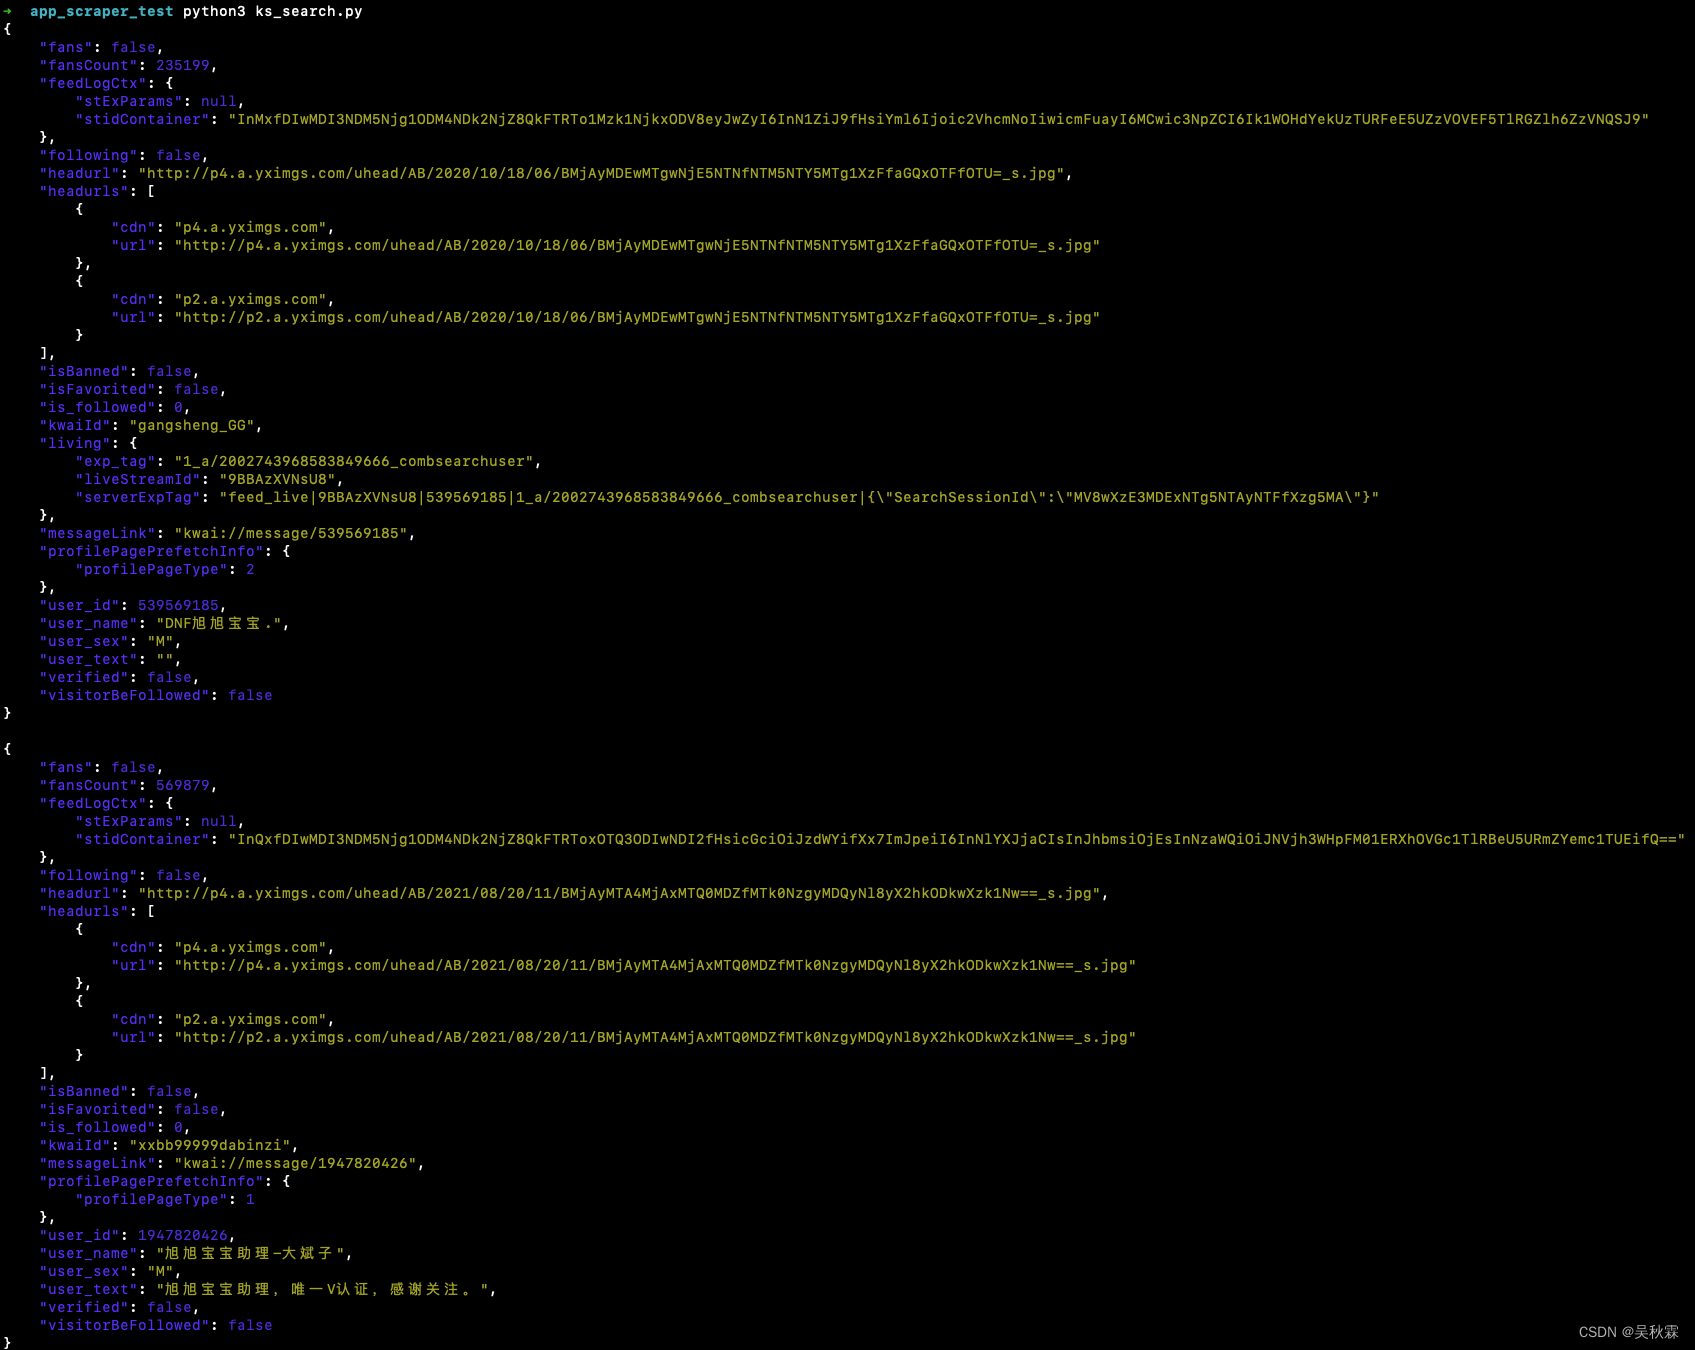
搜索接口的话这里我实现的是APP端的爬取,可以看到下面就是运行效果:
好了,到这里又到了跟大家说再见的时候了。创作不易,帮忙点个赞再走吧。你的支持是我创作的动力,希望能带给大家更多优质的文章