1. RPC基本介绍
-
RPC(Remote Procedure Call):远程 过程调用,是一个计算机 通信协议。该协议允许运 行于一台计算机的程序调 用另一台计算机的子程序, 而程序员无需额外地为这 个交互作用编程 -
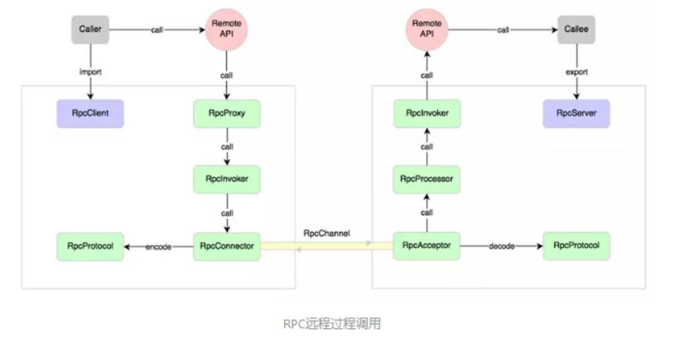
两个或多个应用程序都分 布在不同的服务器上,它 们之间的调用都像是本地 方法调用一样(如图)
-
常见的 RPC 框架有: 比较知名的如阿里的Dubbo、google的gRPC、Go语言的rpcx、Apache的thrift, Spring 旗下的 Spring Cloud。
2. RPC调用流程图
术语说明:在RPC中,
- Client叫服务消费者
- Server叫服务提供者
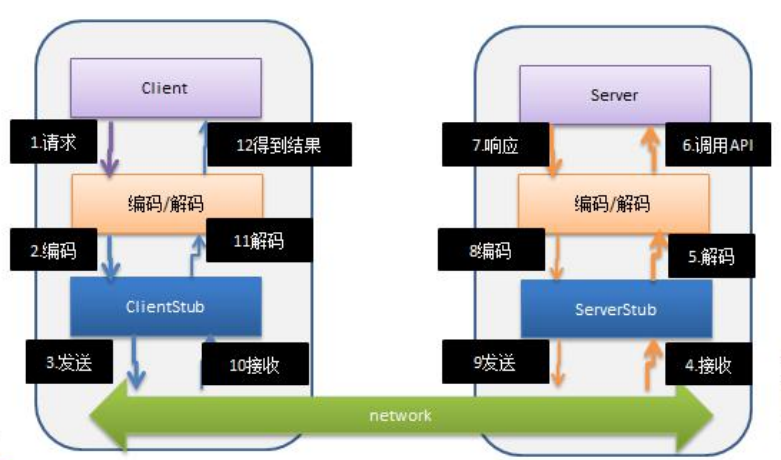
3. PRC调用流程说明
- **服务消费方(client)**以本地调用方式调用服务
- client stub 接收到调用后负责将方法、参数等封装成能够进行网络传输的消息体
- client stub 将消息进行编码并发送到服务端
- server stub 收到消息后进行解码
- server stub 根据解码结果调用本地的服务
- 地服务执行并将结果返回给 server stub
- server stub 将返回导入结果进行编码并发送至消费方
- client stub 接收到消息并进行解码
- 服务消费方(client)得到结果
小结:RPC 的目标就是将 2-8 这些步骤都封装起来,用户无需关心这些细节,可以像调用本地方法一样即可完成远程服务调用。
4. 自己实现 dubbo RPC(基于Netty)
需求说明
- dubbo 底层使用了 Netty 作为网络通讯框架,要求用Netty 实现一个简单的RPC框架
- 模仿 dubbo,消费者和提供者约定接口和协议,消费者远程调用提供者的服务,提供者返回一个字符串,消费者打印提供者返回的数据。底层网络通信使用Netty4.1.20
设计说明
- 创建一个接口,定义抽象方法。用于消费者和提供者之间的约定。
- 创建一个提供者,该类需要监听消费者的请求,并按照约定返回数据。
- 创建一个消费者,该类需要透明的调用自己不存在的方法,内部需要使用Netty请求提供者返回数据
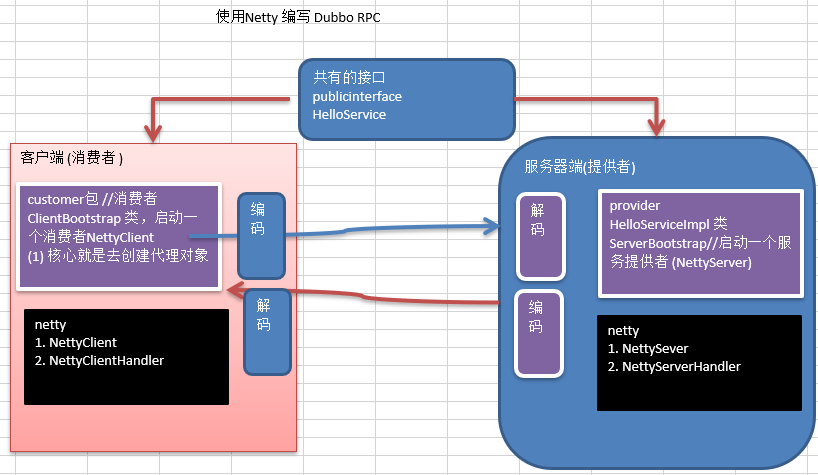
4.1 公共接口 publicinterface包
4.1.1 HelloService
package site.zhourui.nioAndNetty.netty.dubborpc.publicinterface;

//这个是接口,是服务提供方和 服务消费方都需要
public interface HelloService {


    String hello(String msg);
}
4.2 远程调用netty包
本质上就是客户端访问服务端
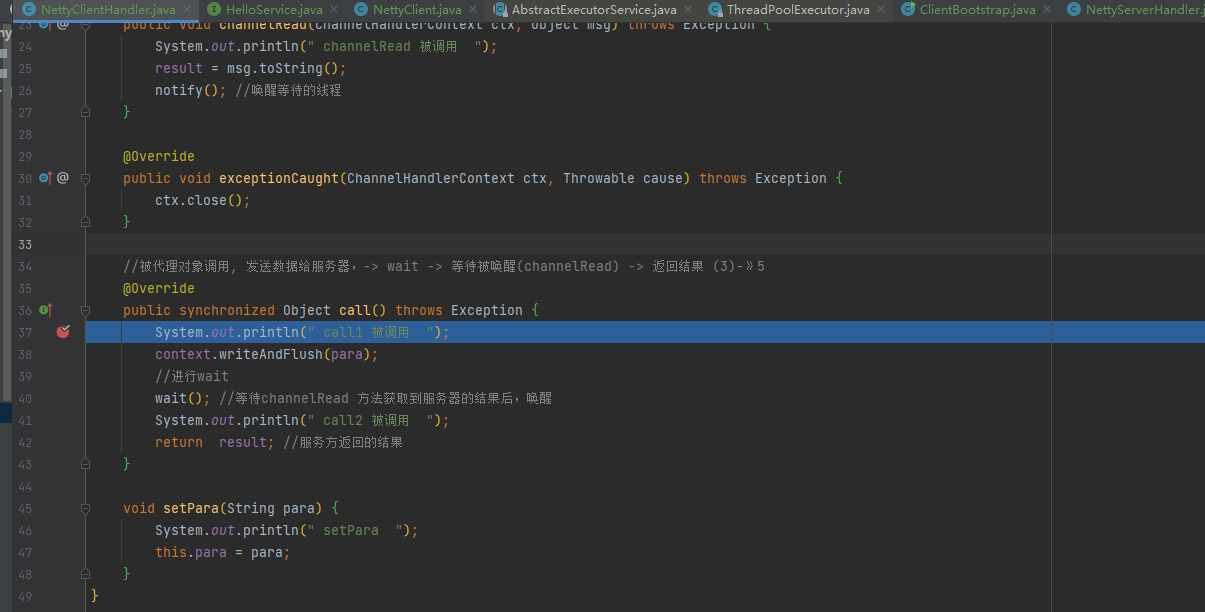
4.2.1 NettyClientHandler
- 我们实现了Callable方法
- setPara(String para)方法: 设置要发给服务器端的信息
- 我们将ctx在channelActive时抽取为全局对象context,方便我们在其他方法也能使用(这里就是call方法)
- call方法:
- 开启子线程向服务端发送消息
- 发送完成后该子线程进行wait,等待服务提供方处理并返回数据(被唤醒)
- 唤醒后打印服务端返回数据全局变量result中的数据
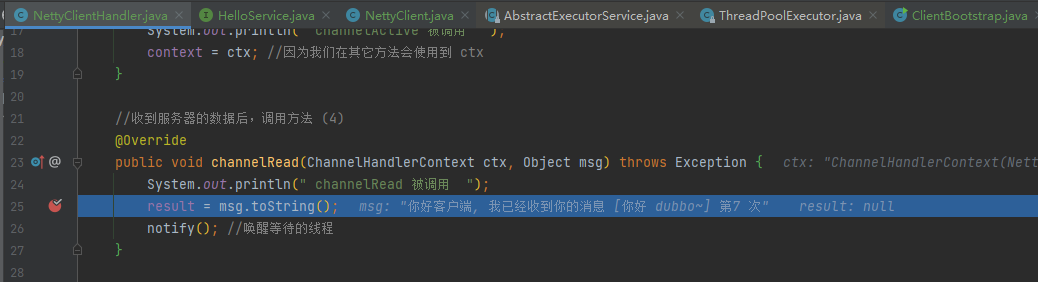
- channelRead方法:
- 收到服务器的返回数据后,将返回数据放在全局变量result中
- 唤醒等待的线程
- 因为channelRead和call方法是有同步关系的所有要加上
synchronized加锁- 小结: 代码执行流程
- channelActive()
- setPara()设置需要发送的数据
- call(wait之前代码)被代理对象调用, 发送数据给服务器-> wait
- 等待被唤醒(channelRead)->notify
- call(wait之后代码)
package site.zhourui.nioAndNetty.netty.dubborpc.netty;

import io.netty.channel.ChannelHandlerContext;
import io.netty.channel.ChannelInboundHandlerAdapter;

import java.util.concurrent.Callable;

public class NettyClientHandler extends ChannelInboundHandlerAdapter implements Callable {


    private ChannelHandlerContext context;//上下文
    private String result; //返回的结果
    private String para; //客户端调用方法时,传入的参数

    //与服务器的连接创建后,就会被调用, 这个方法是第一个被调用(1)
    @Override
    public void channelActive(ChannelHandlerContext ctx) throws Exception {


        System.out.println(" channelActive 被调用  ");
        context = ctx; //因为我们在其它方法会使用到 ctx
    }

    //收到服务器的数据后,调用方法 (4)
    @Override
    public void channelRead(ChannelHandlerContext ctx, Object msg) throws Exception {


        System.out.println(" channelRead 被调用  ");
        result = msg.toString();
        notify(); //唤醒等待的线程
    }

    @Override
    public void exceptionCaught(ChannelHandlerContext ctx, Throwable cause) throws Exception {


        ctx.close();
    }

    //被代理对象调用, 发送数据给服务器,-> wait -> 等待被唤醒(channelRead) -> 返回结果 (3)-》5
    @Override
    public synchronized Object call() throws Exception {


        System.out.println(" call1 被调用  ");
        context.writeAndFlush(para);
        //进行wait
        wait(); //等待channelRead 方法获取到服务器的结果后,唤醒
        System.out.println(" call2 被调用  ");
        return  result; //服务方返回的结果
    }

    void setPara(String para) {


        System.out.println(" setPara  ");
        this.para = para;
    }
}
4.2.2 NettyClient
说明:
创建线程池executor
initClient():
- 初始化NettyClientHandler 设为全局对象client
- 创建客户端并连接客户端
- StringDecoder():字符串编码器
- StringEncoder():字符串解码器
- pipeline.addLast(client):将加入自定义handler-client
编写方法getBean使用代理模式,获取一个代理对象
public Object getBean(final Class<?> serivceClass, final String providerName)
- serivceClass: 需要代理的Class对象
- providerName: 协议以及需要发送的数据
- 如果client为空就初始化initClient
- client.setPara():使用自定义handler的全局对象client设置需要发送的数据
- executor.submit(client): 将我们的自定义handler提交给异步线程池,因为NettyClientHandler 实现了Callable方法,会自动调用call方法
- .get():异步任务执行完成后获取返回结果
- 将返回结果return
package site.zhourui.nioAndNetty.netty.dubborpc.netty;

import io.netty.bootstrap.Bootstrap;
import io.netty.channel.ChannelInitializer;
import io.netty.channel.ChannelOption;
import io.netty.channel.ChannelPipeline;
import io.netty.channel.nio.NioEventLoopGroup;
import io.netty.channel.socket.SocketChannel;
import io.netty.channel.socket.nio.NioSocketChannel;
import io.netty.handler.codec.string.StringDecoder;
import io.netty.handler.codec.string.StringEncoder;

import java.lang.reflect.Proxy;
import java.util.concurrent.ExecutorService;
import java.util.concurrent.Executors;

public class NettyClient {


    //创建线程池
    private static ExecutorService executor = Executors.newFixedThreadPool(Runtime.getRuntime().availableProcessors());

    private static NettyClientHandler client;
    private int count = 0;

    //编写方法使用代理模式,获取一个代理对象

    public Object getBean(final Class<?> serivceClass, final String providerName) {


        return Proxy.newProxyInstance(Thread.currentThread().getContextClassLoader(),
                new Class<?>[]{

    serivceClass}, (proxy, method, args) -> {


                    System.out.println("(proxy, method, args) 进入...." + (++count) + " 次");
                    //{}  部分的代码,客户端每调用一次 hello, 就会进入到该代码
                    if (client == null) {


                        initClient();
                    }

                    //设置要发给服务器端的信息
                    //providerName 协议头 args[0] 就是客户端调用api hello(???), 参数
                    client.setPara(providerName + args[0]);

                    //
                    return executor.submit(client).get();

                });
    }

    //初始化客户端
    private static void initClient() {


        client = new NettyClientHandler();
        //创建EventLoopGroup
        NioEventLoopGroup group = new NioEventLoopGroup();
        Bootstrap bootstrap = new Bootstrap();
        bootstrap.group(group)
                .channel(NioSocketChannel.class)
                .option(ChannelOption.TCP_NODELAY, true)
                .handler(
                        new ChannelInitializer<SocketChannel>() {


                            @Override
                            protected void initChannel(SocketChannel ch) throws Exception {


                                ChannelPipeline pipeline = ch.pipeline();
                                pipeline.addLast(new StringDecoder());
                                pipeline.addLast(new StringEncoder());
                                pipeline.addLast(client);
                            }
                        }
                );

        try {


            bootstrap.connect("127.0.0.1", 7000).sync();
        } catch (Exception e) {


            e.printStackTrace();
        }
    }
}
4.2.3 NettyServerHandler
- 当通道发生读事件时
- 获取客户端发送的消息,并调用服务
- 按照协议规则取出数据(HelloService#hello#)
- HelloService# 为协议头
- hello为数据
- 回复客户端调用结果
package site.zhourui.nioAndNetty.netty.dubborpc.netty;

import io.netty.channel.ChannelHandlerContext;
import io.netty.channel.ChannelInboundHandlerAdapter;
import site.zhourui.nioAndNetty.netty.dubborpc.customer.ClientBootstrap;
import site.zhourui.nioAndNetty.netty.dubborpc.provider.HelloServiceImpl;

public class NettyServerHandler extends ChannelInboundHandlerAdapter {


    @Override
    public void channelRead(ChannelHandlerContext ctx, Object msg) throws Exception {


        //获取客户端发送的消息,并调用服务
        System.out.println("msg=" + msg);
        //客户端在调用服务器的api 时,我们需要定义一个协议
        //比如我们要求 每次发消息是都必须以某个字符串开头 "HelloService#hello#你好"
        if(msg.toString().startsWith(ClientBootstrap.providerName)) {


            String result = new HelloServiceImpl().hello(msg.toString().substring(msg.toString().lastIndexOf("#") + 1));
            ctx.writeAndFlush(result);
        }
    }

    @Override
    public void exceptionCaught(ChannelHandlerContext ctx, Throwable cause) throws Exception {


        ctx.close();
    }
}
4.2.4 NettyServer
- 启动客户端
- StringDecoder
- StringEncoder
- NettyServerHandler
package site.zhourui.nioAndNetty.netty.dubborpc.netty;

import io.netty.bootstrap.ServerBootstrap;
import io.netty.channel.ChannelFuture;
import io.netty.channel.ChannelInitializer;
import io.netty.channel.ChannelPipeline;
import io.netty.channel.EventLoopGroup;
import io.netty.channel.nio.NioEventLoopGroup;
import io.netty.channel.socket.SocketChannel;
import io.netty.channel.socket.nio.NioServerSocketChannel;
import io.netty.handler.codec.string.StringDecoder;
import io.netty.handler.codec.string.StringEncoder;

public class NettyServer {


    public static void startServer(String hostName, int port) {


        startServer0(hostName,port);
    }

    //编写一个方法,完成对NettyServer的初始化和启动

    private static void startServer0(String hostname, int port) {


        EventLoopGroup bossGroup = new NioEventLoopGroup(1);
        EventLoopGroup workerGroup = new NioEventLoopGroup();

        try {


            ServerBootstrap serverBootstrap = new ServerBootstrap();

            serverBootstrap.group(bossGroup,workerGroup)
                    .channel(NioServerSocketChannel.class)
                    .childHandler(new ChannelInitializer<SocketChannel>() {


                                      @Override
                                      protected void initChannel(SocketChannel ch) throws Exception {


                                          ChannelPipeline pipeline = ch.pipeline();
                                          pipeline.addLast(new StringDecoder());
                                          pipeline.addLast(new StringEncoder());
                                          pipeline.addLast(new NettyServerHandler()); //业务处理器

                                      }
                                  }

                    );

            ChannelFuture channelFuture = serverBootstrap.bind(hostname, port).sync();
            System.out.println("服务提供方开始提供服务~~");
            channelFuture.channel().closeFuture().sync();

        }catch (Exception e) {


            e.printStackTrace();
        }
        finally {


            bossGroup.shutdownGracefully();
            workerGroup.shutdownGracefully();
        }

    }
}
4.3 customer 包
4.3.1 ClientBootstrap
- 设置providerName:我们发送的数据(协议+数据)
- 创建一个消费者
- 创建代理对象
- 通过代理对象调用服务提供者的方法(服务)
package site.zhourui.nioAndNetty.netty.dubborpc.customer;

import site.zhourui.nioAndNetty.netty.dubborpc.netty.NettyClient;
import site.zhourui.nioAndNetty.netty.dubborpc.publicinterface.HelloService;

public class ClientBootstrap {


    //这里定义协议头
    public static final String providerName = "HelloService#hello#";

    public static void main(String[] args) throws  Exception{


        //创建一个消费者
        NettyClient customer = new NettyClient();

        //创建代理对象
        HelloService service = (HelloService) customer.getBean(HelloService.class, providerName);

        for (;; ) {


            Thread.sleep(2 * 1000);
            //通过代理对象调用服务提供者的方法(服务)
            String res = service.hello("你好 dubbo~");
            System.out.println("调用的结果 res= " + res);
        }
    }
}
4.4 provider 包
4.4.1 HelloServiceImpl
服务端提供方的实现,远程真正被调用的方法
package site.zhourui.nioAndNetty.netty.dubborpc.provider;

import site.zhourui.nioAndNetty.netty.dubborpc.publicinterface.HelloService;

public class HelloServiceImpl implements HelloService {


    private static int count = 0;
    //当有消费方调用该方法时, 就返回一个结果
    @Override
    public String hello(String msg) {


        System.out.println("收到客户端消息=" + msg);
        //根据mes 返回不同的结果
        if(msg != null) {


            return "你好客户端, 我已经收到你的消息 [" + msg + "] 第" + (++count) + " 次";
        } else {


            return "你好客户端, 我已经收到你的消息 ";
        }
    }
}
4.4.1 ServerBootstrap
ServerBootstrap 会启动一个服务提供者,就是 NettyServer
package site.zhourui.nioAndNetty.netty.dubborpc.provider;

import site.zhourui.nioAndNetty.netty.dubborpc.netty.NettyServer;

//ServerBootstrap 会启动一个服务提供者,就是 NettyServer
public class ServerBootstrap {


    public static void main(String[] args) {


        //代码代填..
        NettyServer.startServer("127.0.0.1", 7000);
    }
}
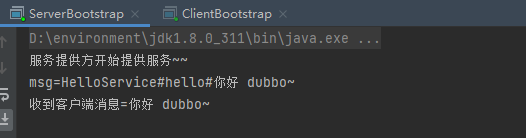
4.5 测试
-
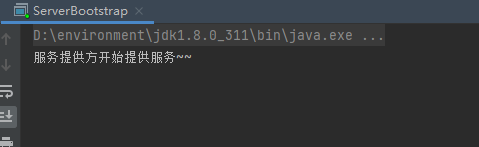
启动ServerBootstrap
-
启动ClientBootstrap

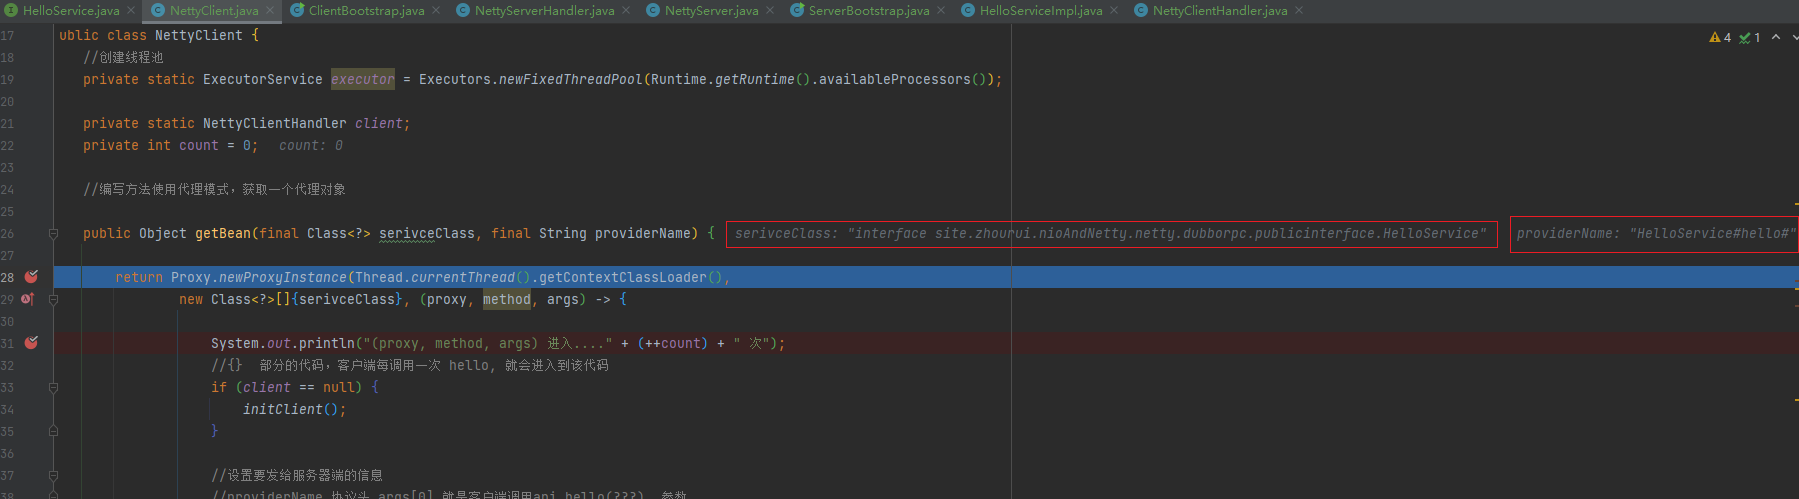
4.5.1 debug看一下ClientBootstrap启动
首先还是先启动服务端ServerBootstrap
-
debug启动ClientBootstrap

-
NettyClient(),此时只是初始化了全局属性
-
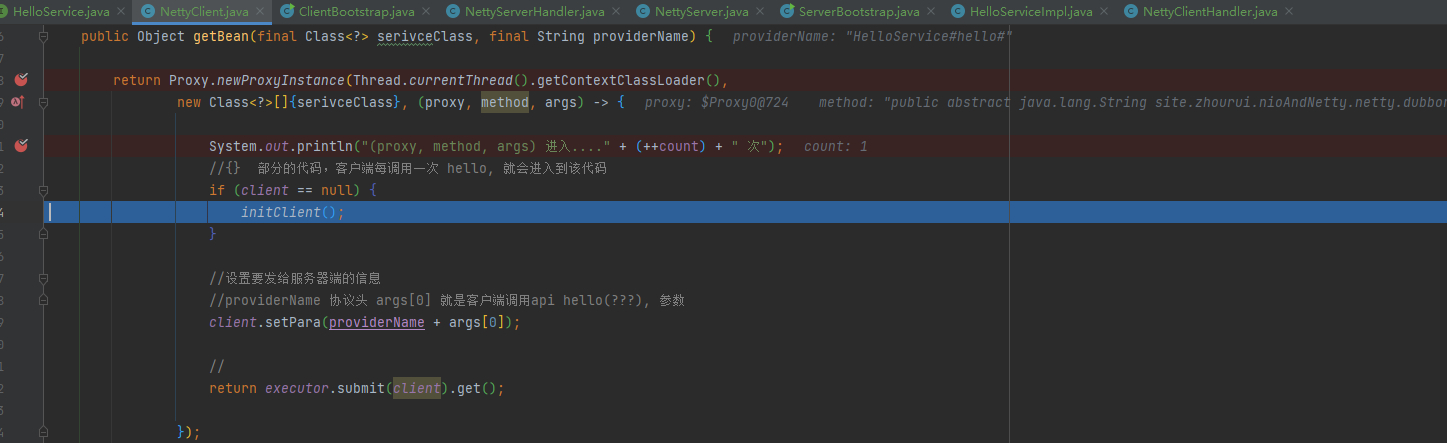
getBean:创建代理对象
-
先看看入参是什么数据
-
如果client没有被初始化就初始化
-
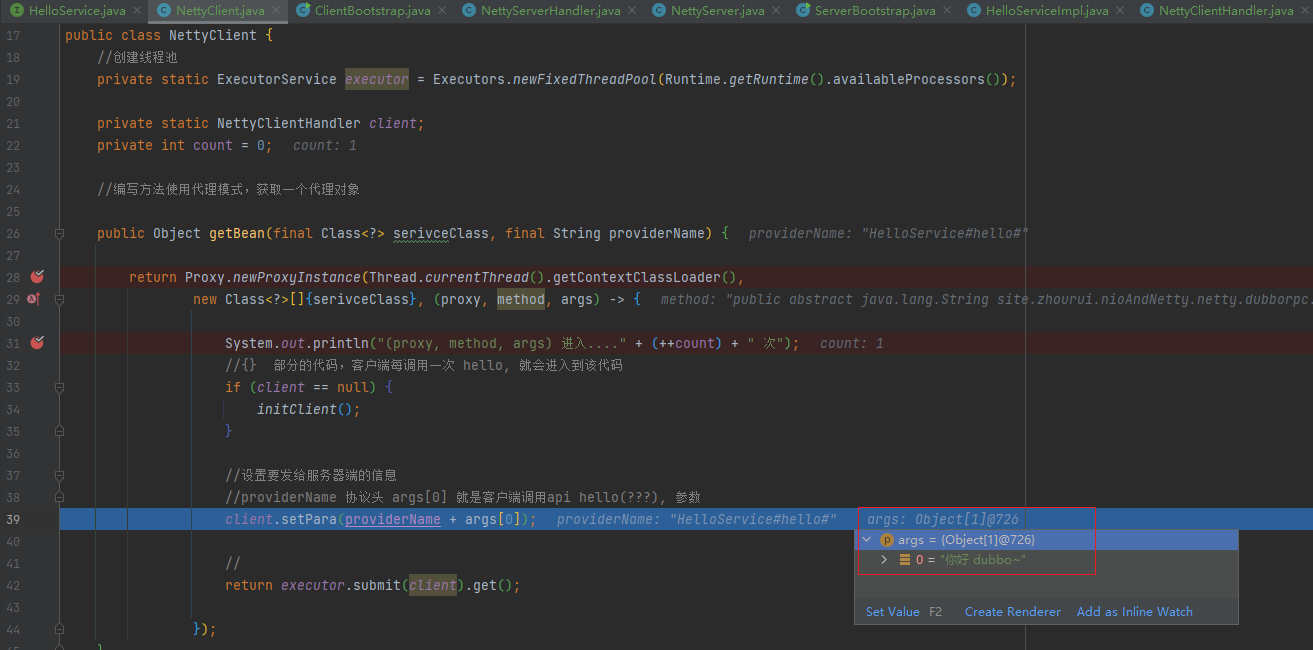
设置要发给服务器端的信息
-
executor.submit:提交异步任务就会来到NettyClientHandler的call方法
-
call方法执行到wait()方法后,channelRead不久后就会收到服务端的调用结果然后唤醒call方法的子线程继续执行
-