[[toc]]
环境安装
macOs: 10.15.5
xcode: 11.6
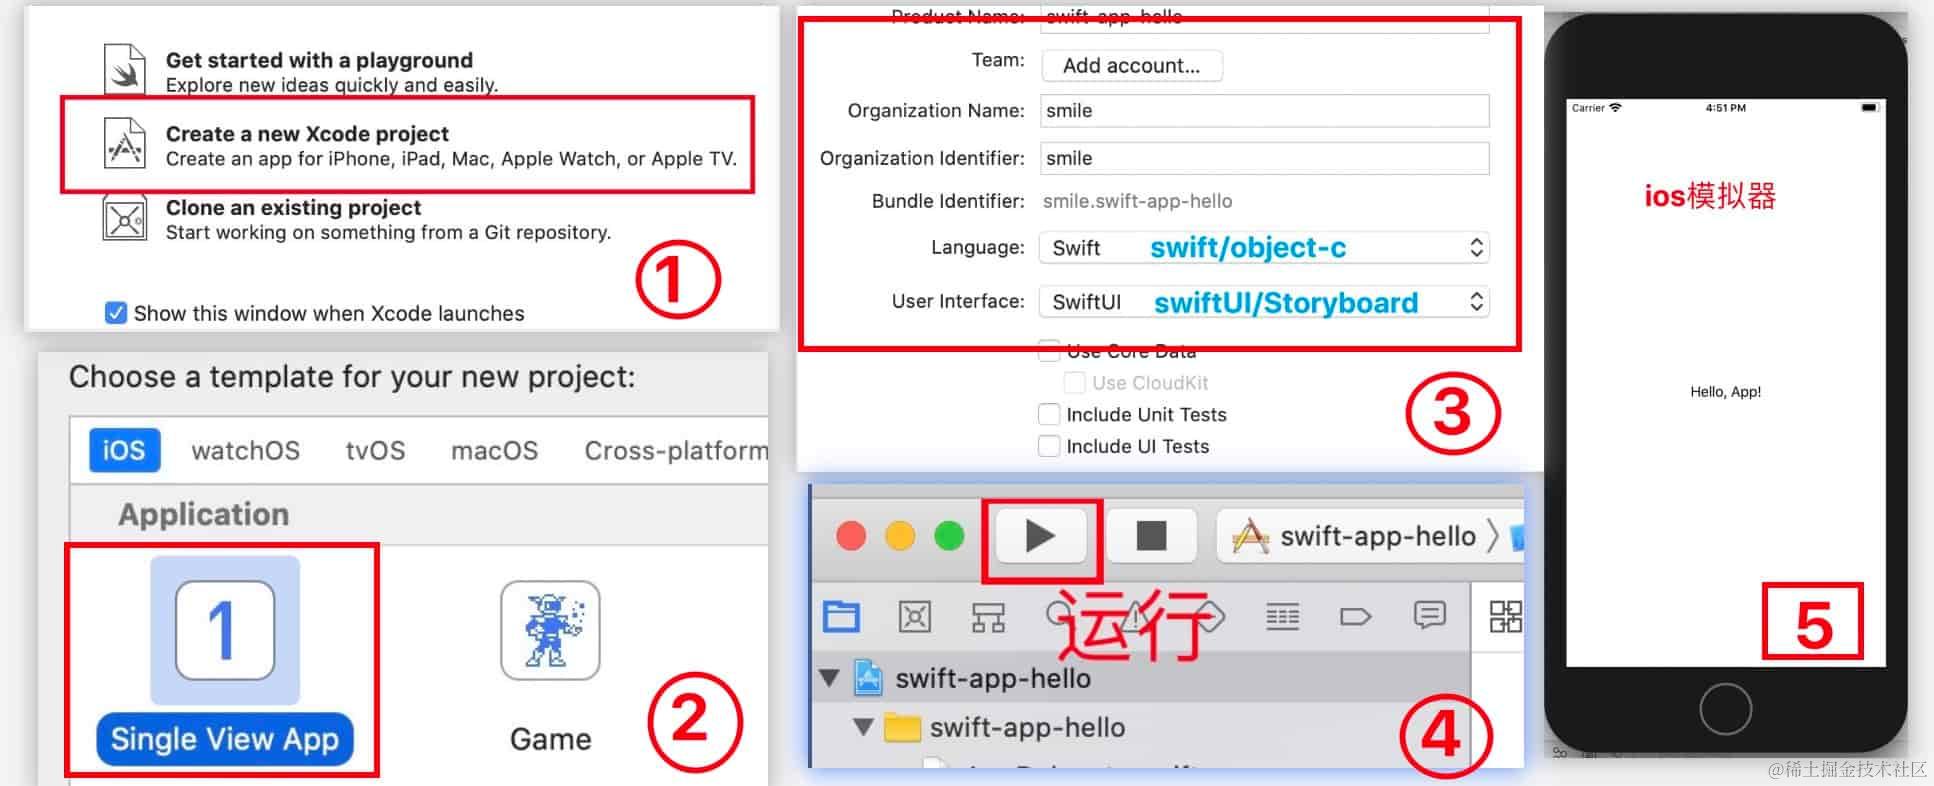
demo:app 创建 hello world iOS app
创建工程步骤
- 选择:Create a new Xcode project
- 选择:iOS-> single View App
- 填写:
- project name: swift-app-hello
- identifer: smile 包名
- language: swift
- user interface: swiftUI
- 工具栏:点击运行 -》build success -》iOS模拟器
看看默认生成的代码
// AppDelegate.swift
@UIApplicationMain //@UIApplication注解:表示这个Class类是程序的入口
class AppDelegate: UIResponder, UIApplicationDelegate {


    // 定义 3个 application 方法
}

// ContentView.swift
import SwiftUI
struct ContentView: View {


    var body: some View {


        Text("Hello, App!")
    }
}
struct ContentView_Previews: PreviewProvider {


    static var previews: some View {


        ContentView()
    }
}
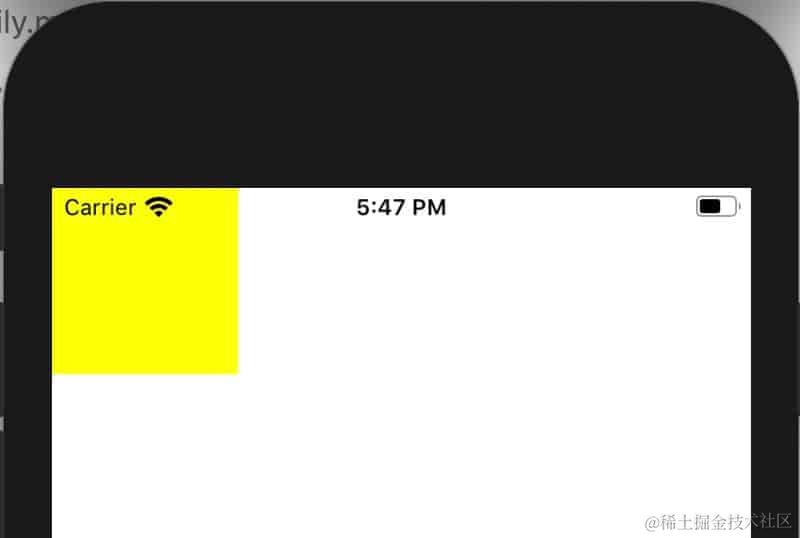
demo:app+ui 添加图形
步骤
- 创建工程和前面步骤相同
- 区别:选择 user interface: storyBoard
import UIKit
class ViewController: UIViewController {
override func viewDidLoad() {
super.viewDidLoad()
// 1.1 创建一个视图:400*400
let v = UIView(frame: CGRect(x:0, y:0, width: 400, height: 400))
// 1.2 设置背景颜色
v.backgroundColor = UIColor.yellow
// 1.3.添加到当前视图
view.addSubview(v)
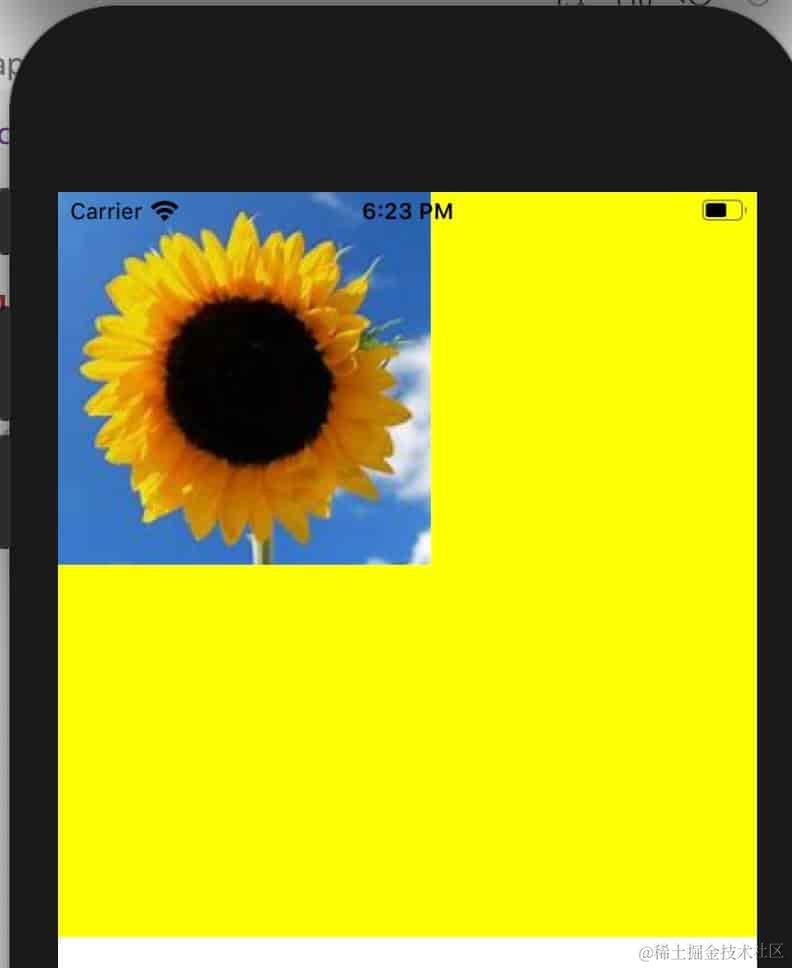
// 2.1 创建一个按钮
let btn = UIButton(type: .conta ctAdd)
// 2.2 添加到当前视图
v.addSubview(btn)
// 2.3 添加点击事件
btn.addTarget(self, action: #selector(btnClick), for: .touchUpInside)
// 3.1 添加一个图片: 先在Assets.xcassets放置图片;然后点击添加图片
let iv = UIImageView(image: (UIImage(named: "flower")!))
// 3.2 添加到视图
view.addSubview(iv)
}
@objc func btnClick(){
print(#function)
print("按钮被点击了!")
}
}
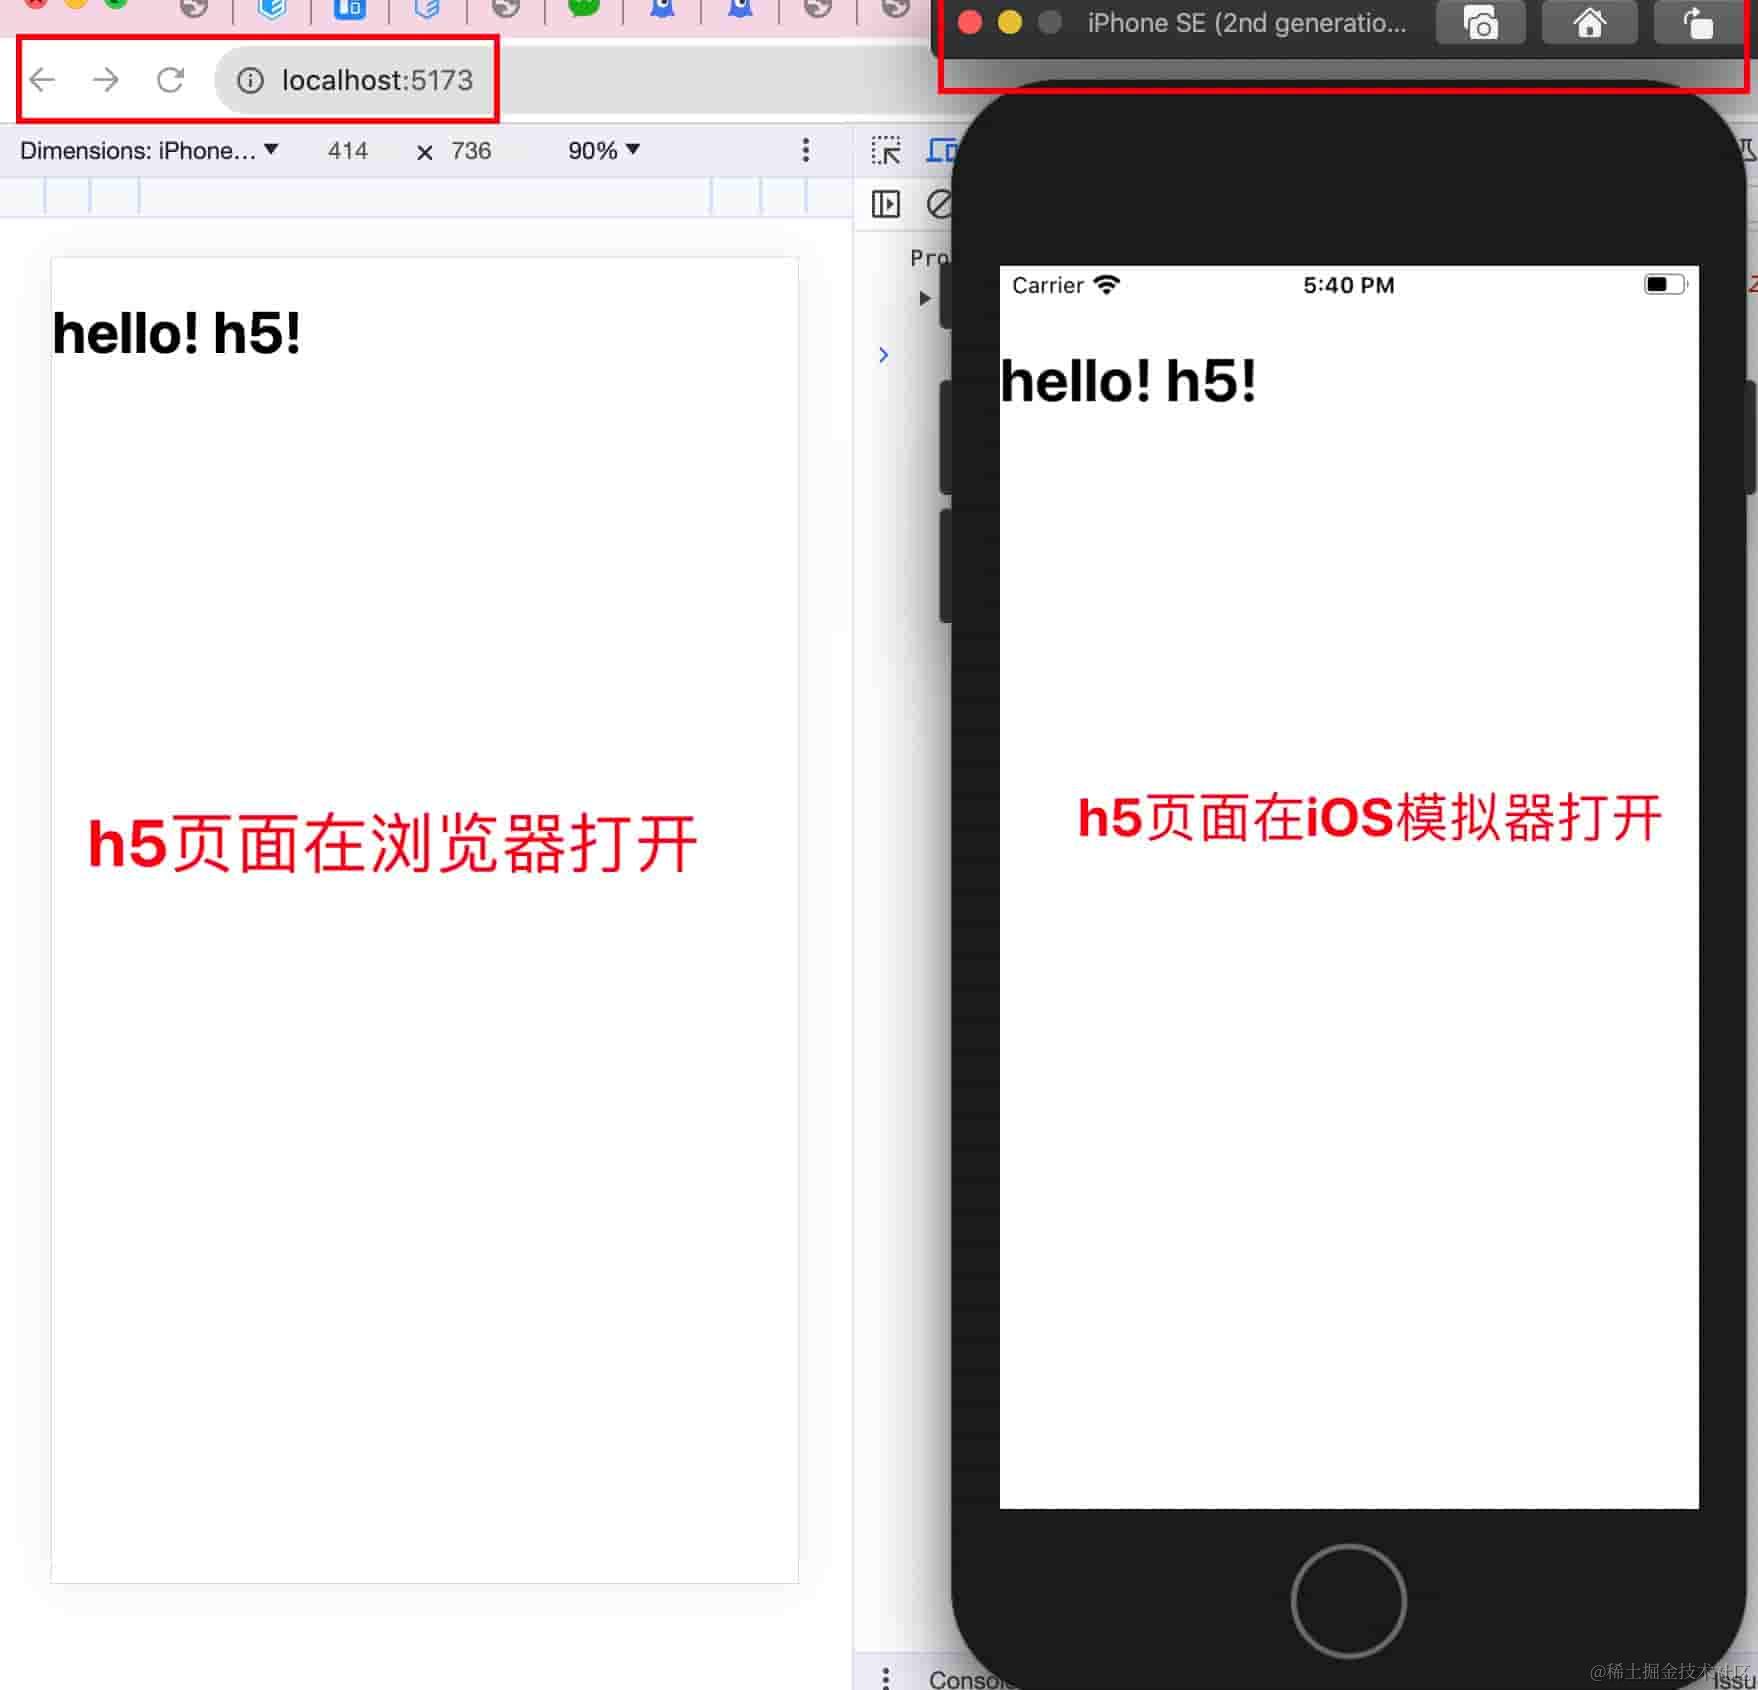
demp:app+h5 加载h5页面
步骤:
- 准备好本地h5页面 http://localhost:5173/
- 工程创建同上 app+ui
- 修改 ViewController.swift 文件如下
- 修改配置 info.plist (右键open as source) 如下
// ViewController.swift
import UIKit
import WebKit
class ViewController: UIViewController, WKUIDelegate {


    var webView: WKWebView!
    override func loadView() {


        let webConfiguration = WKWebViewConfiguration()
        webView = WKWebView(frame: .zero, configuration: webConfiguration)
        webView.uiDelegate = self
        view = webView
    }
    override func viewDidLoad() {


        super.viewDidLoad()
//         let myURL = URL(string:"https://www.baidu.com") // ok
        let myURL = URL(string:"http://localhost:5173/") // ok
        let myRequest = URLRequest(url: myURL!)
        webView.load(myRequest)
    }
}
<!-- info.plist  -->
<key>NSAppTransportSecurity</key>
<dict>
    <key>NSAllowsArbitraryLoads</key>
    <true/>
</dict>
效果: