数字化管理平台
Vue3+Vite+VueRouter+Pinia+Axios+ElementPlus
权限系统-商城
个人博客地址
column.customRender 用于生成复杂数据的渲染函数,V3 版本也对齐做了升级,用法有所不同。


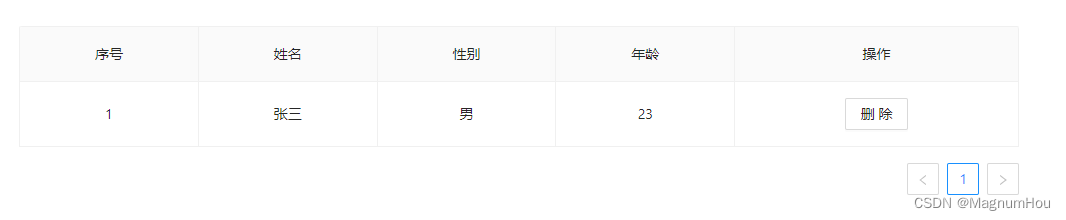
有如下数据
const data = reactive([{


	tid: 1,
	tname: "Magnum",
	tgender: 0,
	tage: 23
}])
想要根据性别标识(0,1),展示对应的结果(男,女):
1. V1 版本处理方式
const columns = reactive([{


	dataIndex: 'tid',
	title: "序号",
	align: "center"
}, {


	dataIndex: 'tname',
	title: "姓名",
	align: "center"
}, {


	dataIndex: 'tgender',
	title: "性别",
	align: "center",
	customRender: (text, record) => {


		return <span>{

     record.tgender === 0 ? '男' : '女' }</span>
	}
}, {


	dataIndex: 'tage',
	title: "年龄",
	align: "center"
}, {


	dataIndex: 'operation',
	title: "操作",
	align: "center",
}])
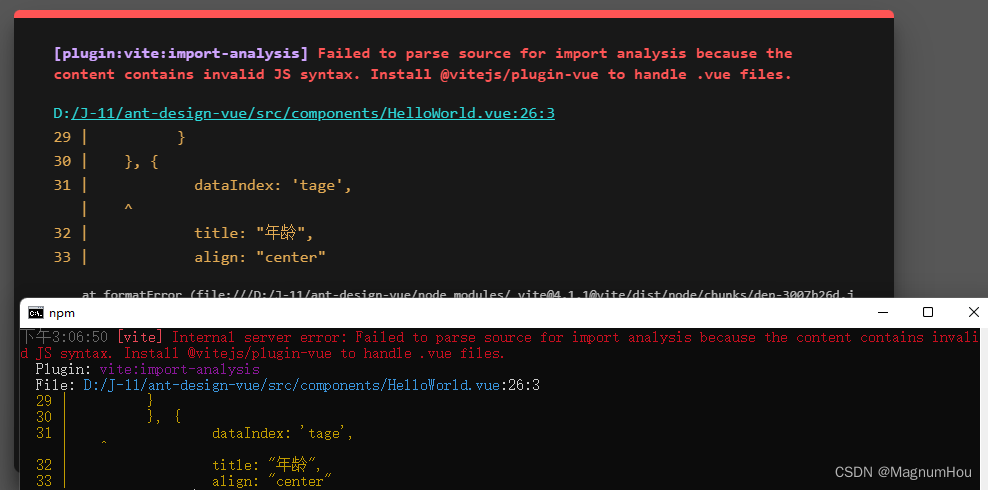
上面的方式放到 Vite+Vue3+Ant V3 版本上,则不兼容,页面和控制台报错如下:
2. V3 版本写法
const columns = reactive([{


	dataIndex: 'tid',
	title: "序号",
	align: "center"
}, {


	dataIndex: 'tname',
	title: "姓名",
	align: "center"
}, {


	dataIndex: 'tgender',
	title: "性别",
	align: "center",
	customRender:({

     text, record, index}) => {


		console.log(text, record, index)
		return record.tgender === 0 ? '男' : '女'
	},
}, {


	dataIndex: 'tage',
	title: "年龄",
	align: "center"
}, {


	dataIndex: 'operation',
	title: "操作",
	align: "center",
}])
Tip:个人看来,V3 版本的写法更加适合个人的开发习惯,也更加简洁。