一、Ubuntu安装MongoDB
MongoDB安装很简单,无需下载源文件,可以直接用apt-get命令进行安装。 打开终端,输入以下命令
sudo apt-get install mongodb
这时装好以后应该会自动运行mongod程序,通过命令查看进程是否已经启动
pgrep mongo -l
命令窗口结果
root@iZm5eetszs07500os8erolZ:~# pgrep mongo -l
32216 mongod
root@iZm5eetszs07500os8erolZ:~#
二、关闭/启动MongoDB
关闭MongoDB
sudo service mongodb stop
启动MongoDB
sudo service mongodb start
三、systemd管理MongoDB
检查服务状态
sudo systemctl status mongodb
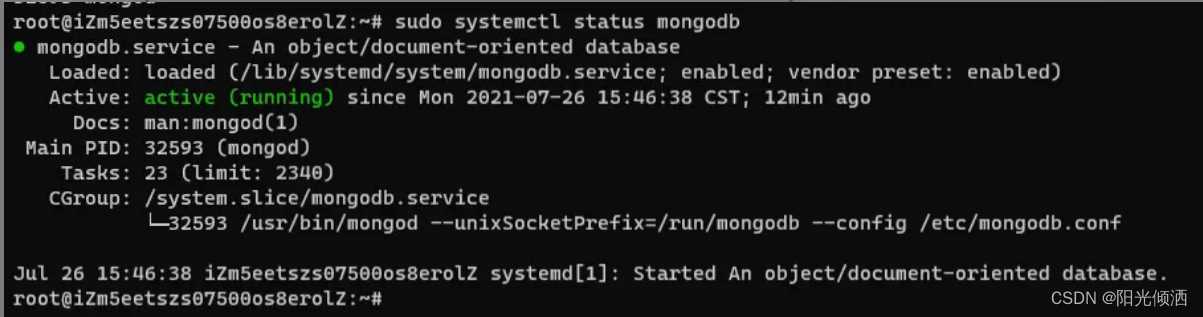
命令窗口结果
其它命令
// 状态查询
sudo systemctl status mongodb

//停用
sudo systemctl stop mongodb

//启动
sudo systemctl start mongodb

//重启
sudo systemctl restart mongodb
修改 MongoDB 是否自动随系统启动(默认:启用)
sudo systemctl disable mongodb

sudo systemctl enable mongodb
注意:极不建议使用kill强制杀死进程,这样数据会存在损坏
四、卸载MongoDB
如果你从 Ubuntu 仓库安装 MongoDB 并想要卸载它(可能要使用官方支持的方式安装),可以输入:
sudo systemctl stop mongodb

sudo apt purge mongodb

sudo apt autoremove
五、目录说明
默认情况下,包管理器将创建 /var/lib/mongodb 和 /var/log/mongodb,配置文件目录为/etc/mongodb.conf
六、使用MongoDB
6.1 使用数据库
MongoDB中,每个数据库的实例都可拥有多个用户,安全检查开启后,只要通过身份验证的用户才能够进行数据的读写操作。admin(管理员)和local(本地)是两个特殊的数据库,它们当中的用户可对任何数据库进行操作。这两个数据库中的用户可被看作是超级用户。经认证后,管理员用户可对任何数据库进行读写,同时能执行某些只有管理员才能执行的命令,如listDatabases和shutDown。
在默认情况下,mongod是监听在127.0.0.1之上的,任何客户端都可以直接连接27017,且没有认证。这样做的好处是,用户可以即时上手,不用担心被一堆配置弄的心烦意乱。然而坏处也是显而易见,如果直接在公网服务器上如此搭建MongoDB,那么所有人都可以直接访问并修改数据库数据了。
MongoDB默认是没有设置鉴权的,业界大部分使用MongoDB的项目也没有设置访问权限。这就意味着只要知道MongoDB服务器的端口,任何能访问到这台服务器的人都可以查询和操作MongoDB数据库的内容。在一些项目当中,这种使用方式会被看成是一种安全漏洞。
其实MongoDB本身有非常详细的安全配置准则,显然开发者也是想到了,然而他是将安全的任务推给用户去解决,这本身的策略就是偏向易用性的,对于安全性,则得靠边站了。
注:每个数据库都有自己的用户,创建用户的命令是db.createUser(),当你创建一个用户时,该用户就属于你当前所在的数据库。
MongoDB有一个比较奇怪的设置是,即便是一个admin用户,授权也必须在admin数据库下进行,而不能在其他数据库下进行。而授权之后admin用户就可以在任何数据库下进行任何操作了。当然数据库级别的用户在他自己的数据库下授权之后是不能到其他数据库进行操作的
标准 URI 连接语法:
mongodb://[username:password@]host1[:port1][,host2[:port2],...[,hostN[:portN]]][/[database][?options]]

mongodb:// 这是固定的格式,必须要指定。
username:password@ 可选项,如果设置,在连接数据库服务器之后,驱动都会尝试登陆这个数据库
host1 必须的指定至少一个host, host1 是这个URI唯一要填写的。它指定了要连接服务器的地址。如果要连接复制集,请指定多个主机地址。
portX 可选的指定端口,如果不填,默认为27017
/database 如果指定username:password@,连接并验证登陆指定数据库。若不指定,默认打开admin数据库。
?options 是连接选项。如果不使用/database,则前面需要加上/。所有连接选项都是键值对name=value,键值对之间通过&或;(分号)隔开
root@iZm5eetszs07500os8erolZ:~# mongo mongodb://127.0.0.1:27017
MongoDB shell version v3.6.3
connecting to: mongodb://127.0.0.1:27017
MongoDB server version: 3.6.3
Server has startup warnings:
2021-07-26T16:03:25.186+0800 I STORAGE  [initandlisten]
2021-07-26T16:03:25.186+0800 I STORAGE  [initandlisten] ** WARNING: Using the XFS filesystem is strongly recommended with the WiredTiger storage engine
2021-07-26T16:03:25.186+0800 I STORAGE  [initandlisten] **          See http://dochub.mongodb.org/core/prodnotes-filesystem
2021-07-26T16:03:26.300+0800 I CONTROL  [initandlisten]
2021-07-26T16:03:26.300+0800 I CONTROL  [initandlisten] ** WARNING: Access control is not enabled for the database.
2021-07-26T16:03:26.300+0800 I CONTROL  [initandlisten] **          Read and write access to data and configuration is unrestricted.
2021-07-26T16:03:26.300+0800 I CONTROL  [initandlisten]
> show databases;
admin   0.000GB
config  0.000GB
local   0.000GB
>
使用shell的方式连接:
root@iZm5eetszs07500os8erolZ:~# mongo
MongoDB shell version v3.6.3
connecting to: mongodb://127.0.0.1:27017
MongoDB server version: 3.6.3
Server has startup warnings:
2021-07-26T16:03:25.186+0800 I STORAGE  [initandlisten]
2021-07-26T16:03:25.186+0800 I STORAGE  [initandlisten] ** WARNING: Using the XFS filesystem is strongly recommended with the WiredTiger storage engine
2021-07-26T16:03:25.186+0800 I STORAGE  [initandlisten] **          See http://dochub.mongodb.org/core/prodnotes-filesystem
2021-07-26T16:03:26.300+0800 I CONTROL  [initandlisten]
2021-07-26T16:03:26.300+0800 I CONTROL  [initandlisten] ** WARNING: Access control is not enabled for the database.
2021-07-26T16:03:26.300+0800 I CONTROL  [initandlisten] **          Read and write access to data and configuration is unrestricted.
2021-07-26T16:03:26.300+0800 I CONTROL  [initandlisten]
> show databases;
admin   0.000GB
config  0.000GB
local   0.000GB
> use admin
switched to db admin
>
命令说明
//进入数据库
mongo

//显示数据库
show databases;

//使用数据库
use admin
6.2 创建用户
首先保证你已经以用户管理员的身份登录admin数据库。然后用use命令切换到目标数据库,同样用db.createUser() 命令来创建用户,其中角色名为“readWrite”,普通的数据库用户角色有两种,read和readWrite。顾名思义,前者只能读取数据不能修改,后者可以读取和修改。
root@iZm5eetszs07500os8erolZ:~# mongo
MongoDB shell version v3.6.3
connecting to: mongodb://127.0.0.1:27017
MongoDB server version: 3.6.3
Server has startup warnings:
2021-07-26T16:03:25.186+0800 I STORAGE  [initandlisten]
2021-07-26T16:03:25.186+0800 I STORAGE  [initandlisten] ** WARNING: Using the XFS filesystem is strongly recommended with the WiredTiger storage engine
2021-07-26T16:03:25.186+0800 I STORAGE  [initandlisten] **          See http://dochub.mongodb.org/core/prodnotes-filesystem
2021-07-26T16:03:26.300+0800 I CONTROL  [initandlisten]
2021-07-26T16:03:26.300+0800 I CONTROL  [initandlisten] ** WARNING: Access control is not enabled for the database.
2021-07-26T16:03:26.300+0800 I CONTROL  [initandlisten] **          Read and write access to data and configuration is unrestricted.
2021-07-26T16:03:26.300+0800 I CONTROL  [initandlisten]
> use admin
switched to db admin
> db.createUser({user:"root",pwd:"root123abc",roles:["userAdminAnyDatabase"]})
Successfully added user: { "user" : "root", "roles" : [ "userAdminAnyDatabase" ] }
> use admin
switched to db admin
> db.auth("root","root123abc")
1
> show users;
{
        "_id" : "admin.root",
        "user" : "root",
        "db" : "admin",
        "roles" : [
                {
                        "role" : "userAdminAnyDatabase",
                        "db" : "admin"
                }
        ]
}
>
命令说明
//创建root用户
db.createUser({user:"root",pwd:"root123abc",roles:["userAdminAnyDatabase"]})

//root登录 db.auth()方法返回1表示登录成功。
db.auth("root","root123abc")

//查看用户
show users;
6.3 删除用户
>db.system.users.remove({"user" : "test_user"}); 删除一个test_user用户
6.4 mongodb创建、删除、插入数据命令使用
root@iZm5eetszs07500os8erolZ:~# mongo
MongoDB shell version v3.6.3
connecting to: mongodb://127.0.0.1:27017
MongoDB server version: 3.6.3
Server has startup warnings:
2021-07-26T17:22:22.563+0800 I STORAGE  [initandlisten]
2021-07-26T17:22:22.563+0800 I STORAGE  [initandlisten] ** WARNING: Using the XFS filesystem is strongly recommended with the WiredTiger storage engine
2021-07-26T17:22:22.563+0800 I STORAGE  [initandlisten] **          See http://dochub.mongodb.org/core/prodnotes-filesystem
2021-07-26T17:22:23.721+0800 I CONTROL  [initandlisten]
2021-07-26T17:22:23.721+0800 I CONTROL  [initandlisten] ** WARNING: Access control is not enabled for the database.
2021-07-26T17:22:23.721+0800 I CONTROL  [initandlisten] **          Read and write access to data and configuration is unrestricted.
2021-07-26T17:22:23.721+0800 I CONTROL  [initandlisten]
> use test     #创建一个test数据库
switched to db test
> show dbs;    #列出所有数据库
admin   0.000GB
config  0.000GB
local   0.000GB

# 但是并没有看到刚才我们创建的test数据库,那是因为test数据库是空的,我们插入一条数据

> db.test.insert({"name":"alanchen"})
WriteResult({ "nInserted" : 1 })
> db.test.find({"name":"alanchen"})     #查询数据
{ "_id" : ObjectId("60fe80e2098d05fbdf907486"), "name" : "alanchen" }
> db.test.findOne()    #查询一条数据
{ "_id" : ObjectId("60fe80e2098d05fbdf907486"), "name" : "alanchen" }

> show dbs;    #test 数据库就显示了
admin   0.000GB
config  0.000GB
local   0.000GB
test    0.000GB

> db.dropDatabase();   # 删除数据库
{ "dropped" : "test", "ok" : 1 }

> show dbs;  # test数据库不显示了
admin   0.000GB
config  0.000GB
local   0.000GB
>
七、MongoDB存储引擎
存储引擎(Storage Engine)是MongoDB的核心组件,负责管理数据如何存储在硬盘(Disk)和内存(Memory)上。从MongoDB 3.2 版本开始,MongoDB 支持多数据存储引擎(Storage Engine),MongoDB支持的存储引擎有:WiredTiger,MMAPv1和In-Memory。
从MongoDB 3.2版本开始,WiredTiger成为MongDB默认的Storage Engine,用于将数据持久化存储到硬盘文件中,WiredTiger提供文档级别(Document-Level)的并发控制,检查点(CheckPoint),数据压缩和本地数据加密( Native Encryption)等功能。
MongoDB不仅能将数据持久化存储到硬盘文件中,而且还能将数据只保存到内存中;In-Memory存储引擎用于将数据只存储在内存中,只将少量的元数据和诊断日志(Diagnostic)存储到硬盘文件中,由于不需要Disk的IO操作,就能获取索取的数据,In-Memory存储引擎大幅度降低了数据查询的延迟(Latency)。
查看MongoDB的默认存储引擎:
echo "db.serverStatus()"| mongo|grep wiredTiger
命令窗口结果
root@iZm5eetszs07500os8erolZ:~# echo "db.serverStatus()"| mongo|grep wiredTiger
                "name" : "wiredTiger",
        "wiredTiger" : {
root@iZm5eetszs07500os8erolZ:~#
WiredTiger和MMAPv1都用于持久化存储数据,相对而言,WiredTiger比MMAPv1更新,功能更强大。
八、MongoDB使用注意事项以及性能优化
- 使用explain()测试应用程序中的每个查询
- 避免分散-聚集查询
- 你的操作应用程序只应从主节点读取
- 使用MongoDB最新的驱动程序
- 将记录的所有数据存储在单个文档中
- 避免使用大文档
- 避免使用大型索引数组
- 避免不必要的长字段名称
- 在考虑低基数字段上的索引时,请谨慎
- 取消不必要的索引
- 删除作为其他索引的前缀的索引
- 使用复合索引而不是索引交集
- 避免没有留下锚定或生根的正则表达式
- 使用WiredTiger存储引擎中提供的索引优化(3.0版本之后默认是WiredTiger引擎)
- 对不同的数据库使用多个设备 - WiredTiger
- 避免使用ext3文件系统,使用ext4或者xfs文件系统