一、引言
因工作需要,需部署 mqtt 服务器进行测试。
二、技术小结
- dockerhub 上相关镜像,直接拉取可用。经查,
eclipse-mosquitto有官方认证OFFICIAL,故使用之,版本为2.0.15。 - 先启动容器,获取配置文件,并设置用户和密码,生成账户文件。
- 修改配置,挂账户文件。
- 使用客户端测试。
三、实践
下载
命令:
docker pull eclipse-mosquitto:2.0.15
获取配置
获取配置文件,创建密码:
docker run --rm -it -v /tmp/config:config/mqtt --rm --name mqtt eclipse-mosquitto:2.0.15 sh

cd /tmp/config/
cp /mosquitto/config/mosquitto.conf .

touch /tmp/config/latelee.conf
mosquitto_passwd -b /tmp/config/latelee.conf latelee 123456
cat /tmp/config/latelee.conf
latelee:$7$101$8uztnbWciNtQhAB+$ElyWv714QaN8E/DOt9wzN/fRs9MdXtmpuq1xJifPKVfno1meGzCp4UnkZErM3WbaZtWIL/tKaxq72dXJ8oRwKw==
exit
如要创建多个用户,执行
mosquitto_passwd -b /tmp/config/latelee.conf <用户> <密码>即可。
修改配置
重新编辑文件mosquitto.conf:
persistence true
persistence_file mosquitto.db
persistence_location /mosquitto/data
log_dest file /mosquitto/log/mosquitto.log

allow_anonymous false
password_file /mosquitto/config/latelee.conf

# 默认端口是 1883
port 1883

# 以下两行表示可以通过9001端口以websocket的方式连接mosquitto服务
#listener 9001
#protocol websockets
docker-compose配置
docker-compose.yaml文件内容:
  ll-mqtt:
    image: eclipse-mosquitto:2.0.15
    container_name: ll-mqtt
    hostname: ll-mqtt
    # privileged: true
    restart: always
    #command: xxx
    volumes:
      - ./config/mqtt:/mosquitto/config
      - ./mqttdata:/mosquitto/data
      - ./mqttlog:/mosquitto/log
    environment:
      - TZ=Asia/Shanghai
    ports:
      - "11883:1883"
      #- "19001:9001"
    networks:
      stdtoll-net:
        ipv4_address: 172.18.200.30
启动:
docker-compose up -d ll-mqtt
注:似乎启动较慢
四、测试
使用MQTTX工具测试,地址在此。
新建链接
链接配置示例如下:

)]
输入信息正确后,连接成功:

)]
新加订阅
使用默认Topic

发送消息
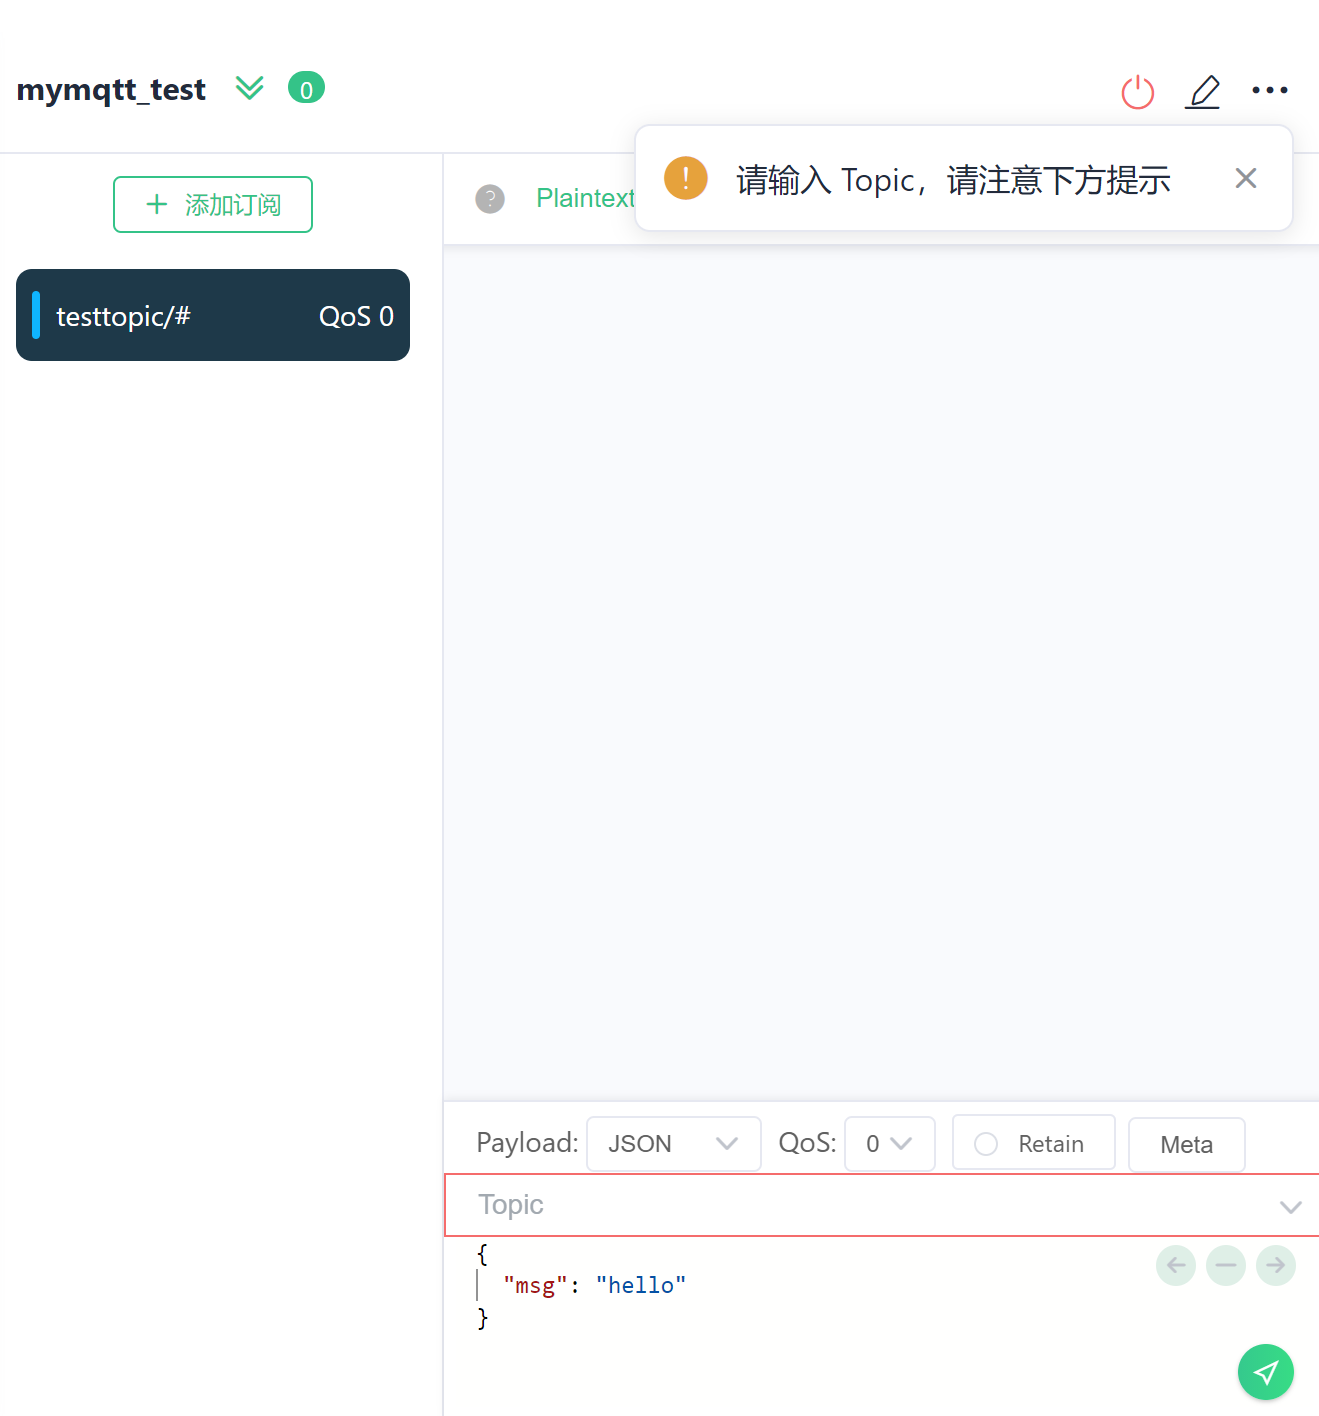
选择订阅,输入Topic,发送。如图所示。

五、多用户测试
为行文简洁,与前面的操作相同的略去。
添加多个用户信息:
mosquitto_passwd -b /tmp/config/latelee.conf latelee1 123456
# cat latelee.conf
latelee:$7$101$sBW5H73ll8re2i1F$JHHLDgQC8QN/Ig2y3dYw4QOVvAx1HyBSc94KW7y6E3rlCyDdeC909GhRjS5BW5RM4AARzO6xknhmDt1PvahAxA==
latelee1:$7$101$iZDWCtfmj9oby9BH$RoSTqv37knkc9Ow1O9f7N241KBv1TiLXRphg4xOnLQuHxEj5PQHcjLRkxj34Eqbjz6Cvvs2f1vgf9o+Kgg3qPg==
latelee2:$7$101$AcmF60V2ymIiGSJh$55FiXACOO7k9d20Pz4nt/mSTryVsQ+L+G59ihjDziz408JZWaIm41fisIu0AYITxZ+5bDgHM1IXPkjYos+AT6Q==
latelee3:$7$101$jCVWCbIsbRNuP+zv$IGdfF/E5LVWxRUSk3a+x5AXks9tFFbN3R6cqBnoq+aHpQxvzqrcn8fJtuSz2e3uokZyiPTosumcTx15cyeqkpA==
待实现。
参考:https://www.ifsvc.cn/posts/160
六、高阶
挂载的文件,用户会变成1883,因为在镜像中设置了,但系统没有其对应的用户名。
镜像中的用户:
cat /etc/passwd
root:x:0:0:root:/root:/bin/ash
bin:x:1:1:bin:/bin:/sbin/nologin
daemon:x:2:2:daemon:/sbin:/sbin/nologin
mosquitto:x:1883:1883:mosquitto:/var/empty:/sbin/nologin
其中用户mosquitto的ID为1883。在镜像的启动脚本中更改了目录权限:
cat /docker-entrypoint.sh
#!/bin/ash
set -e

# Set permissions
user="$(id -u)"
if [ "$user" = '0' ]; then
        [ -d "/mosquitto" ] && chown -R mosquitto:mosquitto /mosquitto || true
fi

exec "$@"
七、参考
mqtt镜像:https://hub.docker.com/_/eclipse-mosquitto
附
如果没有指定端口,会提示:
1679721126: mosquitto version 2.0.15 starting
1679721126: Config loaded from /mosquitto/config/mosquitto.conf.
1679721126: Starting in local only mode. Connections will only be possible from clients running on this machine.
1679721126: Create a configuration file which defines a listener to allow remote access.
1679721126: For more details see https://mosquitto.org/documentation/authentication-methods/
1679721126: Opening ipv4 listen socket on port 1883.
1679721126: Opening ipv6 listen socket on port 1883.
1679721126: Error: Address not available
1679721126: mosquitto version 2.0.15 running
连接日志:
1679721710: New connection from 192.168.28.11:62840 on port 1883.
1679721710: New client connected from 192.168.28.11:62840 as mqttx_5607984c (p5, c1, k60, u'latelee').
1679721767: New connection from 192.168.28.11:62868 on port 1883.
1679721767: New client connected from 192.168.28.11:62868 as mqttx_67e55882 (p5, c1, k60, u'latelee').
使用MQTTX工具发送消息时,必须输入正确的 Topic,且不能带有“#”之类的通配符。