Hyperledger Fabric是Linux基金会发起的一种跨行业的区块链技术,目前在多家大型公司有着应用,这里就不多做HF本身的介绍了,有兴趣可关注其官网。
1. 准备工作:
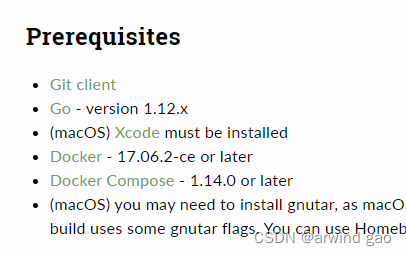
开始前需要一定的准备工作,安装各类中间件:
其中安装docker compose的时候如出现以下问题,可如此处理
问题:
command 'gcc' failed with exit status 1
yum install python-devel
问题:
Cannot uninstall 'requests'.
pip install docker-compose --ignore-installed requests
如果有需要可以安装cello、explorer两个管理工具,均为Hyperledger下的开源产品。
2. 本地网络部署(HF2.0+)
此模式一般用于用户学习Hyperledger Fabric网络,并尝试在本地运行起测试网络和代码编写,不在生产环境下使用,生产环境会使用k8s部署相关网络且一般仅仅需要合约或apiserver等内容。
1. 源码拷贝,最好在网络畅通的情况进行
2. 启动网络(couchdb+CA节点)
./byfn.sh up -a -s couchdb单独启动couchDB
docker-compose -f docker-compose-cli.yaml -f docker-compose-couch.yaml -f docker-compose-etcdraft2.yaml up -d3. 涉及到改动Hyperledger Fabric源码的,例如改掉其加密算法为国密,需要编译和打包,命令如下:
(1)Fabric编译 - 二级制文件及主要demo镜像
make dist-clean all(2)Fabric-node编译
cd docker
docker build -t hyperledger/fabric-nodeenv:latest .
(3)离线部署、一般情况
docker save -o fabric-tools.tar hyperledger/fabric-tools:latest
docker load --input fabric-tools21.rar
如出现save-load失败,如couchdb节点,使用export-import替代
docker export -o fabric-couchdb.tar couchdb1
docker import fabric-couchdb.tar hyperledger/fabric-couchdb:0.4.18
3. 智能合约安装(HF2.0+)
编写(或更新)完智能合约代码后,
(1)使用go build进行代码编译
(2)智能合约安装(需要每个节点执行)
peer lifecycle chaincode install record9.tar.gz
# 环境变量设置
export CC_PACKAGE_ID=record9:0305dad14704dbdd48c2650d35f45038452e0aa281541f463c37a0e293a266b4
(3)查询已安装合约
peer lifecycle chaincode queryinstalled(4)切换节点组织
CORE_PEER_MSPCONFIGPATH=/opt/gopath/src/github.com/hyperledger/fabric/peer/crypto/peerOrganizations/org2.example.com/users/[email protected]/msp
CORE_PEER_ADDRESS=peer0.org2.example.com:9051
CORE_PEER_LOCALMSPID="Org2MSP"
CORE_PEER_TLS_ROOTCERT_FILE=/opt/gopath/src/github.com/hyperledger/fabric/peer/crypto/peerOrganizations/org2.example.com/peers/peer0.org2.example.com/tls/ca.crt
(5)承认合约定义(需要每个组织执行)
peer lifecycle chaincode approveformyorg --channelID $CHANNEL_NAME --name {

   {test7}} --version 1.0 --init-required --package-id $CC_PACKAGE_ID --sequence 1 --tls true --cafile /opt/gopath/src/github.com/hyperledger/fabric/peer/crypto/ordererOrganizations/example.com/orderers/orderer.example.com/msp/tlscacerts/tlsca.example.com-cert.pem
(6)查看已承认合约的组织
peer lifecycle chaincode checkcommitreadiness --channelID $CHANNEL_NAME --name record9 --version 1.0 --init-required --sequence 1 --tls true --cafile /opt/gopath/src/github.com/hyperledger/fabric/peer/crypto/ordererOrganizations/example.com/orderers/orderer.example.com/msp/tlscacerts/tlsca.example.com-cert.pem --output json(7)提交合约定义至Channel
peer lifecycle chaincode commit -o orderer.example.com:7050 --channelID $CHANNEL_NAME --name record9 --version 1.0 --sequence 1 --init-required --tls true --cafile /opt/gopath/src/github.com/hyperledger/fabric/peer/crypto/ordererOrganizations/example.com/orderers/orderer.example.com/msp/tlscacerts/tlsca.example.com-cert.pem --peerAddresses peer0.org1.example.com:7051 --tlsRootCertFiles /opt/gopath/src/github.com/hyperledger/fabric/peer/crypto/peerOrganizations/org1.example.com/peers/peer0.org1.example.com/tls/ca.crt --peerAddresses peer0.org2.example.com:9051 --tlsRootCertFiles /opt/gopath/src/github.com/hyperledger/fabric/peer/crypto/peerOrganizations/org2.example.com/peers/peer0.org2.example.com/tls/ca.crt(8)合约初始化
peer chaincode invoke -o orderer.example.com:7050 --isInit --tls true --cafile /opt/gopath/src/github.com/hyperledger/fabric/peer/crypto/ordererOrganizations/example.com/orderers/orderer.example.com/msp/tlscacerts/tlsca.example.com-cert.pem -C $CHANNEL_NAME -n record9 --peerAddresses peer0.org1.example.com:7051 --tlsRootCertFiles /opt/gopath/src/github.com/hyperledger/fabric/peer/crypto/peerOrganizations/org1.example.com/peers/peer0.org1.example.com/tls/ca.crt --peerAddresses peer0.org2.example.com:9051 --tlsRootCertFiles /opt/gopath/src/github.com/hyperledger/fabric/peer/crypto/peerOrganizations/org2.example.com/peers/peer0.org2.example.com/tls/ca.crt -c '{"Args":["Init","a","100"]}' --waitForEvent(9)执行合约查询(代码已提供)
peer chaincode query -C $CHANNEL_NAME -n record9 -c '{"Args":["queryRecord","-2"]}'(10)执行合约调用(代码已提供)
peer chaincode invoke -o orderer.example.com:7050 --tls true --cafile /opt/gopath/src/github.com/hyperledger/fabric/peer/crypto/ordererOrganizations/example.com/orderers/orderer.example.com/msp/tlscacerts/tlsca.example.com-cert.pem -C $CHANNEL_NAME -n record9 --peerAddresses peer0.org1.example.com:7051 --tlsRootCertFiles /opt/gopath/src/github.com/hyperledger/fabric/peer/crypto/peerOrganizations/org1.example.com/peers/peer0.org1.example.com/tls/ca.crt --peerAddresses peer0.org2.example.com:9051 --tlsRootCertFiles /opt/gopath/src/github.com/hyperledger/fabric/peer/crypto/peerOrganizations/org2.example.com/peers/peer0.org2.example.com/tls/ca.crt -c '{"Args":["createRecord","-2","0","test file hash","10000", "2020-2-13 10:11:00"]}' --waitForEvent3. ApiServer安装及部署(HF2.0+)
apiserver部署比较多样化,根据使用的语言go、java、nodejs不同而有所区别,这里主要介绍下大体步骤,实际脚本就不放了。
1. 修改生成镜像文件的配置参数,或填写输入变量(如已经搭建CI平台)
2. 生成镜像(例如./buildImages.sh apiserver 1.0)
3. 生成编译工具(makeYaml)
4. 生辰配置文件 ,合约识别名/网络名/组织识别名/暴露的ip+端口/国密-非国密(取决于网络),使用第三步的编译工具进行
5. 拷贝client_sdk.yaml/crypto-config到deploy文件夹下
6. 启动镜像(docker compose)
7. 反向代理设置