目录
一、Canvas签名画板
1.1、效果展示

1.2、代码分析
<style>
        button.active {
            color: #fff;
            background-color: orange;
</style>
<body>
    <canvas id="MyCanvas" width="600" height="400"></canvas>
    <hr>
    <button id="boldBtn" type="button">粗线条</button>
    <button id="thinBtn" type="button">细线条</button>
    <button id="saveBtn" type="button">保存签名</button>
    <input type="color" id="color">
    <button class="clearBtn" type="button">橡皮擦</button>
    <button id="nullBtn" type="button">清空画布</button>
    <script>
        var canvas = document.getElementById("MyCanvas");
        var ctx = canvas.getContext("2d");
        ctx.lineJoin = 'round';//连接处圆润
        ctx.lineCap = 'round'//开端与终端圆润
        // 设置画笔粗细
        var boldBtn = document.querySelector("#boldBtn")
        var thinBtn = document.querySelector("#thinBtn")
        // 设置颜色
        var inputColor = document.querySelector("#color")
        // 保存签名
        var saveBtn = document.querySelector("#saveBtn")
        // 橡皮擦按钮
        var clearBtn = document.querySelector(".clearBtn")
        // 清空画布
        var nullBtn = document.querySelector("#nullBtn")
        // 设置允许绘制的变量
        var isDraw = false;
        // 鼠标按下开始画线
        canvas.onmousedown = function () {
            isDraw = true;
            ctx.beginPath();
            var x = event.pageX - canvas.offsetLeft;
            var y = event.pageY - canvas.offsetTop;
            ctx.moveTo(x, y)
        }
        // 鼠标抬起/离开,操作停止(防止画线操作粘连)
        canvas.onmouseleave = function () {
            isDraw = false;
            ctx.closePath()
        }
        canvas.onmouseup = function () {
            isDraw = false;
            ctx.closePath()
        }
        // 鼠标移动,继续画线
        canvas.onmousemove = function () {
            if (isDraw) {
                var x = event.pageX - canvas.offsetLeft;
                var y = event.pageY - canvas.offsetTop;
                ctx.lineTo(x, y);
                ctx.stroke()
            }
        }
        // 粗细画笔点击事件,线条宽度改变
        boldBtn.onclick = function () {
            ctx.globalCompositeOperation = 'source-over';
            ctx.lineWidth = 20;
            boldBtn.classList.add('active')
            thinBtn.classList.remove('active')
            clearBtn.classList.remove('active')
        }
        thinBtn.onclick = function () {
            ctx.globalCompositeOperation = 'source-over';
            ctx.lineWidth = 2;
            thinBtn.classList.add('active')
            boldBtn.classList.remove('active')
            clearBtn.classList.remove('active')
        }
        // 橡皮擦
        clearBtn.onclick = function () {
            ctx.globalCompositeOperation = 'destination-out';//合成模式(刮刮卡)
            ctx.lineWidth = 30;
            clearBtn.classList.add('active')
            boldBtn.classList.remove('active')
            thinBtn.classList.remove('active')
        }
        // 画布清除
        nullBtn.onclick = function () {
            ctx.clearRect(0, 0, 600, 400)
            nullBtn.classList.add('active')
        }
        // 保存
        saveBtn.onclick = function () {
            var urlData = canvas.toDataURL();
            var downloadA = document.createElement('a');
            downloadA.setAttribute('download', '酷炫签名');
            downloadA.href = urlData;
            downloadA.click()
            saveBtn.classList.add('active')
        }
        // 颜色设置
        inputColor.onchange = function () {
            ctx.strokeStyle = inputColor.value
        }
    </script>
</body>
总结:
(1)首先创造一个画板,获取要操作的元素。(2)改变画笔粗细与颜色在控制台可以打印ctx,获取到它里面的具体属性,在点击事件触发的时候,改变的属性值即可;
(3)橡皮擦其实就是元素的合成,将新元素覆盖在旧的元素上即可;
(4)清空画布直接clearRect;
(5)内容保存:toDataURL()方法返回一个包含图片展示的 data URI ,相当于将画布转换为图片,将地址放在a标签里进行点击,就达到了类似图片下载的效果。
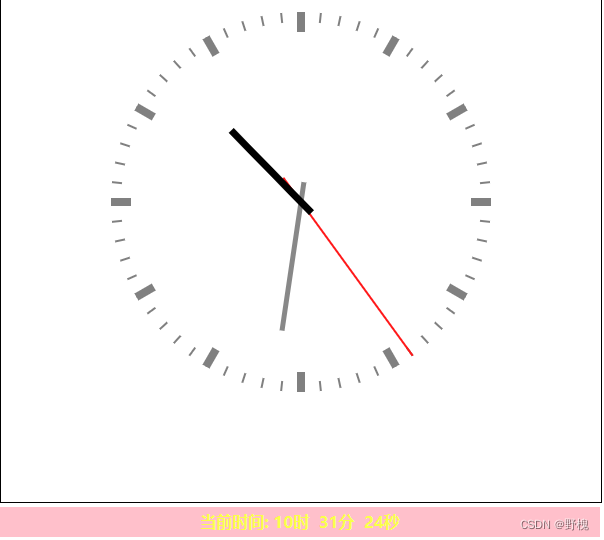
二、Canvas绘制动态时钟
2.1、效果展示
2.2、代码分析
<canvas id="MyCanvas" width="600" height="600"></canvas>
<div class="timeClock">
<span>当前时间:</span>
<span class="hourbox"></span>
<span class="minubox"></span>
<span class="secondsbox"></span>
</div>
<script>
var canvas = document.getElementById("MyCanvas");
var ctx = canvas.getContext("2d");
function render() {
ctx.clearRect(0, 0, 600, 600)
// 存档 保存当前坐标位置和上下文对象的状态
ctx.save()
ctx.translate(300, 300)
ctx.rotate(-Math.PI / 2)
ctx.save()
for (var i = 0; i < 12; i++) {
// 绘制小时的刻度
ctx.beginPath();
ctx.moveTo(170, 0);
ctx.lineTo(190, 0);//画一条竖线(170-190)
ctx.lineWidth = 8;
ctx.strokeStyle = 'gray';
ctx.stroke();
ctx.closePath();
ctx.rotate(2 * Math.PI / 12);//12个方向,旋转30度
}
ctx.restore()
ctx.save()
for (var i = 0; i < 60; i++) {
// 绘制分钟的刻度
ctx.beginPath();
ctx.moveTo(180, 0);
ctx.lineTo(190, 0);//画一条竖线(180-190)
ctx.lineWidth = 2;
ctx.strokeStyle = 'gray';
ctx.stroke();
ctx.closePath();
ctx.rotate(2 * Math.PI / 60);//60个方向,旋转6度
}
ctx.restore()
ctx.save()
// 获取当前时间
var time = new Date()
var hour = time.getHours();
var min = time.getMinutes();
var sec = time.getSeconds();
hour = hour >= 12 ? hour - 12 : hour;
// 绘制秒针
ctx.rotate(2 * Math.PI / 60 * sec)
ctx.beginPath();
ctx.moveTo(-30, 0);
ctx.lineTo(190, 0);//画一条竖线(-30~190)
ctx.lineWidth = 2;
ctx.strokeStyle = 'red';
ctx.stroke();
ctx.closePath();
ctx.restore()
ctx.save()
// 绘制分针
ctx.rotate(2 * Math.PI / 60 * min + 2 * Math.PI / 60 / 60 * sec)
ctx.beginPath();
ctx.moveTo(-20, 0);
ctx.lineTo(130, 0);//画一条竖线(-20~130)
ctx.lineWidth = 5;
ctx.strokeStyle = '#888';
ctx.stroke();
ctx.closePath();
ctx.restore()
ctx.save()
// 绘制时针
ctx.rotate(2 * Math.PI / 12 * hour + 2 * Math.PI / 12 / 60 * min + 2 * Math.PI / 12 / 60 / 60 * sec)
ctx.beginPath();
ctx.moveTo(-15, 0);
ctx.lineTo(100, 0);//画一条竖线(-15~110)
ctx.lineWidth = 7;
ctx.strokeStyle = '#000';
ctx.stroke();
ctx.closePath();
ctx.restore()
ctx.restore()
requestAnimationFrame(render);
var box1 = document.querySelector(".hourbox")
var box2 = document.querySelector(".minubox")
var box3 = document.querySelector(".secondsbox")
box1.innerHTML = `${hour}时`
box2.innerHTML = `${min}分`
box3.innerHTML = `${sec}秒`
}
render()
</script>总结:
(1)时钟的刻度:小时有12个,分钟有60个,都是先画出一条竖着的短线【moveTo结合lineTo】,在循环里进行相应角度的旋转【rotate】;
(2)获取当前时间【getHours、getMinutes、getSeconds】;
(3)绘制秒针、分针、时针:先旋转对应的时间点上rotate,再勾画出自己的样式(比如秒针:2 * Math.PI / 60 * sec===360/60*当前秒数值,就是秒针要在的位置)
(4)让时钟自己动:借助render函数,每次执行前先将画布清空clearRect
js、vue等其他语言也可以实现动态时钟,思路差不多。