简单的编译so动态库例子。
该例子虽然简单,但是不得不说还是弄了很久,很多坑会踩到。虽然不是第一次接触jni,但是这次是印象最深的一次,大家也可以动动手加深记忆。如有不对的地方,欢迎指正~
在Android Studio中编译so库可以用ndk-build和cmake,另外用cygwin(window模拟Linux环境)也可以编译so库。
1.配置NDK环境
- 下载NDK,通过Android Studio SDKManager下载,选中ndk点击ok进行下载。

图1
- 在https://developer.android.google.cn/ndk/downloads/上手动下载ndk,根据自己的电脑下载对应的版本。如果网址不对,百度搜索“NDK下载”。将下载好的压缩包解压,在工程里打开“Project Structure”,选择NDK位置为NDK解压后的目录,如图4。NDK环境配置就ok了。

图2

图3

图4
2.新建工程,JNIDemo,按照上面配置好该工程的NDK,否则会提示没有配置该项目的NDK。创建一个java类,JniTest,内容如下:
package com.example.jnidemo;

public class JniTest {
    static {
        System.loadLibrary("JniTest");
    }

    public native String jniHelloWorld();
}
图5
3.rebuild一下工程,查看JniTest.java是否有生成JniTest.class文件,我使用Android studio3.0 检查以下目录,app/build/intermediates/javac/debug/compileDebugJavaWithJavac/classes/com/example/jnidemo/JniTest.class,如图6。别的版本studio可能是该目录,
“JNIDemo/app/build/intermediates/classes/debug/com/example/jnidemo/JniTest.class”.

图6
4. 使用javah生成.h文件。
- 打开Terminal。
- 将目录打开至app\src\main下,如图7。

图7
- 使用命令,javah -d jni -classpath 生成的JniTest.class绝对目录,来生成.h文件。
获得JniTest.class的绝对路径的上一级目录,最后的包名和类名手打上去,如图8。
完整命令(注意classes后面有空格),如图9:
“javah -d jni -classpath D:\workplace\JNIDemo\app\build\intermediates\javac\debug\compileDebugJavaWithJavac
\classes com.example.jnidemo.JniTest”
注意:要让生成的jni文件夹和java文件夹在同一目录级,否则会生成不了so文件。生成的.h文件和目录结构 如图10。.h文件内容如图11.

图8
 图9
图9

图10

图11
5. 编写.c文件。
将.h文件通过"#include "com_example_jnidemo_JniTest.h" "包含进来。
将头文件中的方法实现,如图12。内容如下:
//
// Created by Lee on 2019/2/17.
//
#include "com_example_jnidemo_JniTest.h"
JNIEXPORT jstring JNICALL Java_com_example_jnidemo_JniTest

_jniHelloWorld
  (JNIEnv *env, jobject obj){
        return (*env)->NewStringUTF(env,"JNI helloworld");
} 
图12
6.rebuild工程,运行,出现如下错误,如图13:
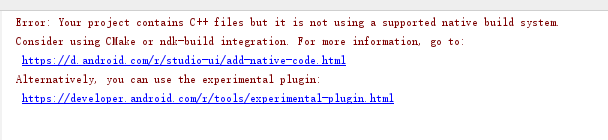
图13
在项目的gradle.properties中加入 android.useDeprecatedNdk=true,如图15.

图14

图15
出现新错误:
Error: Flag android.useDeprecatedNdk is no longer supported and will be removed in the next version of Android Studio. Please switch to a supported build system.
Consider using CMake or ndk-build integration. For more information, go to:
https://d.android.com/r/studio-ui/add-native-code.html#ndkCompile
To get started, you can use the sample ndk-build script the Android
plugin generated for you at:
D:\workplace\JNIDemo\app\build\intermediates\ndk\debug\Android.mk
Alternatively, you can use the experimental plugin:
https://developer.android.com/r/tools/experimental-plugin.html
To continue using the deprecated NDK compile for another 60 days, set
android.deprecatedNdkCompileLease=1550382670665 in gradle.properties

图16
大概意思android.useDeprecatedNdk=true不久之后将不再支持使用,而且可能在下个Android studio中会被移除。可以使用CMake或者是ndk-build。或者使用android.deprecatedNdkCompileLease=1550382670665来继续使用60天。
所以可以将android.deprecatedNdkCompileLease=1550382670665替代android.useDeprecatedNdk=true来使用。rebuilde项目,会在intermediates目录下的ndk目录中得到so动态库。下面也会使用Cmake来解决。
使用Cmake的方法:
- 下载Cmake和LLDB,直接在sdkmanager上下载就行了。如图17.也可以在百度下载,配置好环境变量之后就能使用了。

图17
- 在app的build.gradle文件中的defaultConfig标签下增加:
externalNativeBuild {
    cmake {
        cppFlags ""
        //生成多个版本的so文件
        abiFilters 'arm64-v8a', 'armeabi-v7a','x86'
    }
}
在android标签下增加:
externalNativeBuild{
    cmake{
        path "CMakeLists.txt"
    }
}
CMakeLists.txt用于设置要编译的C源码文件和编译后so库的文件名。
- 添加CMakeLists.txt问价到app目录下(注意:要和app目录下build.gradle文件同级,否则会出现问题,本人因为放错目录卡了很久),CMakeLists.txt文件的内容如下,如图18,图19:
# For more information about using CMake with Android Studio, read the
# documentation: https://d.android.com/studio/projects/add-native-code.html

# Sets the minimum version of CMake required to build the native library.
#CMakeLists.txt
cmake_minimum_required(VERSION 3.4.1)

# Creates and names a library, sets it as either STATIC
# or SHARED, and provides the relative paths to its source code.
# You can define multiple libraries, and CMake builds them for you.
# Gradle automatically packages shared libraries with your APK.

add_library( # Sets the name of the library.
      # 设置so文件名称.
       JniTest

       # Sets the library as a shared library.
       SHARED
       # 设置这个so文件为共享.

       # Provides a relative path to your source file(s).
       # 要编译的文件
       src/main/jni/main.c)

# Searches for a specified prebuilt library and stores the path as a
# variable. Because CMake includes system libraries in the search path by
# default, you only need to specify the name of the public NDK library
# you want to add. CMake verifies that the library exists before
# completing its build.

find_library( # Sets the name of the path variable.
       log-lib

       # Specifies the name of the NDK library that
       # you want CMake to locate.
       log )

# Specifies libraries CMake should link to your target library. You
# can link multiple libraries, such as libraries you define in this
# build script, prebuilt third-party libraries, or system libraries.

target_link_libraries( # Specifies the target library.
            # 制定目标库.
            JniTest

            # Links the target library to the log library
            # included in the NDK.
${log-lib} ) 
图18

图19
- rebuild工程,出现so动态库,如图20。

图20
- 运行项目
