之前的文章中讲解了SpringBoot整合freemarker,本篇文章我们主要来看看SpringBoot整合thymeleaf。
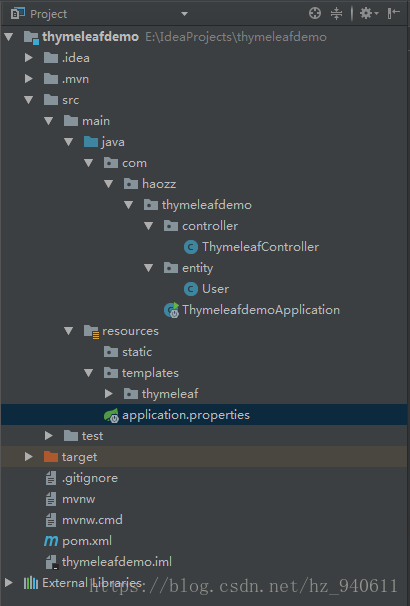
先来看一下项目文件目录:
首先,pom.xml中导入thymeleaf的依赖:
<!--引入thymeleaf的依赖-->
<dependency>
    <groupId>org.springframework.boot</groupId>
    <artifactId>spring-boot-starter-thymeleaf</artifactId>
</dependency>
在资源配置文件中加入thymeleaf相关配置:
##############################################
#
# thymeleaf静态资源配置
#
##############################################
# 默认路径
spring.thymeleaf.prefix=classpath:/templates/
# 后缀
spring.thymeleaf.suffix=.html
# 模板格式
spring.thymeleaf.mode=HTML5
spring.thymeleaf.encoding=UTF-8
spring.thymeleaf.content-type=text/html
spring.thymeleaf.cache=false
这里指定了thymeleaf文件的路径是classpath/templates,在resources文件夹下的templates新建thymeleaf文件夹,并且在其中新建index.html:
<!DOCTYPE html>
<html lang="en" xmlns:th="http://www.w3.org/1999/xhtml">
<head>
    <meta charset="UTF-8">
    <title>Title</title>
</head>
<body>
Thymeleaf模板引擎
<h1 th:text="${name}">hello world~~~~~~~~~~${name}</h1>
</body>
</html>
新建ThymeleafController控制器类:
package com.haozz.thymeleafdemo.controller;

import org.springframework.stereotype.Controller;
import org.springframework.ui.ModelMap;
import org.springframework.web.bind.annotation.RequestMapping;


@Controller
@RequestMapping(value="/th")
public class ThymeleafController {

    @RequestMapping("/index")
    public String index(ModelMap map){
        map.addAttribute("name","haozz");
        return "thymeleaf/index";
    }
}
浏览器请求:
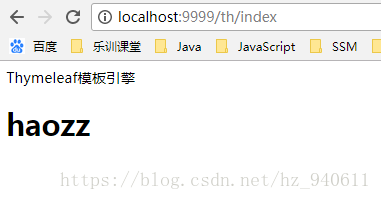
可以看到,index.html中h1标签中的hello world并没有显示出来,而是被EL表达式所代替,key和value都在ThymeleafController中初始化(非常适合做前后端动静分离)。其中,th:text是thymeleaf自己的标签写法。下面我们来看看thymeleaf中常用标签的写法。
ThymeleafController中加入如下方法:
@RequestMapping("/test")
    public String test(ModelMap map){
        User u = new User();
        u.setName("haozz");
        u.setAge(24);
        u.setPassword("qwerty");
        u.setBirthday(new Date());
        u.setDesc("<font color='green'><b>talk is cheap, show me the code</b></font>");

        User u1 = new User();
        u1.setName("nico robin");
        u1.setAge(35);
        u1.setPassword("qwerty");
        u1.setBirthday(new Date());
        u1.setDesc("<font color='green'><b>talk is cheap, show me the code</b></font>");

        User u2 = new User();
        u2.setName("nami");
        u2.setAge(27);
        u2.setPassword("qwerty");
        u2.setBirthday(new Date());
        u2.setDesc("<font color='green'><b>talk is cheap, show me the code</b></font>");

        List<User> userList = new ArrayList<>();
        userList.add(u);
        userList.add(u1);
        userList.add(u2);
        map.addAttribute("user",u);
        map.addAttribute("userList",userList);
        return "thymeleaf/test/test";
    }

    @PostMapping("/postform")
    public String postform(User u){
        System.out.println(u.getName());
        return "redirect:/th/test";
    }
这里的User只是一个普通的JavaBean,不做过多赘述。
在相应路径下新建test.html:
<!DOCTYPE html>
<html lang="en" xmlns:th="http://www.w3.org/1999/xhtml" xmlns:method="http://www.w3.org/1999/xhtml">
<head>
    <meta charset="UTF-8">
    <title>Title</title>
</head>
<body>

<div>
    用户姓名:<input th:id="${user.name}" th:name="${user.name}" th:value="${user.name}"/>
    <br/>
    用户年龄:<input th:value="${user.age}"/>
    <br/>
    用户生日:<input th:value="${user.birthday}"/>
    <br/>
    用户生日:<input th:value="${#dates.format(user.birthday,'yyyy-MM-dd')}"/><!--时间格式转换-->
    <br/>
</div>
<br/>
<div th:object="${user}"><!--定义一个对象,指定为user,下面的user都可以省略不写-->
    用户姓名:<input th:id="*{name}" th:name="*{name}" th:value="*{name}"/>
    <br/>
    用户年龄:<input th:value="*{age}"/>
    <br/>
    用户生日:<input th:value="*{#dates.format(birthday,'yyyy-MM-dd')}"/><!--时间格式转换-->
    <br/>
</div>
<br/>
th:text与th:utext<br/>
<span th:text="${user.desc}"></span><!--th:text 不会进行转译-->
<br/>
<span th:utext="${user.desc}"></span><!--th:utext 会进行转译-->
<br/>
<br/>
URL:<br/>
<a th:href="@{http://www.haozz.top:18158}" th:target="_blank">多多关照</a>
<br/>
<br/>
<form th:action="@{/th/postform}" th:object="${user}" th:method="post"><!--表单提交-->
    <input type="text" th:field="*{name}"/><!--th:field="*{name}"相当于id="name" name="name" value="具体的name值"-->
    <input type="submit"/>
</form>
<br/>
<br/>
<div th:if="${user.age lt 25}">young</div><!--lt 小于-->
<div th:if="${user.age ge 25}">old</div><!--ge 大于等于-->
<br/>
<br/>
<table>
    <tr>
        <th>姓名</th>
        <th>年龄</th>
        <th>备注</th>
        <th>生日</th>
    </tr>
    <tr th:each="person:${userList}"><!--循环userList,以person作为形参-->
        <td th:text="${person.name}"></td>
        <td th:text="${person.age}"></td>
        <td th:text="${person.age ge 25} ? old : young"></td>
        <td th:text="${#dates.format(person.birthday,'yyyy-MM-dd hh:mm:ss')}"></td>
    </tr>
</table>
<br/>
<br/>
<div th:switch="${user.name}">
    <p th:case="'haozz'">最帅的</p>
    <p th:case="'nico robin'">妮可罗宾</p>
    <p th:case="'nami'">娜美</p>
</div>
</body>
</html>
浏览器请求:
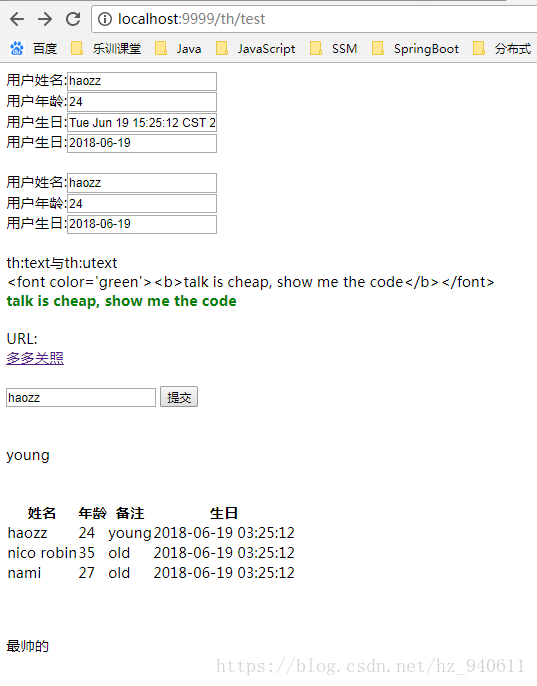
浏览器中查看元素,可以看到元素中的各项属性值都已经覆上了。
此外,还有th:unless(与th:if相反),th:selected(用于select选择框)标签等。