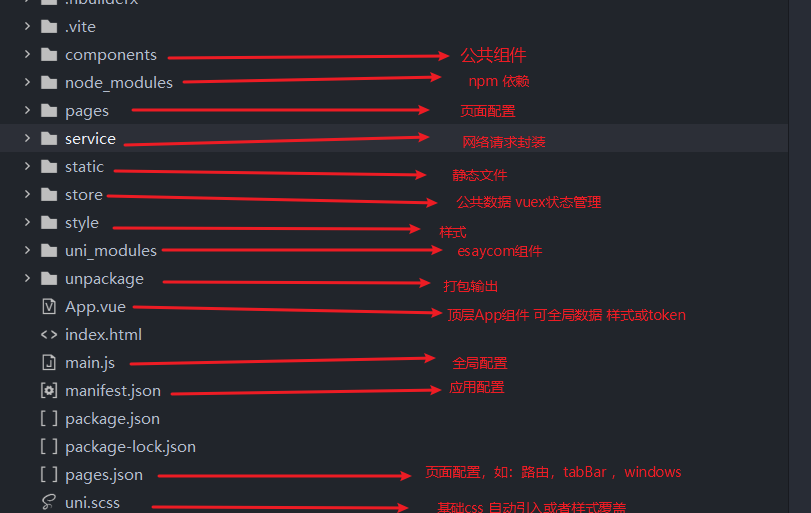
文章目录
1. 项目构建
1.1 脚手架构建
- 全局安装脚手架
- npm install -g @vue/cli@4 (切记安装4.x.x的版本)
- 创建项目
vue create -p dcloudio/uni-preset-vue my-project
- 默认模板

- 执行命令参考
package.json
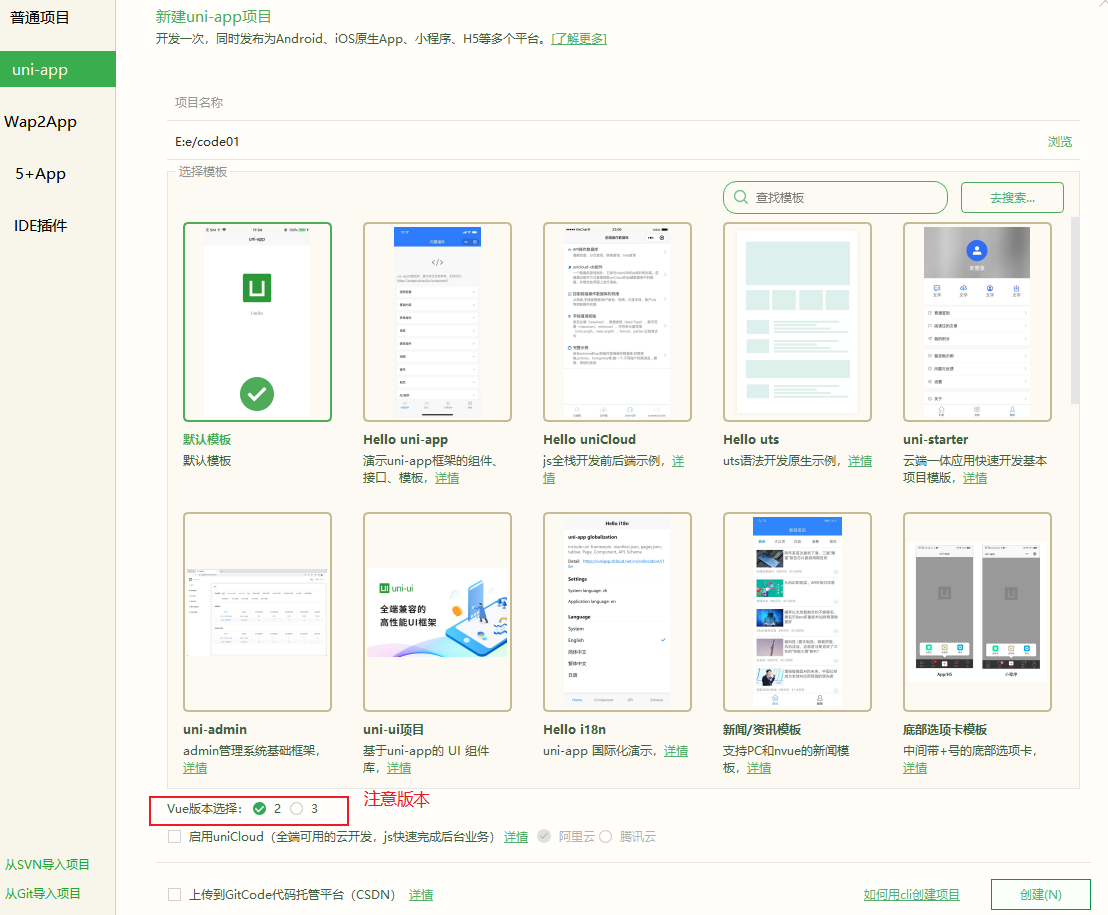
1.2 HBuilderX创建 uni-app项目步骤:
- 点工具栏里的文件 -> 新建 -> 项目
2 . 包依赖
2.1 uView
- 安装依赖 (注意:项目名称不能有中文字符)
   // 安装sass
   npm i sass -D

   // 安装sass-loader,注意需要版本10,否则可能会导致vue与sass的兼容问题而报错
   npm i sass-loader@10 -D

   // 安装uview-ui
   npm install uview-ui@2.0.31
- 全局引入uview js库
main.js
   import uView from "uview-ui";
   Vue.use(uView);
- 全局引入uView的全局SCSS主题文件
   /* uni.scss */
   @import 'uview-ui/theme.scss';
- 全局引入uview 基础样式
   // 在App.vue中首行的位置引入,注意给style标签加入lang="scss"属性
   <style lang="scss">
   	/* 注意要写在第一行,同时给style标签加入lang="scss"属性 */
   	@import "uview-ui/index.scss";
   </style>
- 配置easycom模式引入uview组件
   // pages.json
   {


   	"easycom": {


   		"^u-(.*)": "uview-ui/components/u-$1/u-$1.vue"
   	},
   	// 此为本身已有的内容
   	"pages": [
   		// ......
   	]
   }
- 配置vue.config.js文件
   // vue.config.js,如没有此文件则手动创建 放入项目根目录下
   module.exports = {


       transpileDependencies: ['uview-ui']
   }
- 使用uview组件
   <u-button type="primary" :disabled="disabled" text="禁用"></u-button>
   <u-button type="primary" loading loadingText="加载中"></u-button>
   <u-button type="primary" icon="map" text="图标按钮"></u-button>
   <u-button type="primary" shape="circle" text="按钮形状"></u-button>
   <u-button type="primary" size="small" text="大小尺寸"></u-button>
2.2 使用uni原生ui插件
- 安装sass 及 sass-loader
npm i sass -D
npm i sass-loader@10.1.1 -D
- 安装uni-ui
npm install @dcloudio/uni-ui
- 使用
<script>
   import  {

    uniBadge}  from  '@dcloudio/uni-ui'
   export default  {


				components:   {

    uniBadge}
   }
</script>
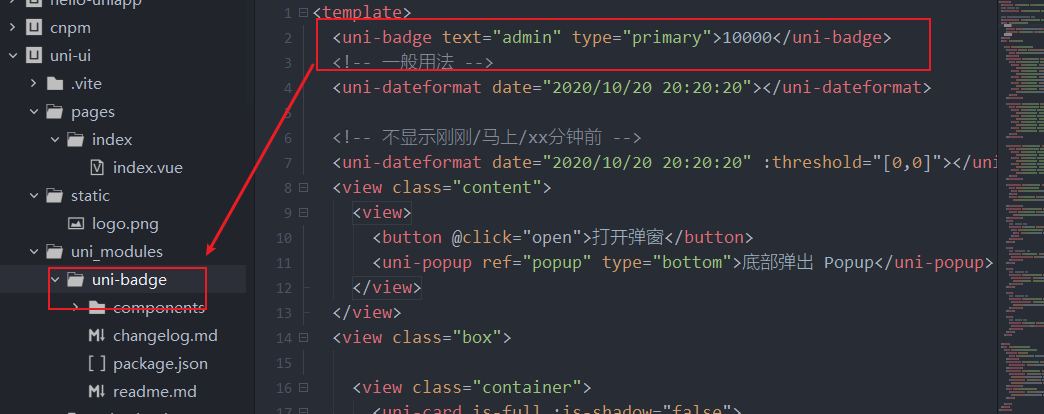
2.3 uni-modules
- 通过 uni_modules(插件模块化规范)单独安装组件,或通过 uni_modules 按需安装某个组件
- node_modules与uni_modules区别
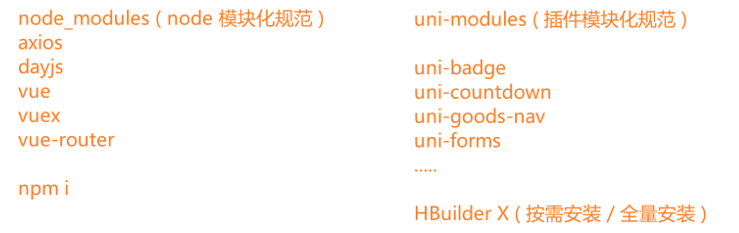
- 具体引入参考
2.4 vuex使用
- vuex是基于vue框架的一个状态管理库。可以管理复杂应用的数据状态,比如兄弟组件的通信、多层嵌套的组件的传值等等。核心概念 State、Getter、Mutation、Action、Module。

- 安装
npm install vuex --save 先安装依赖
- 新建 store/index.js
// 导入 vue 和 vuex
import Vue from 'vue'
import Vuex from 'vuex'

// 以插件形式使用 vuex
Vue.use(Vuex)

// Vuex.Store 构造器选项
const store = new Vuex.Store({


  state: {


    username: 'foo',
    age: 18,
  },
})

export default store
- main.js 引入
import store from './store';
Vue.config.productionTip = false
Vue.use(uView);
App.mpType = 'app'

const app = new Vue({


  // 把 store 的实例注入所有的子组件
  store,
  ...App
})
app.$mount()
- 具体使用说明参考 vuex
3.跨平台兼容
3.1 条件编译
- 不同的平台展示不同特性与功能
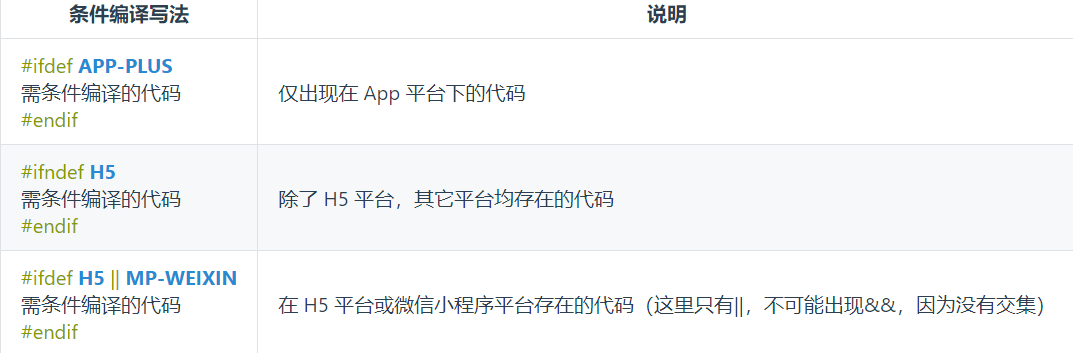
- 条件编译是用特殊的注释作为标记,在编译时根据这些特殊的注释,将注释里面的代码编译到不同平台。
- 官网配置参考
以
#ifdef 或 #ifndef 加 %PLATFORM%开头,以#endif结尾。
#ifdef:if defined 仅在某平台存在
#ifndef:if not defined 除了某平台均存在
%PLATFORM%:平台名称
- uni.getSystemInfo 区分
Android和iOS
<template>
	<!-- 条件编译支持样式,支持js与Ui -->
	<view class="content">
		<!-- #ifdef H5 -->
		<image class="logo" src="/static/logo.png"></image>
		<view class="text-area">
			<text class="title">{

    {

    title}}</text>
		</view>
		<!-- 条件编译 -->
		<!-- #endif -->
		<!-- APP-PLUS有 多端用或|| -->
		<!-- #ifndef APP-PLUS || H5 -->
		<!-- #endif -->
	</view>
</template>

<script>
	export default {


		data() {


			return {


				title: 'Hello'
			}
		},
		onLoad() {


			// 方法里面也一样使用
			// #ifdef APP-PLUS
			// #endif
		switch(uni.getSystemInfoSync().platform){


   case 'android' :
  		console.log('运行在Android上')
  		break;
  case 'ios' :
  		console.log('运行在IOS上')
  		break;
  default :
  		console.log('运行在开发者工具上')
  		break;
  		}

		},
	}
</script>
4.API 使用
4.1 正逆参数传递
- index.vue
<template>
	<view class="content">
		<navigator url="/pages/home/home?name=admin">跳转</navigator>
		<button @click="hyChange()">事件跳转</button>
	</view>
</template>

<script>
	export default {


		data() {


			return {


				title: 'Hello'
			}
		},
		methods: {


			hyChange() {


				uni.navigateTo({


					url: '/pages/home/home?name=admin&psd=12346678',
					// 触发这个事件成功时的传递参数
					success(res) {


						res.eventChannel.emit('hyPageHome', {


							data: '触发成功跳转传递的事件'
						})
					},
					events: {


						backEvent(data) {


							console.log('逆序参数', data);
						}
					}
				})
			}
		}
	}
</script>

<style>
</style>
- home.vue
<template>
	<view>
		<button type="default">home</button>
		<button type="warn" size="mini" @click="hyIndex">逆向传递</button>
	</view>
</template>

<script>
	export default {


		data() {


			return {


			}
		},
		// 正向传参
		onLoad(options) {


			console.log('@参数', options);
			const eventChannel = this.getOpenerEventChannel()
			eventChannel.on('hyPageHome', res => {


				console.log(res);
			})
		},

		methods: {


			// 逆向传参
			hyIndex() {


				uni.navigateBack()
				const eventChannel = this.getOpenerEventChannel()
				eventChannel.emit('backEvent', {


					name: 'admin',
					pad: 'password'
				})
			}
		}
	}
</script>

<style>

</style>
5. 接口封装
6. 多端打包
3.1 微信小程序
3.2 打包App
3.2.1 自有证书-申请
- 下载安装jre并配置环境变量 (这里不做配置)
bin\jlink.exe --module-path jmods --add-modules java.desktop --output jre
- 使用keytool -genkey命令生成证书
estalias是后面在hbuilder上要填的 证书别名
test.keystore是后面在hbuilder上要填的 证书文件
自己输入的密钥库口令 是后面在hbuilder上要填的 证书私钥密码 (比如123456)
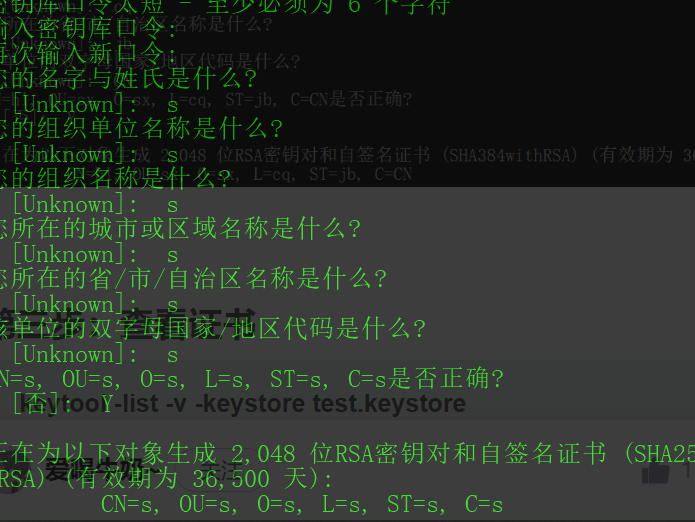
3. 查看证书
keytool -list -v -keystore test.keystore
- 配置
注意导入的证书文件是test.keystore