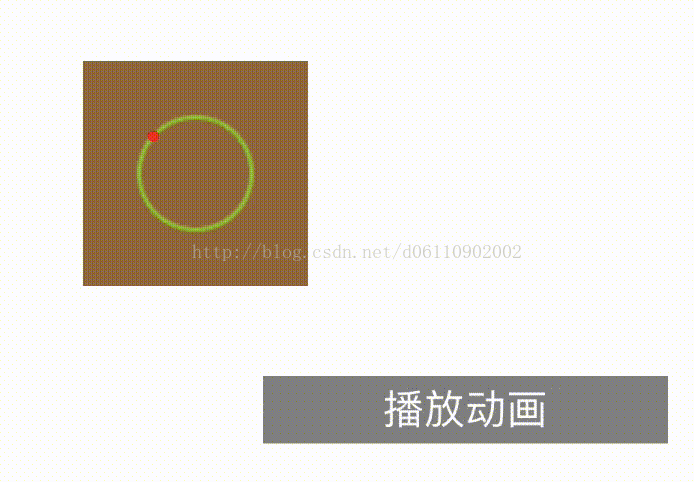
效果图如下:
android的做法是,扩展一个View然后画一个圆点,再通过一个动画来不改变这个圆点的座标即可。
IOS的做法一:展示这个小圆点方法同android,但是圆点的座标变换通过定时器,代码如下:
-(void) playAnim{

    NSDate *scheduledTime = [NSDate dateWithTimeIntervalSinceNow:0];
    NSTimer *timer = [[NSTimer alloc] initWithFireDate:scheduledTime
                                              interval:0.00000001
                                                target:self
                                              selector:@selector(task)
                                              userInfo:nil
                                               repeats:YES];
    NSRunLoop *runLoop = [NSRunLoop currentRunLoop];
    [runLoop addTimer:timer forMode:NSDefaultRunLoopMode];


}

-(void)task {
    self.dAngle += 1;
    [self setNeedsDisplay];

}

-(void) stopAnim{


}

-(void) drawInContext:(CGContextRef)ctx{


    //画圆
    CGContextSetRGBStrokeColor(ctx,0.52f, 0.76f, 0.07f, 1.0f);

    CGContextSetLineWidth(ctx, 2.0);

    //    CGContextAddArc(ctx, self.frame.size.width / 2 - 10, self.frame.size.height / 2, 25, 0, PI, 0);
    //
    //    CGContextAddArc(ctx, self.frame.size.width / 2 + 10, self.frame.size.height / 2, 25, 0, PI, 0);


    /*
     CGContextRef c:上下文
     CGFloat x :x,y圆弧所在圆的中心点坐标
     CGFloat y :x,y圆弧所在圆的中心点坐标
     CGFloat radius :所在圆的半径
     CGFloat startAngle : 圆弧的开始的角度  单位是弧度  0对应的是最右侧的点;
     CGFloat endAngle  : 圆弧的结束角度
     int clockwise : 顺时针(0) 或者 逆时针(1)
     */
    CGContextAddArc(ctx, self.frame.size.width / 2, self.frame.size.height / 2, 25, 0,  2 * PI, 0);

    CGContextDrawPath(ctx, kCGPathStroke);


    //画一个圆点,,将上面的定时器开启可以达到圆点绕圆周运动
    CGContextSetRGBStrokeColor(ctx,0.12f, 0.26f, 0.07f, 1.0f);
    CGContextAddArc(ctx,
                    self.frame.size.width / 2 + cos(self.dAngle * PI / 180) * 25,
                    self.frame.size.height / 2 + sin(self.dAngle * PI / 180) * 25,
                    5,
                    0,
                    2 * PI,
                    0);
    CGContextDrawPath(ctx, kCGPathFillStroke);

}


@end
这种方法的缺点是是,小圆点的座标改变是线性变化,如果想达到淡入淡出的效果,需要自己支写动画插值器,难度有点大, 不推荐使用此方法。
针对方法一中的缺点,方法二有能有效解决这个问题。
方法二: 使用
CAKeyframeAnimation+UIBezierPath
其中UIBezierPath作为小圆点的运动轨迹,CAKeyframeAnimation则用来改变小圆点的座标,在IOS中提供了几种动画运行的效果,很容易实现淡入淡出的效果。
其中,小圆点的运动轨迹应该与外面那个圆环一致,为了方便操作,将小圆点所在的图层作为圆环的子图层就可以不用进行座标转换,如果2个图片层为兄弟关系就需要进行座标转换,这里大家稍微想想就很容易明白,为什么需要座标转换。
外面圆环的代码,:只要绘图方法即可,
-(void) drawInContext:(CGContextRef)ctx{


    //画圆
    CGContextSetRGBStrokeColor(ctx,0.52f, 0.76f, 0.07f, 1.0f);

    CGContextSetLineWidth(ctx, 2.0);

    //    CGContextAddArc(ctx, self.frame.size.width / 2 - 10, self.frame.size.height / 2, 25, 0, PI, 0);
    //
    //    CGContextAddArc(ctx, self.frame.size.width / 2 + 10, self.frame.size.height / 2, 25, 0, PI, 0);


    /*
     CGContextRef c:上下文
     CGFloat x :x,y圆弧所在圆的中心点坐标
     CGFloat y :x,y圆弧所在圆的中心点坐标
     CGFloat radius :所在圆的半径
     CGFloat startAngle : 圆弧的开始的角度  单位是弧度  0对应的是最右侧的点;
     CGFloat endAngle  : 圆弧的结束角度
     int clockwise : 顺时针(0) 或者 逆时针(1)
     */
    CGContextAddArc(ctx, self.frame.size.width / 2, self.frame.size.height / 2, 25, 0,  2 * PI, 0);

    CGContextDrawPath(ctx, kCGPathStroke);


    //画一个圆点,,将上面的定时器开启可以达到圆点绕圆周运动
//    CGContextSetRGBStrokeColor(ctx,0.12f, 0.26f, 0.07f, 1.0f);
//    CGContextAddArc(ctx,
//                    self.frame.size.width / 2 + cos(self.dAngle * PI / 180) * 25,
//                    self.frame.size.height / 2 + sin(self.dAngle * PI / 180) * 25,
//                    5,
//                    0,
//                    2 * PI,
//                    0);
//    CGContextDrawPath(ctx, kCGPathFillStroke);

}
在vc中的测试代码如下:
#import "PointMoveByCircleVC.h"
#import "PointMoveByCircleLayer.h"

@interface PointMoveByCircleVC ()

@property(nonatomic,strong) PointMoveByCircleLayer* layer;

@end

@implementation PointMoveByCircleVC

- (void)viewDidLoad {
    [super viewDidLoad];
    [self initView];
}
-(void) initView{

    self.view.backgroundColor  = [UIColor whiteColor];

    self.layer = [PointMoveByCircleLayer layer];
    self.layer.dAngle = 0;
    self.layer.frame = CGRectMake(100, 100, 100, 100);

    [self.layer setNeedsDisplay];    //写这个方法才会自动触发 drawInContext:的方法
    self.layer.backgroundColor = [UIColor brownColor].CGColor;

    [self.view.layer addSublayer:self.layer];


    UIButton* btnAnim = [[UIButton alloc] initWithFrame:CGRectMake(180, 240, 180, 30)];
    btnAnim.backgroundColor = [UIColor grayColor];
    btnAnim.tag = 13;
    [btnAnim setTitle:@"播放动画" forState:UIControlStateNormal];
    [btnAnim addTarget:self action:@selector(onClick:) forControlEvents:UIControlEventTouchUpInside];
    [self.view addSubview:btnAnim];
}

-(void) onClick:(UIButton*) button{

    switch (button.tag) {
            case 13:{

                //[self.layer playAnim];


                UIBezierPath *bezierPath = [[UIBezierPath alloc] init];
                [bezierPath moveToPoint:CGPointMake(0, 150)];
                [bezierPath addCurveToPoint:CGPointMake(300, 150) controlPoint1:CGPointMake(75, 0) controlPoint2:CGPointMake(225, 300)];

                //初始化圆点层
                UIBezierPath* path = [[UIBezierPath alloc] init];
                [path addArcWithCenter:CGPointMake(self.layer.frame.size.width / 2, self.layer.frame.size.width / 2)
                                radius:25
                            startAngle:0
                              endAngle:2 * 3.1415926
                             clockwise:1];


                CALayer *colorLayer = [CALayer layer];
                colorLayer.frame = CGRectMake(0, 0, 5, 5);
                colorLayer.cornerRadius = 2.5;
                colorLayer.position = CGPointMake(self.layer.frame.size.width / 2 + cos(90 * 3.1415926 / 180) * 25,
                                                  self.layer.frame.size.width / 2 + sin(90 * 3.1415926 / 180) * 25);

                colorLayer.backgroundColor = [UIColor redColor].CGColor;
                [self.layer addSublayer:colorLayer];

                //创建一个帧动画需要 的圆周 路径,这个路径 与外圆圈一一致
                CAKeyframeAnimation *animation1 = [CAKeyframeAnimation animation];
                animation1.keyPath = @"position";
                animation1.path = path.CGPath;
                animation1.duration = 1.0;
                animation1.repeatCount = MAXFLOAT;
                animation1.timingFunction =  [CAMediaTimingFunction functionWithName:kCAMediaTimingFunctionEaseOut];


                [colorLayer addAnimation:animation1 forKey:nil];


        }
            break;

        default:
            break;
    }

}

- (void)didReceiveMemoryWarning {
    [super didReceiveMemoryWarning];

}


@end