关于 gltf 模型的介绍、引入方法以及设置属性添加功能(结尾附代码)
绘制模型
前端推荐使用 Blender 三维建模软件,模型推荐使用 gltf 或者 glb 文件。
后续会更新 Blender 的使用方法
gltf
glTF(GL Transmission Format)是一种用于传输和加载 3D 模型的开放标准格式。它是由 Khronos Group 开发的,旨在提供一种轻量级、高效、可扩展的 3D 模型格式,以便在 Web 和移动设备等平台上实现快速加载和渲染。glTF 格式支持包括几何体、材质、纹理、动画和场景等多种 3D 模型元素,并且可以使用 JSON 格式进行序列化和压缩,从而减少文件大小和加载时间。glTF 格式还支持 PBR(Physically Based Rendering)渲染流程,可以实现更真实的光照和材质效果。由于其开放性和高效性,glTF 格式已经被广泛应用于 Web 和移动设备等领域,成为了一种重要的 3D 模型传输和加载标准。
加载 gltf 文件
引入扩展库
// 引入gltf模型加载库GLTFLoader.js
import {

     GLTFLoader } from "three/addons/loaders/GLTFLoader.js";
实例化一个 gltf 加载器
const loader = new GLTFLoader();
gltf 加载器方法.load()
loader.load("模型名称.gltf", function (gltf) {


  console.log("控制台查看加载gltf文件返回的对象结构", gltf);
  console.log("gltf对象场景属性", gltf.scene);
  // 返回的场景对象gltf.scene插入到threejs场景中
  scene.add(gltf.scene);
});
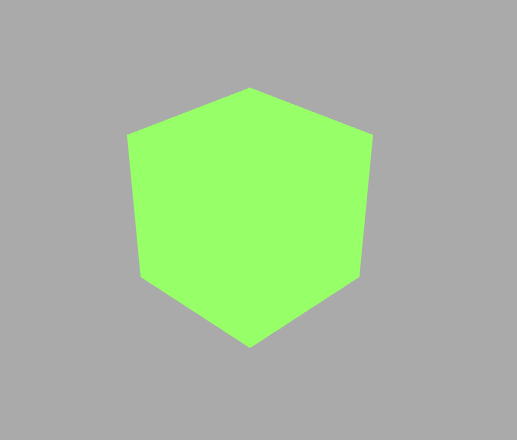
关于会出现模型是黑色的情况,存在两种可能:
- 这时需要在成功函数中添加
traverse函数设置材质和贴图
gltf.scene.traverse(function (child) {


    if (child.isMesh) {


        child.frustumCulled = false;
        //模型阴影
        child.castShadow = true;
        //模型自发光
        child.material.emissive = child.material.color;
        child.material.emissiveMap = child.material.map;
    }
}
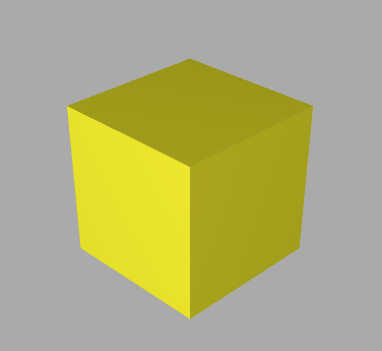
效果如下:
// 光源
const linght = () => {


  const pointLight = new THREE.PointLight(0xffffff, 1.0);
  pointLight.position.set(50, 50, 100);
  const pointLightHelper = new THREE.PointLightHelper(pointLight, 10);
  scene.add(pointLightHelper);
  scene.add(pointLight);
};
效果:
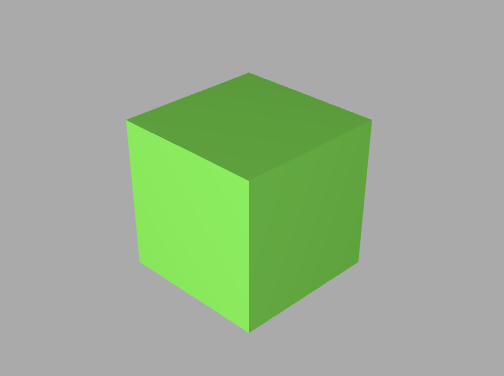
注意:我这里的模型长宽高的比例是(10,10,10),所以将相机镜头调整到合适大小即可,推荐camera.position值为(30,30,30)
camera.position.set(30, 30, 30);
观察相机位置变化OrbitControls改变相机.lookAt观察目标
通过OrbitControls平移,OrbitControls的.target属性会发生变化,.target属性对应的就是透视投影相机PerspectiveCamera的.lookAt观察目标`。
放在相机控件中查看,当触发模型的 change 事件时可在控制台查看数值的变化
// 相机控件
const control = () => {


  controls = new OrbitControls(camera, renderer.domElement);
  controls.addEventListener("change", function () {


    // 浏览器控制台查看controls.target变化,辅助设置lookAt参数
    console.log("controls.target", controls.target);
    // 浏览器控制台查看相机位置变化
    console.log("camera.position", camera.position);
  });
};
control();
gltf 生成不同的文件形式(glb)
- 单独的 gltf 模型文件
- 单独的 glb 模型文件
- gltf + bin + 贴图文件
正常加载就可以,但路径不要动,以免出现错乱
const loader = new GLTFLoader();
loader.load(
  new URL(`../assets/111.gltf`, import.meta.url).href,
  function (gltf) {


    scene.add(gltf.scene);
    gltf.scene.traverse(function (child) {


      if (child.isMesh) {


        child.frustumCulled = false;
        //模型阴影
        child.castShadow = true;
        //模型自发光
        child.material.emissive = child.material.color;
        child.material.emissiveMap = child.material.map;
      }
    });
  },
  function (xhr) {


    // 后台打印查看模型文件加载进度
    console.log("加载完成的百分比" + (xhr.loaded / xhr.total) * 100 + "%");
  },
  function (err) {


    console.error("加载发生错误");
  }
);
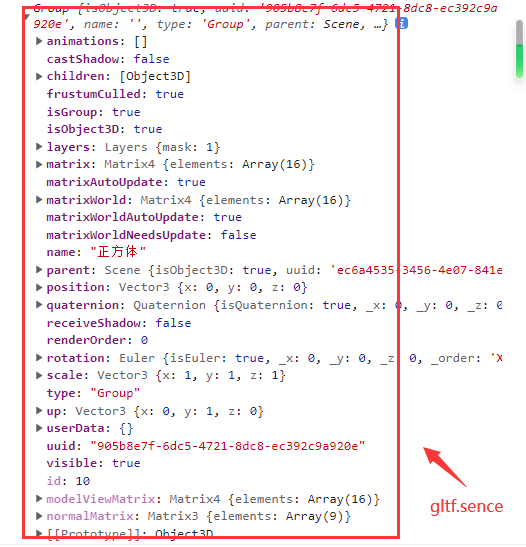
浏览器控制台查看 3D 模型树结构
console.log(gltf.scene);
添加 name 名称
console.log(gltf.scene);
gltf.scene.name = "正方体";
.getObjectByName()根据.name获取模型节点
gltf.scene.name = "正方体";
const nameNode = gltf.scene.getObjectByName("正方体");
console.log(nameNode);
nameNode.material.color.set(0xfff000);
这里不可以直接更改 material 的颜色
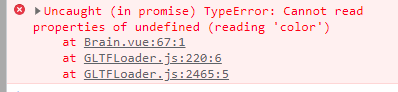
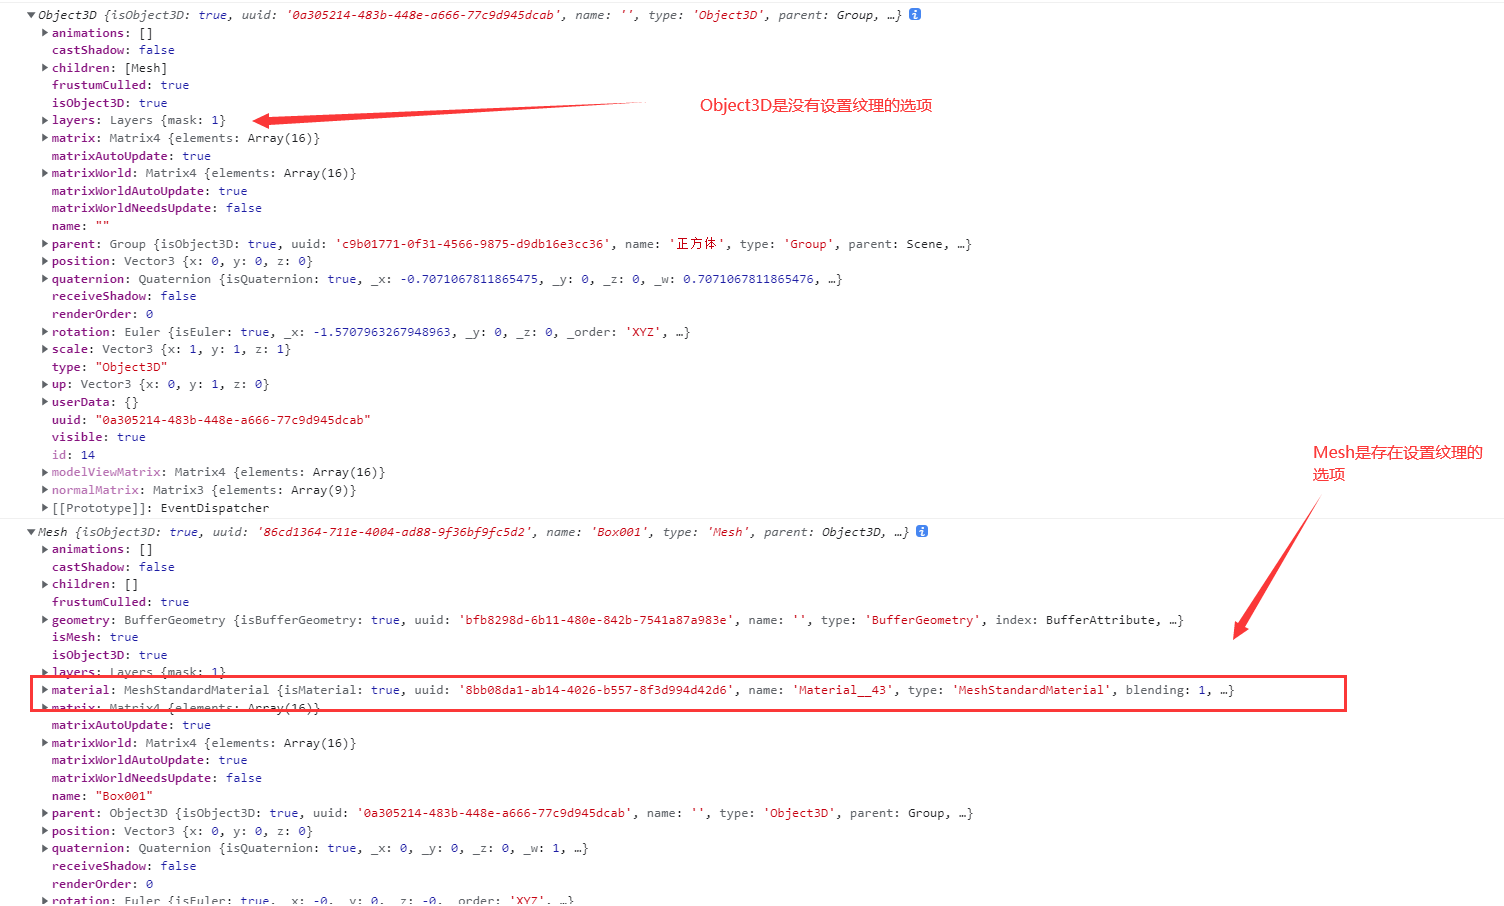
原因是 Object3D 属性中是不存在material的所以我们需要更准确的判断他的类型
gltf.scene.traverse(function (child) {


  console.log(child);
  if (child.isMesh) {


    child.material.color.set(0xfff000);
  }
});
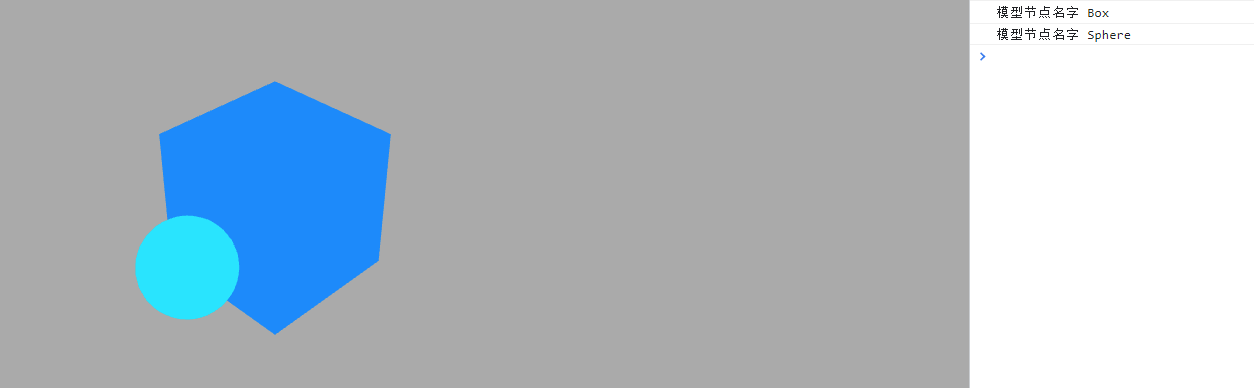
递归遍历层级模型修改材质
如果想修改多个 Mesh 材质,用递归遍历方法.traverse()批量操作
gltf.scene.traverse(function (child) {


  if (child.isMesh) {


    console.log("模型节点名字", child.name);
  }
});
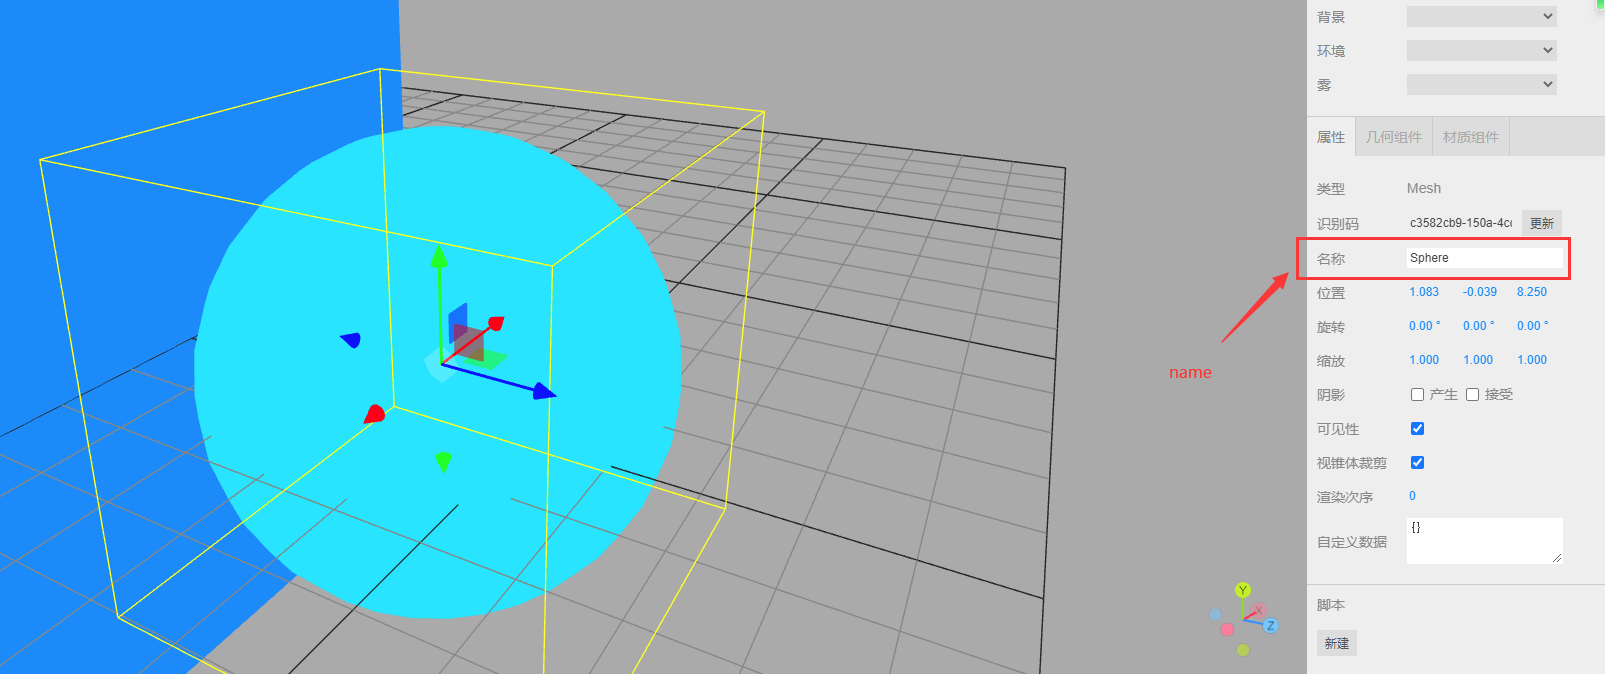
这个名称可以在创建建模的时候起名,也可以自己定义name
可以使用 three 自带的编辑器https://threejs.org/editor/
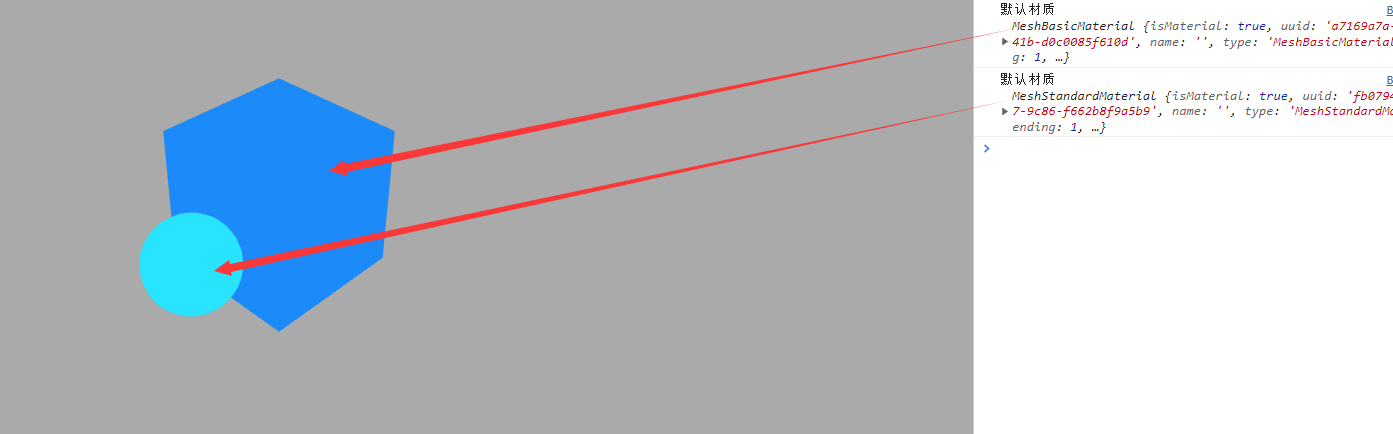
递归遍历所有模型节点批量修改材质
// 递归遍历所有模型节点批量修改材质
gltf.scene.traverse(function (obj) {


  if (obj.isMesh) {


    console.log("gltf默认材质", obj.material);
  }
});
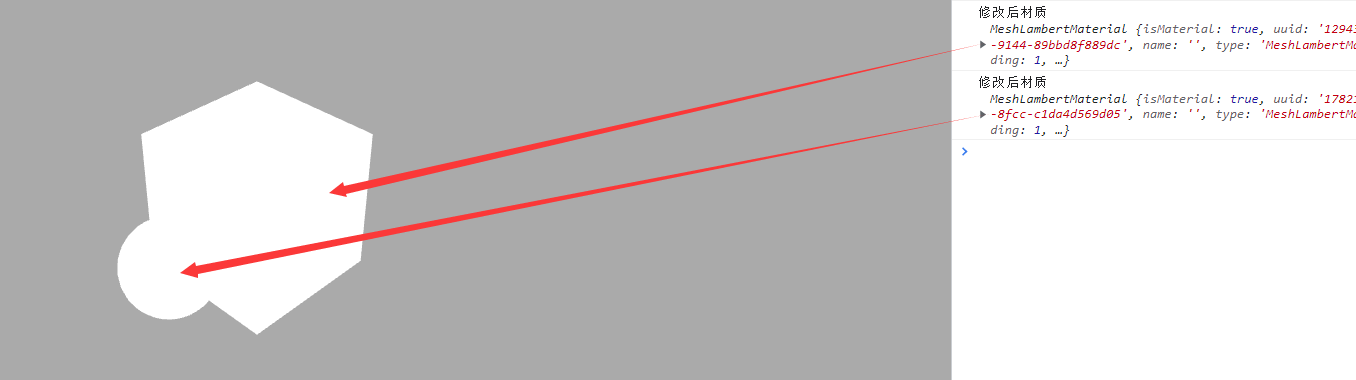
批量修改Mesh材质
gltf.scene.traverse(function (child) {


  if (child.isMesh) {


    child.material = new THREE.MeshLambertMaterial({


      color: 0xffffff,
    });
  console.log("修改后材质", child.material);
}
  // 环境光源
  const linght = () => {


  const pointLight = new THREE.AmbientLight(0xffffff, 1.0);
    pointLight.position.set(10, 10, 20);
    scene.add(pointLight);
  };
  linght();
完整代码如下:
<!-- author: Southern Wind -->
<template>
  <div class="container" ref="container"></div>
</template>

<script setup>
import * as THREE from "three";
// 轨道
import {

       OrbitControls } from "three/examples/jsm/controls/OrbitControls";
import {

       GLTFLoader } from "three/addons/loaders/GLTFLoader.js";
import {

       ref, reactive, onMounted } from "vue";
// 三个必备的参数
let scene, camera, renderer, controls, mesh, material, group, texture;

onMounted(() => {


  // 外层需要获取到dom元素以及浏览器宽高,来对画布设置长宽
  // clientWidth等同于container.value.clientWidth
  let container = document.querySelector(".container");
  const {

       clientWidth, clientHeight } = container;
  console.log(clientHeight);

  // 首先需要获取场景,这里公共方法放在init函数中
  const init = () => {


    scene = new THREE.Scene();
    // 给相机设置一个背景
    scene.background = new THREE.Color(0xaaaaaa);
    // 透视投影相机PerspectiveCamera
    // 支持的参数:fov, aspect, near, far
    camera = new THREE.PerspectiveCamera(
      60,
      clientWidth / clientHeight,
      0.001,
      6000
    );
    // 相机坐标
    camera.position.set(30, 30, 30);

    // 相机观察目标
    camera.lookAt(scene.position);
    // 渲染器
    renderer = new THREE.WebGLRenderer({


      antialias: true,
    });
    // 渲染多大的地方
    renderer.setSize(clientWidth, clientHeight);
    renderer.outputEncoding = THREE.sRGBEncoding;
    // const axesHelper = new THREE.AxesHelper(150);
    // scene.add(axesHelper);
    container.appendChild(renderer.domElement);
    addBox();
    console.log("查看当前屏幕设备像素比", window.devicePixelRatio);
  };
  init();
  function addBox() {


    const loader = new GLTFLoader();
    loader.load(
      new URL(`../assets/scene (3).glb`, import.meta.url).href,
      function (gltf) {


        console.log(gltf.scene);
        gltf.scene.name = "正方体";
        const nameNode = gltf.scene.getObjectByName("正方体");
        console.log(nameNode);
        // nameNode.material.color.set(0xfff000)
        gltf.scene.traverse(function (child) {


          // console.log(child);
          if (child.isMesh) {


            // child.material.color.set(0xfff000)
            child.material = new THREE.MeshLambertMaterial({


              color: 0xffffff,
            });
            console.log("修改后材质", child.material);
          }
        });
        scene.add(gltf.scene);
      },
      function (xhr) {


        // 后台打印查看模型文件加载进度
        console.log("加载完成的百分比" + (xhr.loaded / xhr.total) * 100 + "%");
      },
      function (err) {


        console.error("加载发生错误");
      }
    );
  }

  // 相机控件
  const control = () => {


    controls = new OrbitControls(camera, renderer.domElement);
    controls.addEventListener("change", function () {


      // 浏览器控制台查看controls.target变化,辅助设置lookAt参数
      console.log("controls.target", controls.target);
      // 浏览器控制台查看相机位置变化
      console.log("camera.position", camera.position);
    });
  };
  control();

  // 光源
  const linght = () => {


    const pointLight = new THREE.AmbientLight(0xffffff, 1.0);
    pointLight.position.set(10, 10, 20);
/*     const pointLightHelper = new THREE.PointLightHelper(pointLight, 1);
    scene.add(pointLightHelper); */
    scene.add(pointLight);
  };
  linght();
  const render = () => {


    renderer.render(scene, camera);
    requestAnimationFrame(render);
  };
  render();
  window.addEventListener("resize", () => {


    // 更新摄像头
    camera.aspect = window.innerWidth / window.innerHeight;
    camera.updateProjectionMatrix();
    renderer.setSize(window.innerWidth, window.innerHeight);
  });
});
</script>

<style>
.container {


  width: 100%;
  height: 100vh;
  position: relative;
  z-index: 1;
}
</style>

;
  window.addEventListener("resize", () => {
    // 更新摄像头
    camera.aspect = window.innerWidth / window.innerHeight;
    camera.updateProjectionMatrix();
    renderer.setSize(window.innerWidth, window.innerHeight);
  });
});
</script>

<style>
.container {


  width: 100%;
  height: 100vh;
  position: relative;
  z-index: 1;
}
</style>