最近学习社会媒体挖掘,需要完成几个实验,Python的第三方模块networkx几乎都囊括了这些实现的接口,Python的好处就是开源,所以它的第三方模块的源码都可以看到,我看了实现的源码做了部分修改,算是完成了实验。下面对这个库做一些介绍。
1. introduction
networkX是一款Python的软件包,用于创造、操作复杂网络,以及学习复杂网络的结构、动力学及其功能。
有了networkX你就可以用标准或者不标准的数据格式加载或者存储网络,它可以产生许多种类的随机网络或经典网络,也可以分析网络结构,建立网络模型,设计新的网络算法,绘制网络等等。
2. install
对于已经装了pip的环境,安装第三方模块很简单,只需要pip install networkx即可。没有安装pip环境的机器可以先安装pip,Python3默认都是安装了pip的。
3. tutorial
Creating a graph
创建一个空图,不包含任何结点和边。
import networkx as nx
G = nx.Graph()
图是顶点集和确定的顶点之间的边集组成。在NetworkX中,顶点可以是任何可以哈希的对象,比如文本,图片,XML对象,其他的图对象,任意定制的节点对象,等等。(Python中的None对象不可以作为结点类型。)
Nodes
图的增长有几种方式,NetworkX包含了许多图的产生函数和一些读写图的工具。
一次添加一个顶点。
G.add_node(1)也可以添加顶点的列表。
G.add_nodes_from([2, 3])或者从nbunch中添加节点,nbunch是任何可迭代的节点容器(如list、set、graph、file等),nbunch本身不是图中的一个节点。
H = nx.path_graph(10)
G.add_nodes_from(H)
此时图G中就包含了图H中的10个节点。作为比较,我们可以使图H作为图G的一个节点.
G.add_node(H)现在图G就包含了一个节点H,即该节点是一个图。可以看到这种灵活性是非常强大的,它允许图的图,文件的图,函数的图等等。因此我们应该好好思考如何构建我们的应用程序才能使我们的节点是有用的实体。当然我们可以在图中使用一个唯一的标识符或者使用一个不同的字典的键来标识节点信息。(如果该hash依赖于它的内容,则我们不应该改变节点对象)
Edges
图可以通过一次加一条边来增长。
 G.add_edge(1, 2)
 e = (2, 3)
 G.add_edge(*e)  # unpack edge tuple*
也可以一次加入一组边(边的列表)
G.add_edges_from([(1, 2), (1, 3)])或者通过添加任何ebunch来添加边,一个ebunch是任何可迭代的边的元组,一个边的元组可以是两个节点之间的一个2元组(无权值的边)或者3元组(3元组还有一个元素是边的权值,比如(1,2,{‘weight’:100}))。下面将进一步讨论边的属性:
G.add_edges_from(H.edges)我们可以用类似的方法拆除图:
G.remove_node(),G.remove_nodes_from(),G.remove_edge(),G.remove_edges_from()
比如:
G.remove_node(H)如果你添加的节点和边是已经存在的,是不会报错的。比如,我们先将图G里的所有节点和边删除:
G.clear()然后我们新的节点和边,NetworkX会自动忽略掉已经存在的边和节点的添加:
G.add_edges_from([(1,2),(1,3)])
G.add_node(1)
G.add_edge(1,2)
G.add_node("spam")       # adds node "spam"
G.add_nodes_from("spam")  # adds 4 nodes: 's', 'p', 'a', 'm'
此时图G一共有8个节点和2条边。
我们可以通过如下函数查看:
print G.number_of_nodes()
8
print G.number_of_edges()
3
What to use as nodes and edges
你可能已经注意到在NetworkX中节点和边并没有被指定一个对象,因此你就可以自由地指定节点和边的对象。最常见的对象是数值和字符串,但是一个节点可以是任意hash对象(除了None对象),一条边也可以关联任意的对象x,比如:
G.add_edge(a,b,object=x)。
举个关于边关联对象的例子,加入a和b是两个人,而他们两个人之间的联系(边),可以是一个概率,即边的对象是一个概率值,表示这两个人之间每天通电话的可能性。
可以看到这是十分强大而且有用的,但是如果你滥用该方法将会导致意想不到的后果,除非你对Python真的很熟悉。如果你不是很确定,你可以考虑使用conver_node_label_to_integers(),他可以将一个图的所有节点按顺序转化为整数对象赋给另一个图。
Accessing edges and neighbors
除了上面提到的那些访问节点和边的方法以外( eg:Graph.nodes(), Graph.edges(), Graph.neighbors()…),也可以利用下标表示来获取边和邻居结点。
>>> G[1]  # same as G.adj[1]
AtlasView({2: {}})
>>> G[1][2]
{}
>>> G.edges[1, 2]
{}
如果边已经存在时,也可以利用下标表示来设置边的属性。
>>> G.add_edge(1, 3)
>>> G[1][3]['color'] = "blue"
>>> G.edges[1, 2]['color'] = "red"
可以使用G.adjacency()或者G.adj.items()来快速访问每一条边,注意在无向图中adjacency迭代器可以看到边出现了2次。
>>> FG = nx.Graph()
>>> FG.add_weighted_edges_from([(1, 2, 0.125), (1, 3, 0.75), (2, 4, 1.2), (3, 4, 0.375)])
>>> for n, nbrs in FG.adj.items():
...    for nbr, eattr in nbrs.items():
...        wt = eattr['weight']
...        if wt < 0.5: print('(%d, %d, %.3f)' % (n, nbr, wt))
(1, 2, 0.125)
(2, 1, 0.125)
(3, 4, 0.375)
(4, 3, 0.375)
可以通过边的属性方便的访问所有的边。
>>> for (u, v, wt) in FG.edges.data('weight'):
...     if wt < 0.5: print('(%d, %d, %.3f)' % (u, v, wt))
(1, 2, 0.125)
(3, 4, 0.375)
``
#### Adding attributes to graphs, nodes, and edges
`属性诸如weight,labels,colors,或者任何对象,你都可以附加到图、节点或边上。
对于每一个图、节点和边都可以在关联的属性字典中保存一个(多个)键-值对。默认情况下这些是一个空的字典,但是我们可以增加或者是改变这些属性通过使用add\_edge,add\_node或者字典操作这些属性字典,比如G.graph,G.node或者G.edge。
##### Graph attributes
在创建新图时指派图的属性
``
>>> G = nx.Graph(day="Friday")
>>> G.graph
{'day': 'Friday'}
随后也可以修改属性
>>> G.graph['day'] = "Monday"
>>> G.graph
{'day': 'Monday'}
Node attributes
使用add_nodes(), add_nodes_from(), 或者G.nodes来添加顶点属性。
>>> G.add_node(1, time='5pm')
>>> G.add_nodes_from([3], time='2pm')
>>> G.nodes[1]
{'time': '5pm'}
>>> G.nodes[1]['room'] = 714
>>> G.nodes.data()
NodeDataView({1: {'room': 714, 'time': '5pm'}, 3: {'time': '2pm'}})
注意添加一个节点是G.add_node而不是G.node。
Edge Attributes
使用add_edges(), add_edges_from()或者下标表示上来增加/改变边的属性.
>>> G.add_edge(1, 2, weight=4.7 )
>>> G.add_edges_from([(3, 4), (4, 5)], color='red')
>>> G.add_edges_from([(1, 2, {'color': 'blue'}), (2, 3, {'weight': 8})])
>>> G[1][2]['weight'] = 4.7
>>> G.edges[3, 4]['weight'] = 4.2
特殊属性weight应该是一个数值型的,并且在算法需要使用weight时保存该数值。
Directed graphs
DiGraph类提供了许多有向图中的额外算法,比如DiGraph.out_edges(),DiGraph.in_degree(),DiGraph.predecessors(),DiGraph.successors()等。为了让算法可以在两类图中都可以工作,无向图中的neighbors()和degree()分别等价于有向图中的successors()和有向图中的in_degree()和out_degree()的和。虽然这样有时候会让我们感觉不太一致。
>>> DG = nx.DiGraph()
>>> DG.add_weighted_edges_from([(1, 2, 0.5), (3, 1, 0.75)])
>>> DG.out_degree(1, weight='weight')
0.5
>>> DG.degree(1, weight='weight')
1.25
>>> list(DG.successors(1))
[2]
>>> list(DG.neighbors(1))
[2]
有些算法只能在有向图中使用,而有些图并没有为有向图定义。确实将有向图和无向图混在在一起是很危险的一件事情,所以,如果有些实验你想把一个有向图看做一个无向图,你可以将有向图转化为无向图,通过:
H=DG.to_undirected()
#或者
H=nx.Graph(DG)
Multigraphs
NetworkX提供了一个类,它可以允许任何一对节点之间有多条边。类MultiGraph和类MultiDiGraph允许添加相同的边两次,这两条边可能附带不同的权值。对于有些应用程序这是非常有用的类,但是许多算法不能够很好的在这样的图中定义,比如最短路径算法,但是像MultiGraph.degree这种算法又可以很好的被定义。否则你应该为了很好的定义测量,而将图转化为标准的图。
>>> MG = nx.MultiGraph()
>>> MG.add_weighted_edges_from([(1, 2, 0.5), (1, 2, 0.75), (2, 3, 0.5)])
>>> dict(MG.degree(weight='weight'))
{1: 1.25, 2: 1.75, 3: 0.5}
>>> GG = nx.Graph()
>>> for n, nbrs in MG.adjacency():
...    for nbr, edict in nbrs.items():
...        minvalue = min([d['weight'] for d in edict.values()])
...        GG.add_edge(n, nbr, weight = minvalue)
...
>>> nx.shortest_path(GG, 1, 3)
[1, 2, 3]
Graph generators and graph operations
除了通过节点和边生成图,也可以通过以下方法产生:
使用典型的图形操作:
subgraph(G, nbunch) - 产生nbunch节点的子图
union(G1,G2) - 结合图
disjoint_union(G1,G2) - 假设所有节点都不同,然后结合图
cartesian_product(G1,G2) - 返回笛卡尔乘积图
compose(G1,G2) - 结合两个图并表示两者共同的节点
complement(G) - 图G的补图
create_empty_copy(G) - 返回同一类图的无边副本
convert_to_undirected(G) - 返回G的无向图
convert_to_directed(G) - 返回G的有向图
调用经典的小图
>>> petersen = nx.petersen_graph()
>>> tutte = nx.tutte_graph()
>>> maze = nx.sedgewick_maze_graph()
>>> tet = nx.tetrahedral_graph()
使用生成器来构造一些典型的图
>>> K_5 = nx.complete_graph(5)
>>> K_3_5 = nx.complete_bipartite_graph(3, 5)
>>> barbell = nx.barbell_graph(10, 10)
>>> lollipop = nx.lollipop_graph(10, 20)
使用随机图发生器
>>> er = nx.erdos_renyi_graph(100, 0.15)
>>> ws = nx.watts_strogatz_graph(30, 3, 0.1)
>>> ba = nx.barabasi_albert_graph(100, 5)
>>> red = nx.random_lobster(100, 0.9, 0.9)
通过读取存储在文件中的一些标准图形格式,例如边表,邻接表,GML,GraphML,pickle,LEAD或者其他的一些格式:
>>> nx.write_gml(red, "path.to.file")
>>> mygraph = nx.read_gml("path.to.file")
Analyzing graphs
图G的结构可以通过各种图论的函数来分析,例如:
>>> G = nx.Graph()
>>> G.add_edges_from([(1, 2), (1, 3)])
>>> G.add_node("spam")       # adds node "spam"
>>> list(nx.connected_components(G))
[set([1, 2, 3]), set(['spam'])]
>>> sorted(d for n, d in G.degree())
[0, 1, 1, 2]
>>> nx.clustering(G)
{1: 0, 2: 0, 3: 0, 'spam': 0}
返回节点属性的函数是通过返回一个以节点为键的字典来实现的
>>> sp = dict(nx.all_pairs_shortest_path(G))
>>> sp[3]
{1: [3, 1], 2: [3, 1, 2], 3: [3]}
Drawing graphs
NetworkX并不是专门用来绘图的包,但是Matplotlib以及一些接口却提供了很好的绘图功能。
首先我们导入Matplotlib的plot接口(pylab也可以)
>>> import matplotlib.pyplot as plt你可能会发现使用“ipthon -pylab”q去交互测试代码是很有用的,它提供了强大的ipython和matplotlib,也提供了一个方便的交互模式。
测试networkx.drawing是是否导入成功,可以通过:
>>> G = nx.petersen_graph()
>>> plt.subplot(121)
<matplotlib.axes._subplots.AxesSubplot object at ...>
>>> nx.draw(G, with_labels=True, font_weight='bold')
>>> plt.subplot(122)
<matplotlib.axes._subplots.AxesSubplot object at ...>
>>> nx.draw_shell(G, nlist=[range(5, 10), range(5)], with_labels=True, font_weight='bold')
你要将这个图形绘制到屏幕,你可能需要Matplotlib:
>>> plt.show()没有在交互模式下使用matplotlib的一些命令
>>> options = {
...     'node_color': 'black',
...     'node_size': 100,
...     'width': 3,
... }
>>> plt.subplot(221)
<matplotlib.axes._subplots.AxesSubplot object at ...>
>>> nx.draw_random(G, **options)
>>> plt.subplot(222)
<matplotlib.axes._subplots.AxesSubplot object at ...>
>>> nx.draw_circular(G, **options)
>>> plt.subplot(223)
<matplotlib.axes._subplots.AxesSubplot object at ...>
>>> nx.draw_spectral(G, **options)
>>> plt.subplot(224)
<matplotlib.axes._subplots.AxesSubplot object at ...>
>>> nx.draw_shell(G, nlist=[range(5,10), range(5)], **options)
可以通过draw_networkx()进行其他的操作或者layout进行布局。可以使用draw_shell()使用多重的shells。
>>> G = nx.dodecahedral_graph()
>>> shells = [[2, 3, 4, 5, 6], [8, 1, 0, 19, 18, 17, 16, 15, 14, 7], [9, 10, 11, 12, 13]]
>>> nx.draw_shell(G, nlist=shells, **options)
通过下面的方式可以将图保存到文件
>>> nx.draw(G)
>>> plt.savefig("path.png")
4. Reference
Introduction
NetworkX源码可以在网上看到,这个包提供的类涉及到了图对象,创建标准图的生成器,读取已经存在的数据集的IO例程,分析结果网络的算法,以及基本的绘图工具。
大部分的NetworkX接口需要一个图对象作为参数,图对象的方法被限制于基本的操作和输出。
类的名字采用骆驼式命名法(每个单词的首字母大写)。函数,方法,和变量的名字采用小写字母加下划线分开。
NetworkX Basics
打开Python后,用下面推荐的方式导入networkx模块。
>>> import networkx as nx如果导入networkx失败,表示Python没有找到这个已经安装的模块,在Python的路径下面检查你的安装。(如果安装了pip,并且设置了环境变量,可以直接在CMD控制台中执行指令pip install networkx)。
图的内部的数据结构是基于邻接表来表示,实现利用了Python的字典。
Graphs
使用networkx时首先需要选择使用什么类型的图。一个图(网络)是结点集和边集的集合。属性可以和顶点或者边连续在一起。
Nodes and Edges
接下来需要具体化一个图,来决定你需要使用的结点和边。
Graphs Creation
networkx图对象可以用下面的三种方式来创造。
A. 图生成器-利用标准的算法来创建网络的拓扑。
B. 从已经存在的文件中导入数据
C. 显示的添加边和结点。
显示添加/移除边和顶点是最容易的方法,每一个图对象都会提供方法来
>>> import networkx as nx
>>> G = nx.Graph()
>>> G.add_edge(1, 2)  # default edge data=1
>>> G.add_edge(2, 3, weight=0.9)  # specify edge data属性可以是任意值。
边的属性可以是任意值
>>> import math
>>> G.add_edge('y', 'x', function=math.cos)
>>> G.add_node(math.cos)  # any hashable can be a node
一次可以添加多条表.
>>> elist = [(1, 2), (2, 3), (1, 4), (4, 2)]
>>> G.add_edges_from(elist)
>>> elist = [('a', 'b', 5.0), ('b', 'c', 3.0), ('a', 'c', 1.0), ('c', 'd', 7.3)]
>>> G.add_weighted_edges_from(elist)
Graph Reporting
主要是通过迭代器来遍历边或者顶点。直接给出官方说明。
Class views provide basic reporting of nodes, neighbors, edges and degree. These views provide iteration over the properties as well as membership queries and data attribute lookup. The views refer to the graph data structure so changes to the graph are reflected in the views. This is analogous to dictionary views in Python 3. If you want to change the graph while iterating you will need to use e.g. for e in list(G.edges):. The views provide set-like operations, e.g. union and intersection, as well as dict-like lookup and iteration of the data attributes using G.edges[u, v][‘color’] and for e, datadict in G.edges.items():. Methods G.edges.items() and G.edges.values() are familiar from python dicts. In addition G.edges.data() provides specific attribute iteration e.g. for e, e_color in G.edges.data(‘color’):.
The basic graph relationship of an edge can be obtained in two ways. One can look for neighbors of a node or one can look for edges. We jokingly refer to people who focus on nodes/neighbors as node-centric and people who focus on edges as edge-centric. The designers of NetworkX tend to be node-centric and view edges as a relationship between nodes. You can see this by our choice of lookup notation like G[u] providing neighbors (adjacency) while edge lookup is G.edges[u, v]. Most data structures for sparse graphs are essentially adjacency lists and so fit this perspective. In the end, of course, it doesn’t really matter which way you examine the graph. G.edges removes duplicate representations of undirected edges while neighbor reporting across all nodes will naturally report both directions.
Any properties that are more complicated than edges, neighbors and degree are provided by functions. For example nx.triangles(G, n) gives the number of triangles which include node n as a vertex. These functions are grouped in the code and documentation under the term algorithms.
Algorithms
networkx提供了很多图算法,包括最短路径,广度优先搜索,聚类,同构算法已经其他一些算法。下面给出Dijkstra算法来求解最短路径。
>>> G = nx.Graph()
>>> e = [('a', 'b', 0.3), ('b', 'c', 0.9), ('a', 'c', 0.5), ('c', 'd', 1.2)]
>>> G.add_weighted_edges_from(e)
>>> print(nx.dijkstra_path(G, 'a', 'd'))
['a', 'c', 'd']
Drawing
networkx并不是一个绘图工具,他只提供了一个简单的绘图包的接口和一些简单的布局算法。需要画图时可以采用外部的程序或者导入Matplotlib包。
>>> import matplotlib.pyplot as plt
>>> G = nx.cubical_graph()
>>> plt.subplot(121)
<matplotlib.axes._subplots.AxesSubplot object at ...>
>>> nx.draw(G)   # default spring_layout
>>> plt.subplot(122)
<matplotlib.axes._subplots.AxesSubplot object at ...>
>>> nx.draw(G, pos=nx.circular_layout(G), nodecolor='r', edge_color='b')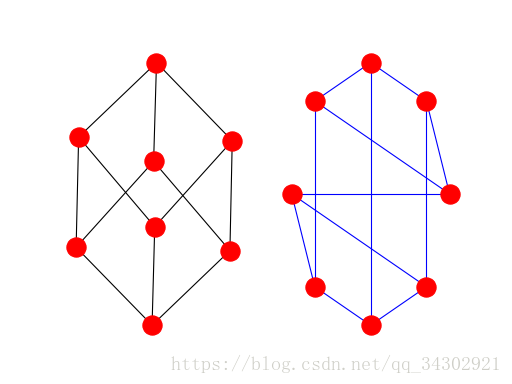
Data Structure
NetworkX 使用字典词典作为基本的数据结构。
>>> G = nx.Graph()
>>> G.add_edge('A', 'B')
>>> G.add_edge('B', 'C')
>>> print(G.adj)
{'A': {'B': {}}, 'C': {'B': {}}, 'B': {'A': {}, 'C': {}}}
>>> G = nx.Graph()
>>> G.add_edge(1, 2, color='red', weight=0.84, size=300)
>>> print(G[1][2]['size'])
300
>>> print(G.edges[1, 2]['color'])
red下面介绍实验用到的算法和生成器。