上篇文章Selenium框架详解一是对selenium的基础分析,下面将对selenium的具体元素使用详解。
1 元素定位
selenium使用最重要的是元素定位,常用的元素定位方式通过class name,css selector,id,name,link text,partial link text,tag name,xpath。
from selenium import webdriver
from selenium.webdriver.common.by import By
from selenium.webdriver.chrome.service import Service as ChromeService
from webdriver_manager.chrome import ChromeDriverManager


driver = webdriver.Chrome(service=ChromeService(executable_path=ChromeDriverManager().install()))

driver.get("https://www.selenium.dev/selenium/web/web-form.html")
fruits = driver.find_element(By.ID, "fruits")  #ID定位
vegetable = driver.find_element(By.CLASS_NAME, "tomatoes")  #类名定位
fruit = driver.find_element(By.CSS_SELECTOR,"#fruits .tomatoes")  #css选择器定位
plants = driver.find_elements(By.TAG_NAME, "li")   #标签名字定位
vegetable = driver.find_element(By.XPATH, "//input[@id='kw']")  #xpath定位

#定位到元素之后需要获取文本、点击操作、发送文本操作
buttons.click()   #点击
file_text.send_keys('36718683')  #发送文本
fruit.text   #获取文本
2 元素定位策略
有时元素定位可能难以定位到元素,这时可以采取相对定位策略。
相对定位策略:above、blow、left of、right of、near、chaining relative locator.
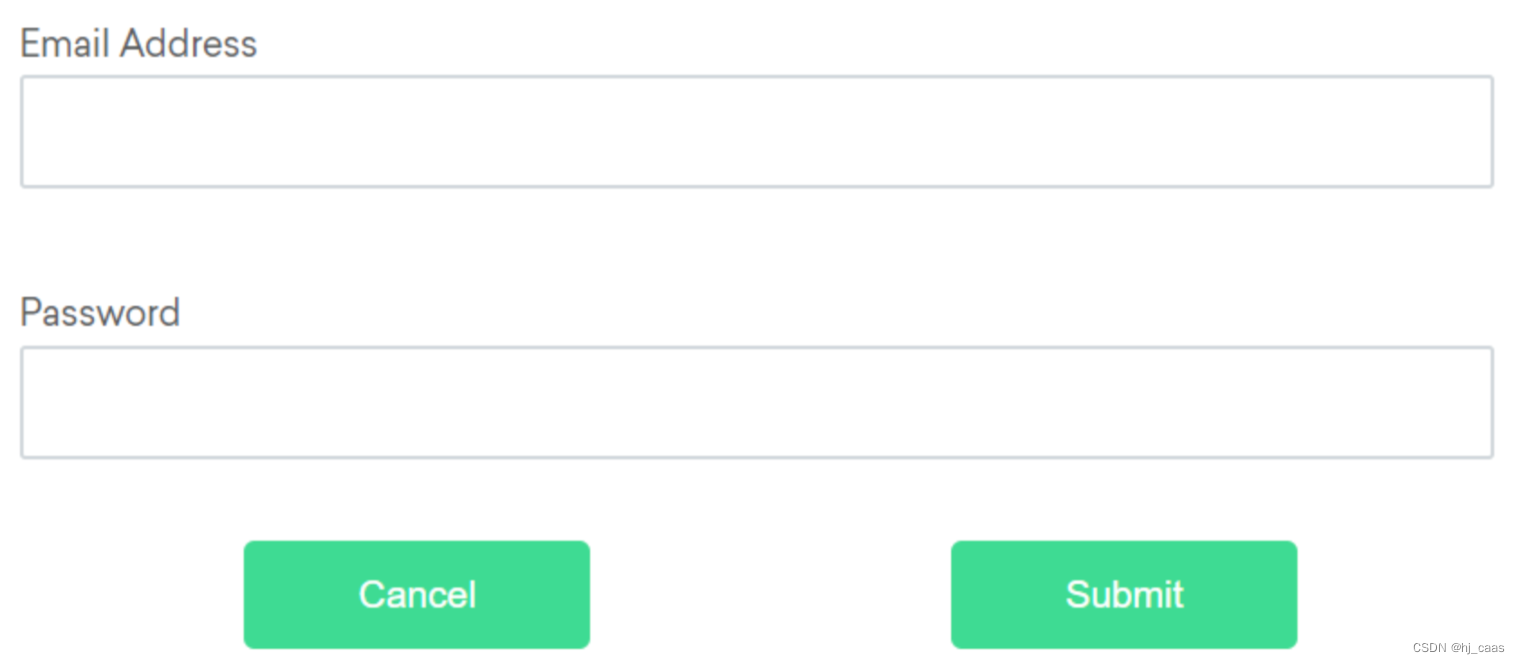
以下面界面为例:
from selenium import webdriver
from selenium.webdriver.common.by import By
from selenium.webdriver.chrome.service import Service as ChromeService
from webdriver_manager.chrome import ChromeDriverManager
from selenium.webdriver.support.relative_locator import locate_with

driver = webdriver.Chrome(service=ChromeService(executable_path=ChromeDriverManager().install()))

driver.get("")  #自行填充url

#above使用,当邮件的文本不好定位,但是密码的文本容易定位,这时可以通过密码文本定位到邮件文本,邮箱文本在密码文本的上方。
email_locator = locate_with(By.TAG_NAME, "input").above({

    By.ID: "password"})

#below使用,当密码的文本不好定位,但是邮箱的文本容易定位,这时可以通过邮箱文本定位到密码文本,密码文本在邮箱文本的下方。
password_locator = locate_with(By.TAG_NAME, "input").below({

    By.ID: "email"})

#同理,right of 右边,left of 左边
cancel_locator = locate_with(By.TAG_NAME, "button").to_left_of({

    By.ID: "submit"})
submit_locator = locate_with(By.TAG_NAME, "button").to_right_of({

    By.ID: "cancel"})

#邻近定位
email_locator = locate_with(By.TAG_NAME, "input").near({

    By.ID: "lbl-email"})

#连续相对定位
submit_locator = locate_with(By.TAG_NAME, "button").below({

    By.ID: "email"}).to_right_of({

    By.ID: "cancel"})


#特殊,若标签无效,检查是否可见、是否被启用
is_button_visible = driver.find_element(By.CSS_SELECTOR, "[name='login']").is_displayed()
value = driver.find_element(By.NAME, 'btnK').is_enabled()
3 Wait
使用selenium常用到的问题是无法捕获完整的响应数据,可能因为程序运行和浏览器加载不同步,这时需要等待浏览器加载完成之后再进行。
selenium给出的等待策略是显式等待和隐式等待,可根据需求选择使用。
#Waits
#同步浏览器及其 DOM 和 WebDriver 脚本之间的状态

#显式等待
#WebDriverWait(driver, timeout=3).until(some_condition)
from selenium.webdriver.support.wait import WebDriverWait
def document_initialised(driver):
    return driver.execute_script("return initialised")

driver.navigate("file:///race_condition.html")
WebDriverWait(driver, timeout=10).until(document_initialised)
el = driver.find_element(By.TAG_NAME, "p")
assert el.text == "Hello from JavaScript!"

#隐式等待
driver = Firefox()
driver.implicitly_wait(10)  #隐式等待
driver.get("http://somedomain/url_that_delays_loading")
my_dynamic_element = driver.find_element(By.ID, "myDynamicElement")
注意,selenium与脚本运行的同步状态。