目录
1. 组件的基本使用
简单的组件示例
<!DOCTYPE html>
<html lang="en">
<head>
  <meta charset="UTF-8">
  <title>Title</title>
</head>
<body>
<div id="app">
  <!-- 3.使用组件 -->
  <my-cpn></my-cpn>
  <my-cpn></my-cpn>
  <my-cpn></my-cpn>
  <cpnc></cpnc>
</div>
<script src="../js/vue.js"></script>
<script>
  // 1.创建组件构造器对象
  const cpnc = Vue.extend({
    template:`
        <div>
          <h2>标题</h2>
          <p>内容1...<p>
          <p>内容2...<p>
        </div>`
  })
  // 2.全局注册组件
  Vue.component('my-cpn', cpnc)
  const app = new Vue({
    el:"#app",
    data:{
    },
    components:{
      //局部组件创建
      cpnc:cpnc
    }
  })
</script>
</body>
</html> 组件是可复用的 Vue 实例,且带有一个名字:在这个例子中是 my-cpn。我们可以在一个通过 new Vue 创建的 Vue 根实例中,把这个组件作为自定义元素来使用: <my-cpn></my-cpn>。
1.1 创建组件构造器对象
template中是组件的DOM元素内容。
1.2 注册组件
- 全局注册,通过
Vue.component。 - 局部注册,通过
components:{cpnc:cpnc}。
1.3 使用组件
像使用html标签一样使用。
  <div id="app">
    <!-- 3.使用组件 -->
    <my-cpn></my-cpn>
    <my-cpn></my-cpn>
    <my-cpn></my-cpn>
    <cpnc></cpnc>
  </div>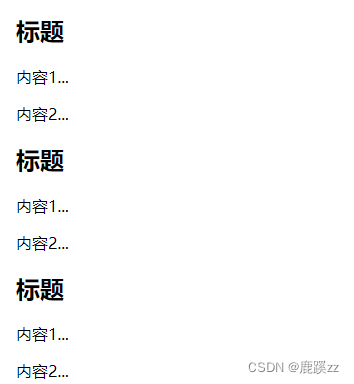
2. 全局组件和局部组件
组件的注册方式有两种,一种是全局组件一种是局部组件。
  <div id="app">
    <h2>全局组件</h2>
    <my-cpn></my-cpn>
    <h2>局部组件</h2>
    <cpnc></cpnc>
  </div>
  <script src="../js/vue.js"></script>
  <script>
    // 1.创建组件构造器对象
    const cpnc = Vue.extend({
      template:`
        <div>
          <h2>标题</h2>
          <p>内容1</p>
          <p>内容2</p>
        </div>`
    })
    // 2.注册组件(全局组件,可以在多个vue实例中使用)
    Vue.component('my-cpn', cpnc)

    const app = new Vue({
      el:"#app",
      components:{//局部组件创建
        cpnc:cpnc
      }
    })
  </script>
2.1 全局组件
全局组件,可以在多个vue实例中使用,类似于全局变量。
使用Vue.component('my-cpn', cpnc)方式注册,直接使用<my-cpn></my-cpn>调用。my-cpn是全局组件的名字,cpnc是定义的组件对象。
2.2 局部组件
局部组件,只能在当前vue实例挂载的对象中使用,类似于局部变量,有块级作用域。
注册方式
    const app = new Vue({
      el:"#app",
      components:{//局部组件创建
        cpnc:cpnc
      }
}) 使用方式与全局变量一样,直接使用<cpnc></cpnc>调用。cpnc:cpnc第一个cpnc是给组件命名的名字,第二个是定义的组件对象。如果俩个同名也可以直接使用es6语法:
components:{//局部组件创建
        cpnc
}
3. 父组件和子组件的区别
  <div id="app">
    <cpn2></cpn2>
  </div>
  <script src="../js/vue.js"></script>
  <script>
    // 1.创建组件构造器对象
    const cpn1 = Vue.extend({
      template:`
        <div>
          <h2>标题1</h2>
          <p>组件1</p>
        </div>`
    })
    // 组件2中使用组件1
    const cpn2 = Vue.extend({
      template:`
        <div>
          <h2>标题2</h2>
          <p>组件2</p>
          <cpn1></cpn1>
        </div>`,
      components:{
        cpn1:cpn1
      }
    })

    const app = new Vue({
      el:"#app",
      components:{//局部组件创建
        cpn2:cpn2
      }
    })
</script> 上述代码中定义了两个组件对象cpn1和cpn2,在组件cpn2中使用局部组件注册了cpn1,并在template中使用了注册的cpn1,然后在vue实例中使用注册了局部组件cpn2,在vue实例挂载的div中调用了cpn2,cpn2与cpn1形成父子组件关系。
注意:组件就是一个vue实例,vue实例的属性,组件也可以有,例如data、methods、computed等。
4. 注册组件的语法糖
 <div id="app">
    <cpn1></cpn1>
    <cpn2></cpn2>
  </div>
  <script src="../js/vue.js"></script>
  <script>
    // 1.注册全局组件语法糖
    Vue.component('cpn1', {
      template:`
        <div>
          <h2>全局组件语法糖</h2>
          <p>全局组件语法糖</p>
        </div>`
    })

    const app = new Vue({
      el:"#app",
      components:{//局部组件创建
        cpn2:{
          template:`
        <div>
          <h2>局部组件语法糖</h2>
          <p>局部组件语法糖</p>
        </div>`
        }
      }
    })
</script>注册组件时候可以不实例化组件对象,直接在注册的时候实例化。{}就是一个组件对象。
5. 组件模板的分离写法
5.1 script标签
使用script标签定义组件的模板,script标签注意类型是text/x-template。
  <!-- 1.script标签注意类型是text/x-template -->
  <script type="text/x-template" id="cpn1">
    <div>
        <h2>组件模板的分离写法</h2>
        <p>script标签注意类型是text/x-template</p>
      </div>
  </script>
5.2 template标签
使用template标签,将内容写在标签内。
  <!-- 2.template标签 -->
  <template id="cpn2">
    <div>
      <h2>组件模板的分离写法</h2>
      <p>template标签</p>
    </div>
  </template>
调用分离的模板,使用
template:'#cpn1'
  <script src="../js/vue.js"></script>
  <script>

    const app = new Vue({
      el: "#app",
      components: { //局部组件创建
        cpn1:{
          template:'#cpn1'
        },
        cpn2: {
          template: '#cpn2'
        }
      }
    })
  </script>
6. 组件的数据
6.1 存放问题
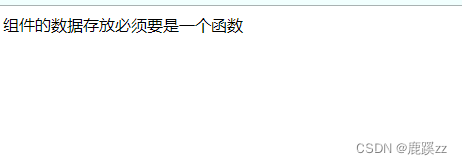
前面说过vue组件就是一个vue实例,相应的vue组件也有data属性来存放数据。
  <div id="app">
    <cpn1></cpn1>
  </div>

  <script src="../js/vue.js"></script>
  <script>

    const app = new Vue({
      el: "#app",
      components: { //局部组件创建
        cpn1:{
          template:'<div>{

   {msg}}</div>',
          data(){
            return {
              msg:"组件的数据存放必须要是一个函数"
            }
          }
        }
      }
    })
</script>在template中使用组件内部的数据msg。
6.2 组件的data为什么必须要是函数
组件的思想是复用,定义组件当然是把通用的公共的东西抽出来复用。
<div id="app">
    <h2>data不使用函数</h2>
    <cpn1></cpn1>
    <cpn1></cpn1>
    <hr>
    <h2>data使用函数</h2>
    <cpn2></cpn2>
    <cpn2></cpn2>
    <hr>
  </div>
  <script src="../js/vue.js"></script>
  <template id="cpn1">
    <div>
      <button @click="count--">-</button>
      当前计数:{

   {count}}
      <button @click="count++">+</button>
    </div>
  </template>
  <template id="cpn2">
    <div>
      <button @click="count--">-</button>
      当前计数:{

   {count}}
      <button @click="count++">+</button>
    </div>
  </template>
  <script>
    const obj = {
      count:0
    };
    const app = new Vue({
      el: "#app",
      components: { //局部组件创建
        cpn1: {
          template: '#cpn1',
          data() {
            return obj;
          }
        },
        cpn2: {
          template: '#cpn2',
          data() {
            return {
              count: 0
            }
          }
        }
      }
    })
</script>上述代码中定义了两个组件cpn1和cpn2,都是定义了两个计数器,con1的data虽然使用了函数,但是为了模拟data:{count:0},使用了常量obj来返回count。
图中可以看到,不使用函数data的好像共用一个count属性,而使用函数的data的count是各自用各自的,像局部变量一样有块级作用域,这个块级就是vue组件的作用域。
我们在复用组件的时候肯定希望,各自组件用各自的变量,如果确实需要都用一样的,可以全局组件注册,也可以是用vuex来进行状态管理。
7. 父组件给子组件传递数据
7.1 使用props属性,父组件向子组件传递数据
使用组件的
props属性
const cpn = {
  template: "#cpn",
  props: {
          cmessage: {
          type: String,
          default: 'zzzzz',
          required: true //在使用组件必传值
          }
  }
}
向cmessage对象传值
<div id="app">
    <cpn :cMessage="message"></cpn>
</div>
<script>
const app = new Vue({
      el: "#app",
      data: {
        message: "你好",
        movies: ["复仇者联盟", "钢铁侠", "星际穿越", "哪吒传奇"]
      },
      components: {
        cpn
      }
    })
  </script>
7.2 props属性使用
数组写法
props: ['cmovies', 'cmessage']对象写法
  props: {
          cmessage: {
          type: String,
          default: 'zzzzz',
          required: true //在使用组件必传值
          }
  }
props属性的类型限制
//1.类型限制(多个类使用数组)
cmovies:Array,//限制为数组类型
cmessage:String,//限制为Strin类型
cmessage:['String','Number']//限制为String或Number类型
props属性的默认值
// 2.提供一些默认值,以及必传值
        cmessage: {
          type: String,
          default: 'zzzzz',//默认值
        }
props属性的必传值
cmessage: {
          type: String,
          default: 'zzzzz',
          required: true //在使用组件必传值
        }
类型是Object/Array,默认值必须是一个函数
//类型是Object/Array,默认值必须是一个函数
cmovies: {
	type: Array,
	default () {
		return [1, 2, 3, 4]
	}
},
自定义验证函数
vaildator: function (value) {
	//这个传递的值必须匹配下列字符串中的一个
	return ['zzzzz', 'ttttt', 'yyy'].indexOf(value) !== -1
}
自定义类型
  function Person(firstName,lastName) {
      this.firstName = firstName
      this.lastName = lastName
    }
	cmessage:Person//限定了cmeessage必须是Person类型
综合使用
<div id="app">
    <cpn :cMovies="movies" :cMessage="message"></cpn>
  </div>
  <template id="cpn">
    <div>
      <ul>
        <li v-for="(item, index) in cmovies" :key="index">{

   {item}}</li>
      </ul>
      <h2>{

   {cmessage}}</h2>
    </div>
  </template>
  <script src="../js/vue.js"></script>

  <script>
    function Person(firstName,lastName) {
      this.firstName = firstName
      this.lastName = lastName
    }
    // 父传子:props
    const cpn = {
      template: "#cpn",
      // props: ['cmovies', 'cmessage'],//数组写法
      props: { //对象写法
        // 1.类型限制(多个类使用数组)
        // cmovies:Array,
        // cmessage:String,
        // cmessage:['String','Number'],
        // 2.提供一些默认值,以及必传值
        cmessage: {
          type: String,
          default: 'zzzzz',
          required: true //在使用组件必传值
        },
        //类型是Object/Array,默认值必须是一个函数
        cmovies: {
          type: Array,
          default () {
            return [1, 2, 3, 4]
          }
        },
        // 3.自定义验证函数
        // vaildator: function (value) {
        //   //这个传递的值必须匹配下列字符串中的一个
        //   return ['zzzzz', 'ttttt', 'yyy'].indexOf(value) !== -1
        // }
        // 4.自定义类型
        // cmessage:Person,
      },
      data() {
        return {
        }
      },
      methods: {

      },
    };
    const app = new Vue({
      el: "#app",
      data: {
        message: "你好",
        movies: ["复仇者联盟", "钢铁侠", "星际穿越", "哪吒传奇"]
      },
      components: {
        cpn
      }
    })
  </script>
8. 组件通信
8.1 父传子(props的驼峰标识)
v-bind是 不支持使用驼峰标识的,例如cUser要改成c-User。
  <div id="app">
    <!-- v-bind不支持驼峰 :cUser改成 :c-User-->
    <!-- <cpn :cUser="user"></cpn> -->
    <cpn :c-User="user"></cpn>
    <cpn :cuser="user" ></cpn>
  </div>
  <template id="cpn">
    <div>
      <!-- 使用驼峰 -->
      <h2>{

   {cUser}}</h2>
      <!-- 不使用 -->
      <h2>{

   {cuser}}</h2>
    </div>
  </template>
  <script src="../js/vue.js"></script>
  <script>
    // 父传子:props
    const cpn = {
      template: "#cpn",
      props: { //对象写法
        //驼峰
        cUser:Object,
        //未使用驼峰
        cuser:Object
      },
      data() {return {}},
      methods: {},
    };
    const app = new Vue({
      el: "#app",
      data: {
        user:{
          name:'zzz',
          age:18,
          height:175
        }
      },
      components: {
        cpn
      }
    })
  </script>
props接收引用类型
<!DOCTYPE html>
<html>
	<head>
		<meta charset="utf-8">
		<title></title>

	</head>
	<body>
		<div id="app">
			<!-- <cpn1 :msg="message"></cpn1> -->
			<!-- <cpn1 :msg="message2"></cpn1> -->
			<cpn1 :msgab="add"></cpn1>
			<h2>{

   {count}}</h2>
		</div>
		<script src="https://cdn.jsdelivr.net/npm/[email protected]/dist/vue.js"></script>
		<script>
			const app = new Vue({
				el: "#app",
				data: {
					/* message: ['蔡英文', '吴钊燮'] */
					/* message2:{
						name:'蔡英文',
						age:56,
						sex:'女'
					} */
					count:0
				},
				methods: {
                    add:function(){
						return this.count++
					}
				},
				computed: {

				},
				components: {
					cpn1: {
						/* template: `
						  <div>我是中国人{

   {msg.name}}{

   {msg.sex}}</div>
						`, */
						template: `
						<div>
						  <div @click="sum">+</div>

						</div>
						`,
						props: {
							/* msg:{
								type: Array
							} */
							/* msg:{
								type: Object
							} */
							msgab:{
								type:Function
							},

						},
						methods:{
							sum(){
								this.msgab()
							}
						}


					}
				}
			})
		</script>
	</body>
</html>
8.2 子传父$emit
子组件向父组件传值,使用自定义事件$emit。
 <!-- 父组件 -->
  <div id="app">
    <!-- 不写参数默认传递btnClick的item -->
    <cpn @itemclick="cpnClcik"></cpn>

  </div>

  <!-- 子组件 -->
  <template id="cpn">

    <div>
      <button v-for="(item, index) in categoties" :key="index" @click="btnClick(item)">{

   {item.name}}</button>
    </div>
  </template>

  <script src="../js/vue.js"></script>

  <script>
    const cpn = {
      template: "#cpn",
      data() {
        return {
          categoties: [{
              id: 'aaa',
              name: '热门推荐'
            },
            {
              id: 'bbb',
              name: '手机数码'
            },
            {
              id: 'ccc',
              name: '家用家电'
            },
            {
              id: 'ddd',
              name: '电脑办公'
            },
          ]
        }
      },
      methods: {
        btnClick(item) {
          this.$emit('itemclick', item)
        }
      },
    };
    const app = new Vue({
      el: "#app",
      data() {
        return {

        }
      },
      methods: {
        cpnClcik(item) {
          console.log('cpnClick'+item.name);
        }
      },
      components: {
        cpn
      },
    })
</script>1.在子组件中定义一个方法btnClick(item),使用$emit,'itemclick'是事件名,item是传过去的值。
methods: {
        btnClick(item) {
          this.$emit('itemclick', item)
        }
      },
2.在子组件中监听点击事件并回调此方法
  <div>
      <button v-for="(item, index) in categoties" :key="index" @click="btnClick(item)">{

   {item.name}}</button>
   </div>
3.在父组件中定义一个方法cpnClcik(item)
methods: {
	cpnClcik(item) {
		console.log('cpnClick'+item.name);
	}
},4.并在父组件(vue实例)中调用<cpn @itemclick="cpnClcik"></cpn>(不写参数默认传递btnClick的item ),父组件监听事件名为itemclick的子组件传过来的事件。
<cpn @itemclick="cpnClcik"></cpn>
监听原生点击事件
<!DOCTYPE html>
<html lang="en">
<head>
	<meta charset="UTF-8">
	<title>Document</title>
	<script type="text/javascript" src="./vue.js"></script>
</head>
<body>
	<div id="app">
    <cpn @click.native="btnClick">点击</cpn>
  </div>
  <!-- 子组件 -->
  <template id="cpn">
    <div>
      我是子组件
    </div>
  </template>
</body>
<script type="text/javascript">
   // 父传子:props
    const cpn = {
      template: "#cpn",
      data() {
        return {
          name:"我是子组件的name"
        }
      }

    };
    const app = new Vue({
      el: "#app",
      data() {
        return {
          message:"hello"
        }
      },
       methods: {
        btnClick(){

          console.log('click')
        }
      },
      components: {
        cpn
      },
    })
</script>
</html>
8.3 父子组件通信案例
<!DOCTYPE html>
<html lang="en">

<head>
  <meta charset="UTF-8">
  <meta name="viewport" content="width=device-width, initial-scale=1.0">
  <meta http-equiv="X-UA-Compatible" content="ie=edge">
  <title>组件通信-父子通信案例</title>
</head>

<body>
<!-- 父组件 -->
<div id="app">

  <cpn :number1='num1' :number2='num2'></cpn>

</div>

<!-- 子组件 -->
<template id="cpn">

  <div>
    <h2>number1:{

   {number1}}</h2>
    <input type="text" v-model="number1">
    <h2>number2:{

   {number2}}</h2>
    <input type="text" v-model="number2">
  </div>
</template>
 <script src="https://cdn.jsdelivr.net/npm/vue/dist/vue.js"></script>

<script>
  // 父传子:props
  const cpn = {
    template: "#cpn",
    data() {
      return {
      }
    },
    props:{
      number1:[Number,String],
      number2:[Number,String],
    },
  };
  const app = new Vue({
    el: "#app",
    data: {
      num1:1,
      num2:2
    },
    components: {
      cpn
    },
  })
</script>
</body>

</html>
以上报错 不能直接改变props里面的值,可以改成下面这样
<!DOCTYPE html>
<html lang="en">

<head>
  <meta charset="UTF-8">
  <meta name="viewport" content="width=device-width, initial-scale=1.0">
  <meta http-equiv="X-UA-Compatible" content="ie=edge">
  <title>组件通信-父子通信案例</title>
</head>

<body>
<!-- 父组件 -->
<div id="app">

  <cpn :number1='num1' :number2='num2'></cpn>

</div>

<!-- 子组件 -->
<template id="cpn">

  <div>
    <h2>number1:{

   {number1}}</h2>
    <h2>number1:{

   {dnumber1}}</h2>
    <input type="text" v-model="dnumber1">
    <h2>number2:{

   {number2}}</h2>
    <h2>number2:{

   {dnumber2}}</h2>
    <input type="text" v-model="dnumber2">
  </div>
</template>
 <script src="https://cdn.jsdelivr.net/npm/vue/dist/vue.js"></script>

<script>
  // 父传子:props
  const cpn = {
    template: "#cpn",
    data() {
      return {
        dnumber1:this.number1,
        dnumber2:this.number2
      }
    },
    props:{
      number1:[Number,String],
      number2:[Number,String],
    },
  };
  const app = new Vue({
    el: "#app",
    data: {
      num1:1,
      num2:2
    },
    components: {
      cpn
    },
  })
</script>
</body>

</html> 实现父子组件的值双向绑定。
<!DOCTYPE html>
<html lang="en">

<head>
  <meta charset="UTF-8">
  <meta name="viewport" content="width=device-width, initial-scale=1.0">
  <meta http-equiv="X-UA-Compatible" content="ie=edge">
  <title>组件通信-父子通信案例</title>
</head>

<body>
<!-- 父组件 -->
<div id="app">

  <h2>子组件</h2>
  <cpn :number1='num1' :number2='num2'
       @num1change="num1Change"
       @num2change="num2Change"></cpn>
  <h2>--------------</h2>

  <h2>父组件{

   {num1}}</h2>
  <input type="text" v-model="num1" >
  <h2>父组件{

   {num2}}</h2>
  <input type="text" v-model="num2">

</div>

<!-- 子组件 -->
<template id="cpn">

  <div>
    <h2>number1:{

   {number1}}</h2>
    <h2>dnumber1:{

   {dnumber1}}</h2>
    <input type="text" :value="dnumber1" @input="num1input">
    <h2>number2:{

   {number2}}</h2>
    <h2>dnumber2:{

   {dnumber2}}</h2>
    <input type="text" :value="dnumber2" @input="num2input">
  </div>
</template>

<script src="../js/vue.js"></script>

<script>
  // 父传子:props
  const cpn = {
    template: "#cpn",
    data() {
      return {
        dnumber1:this.number1,
        dnumber2:this.number2
      }
    },
    props:{
      number1:[Number,String],
      number2:[Number,String],
    },
    methods: {
      num1input(event){
        this.dnumber1 = event.target.value
        this.$emit('num1change',this.dnumber1)
      },
      num2input(event){
        this.dnumber2 = event.target.value
        this.$emit('num2change',this.dnumber2)
      }
    },
  };
  const app = new Vue({
    el: "#app",
    data: {
      num1:1,
      num2:2
    },
    methods: {
      num1Change(value){
        this.num1=value
      },
      num2Change(value){
        this.num1=value
      }
    },
    components: {
      cpn
    },
  })
</script>
</body>

</html>
使用watch实现。
<!DOCTYPE html>
<html lang="en">

<head>
  <meta charset="UTF-8">
  <meta name="viewport" content="width=device-width, initial-scale=1.0">
  <meta http-equiv="X-UA-Compatible" content="ie=edge">
  <title>组件通信-父子通信案例(watch实现)</title>
</head>

<body>
  <!-- 父组件 -->
  <div id="app">

    <cpn :number1='num1' :number2='num2' @num1change="num1Change" @num2change="num2Change"></cpn>

    <h2>父组件{

   {num1}}</h2>
    <input type="text" v-model="num1" >
    <h2>父组件{

   {num2}}</h2>
    <input type="text" v-model="num2">

  </div>

  <!-- 子组件 -->
  <template id="cpn">

    <div>
      <h2>{

   {number1}}</h2>
      <input type="text" v-model="dnumber1">
      <h2>{

   {number2}}</h2>
      <input type="text" v-model="dnumber2">
    </div>
  </template>

  <script src="../js/vue.js"></script>

  <script>
    // 父传子:props
    const cpn = {
      template: "#cpn",
      data() {
        return {
          dnumber1:this.number1,
          dnumber2:this.number2
        }
      },
      props:{
        number1:[Number,String],
        number2:[Number,String],
      },
      watch: {
        dnumber1(newValue){
          this.dnumber1 = newValue
          this.$emit('num1change',newValue)
        },
        dnumber2(newValue){
          this.dnumber1 = newValue
          this.$emit('num2change',newValue)
        }
      },
    };
    const app = new Vue({
      el: "#app",
      data() {
        return {
          num1:1,
          num2:2,
        }
      },
      methods: {
        num1Change(value){
          this.num1=value*10
        },
        num2Change(value){
          this.num1=value*100
        }
      },
      components: {
        cpn
      },
    })
  </script>
</body>

</html>
最终实现
<!DOCTYPE html>
<html>
	<head>
		<meta charset="utf-8">
		<title></title>

	</head>
	<body>
		<div id="app">
			<h2>子组件</h2>
			<cpn :number1="num1" :number2="num2" @num1change="Num1change" @num2change="Num2change"></cpn>
			<h2>--------------</h2>

			<h2>父组件{

   {num1}}</h2>
			<input type="text" v-model="num1">
			<h2>父组件{

   {num2}}</h2>
			<input type="text" v-model="num2">
		</div>
		<template id="cpn">
			<div>
				<h2>dnumber1:{

   {dnumber1}}</h2>
				<h2>number1:{

   {number1}}</h2>
				<input type="text" v-model="dnumber1"/>
				<br />
				<h2>dnumber2:{

   {dnumber2}}</h2>
				<h2>number2:{

   {number2}}</h2>
				<input type="text" v-model="dnumber2"/>
			</div>
		</template>
		<script src="https://cdn.jsdelivr.net/npm/[email protected]/dist/vue.js"></script>
		<script>
			/* 子组件 */
			const cpn = {
				template: '#cpn',
				data() {
					return {
						dnumber1: this.number1,
						dnumber2: this.number2
					}
				},
				props: {
					number1: {
						type: [Number,String]
					},
					number2: {
						type:[Number,String]
					}
				},
				watch:{
					dnumber1(n){
						this.$emit('num1change', n/100)
					},
					dnumber2(n){

						this.$emit('num2change', n*100)
					},
					number1(n){
						this.dnumber1 = n*100
					},
					number2(n){
						this.dnumber2 = n/100
					}
				}
			}

			/* 父组件 */
			const app = new Vue({
				el: "#app",
				data() {
					return {
						num1: 1,
						num2: 2
					}
				},
				methods: {
					Num1change(value) {
						this.num1 = value
					},
					Num2change(value) {
						this.num2 = value
					}
				},
				computed: {

				},
				components: {
					cpn
				}
			})
		</script>
	</body>
</html>
9. 父访问子(children-ref)
父组件访问子组件,有时候需要直接操作子组件的方法,或是属性,此时需要用到$children和$ref。
  <!-- 父组件 -->
  <div id="app">
    <cpn></cpn>
    <cpn></cpn>
    <cpn ref="aaa"></cpn>
    <button @click="btnClick" >按钮</button>
  </div>
  <!-- 子组件 -->
  <template id="cpn">
    <div>
      我是子组件
    </div>
  </template>
  <script src="../js/vue.js"></script>
  <script>
    // 父传子:props
    const cpn = {
      template: "#cpn",
      data() {
        return {
          name:"我是子组件的name"
        }
      },
      methods: {
        showMessage(){
          console.log("showMessage");
        }
      },
    };
    const app = new Vue({
      el: "#app",
      data() {
        return {
          message:"hello"
        }
      },
      methods: {
        btnClick(){
          // 1.children
          // console.log(this.$children[0].showMessage)
          // for (let cpn of this.$children) {
          //   console.log(cpn.showMessage)
          // }
          // 2.$ref
          console.log(this.$refs.aaa.name)
        }
      },
      components: {
        cpn
      },
    })
  </script>
$children方式
// 1.children
console.log(this.$children[0].showMessage)
for (let cpn of this.$children) {
    console.log(cpn.showMessage)
}使用this.$children直接获取**当前实例的直接子组件,需要注意 $children 并不保证顺序,也不是响应式的。**如果你发现自己正在尝试使用 $children 来进行数据绑定,考虑使用一个数组配合 v-for 来生成子组件,并且使用 Array 作为真正的来源。
$refs方式:ref 被用来给元素或子组件注册引用信息。引用信息将会注册在父组件的 $refs 对象上。如果在普通的 DOM 元素上使用,引用指向的就是 DOM 元素;如果用在子组件上,引用就指向组件实例:
ref的基本使用 用在元素上
<!DOCTYPE html>
<html>
	<head>
		<meta charset="utf-8">
		<title></title>

	</head>
	<body>
		<div id="app">
          <p ref="p" @click="handelClick" id="ppp">hello</p>
		</div>
		<script src="https://cdn.jsdelivr.net/npm/[email protected]/dist/vue.js"></script>
		<script>
			const app = new Vue({
				el: "#app",
				data: {

				},
				methods: {
                 handelClick(){
					console.log(this.$refs.p);
					 const ppp = document.querySelector('#ppp')
					 console.log(ppp);
				 }
				},
				computed:{

				}
			})
		</script>
	</body>
</html>
先定义子组件
<cpn ref="aaa"></cpn>直接调用
ref在子组件上的使用
<!DOCTYPE html>
<html>
	<head>
		<meta charset="utf-8">
		<title></title>

	</head>
	<body>
		<div id="app">
           <counter ref="one" @change="handelChange"></counter>
		   <counter ref="two" @change="handelChange"></counter>
		   <div>total:{

   {total}}</div>
		</div>
		<script src="https://cdn.jsdelivr.net/npm/[email protected]/dist/vue.js"></script>
		<script>
			Vue.component('counter',{
				template:'<div @click="handelclick">{

   {number}}</div>',
				data(){
					return {
						number:0
					}
				},
				methods:{
					handelclick(){
						this.number++;
						this.$emit('change');
					}
				}
			})
			const app = new Vue({
				el: "#app",
				data: {
					total:0
				},
				methods: {
                 handelChange(){
					 this.total = this.$refs.one.number + this.$refs.two.number
				 }
				},
				computed:{

				}
			})
		</script>
	</body>
</html>
<!-- ref可以调用组件中的数据 -->
<!DOCTYPE html>
<html>
<head>
<meta charset="utf-8">
<title></title>
</head>
<body>
<div id="app">
<helloworld ref="hello"></helloworld>
<button @click="getHello">获取helloworld组件中的值</button>
</div>
<script src="https://cdn.jsdelivr.net/npm/[email protected]/dist/vue.js"></script>
<script>
Vue.component('helloworld',{
template:'<div></div>',
data(){
return {
number:0
}
},
methods:{
handelclick(){
console.log('被调用了');
}
}
})
const app = new Vue({
el: "#app",
data: {
},
methods: {
getHello(){
this.$refs.hello.handelclick();
console.log(this.$refs.hello.number);
console.log(this.$refs.hello.$el.innerHTML);
}
},
computed:{
}
})
</script>
</body>
</html>
<!-- ref可以调用组件中的方法 -->is用于动态组件且基于 DOM 内模板的限制来工作。
基于 DOM 内模板的限制来工作
<!DOCTYPE html>
<html>
	<head>
		<meta charset="utf-8">
		<title></title>

	</head>
	<body>
		<div id="app">
          <table>
			  <tr is="row">
			  </tr>
		  </table>
		</div>
		<script src="https://cdn.jsdelivr.net/npm/[email protected]/dist/vue.js"></script>
		<script>
			Vue.component('row',{
				template:'<tr><td>111</td></tr>'
			})
			const app = new Vue({
				el: "#app",
				data() {
					return {}
				},
				methods: {

				},
				computed:{

				}
			})
		</script>
	</body>
</html>
动态组件component
<!DOCTYPE html>
<html>
	<head>
		<meta charset="utf-8">
		<title></title>
	</head>
	<body>
		<div id="app">
			<!-- <child-one></child-one>
			<child-two></child-two> -->
			<component :is="type"></component>
			<button @click="handerClick">点击</button>
		</div>
		<script src="https://cdn.jsdelivr.net/npm/vue/dist/vue.js"></script>
		 <script>
			 Vue.component('child-one',{
				 template:'<div>child-one</div>'
			 })
			 Vue.component('child-two',{
			 	template:'<div>child-two</div>'
			 })
			const app = new Vue({
				el:'#app',
				data(){
					return {
						type:'child-one'
					}
				},
				methods:{
					handerClick(){
						console.log('111');
						this.type=this.type==='child-one'?'child-two':'child-one';
					}

				}
			})

		 </script>
	</body>
</html>
这是动态组件官网案例
<!DOCTYPE html>
<html>
	<head>
		<meta charset="utf-8">
		<title></title>
		<style>
		.tab-button {
		        padding: 6px 10px;
		        border-top-left-radius: 3px;
		        border-top-right-radius: 3px;
		        border: 1px solid #ccc;
		        cursor: pointer;
		        background: #f0f0f0;
		        margin-bottom: -1px;
		        margin-right: -1px;
		      }
		      .tab-button:hover {
		        background: #e0e0e0;
		      }
		      .tab-button.active {
		        background: #e0e0e0;
		      }
		      .tab {
		        border: 1px solid #ccc;
		        padding: 10px;
		      }
		</style>
	</head>
	<body>
		<div id="app">
			<button v-for="(tab,index) in tabs":key="index" @click="handelclick(tab)" :class="getStyle(tab)">{

   {tab}}</button>
			<component :is="currentTabComponent"></component>
		</div>
		<script src="https://cdn.jsdelivr.net/npm/vue/dist/vue.js"></script>
		 <script>
			Vue.component('tab-home',{
				template:'<div>child-one</div>'
			})
			Vue.component('tab-posts',{
				template:'<div>child-two</div>'
			})
			Vue.component('tab-archive',{
				template:'<div>child-three</div>'
			})
			const app = new Vue({
				el:'#app',
				data(){
					return {
						 currentTab: "Home",
						 tabs: ["Home", "Posts", "Archive"]
					}
				},
				methods:{
					handelclick(tab){
						this.currentTab = tab
					},
					getStyle(tab){
						return ['tab-button',{active:this.currentTab===tab}]
					}
				},
				computed:{
					currentTabComponent(){
						/* return `tab-${this.currentTab}`.toLowerCase() */
						return "tab-"+this.currentTab.toLowerCase()
					},

				}
			})

		 </script>
	</body>
</html>