LaTeX 环境 Environment
原 文:Environments
译 者:Xovee
翻译时间:2023年4月16日
LaTeX环境被用于对文档的某一个部分进行特别的格式设置。本文介绍如何使用已有的LaTeX环境,以及如何定义新的环境。
介绍
环境由\begin{name}和\end{name}声明:
\begin{name}
Your content here...
...goes here...
\end{name}
其中name是环境的名字,例如在下面的例子中,我们使用center环境来让一个段落的文字居中对齐:
\documentclass{article}
\begin{document}
\begin{center}
This is a demonstration of the \texttt{center} environment.
This paragraph of text will be \textit{centred} because it is
contained within a special environment. Environments provide
an efficient way to modify blocks of text within your document.
\end{center}
\end{document}

环境
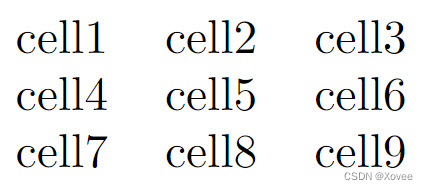
下面的例子使用tabular环境来显示一个表格。该环境接受一个额外的参数{c c c},这个参数定义了表格中内容的对齐方式。更多有关创建表格的信息请参考这篇文章。
\documentclass{article}
\begin{document}
\begin{tabular}{ c c c }
  cell1 & cell2 & cell3 \\
  cell4 & cell5 & cell6 \\
  cell7 & cell8 & cell9 \\
 \end{tabular}
\end{document}
大部分环境命令接受的参数都位于方括号之内。
定义一个新环境
我们使用\newenvironment 来定义新的环境:
\newenvironment{name}[numarg][optarg_default]{begin_def}{end_def}
其中:
name是我们指定的环境名numarg是参数的数量(1到9)。如果没有指定numarg,则该环境不接受任何参数输入。例如boxed环境。optarg_default将环境的第一个参数设定为可选参数,并且设定了其默认值。即,如果用户没有输入可选参数的值,那么环境将会使用默认值。begin_def定义了环境开始时候所执行的代码。你可以在这里使用环境的参数,例如#1、#2等。end_def定义了环境结束时所执行的代码。但是在这里你不能使用环境的参数。
定义简单的环境
在这个例子中,我们定义boxed环境。它不接受任何参数。它的功能是给文本外加一个方框。
\documentclass{article}
%We can define the environment in the preamble
\newenvironment{boxed}
    {\begin{center}
    \begin{tabular}{|p{0.9\textwidth}|}
    \hline\\
    }
    {
    \\\\\hline
    \end{tabular}
    \end{center}
    }
%
\begin{document}
Now we can use the \texttt{boxed} environment in our document:

\begin{boxed}
This text is formatted within the \texttt{boxed} environment.
\end{boxed}

This text is typeset outside the \texttt{boxed} environment.
\end{document}
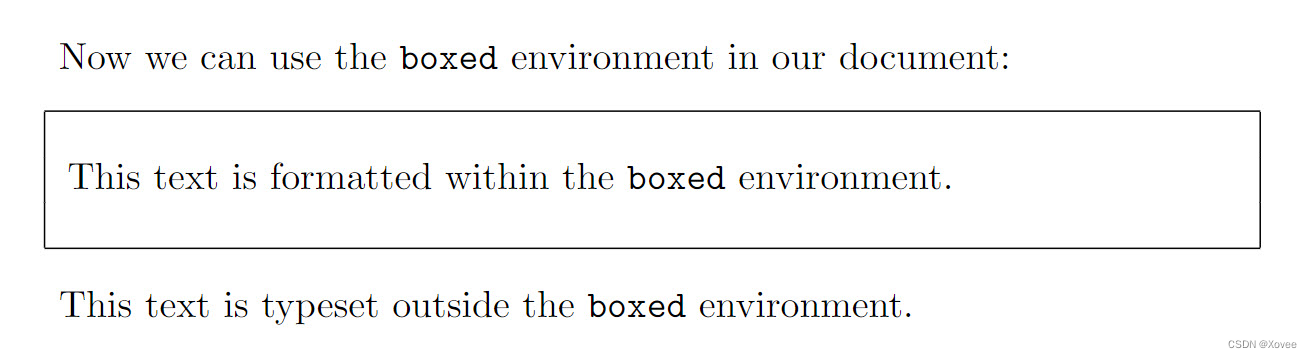
现在我们来分析如何使用\newenvironment 定义这个boxed环境:
name是boxed- 没有使用
[numarg]或者[optarg_default] begin_def定义在大括号之内,里面的代码将会在环境开头执行:
\begin{center}
\begin{tabular}{|p{0.9\textwidth}|}
\hline\\
end_def定义在大括号之内,里面的代码将会在环境结束的时候执行:
 \\\\\hline
 \end{tabular}
 \end{center}
在这个例子中,begin_def定义了一个center环境,在center环境中,定义了tabular环境的初始代码(在文本外画横线和竖线)。end_def定义了一个横线,然后是tabular环境和center环境的结束代码。
定义可接受参数的环境
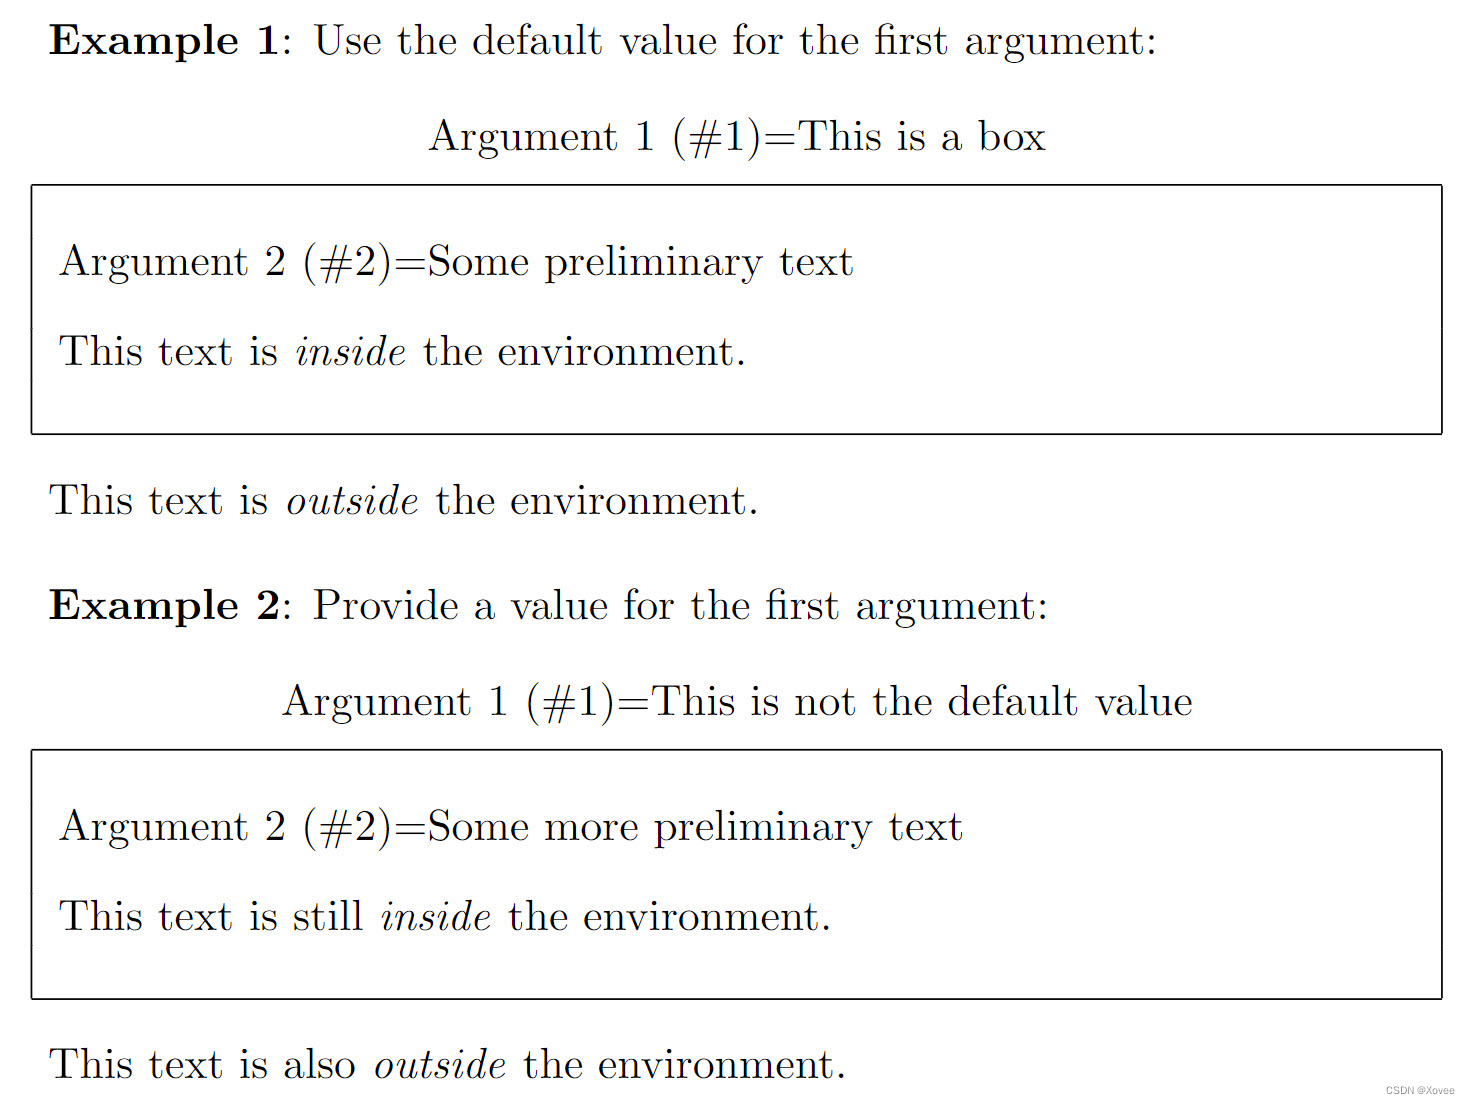
基于上一个例子,我们定义可以接受参数的boxed环境:
- 使用一个可选参数来定义
boxed环境的标题。如果用户没有输入可选参数,使用默认的标题即This is a box - 使用第二个参数,该参数的作用是在环境内容的开头显示参数的内容。
所以我们有两个参数:
- 第一个参数是可选的
- 第二个参数是强制的
同时,numarg需要设定为2.
下面是更新后的boxed环境:
\newenvironment{boxed}[2][This is a box]
    {\begin{center}
    Argument 1 (\#1)=#1\\[1ex]
    \begin{tabular}{

   {

   {!}}p{0.9\textwidth}{

   {!}}}
    \hline\\
    Argument 2 (\#2)=#2\\[2ex]
    }
    {
    \\\\\hline
    \end{tabular}
    \end{center}
    }
- 我们新增了
[numarg],值设定为2 - 我们新增了
[optarg_default],使第一个参数变为可选参数,同时提供了一个默认值即This is a box。
下面的例子展示了新定义的环境的使用:
\documentclass{article}
% Note the default value for the first
% argument is provided by [This is a box]
\newenvironment{boxed}[2][This is a box]
    {\begin{center}
    Argument 1 (\#1)=#1\\[1ex]
    \begin{tabular}{|p{0.9\textwidth}|}
    \hline\\
    Argument 2 (\#2)=#2\\[2ex]
    }
    {
    \\\\\hline
    \end{tabular}
    \end{center}
    }
\begin{document}
\textbf{Example 1}: Use the default value for the first argument:

\begin{boxed}{Some preliminary text}
This text is \textit{inside} the environment.
\end{boxed}

This text is \textit{outside} the environment.

\vskip12pt

\textbf{Example 2}: Provide a value for the first argument:

\begin{boxed}[This is not the default value]{Some more preliminary text}
This text is still \textit{inside} the environment.
\end{boxed}

This text is also \textit{outside} the environment.
\end{document}
带编号的环境
我们可以手动创建计数器,或者使用\newtheorem环境来实现带编号的环境:
\documentclass{article}
% Define our numbered environment within the preamble
\newcounter{example}[section]
\newenvironment{example}[1][]{\refstepcounter{example}\par\medskip
\noindent \textbf{Example~\theexample. #1} \rmfamily}{\medskip}
% Another numbered environment defined with \newtheorem
\usepackage{amsmath} % For the \newtheorem command
\newtheorem{SampleEnv}{Sample Environment}[section]
\begin{document}
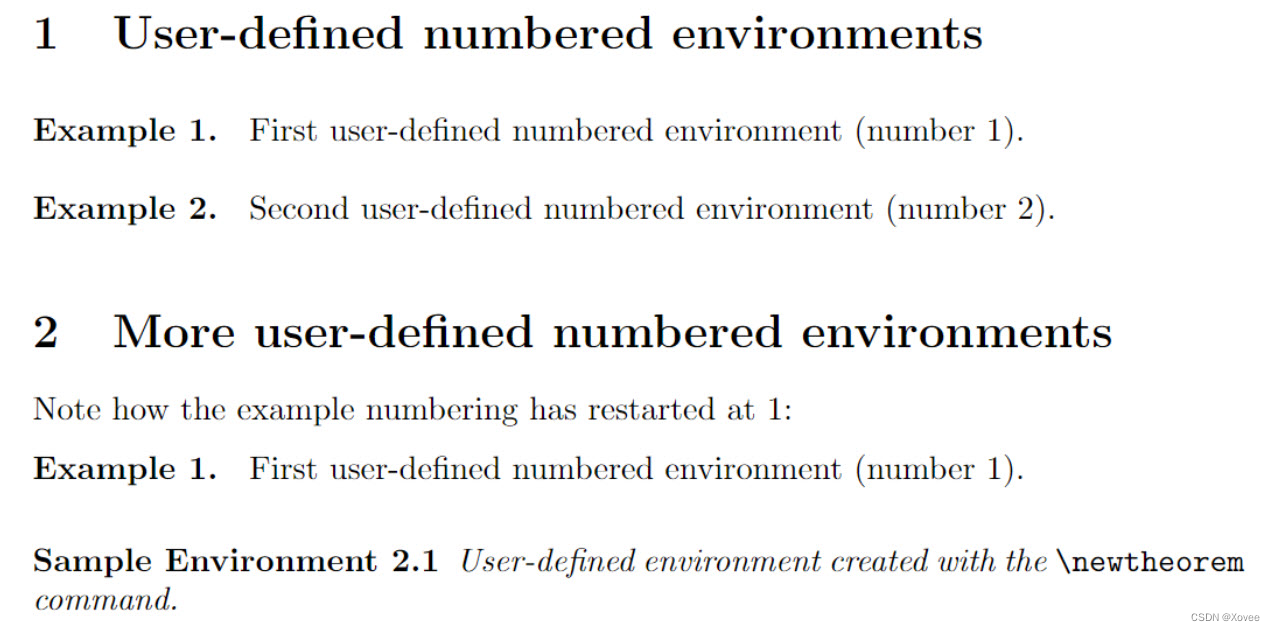
\section{User-defined numbered environments}
\begin{example}
First user-defined numbered environment (number \theexample).
\end{example}
\begin{example}
Second user-defined numbered environment (number \theexample).
\end{example}
\section{More user-defined numbered environments}
Note how the example numbering has restarted at 1:
\begin{example}
First user-defined numbered environment (number \theexample).
\end{example}
\begin{SampleEnv}
User-defined environment created with the \verb|\newtheorem| command.
\end{SampleEnv}
\end{document}
注意事项:
- 在
example环境中,命令\newcounter{example}[section]创建了一个计数器(counter),命名为example。该计数器:- 使用
refstepcounter{example}命令来对计数器的数字进行增加(一次加1) - 每次有
\section{...}开始的时候,重置计数器 - 一个新的变量,通过
\theexample访问。更多有关计数器的内容请参考这篇文章。
- 使用
- 命令
\newtheorem直接创建了一个编号环境,并且接收三个参数:- 环境的名字(在这个例子中为
SampleEnv) - 环境的展示标题(在这个例子中为加粗的
Sample Environment) - 一个可选参数,决定了计数器重置的规则(在这个例子中计数器的值随着
section环境变化)
- 环境的名字(在这个例子中为
除了\newtheorem环境,amsthm包和amsmath包还提供了很多其他的数学环境。
重定义已有的环境
我们可以使用\renewenvironment 命令来重定义已有的环境,这个命令的语法与\newenvironment相同:
\newenvironment{name}[numarg][optarg_default]{begin_def}{end_def}
下面的例子展示了如何重定义了itemize环境(只是一个例子)。新的itemize环境将文字居中对齐,并且将其字体设置为斜体:
\documentclass{article}
% Redefine the environment in the preamble
\renewenvironment{itemize}
{\begin{center}\em}
{\end{center}}
\begin{document}

\begin{itemize}
We have redefined the \texttt{itemize} environment so that any text
within it is centred and emphasised (italicized). It no longer creates
a bulleted list---this is only an example and not intended for use
in real documents!
\end{itemize}
\end{document}
