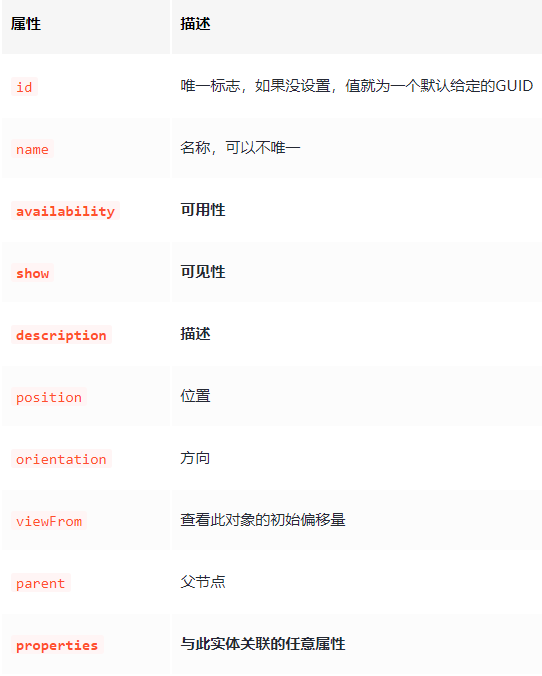
使用 viewer.entities.add 方法进行添加Entity矢量数据,属性如下:
<!--
 * @Author: HuKang
 * @Date: 2023-08-18 11:06:43
 * @LastEditTime: 2023-08-25 09:16:59
 * @LastEditors: HuKang
 * @Description: program-c
 * @FilePath: \global-data-display\src\views\program-c\index.vue
-->
<template>
  <div>
    <div id="cesiumContainer"></div>
  </div>
</template>

<script setup lang="ts">
import * as Cesium from "cesium";
import {

     Viewer } from "cesium";
import cesium from "vite-plugin-cesium";
import {

     getSatellitecloudApi, getGenerateGridApi } from "@/api/servies";

import {

     onMounted } from "vue";
import TOKEN from "@/utils/Tooken";

/**
 * Cesium
 */
// Token 设置
Cesium.Ion.defaultAccessToken = TOKEN;
}
// Viewer
const viewer = ref();
/**
 * 初始化函数
 */
const initViewer = () => {


  viewer.value = new Cesium.Viewer("cesiumContainer", {


    infoBox: false,
  });

  // 去除版权信息
  viewer.value.cesiumWidget.creditContainer.style.display = "none";

  // 增加太阳光效果
  // viewer.value.scene.globe.enableLighting = true;

  // 控制视角不转到底下
  viewer.value.scene.globe.depthTestAgainstTerrain = true;

  // 增加瓦片-海图数据
  const imageryProvider = new Cesium.UrlTemplateImageryProvider({


    url: "cesium-api/map/getMap/{x}/{y}/{z}.png",
    credit: "mapname",
    tilingScheme: new Cesium.GeographicTilingScheme({


      ellipsoid: Cesium.Ellipsoid.WGS84,
    }),
    maximumLevel: 18,
  });
  viewer.value.scene.imageryLayers.addImageryProvider(imageryProvider);

// 创建自己的数据集合
const datasource = new Cesium.CustomDataSource("")

};
onMounted(() => {


  initViewer();
});
</script>

<style scoped></style>
一、绘制点
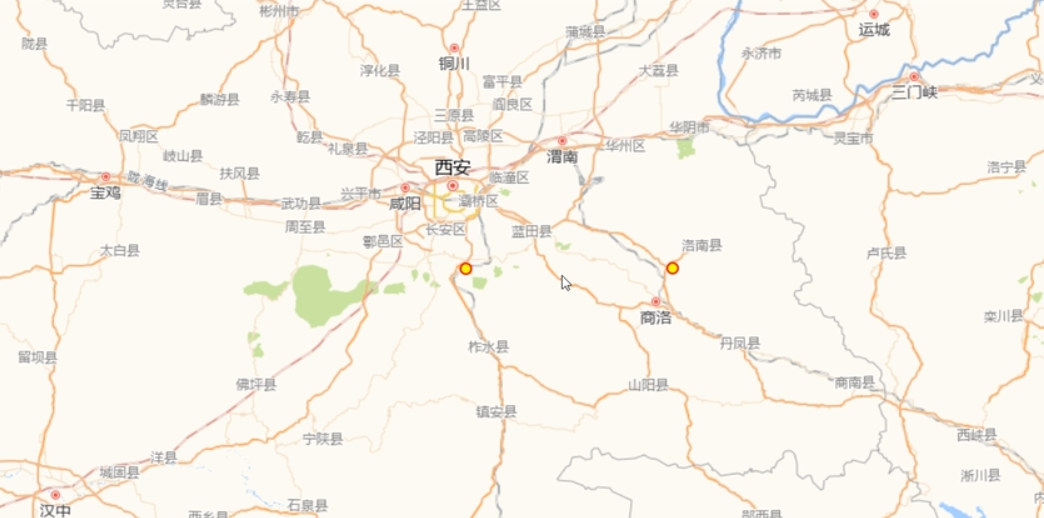
1. 第一种
var pointentity = viewer.value.entities.add({


  id: "point1",
  position: Cesium.Cartesian3.fromDegrees(109, 34),
  point: {


    pixelSize: 10,
    color: Cesium.Color.YELLOW, // 点的颜色
    outlineColor: Cesium.Color.RED, // 外边框颜色
    outlineWidth: 2,  // 外边框宽度
  },
});
2. 第二种
const pointentity2 = new Cesium.Entity({


  id: "point2",
  position: Cesium.Cartesian3.fromDegrees(109, 34),
  point: {


    pixelSize: 10,
    color: Cesium.Color.YELLOW,
    outlineColor: Cesium.Color.RED,
    outlineWidth: 2,
  },
});
viewer.value.entites.add(pointentity2)
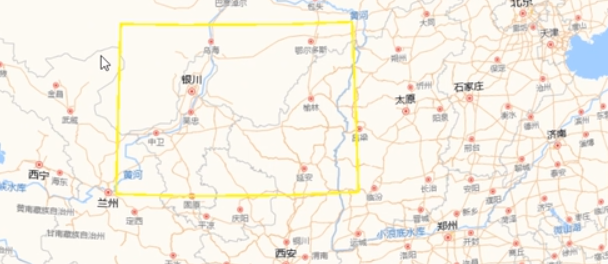
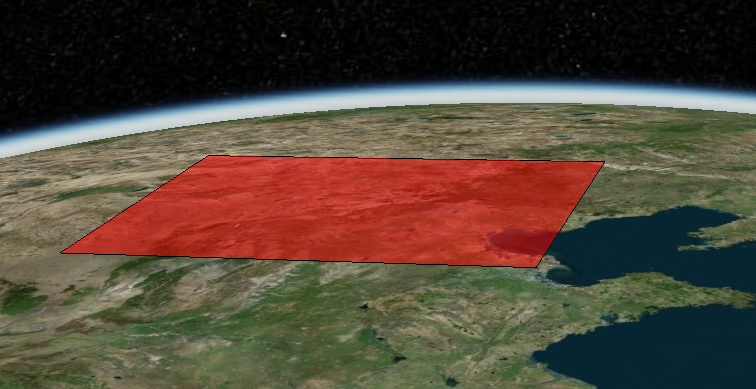
二、绘制面

viewer.value.entities.add({


   id: 'polygontest',
   name: 'mian',
   polygon: {


       hierarchy: Cesium.Cartesian3.fromDegreesArray([
           109.080842, 45.002073,
           105.91517, 45.002073,
           104.058488, 44.996596,
           104.053011, 43.002989,
           104.053011, 41.003906,
           105.728954, 40.998429,
           107.919731, 41.003906,
           109.04798, 40.998429,
           111.047063, 40.998429,
           111.047063, 42.000709,
           111.047063, 44.476286,
           111.05254, 45.002073,
           109.080842, 45.002073]),
       height: 100,
       material: Cesium.Color.RED.withAlpha(0.5),
       outline: true,
       outlineColor: Cesium.Color.BLUE,
       outlineWidth: 1,
       fill: true
       }
});
三、绘制线
1. 不设置材质
viewer.value.entities.add({


   id: 'polygontest',
   name: 'line',
   polyline: {


       positions: Cesium.Cartesian3.fromDegreesArray([
           109.080842, 45.002073,
           105.91517, 45.002073,
           104.058488, 44.996596,
           104.053011, 43.002989,
           104.053011, 41.003906,
           105.728954, 40.998429,
           107.919731, 41.003906,
           109.04798, 40.998429,
           111.047063, 40.998429,
           111.047063, 42.000709,
           111.047063, 44.476286,
           111.05254, 45.002073,
           109.080842, 45.002073]),
       width: 2,
       material: Cesium.Color.YELLOW,
       }
});
2. 设置材质
- 箭头
var entity = viewer.value.entities.add({


  id: "polyline",
  name: "borderLine",
  polyline: {


    positions: Cesium.Cartesian3.fromDegreesArray([28, 69, 98, 69]),
    width: 50,
    material: new Cesium.PolylineArrowMaterialProperty(Cesium.Color.RED),
  },
});
viewer.value.zoomTo(entity);//相机飞行到绘制地点
四、移除 Entity
//方法一,先查后删
var removeEntity = viewer.entities.getById('testLine');
console.log(removeEntity)
viewer.entities.remove(removeEntity)
//方法二,直接删除
viewer.entities.removeById('uniqueId')
//方法三,删除所有
window.viewer.entities.removeAll()
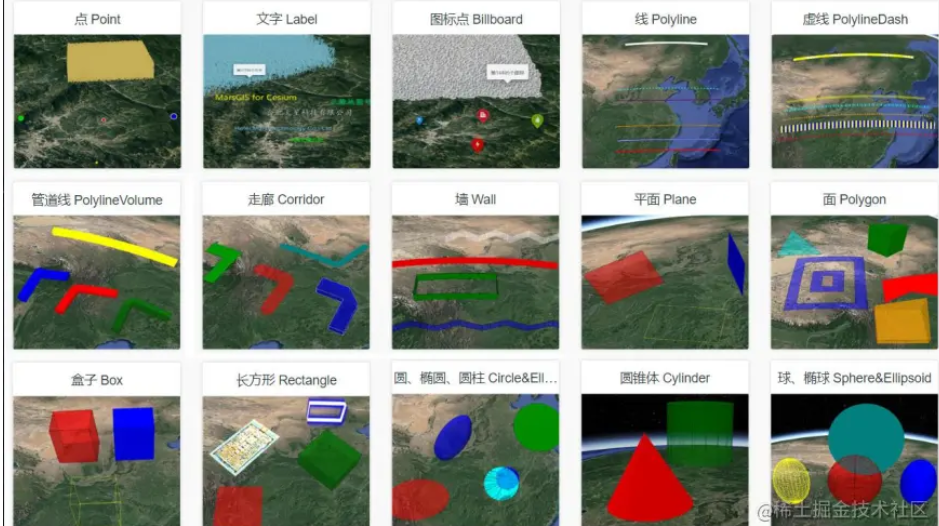
五、代码演示
- 符合地球曲率的实体创建
二维 :
(1)创建椭圆 ellipse

//绘制椭圆
  const ellipse =  new Cesium.Entity({


    position: Cesium.Cartesian3.fromDegrees(114.3, 39.9, 100),
    ellipse: {


      semiMinorAxis: 30000, //椭圆的短半轴
      semiMajorAxis: 40000, //椭圆的长半轴
      extrudedHeight: 4000.0, //拉伸高度
      material: Cesium.Color.WHITE.withAlpha(0.5), //椭圆颜色
      outline: true, //是否显示边框
      outlineColor: Cesium.Color.BLUE, //边框颜色
      rotation: Cesium.Math.toRadians(45), //旋转角度,从正北方向开始顺时针旋转
    },
  });
(2)创建线

const polyline =  new Cesium.Entity({


    polyline: {


      positions: Cesium.Cartesian3.fromDegreesArray([112.3, 39.9, 114.4, 39.9]), //返回笛卡尔坐标数组
      width: 10,
      material: Cesium.Color.RED,
    },
  });
因为线的坐标是由多个坐标对组成,我们这里使用. FromDegreesArray 方法批量转换坐标;
一定要注意 api 的名称写对,cesium 中属性名写错是不会报错的;
(3)创建多边形
  var polygon = new Cesium.Entity({


    name: "多边形",
    polygon: {


      hierarchy: Cesium.Cartesian3.fromDegreesArray([
        114.3, 39.9, 114.3, 32.0, 107.0, 32.0, 107.0, 39.9, 114.3, 39.9,
      ]),
      material: Cesium.Color.RED.withAlpha(0.5),
      outline: true,
      outlineColor: Cesium.Color.BLACK,
    },
  });
相比平面 plane ,我们可以看到多边形是紧贴地面的;
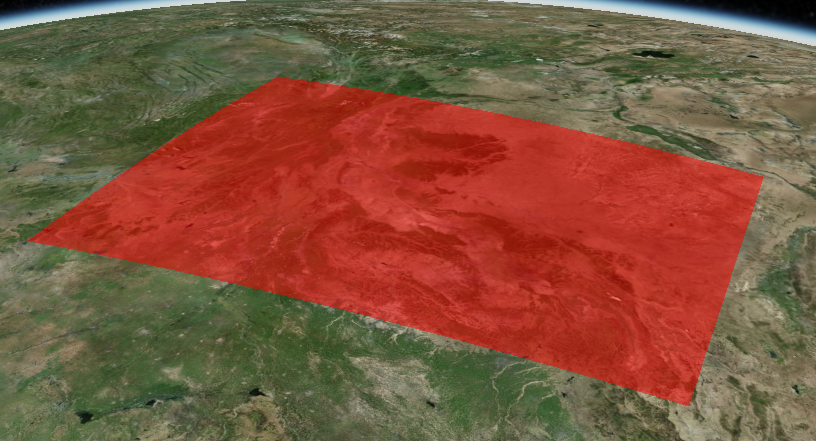
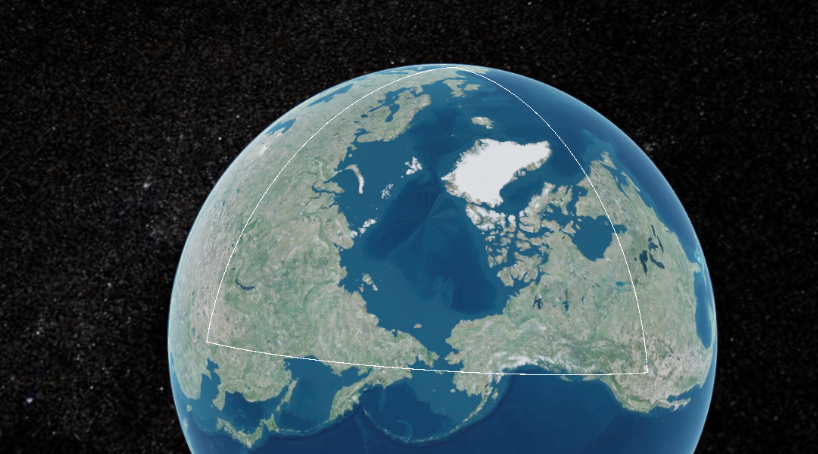
(4)创建矩形
 var rectangle = new Cesium.Entity({


    name : '矩形',
    rectangle : {


        coordinates : Cesium.Rectangle.fromDegrees(114.3, 39.9, 0.4, 50),
        material : Cesium.Color.RED.withAlpha(0.5),
        outline : true,
        outlineColor : Cesium.Color.BLACK,
        height : 0,
        heightReference : Cesium.HeightReference.CLAMP_TO_GROUND,
        extrudedHeight : 500000
    }
});
乍一看,矩形似乎和 box 没什么区别,但是矩形是一个二维区域,由经纬度坐标指定,它可以被挤压成一个立体的形状,且会随着地球的曲率而弯曲。而盒子是一个三维的几何体,它可以用来表示一个立方体或长方体,不会随着地球的曲率而弯曲。
三维
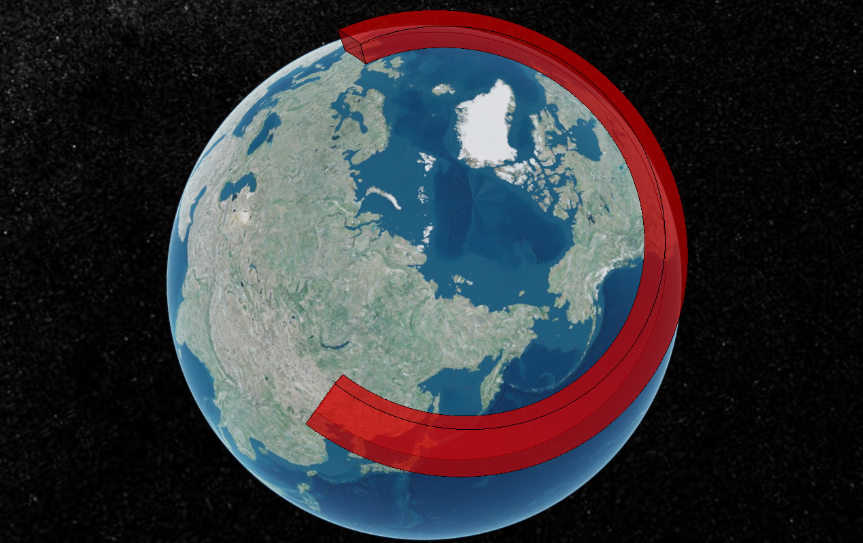
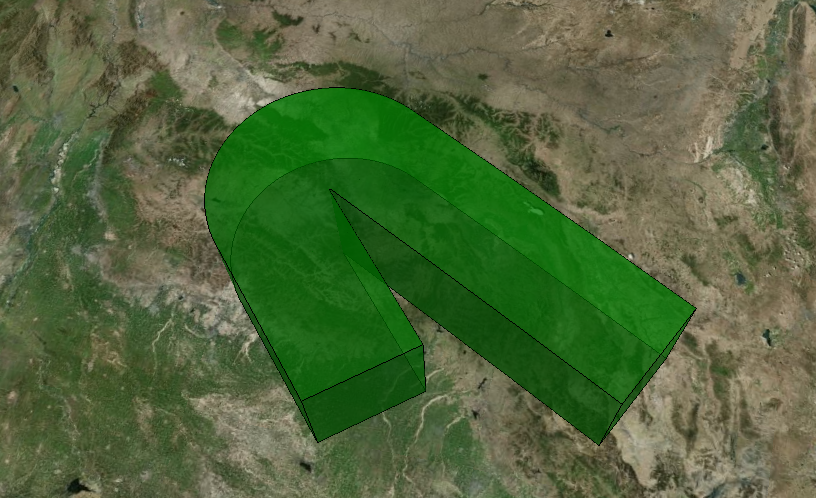
(1)创建走廊 corridor
描述走廊,走廊由中心线和宽度定义的形状符合地球曲率的线。它可以放置在地面上或高空并可以选择挤出成一个体积,可看作是复合地球曲率的线。
  //绘制走廊
  const corridor = new Cesium.Entity({


    name: "走廊",
    corridor: {


      positions: Cesium.Cartesian3.fromDegreesArray([
        114.3, 39.9, -114.0, 40.0, -0.0, 40.0, 114.3, 39.9,
      ]), // 走廊的位置与形状
      height: 200.0, // 走廊的高度
      extrudedHeight: 100.0, //拉伸高度
      width: 2000.0, // 走廊的宽度
      cornerType: Cesium.CornerType.BEVELED, //走廊拐角类型 默认圆角,可选BEVELED或MITERED:
      material: Cesium.Color.BLUE.withAlpha(0.5), //走廊颜色
      outline: true, // 是否展示轮廓
      outlineColor: Cesium.Color.WHITE, //轮廓颜色
    },
  });
(2)创建墙
描述定义为线带和可选的最大和最小高度的二维墙。墙符合地球曲率,可以沿着地面或在高处放置。
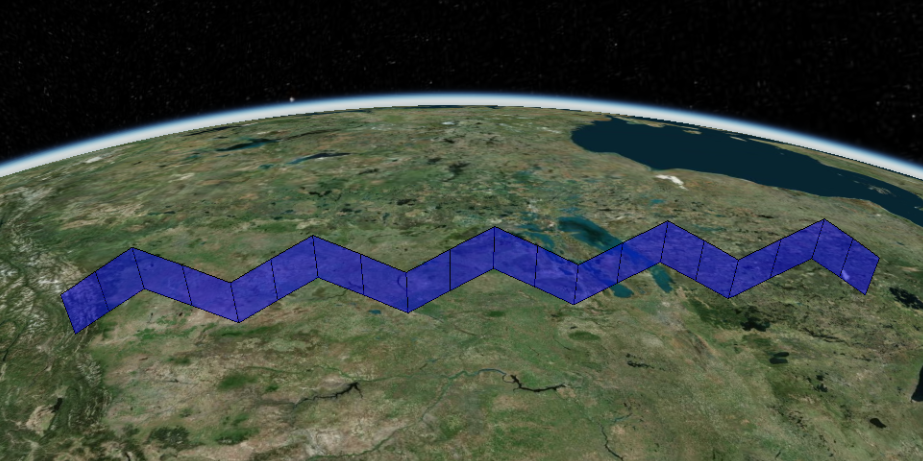
{


 name: "起伏之墙",
 wall: {


   positions: Cesium.Cartesian3.fromDegreesArray([
     -115.0,50.0,
     -112.5,50.0,
     -110.0,50.0,
     -107.5,50.0,
     -105.0,50.0,
     -102.5,50.0,
     -100.0,50.0,
     -97.5,50.0,
     -95.0,50.0,
     -92.5,50.0,
     -90.0,50.0,
   ]),
   maximumHeights: [
     100000,200000,100000,200000,
     100000,200000,100000,200000,
     100000,200000,100000,
   ],
   minimumHeights: [
     0,100000,
     0,100000,
     0,100000,
     0,100000,
     0,100000,
     0,
   ],
   material: Cesium.Color.BLUE.withAlpha(0.5),
   outline: true,
   outlineColor: Cesium.Color.BLACK,
 },
}
(3)创建折线体积:
var polylineVolume = new Cesium.Entity({


    name: "折线体积",
    polylineVolume: {


      positions: Cesium.Cartesian3.fromDegreesArray([
        114.3, 39.9, 112.0, 36.0, 115.0, 38.0,
      ]),
      shape: [
        new Cesium.Cartesian2(-50000, -50000),
        new Cesium.Cartesian2(50000, -50000),
        new Cesium.Cartesian2(50000, 50000),
        new Cesium.Cartesian2(-50000, 50000),
      ],
      material: Cesium.Color.GREEN.withAlpha(0.5),
      outline: true,
      outlineColor: Cesium.Color.BLACK,
    },
  });
- 不符合地球曲率的实体创建
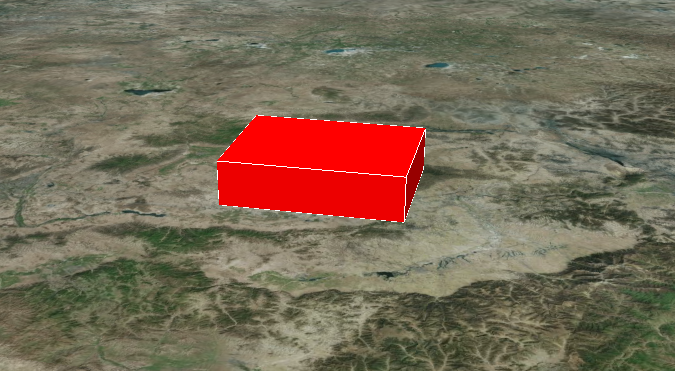
(1)创建一个立方体:
//创建实体所在的坐标
const position = Cesium.Cartesian3.fromDegrees(113.3, 39.9, 5000)

const box = new Cesium.Entity({


    position: position, //位置
    box: {


      dimensions: new Cesium.Cartesian3(4000, 3000, 5000), //盒子的长宽高
      material: Cesium.Color.RED.withAlpha(0.5), //盒子颜色
      outline: true, //边框
      outlineColor: Cesium.Color.WHITE, //边框颜色
    },
  });

 //将立方体添加到场景中
 viewer.entities.add(box);
这里 cesium 中使用的不是经纬度坐标,而是笛卡尔三维空间直角坐标系,所以需要对我们的坐标进行一次转化;可以看到 box 就是我们创建的立方体对象,这里的 position 就是实体在 cesium 空间中的位置;如果不设置这个属性,程序不会报错,但实体也不会显示;
(2)创建点:
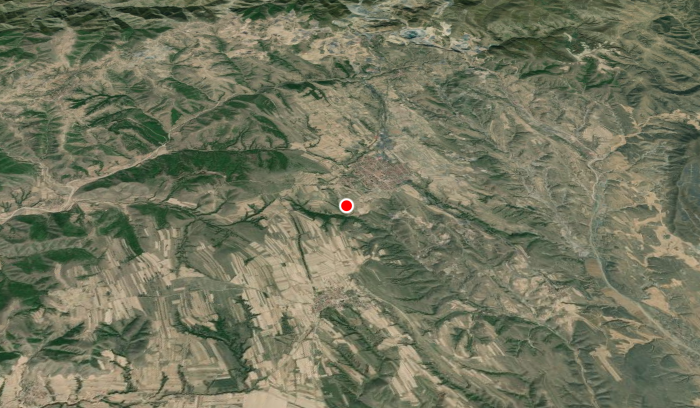
  const point = new Cesium.Entity({


    position: Cesium.Cartesian3.fromDegrees(114.3, 39.9),
    point: {


      pixelSize: 10,//点像素大小
      color: Cesium.Color.RED,//点颜色,不能用rgb等css方法,需要用Cesium.Color
      outlineColor: Cesium.Color.WHITE,
      outlineWidth: 2,
    },
  });
(3)创建图片标注:
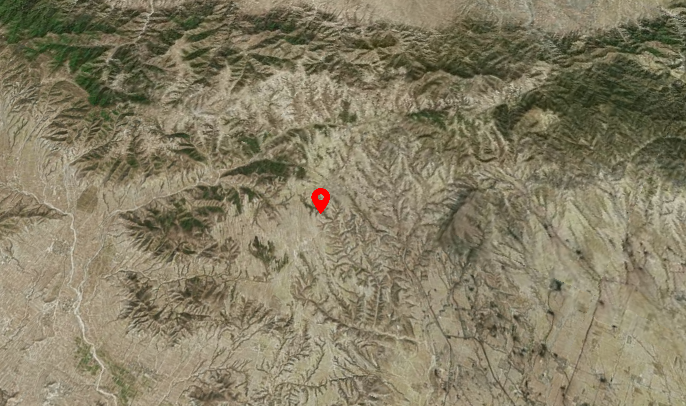
//绘制图片
  const billboard = new Cesium.Entity({


    position: Cesium.Cartesian3.fromDegrees(114.3, 39.9, 10),
    billboard: {


      image: "/src/assets/position.png",
      width: 30,//图片宽度,单位px
      height: 30,//图片高度,单位px
      eyeOffset: new Cesium.Cartesian3(0, 0, -10),//与坐标位置的偏移距离
      color: Cesium.Color.RED,//颜色
      scale: 1,//缩放比例
    },
  });
(4)创建文字标注:

const label = new Cesium.Entity({


    position: Cesium.Cartesian3.fromDegrees(114.3, 39.9, 10),
    label: {


      text: "GISer Liu",
      font: "40px sans-serif",
      fillColor: Cesium.Color.red,
      showBackground: true,
      outlineColor: Cesium.Color.BLACK,
      outlineWidth: 2,
      style: Cesium.LabelStyle.FILL_AND_OUTLINE,
      pixelOffset: new Cesium.Cartesian2(0, 20),
      eyeOffset: new Cesium.Cartesian3(0, 0, -10),
      horizontalOrigin: Cesium.HorizontalOrigin.CENTER,
      verticalOrigin: Cesium.VerticalOrigin.BOTTOM,
      scale: 0.5,
      showBackground: true,
      backgroundColor: new Cesium.Color(0.165, 0.165, 0.165, 0.8),
      backgroundPadding: new Cesium.Cartesian2(10, 10),
    },
  });
(5)创建圆柱体:
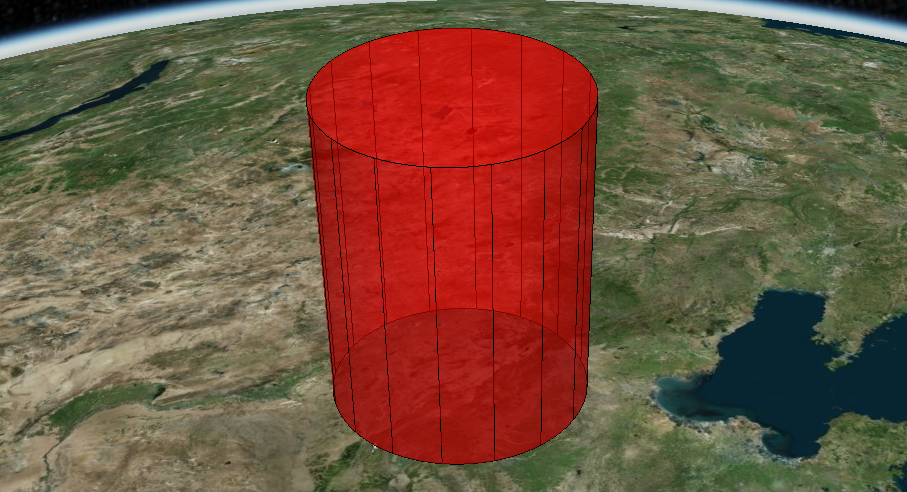
var cylinder = new Cesium.Entity({


    name : '圆柱体',
    position: Cesium.Cartesian3.fromDegrees(114.3, 39.9),
    cylinder : {


        length : 500000.0,
        topRadius : 200000.0,
        bottomRadius : 200000.0,
        material : Cesium.Color.RED.withAlpha(0.5),
        outline : true,
        outlineColor : Cesium.Color.BLACK,
        heightReference : Cesium.HeightReference.CLAMP_TO_GROUND
    }
});
(6)创建椭球:
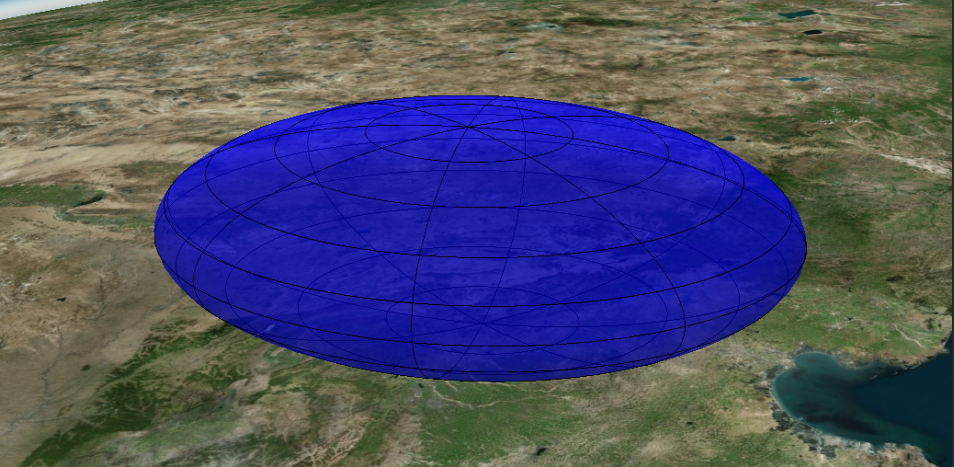
var ellipsoid = new Cesium.Entity({


    name : '椭球体',
    position: Cesium.Cartesian3.fromDegrees(114.3, 39.9),
    ellipsoid : {


        radii : new Cesium.Cartesian3(300000.0, 200000.0, 100000.0),//长半轴,短半轴,高度
        material : Cesium.Color.BLUE.withAlpha(0.5),
        outline : true,//开启轮廓
        outlineColor : Cesium.Color.BLACK,//轮廓颜色
        heightReference : Cesium.HeightReference.CLAMP_TO_GROUND,//底部位置贴地
        fill : true //填充色启用
    }
});
当长半轴,短半轴,高度都一致时,我们就创建了球体;
(7)创建模型:
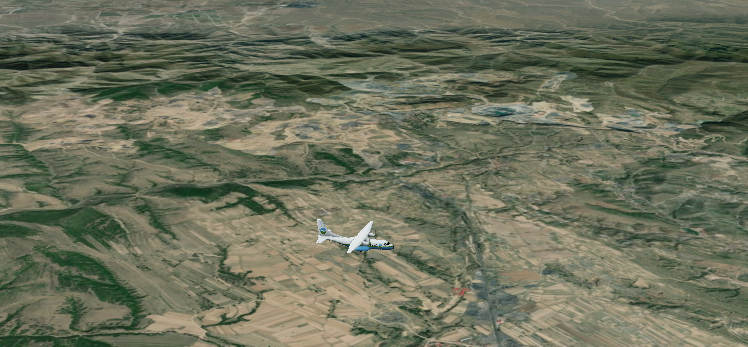
  var model = new Cesium.Entity({


    name: "模型",
    position: Cesium.Cartesian3.fromDegrees(114.3, 39.9, 1000),//位置
    model: {


      uri: "/src/assets/Cesium_Air.glb",
      minimumPixelSize: 128, //模型最小像素
      maximumScale: 200, //模型最大放大倍数
    },
  });
glTF 文件有两种格式:.gltf 和 .glb。
.gltf 是一种基于 JSON 的文本格式,它以人类可读的形式存储模型数据。它通常与其他二进制文件(如纹理图像)一起使用,这些文件包含模型的其他数据。
.glb 是一种二进制格式,它将所有模型数据(包括纹理图像)打包到一个单独的文件中。这种格式更紧凑,更适合在网络上传输。
两种格式都可以表示相同的模型数据,只是存储方式不同。开发者可以根据需要选择适当的格式。
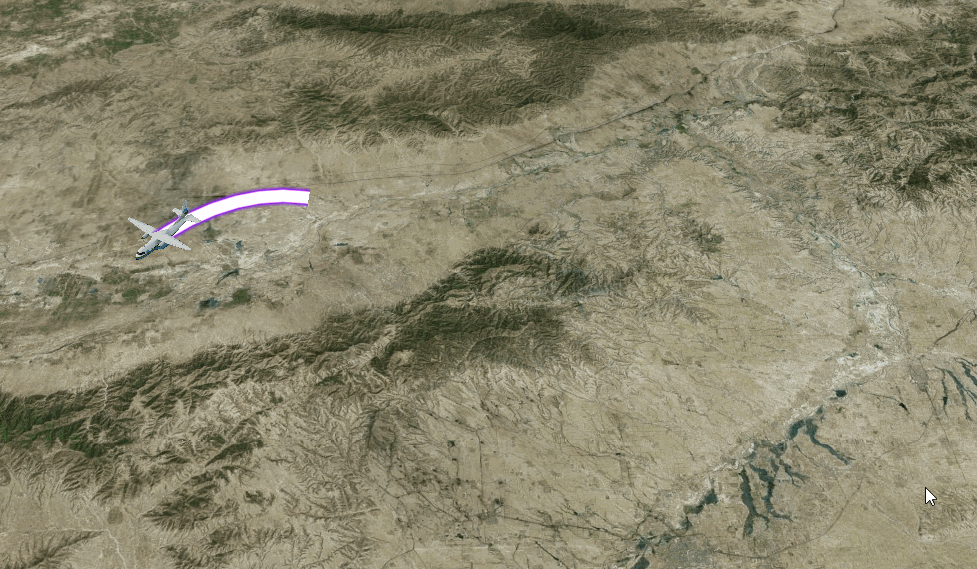
(8)创建轨迹:
 //启用动画
  viewer.clock.shouldAnimate = true;
  // 定义路径的起始和结束时间
  var start = Cesium.JulianDate.fromDate(new Date());
  var stop = Cesium.JulianDate.addSeconds(start, 360, new Cesium.JulianDate());

  // 配置时钟以控制动画
  viewer.clock.startTime = start.clone();
  viewer.clock.stopTime = stop.clone();
  viewer.clock.currentTime = start.clone();
  viewer.clock.clockRange = Cesium.ClockRange.LOOP_STOP;
  viewer.clock.multiplier = 10;

  // 创建一个 SampledPositionProperty 来存储随时间变化的位置数据
  var position = new Cesium.SampledPositionProperty();

  //SampledPositionProperty 是 Cesium 中的一个类,它用于存储随时间变化的位置数据。它可以用来定义路径实体的形状,或者用来控制模型、点等其他实体随时间移动的轨迹。
  //开发者可以使用 addSample 方法向 SampledPositionProperty 中添加位置数据。每个位置数据都包含一个时间值和一个位置值

  for (var i = 0; i <= 360; i += 45) {


    // 计算每个时间点的位置
    var radians = Cesium.Math.toRadians(i);
    var time = Cesium.JulianDate.addSeconds(start, i, new Cesium.JulianDate());
    var height = 10000 + 500 * Math.sin(radians); // 计算飞机的高度
    var positionValue = new Cesium.Cartesian3.fromDegrees(
      114.3 + 0.1 * Math.cos(radians),
      39.9 + 0.1 * Math.sin(radians),
      height
    );

    // 将位置数据添加到 SampledPositionProperty 中
    position.addSample(time, positionValue);
  }

  //设置插值算法,平滑路径
  position.setInterpolationOptions({


    interpolationDegree: 4, //插值程度
    interpolationAlgorithm: Cesium.HermitePolynomialApproximation, //插值算法
  });

  // 创建一个路径实体,并为其提供位置数据和样式
  var path = viewer.entities.add({


    name: "路径",
    position: position,
    orientation: new Cesium.VelocityOrientationProperty(position),
    path: {


      leadTime: 0,
      trailTime: 60, //路径持续时间
      width: 20, //路径宽度
      resolution: 10, //路径分辨率
      material: new Cesium.PolylineGlowMaterialProperty({


        glowPower: 1, //发光强度或者粗细程度
        color: Cesium.Color.BLUEVIOLET, //发光颜色
      }),
    },
    model: {


      uri: "/src/assets/Cesium_Air.glb",
      minimumPixelSize: 128, //模型最小像素
      maximumScale: 200, //模型最大放大倍数,
    },

  });
  //视角飞行至路径
  viewer.zoomTo(path);
路径这里坑比较多,我这里加入了路径的详细使用过程,一般而言我们只需要设定 path 部分就好,使用时一定要设定启动动画,不然是没有效果且不会显示路径的;
代码中我加入了优化路径轨迹的插值功能,实际应用中,我们可以直接使用 CZML 的时序路径数据,我这里用的是自己创建的数据;加入模型可以更好地展现路径;
如果想要静态的路径,可以直接用 polyline 替代;
(9)创建平面 :
var plane = new Cesium.Entity({


    name : '平面',
    position: Cesium.Cartesian3.fromDegrees(114.3, 40),
    plane : {


        plane : new Cesium.Plane(Cesium.Cartesian3.UNIT_Z, 0),
        dimensions : new Cesium.Cartesian2(400000.0, 300000.0),
        material : Cesium.Color.RED.withAlpha(0.5),
        outline : true,
        outlineColor : Cesium.Color.BLACK
    }
});
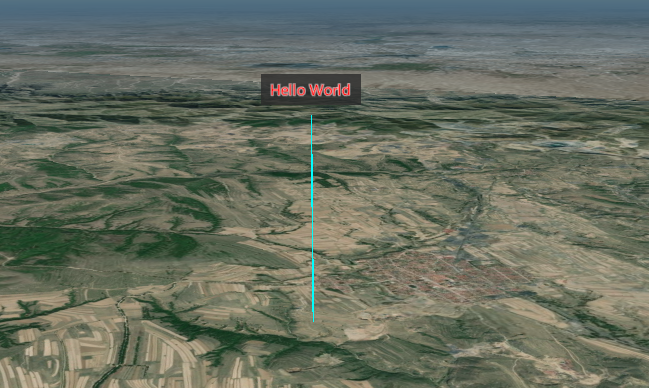
3.组合实体 :
就我们之前的案例代码而言,我们创建都是单个实体,我们也可以创建组合实体,即一个实体元素内包含多个要素;如点和标签,代码如下:
  // 线的顶部位置
  var lineTopPosition = Cesium.Cartesian3.fromDegrees(114.3, 39.9, 1000);
  //创建组合实体
  var entity = new Cesium.Entity({


    position: lineTopPosition,
    // 线
    polyline: {


      positions: Cesium.Cartesian3.fromDegreesArrayHeights([
        114.3, 39.9, 0, 114.3, 39.9, 1000,
      ]),
      material: Cesium.Color.AQUA,//线的颜色
    },

    // 标签
    label: {


      text: "Hello World", // 标签显示的文本内容
      font: "14px sans-serif", // 标签文本的字体
      fillColor: Cesium.Color.RED, // 标签文本的填充颜色
      outlineColor: Cesium.Color.WHITE, // 标签文本的轮廓颜色
      outlineWidth: 2, // 标签文本的轮廓宽度
      style: Cesium.LabelStyle.FILL_AND_OUTLINE, // 标签文本的样式,这里设置为填充和轮廓
      pixelOffset: new Cesium.Cartesian2(0, -10), // 标签相对于其原点的像素偏移量
      eyeOffset: new Cesium.Cartesian3(0, 0, -50), // 标签相对于相机位置的偏移量
      horizontalOrigin: Cesium.HorizontalOrigin.CENTER, // 标签的水平原点,这里设置为中心
      verticalOrigin: Cesium.VerticalOrigin.BOTTOM, // 标签的垂直原点,这里设置为底部
      scale: 1, // 标签的缩放比例
      showBackground: true, // 是否显示标签的背景
      backgroundColor: new Cesium.Color(0.165, 0.165, 0.165, 0.8), // 标签背景的颜色
      backgroundPadding: new Cesium.Cartesian2(10, 10), // 标签背景与文本之间的内边距
    },
  });

  //将立方体添加到场景中
  const Entity = viewer.entities.add(entity);

  //视角飞行至立方体
  viewer.camera.flyTo(
    {


      destination: Cesium.Cartesian3.fromDegrees(114.3, 39.9, 4000), // 目的地的经纬度坐标
      duration: 4,
    } // 动画持续时间,默认为3秒
  );